
Related Manuals for Citizen CX


Summary of Contents for Citizen CX
- Page 1 User’s Manual CX-W Version 1.13...
- Page 2 ●Concerning Copyright The copyrights for this document are the property of CITIZEN SYSTEMS JAPAN Co.,Ltd. Reproduction of any or all of the contents of this document without consent of the company is a violation of copyright law. However, one back-up copy may be made for non-commercial, personal purposes.
-
Page 3: For Safe Operation
Introduction Thank you for purchasing this device. This document explains the handling and operation required to use this printer. Please read this document well before use. Be sure to read “For Safe Operation” (Pg 2-4), and operate the printer correctly. For Safe Operation ・... - Page 4 WARNING ・ Use only with the designated voltage and frequency. Improper connection could cause electric shock or fire. ・ Avoid overstressing outlets and using extension cords. The outlet could overheat and cause a fire. ・ Do not damage, destroy, bundle, or alter the power cord. Also, placing heavy objects on, pulling on, or bending the cord excessively can damage it, and could cause a fire.
- Page 5 CAUTION ・ Do not set the printer up in dusty or overly humid places. This could cause fire or electric shock, or damage the printer. ・ Do not set the printer up on an unstable surface. It could fall and cause injury to the user or others. ・...
-
Page 6: Cautions For Set
Cautions for Set-up ・ Prior to operation, read “For Safe Operation” carefully and observe the rules therein. ・ Use care when moving the printer. Never try carrying the printer alone. Dropping it could cause injury or damage to other property. Do not use or store the printer near fire, excessive moisture, in direct sunlight, near an air ・... - Page 7 Japanese Users ● Mark(S) of Conformity Parts number Rating Plug KP-300 125V 12A Cord VCTF 1.25mm Connector KS-16A 125V 12A Mark(S) of Conformity Parts number Rating Plug LP-53 125V 12A Cord VCTF 1.25mm Connector LS-13J 125V 12A Mark(S) of Conformity Parts number Rating Plug...
-
Page 8: Regulatory Compliance Statements
Regulatory compliance statements American users FCC part 15 This equipment has been tested and found to comply with the limits for a Class B digital device, pursuant to Part 15 of the FCC Rules. These limits are designed to provide reasonable protection against harmful interference in a residential installation. -
Page 9: Declaration Of Conformity
The hereinafter mentioned product is manufactured according to Internal Production Control and Specific Apparatus Tests in compliance with ANNEX Ⅲ of the R&TTE-Directive 99/05/EC Product: CX/CX-W Photo Printer The presumption of conformity with the essential requirements regarding Council Directive 99/05/EC is ensured according to Art. - Page 10 1999/5/CE. Par la présente, CITIZEN SYSTEMS JAPAN Co.,Ltd. déclare que ce CX/CX-W est conforme aux exigences essentielles et aux autres dispositions de la directive 1999/5/CE qui lui sont applicables.
- Page 11 1999/5/CE. Spanish Por medio de la presente CITIZEN SYSTEMS JAPAN Co.,Ltd. declara que el CX/CX-W cumple con los requisitos esenciales y cualesquiera otras disposiciones aplicables o exigibles de la Directiva 1999/5/CE.
-
Page 12: Table Of Contents
Introduction ···············································································2 For Safe Operation ································································2 Cautions for Set-up ································································5 Regulatory compliance statements ······································6 Declaration of Conformity ····················································8 Table of Contents ····································································11 Checking the Contents ································································12 Names of Components ································································13 Connecting the Power Cord ······················································14 Connecting to the Computer ······················································14 Paper and Ribbon ·······································································15 Setting the Media ········································································16 Error Displays ·············································································22... -
Page 13: S E T I N G U P T H E P R I N T E R
・ If the printer is lifted by grasping the cushions, the cushions could break and cause the printerto be dropped. ・ The scrap box, paper holder, paper cassette, and the ribbon cassette are all specific to the respective CX and CX-W. Please do not switch them for use in the opposite printers. -
Page 14: Names Of Components
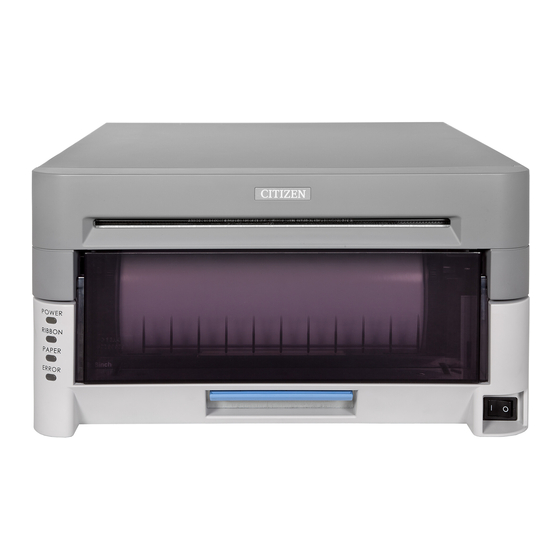
[Front of Unit] Print Feed Out Power Switch Open Lever Scrap Box Platen Roller [Back of Unit] USB port Ventilation [Side of Unit] Power Plug Socket Ventilation CAUTION ・ Please be careful not to hurt yourself or damage anything on the edges of the printer. -
Page 15: Connecting The Power Cord
1. Make sure that the printer’s power switch is set to the OFF position. 2. Plug the cord connector end into the printer Power Plug Socket. 3. Plug the cord into the wall outlet. 1. Make sure that both the printer and computer power switches are set to the OFF position. 2. -
Page 16: Paper And Ribbon
・ The scrap box, paper holder, paper cassette, and the ribbon cassette are all specific to the respective CX and CX-W. Please do not switch them for use in the opposite printers. - Page 17 1. Release the Open Lever, and pull out the mechanism unit. Open Lever 2. Open the Paper Release lever. Paper Release Lever 3. Remove the scrap box Hold the center and lift it up straight. Caution) Never remove the dust box diagonally. The dust box may be damaged and the printer may not operate normally.
- Page 18 5. Install the new roll of paper on the paper holder. When installing it, make sure there are no gaps between the paper and the holder. Make sure the paper is not sticking out. If the end of the roll is uneven (with paper sticking out), remove it from the holder, and flatten it.
- Page 19 7. Remove the tape, and advance the roll as indicated by the arrow. Set the end of the paper about 5mm beyond the roller. When doing this, insert the paper straight along the seal. If it isn’t inserted straight, the paper will be crooked, which could cause white line on the edges of the print, ribbon wrinkles, and register slippage.
- Page 20 9. Turn the paper in the direction of the arrow. When it is advanced enough, the buzzer will beep, and the flashing LED (orange) will go out. It is easier to set if the paper is turned while securing the holder with one hand. 10.
- Page 21 11. Set the new ribbon into the ribbon cassette. Advance the ribbon in the direction of the arrow, and take up any slack. Take Up Supply Supply side 12. Set it with the supply side in front. Set here 13.Close the mechanism unit. *When the mechanism unit is closed, the printer will run initialization (4 blank sheets will be fed out).
- Page 22 14.Attach the Paper Tray to the Scrap Box. *Not included with CX-W. Detailed diagram *When printing sizes other than L or PC, do not attach the Paper Tray. *The tray can hold about 50 photos, but please remove them frequently.
-
Page 23: T R O U B L E - S H O O T I N G
Power Ribbon Paper Error The flashing LED indicates the printer status LED display Refer Status Solution Power Ribbon Paper Error Paper End ● Put in a new roll of paper P.16 Ribbon End ● Put in a new roll of ribbon P.20 Door is Open Set the paper properly and close the... -
Page 24: Solving Media Errors
1. Pull out the mechanism unit. 2. Remove the ribbon cassette. a. If the paper is jammed: 1. Pull any paper remaining in the printer in the direction shown, and cut off any wrinkled or partially printed areas evenly with scissors. Printing over an already printed area will cause the ribbon to stick, and the paper will jam again. - Page 25 2. Remove the scrap box, and rewind the paper. 3. Cut off any partially printed, wrinkled, or otherwise inferior paper evenly with a pair of scissors, and reset the paper. If wrinkles or partially printed areas are left, it could cause the paper to jam again. Cutting the paper ×...
- Page 26 b. If the ribbon is pulled into the mechanism: 1. Cut the ribbon. 2. Carefully remove any ribbon remaining in the mechanism. Any pieces of ribbon left inside the mechanism could affect print quality. In this case, clean the platen roller see P.27 3.
- Page 27 c. If the printer is stopped in the middle of cutting: 1. Turn the power back ON. Free the jammed paper, and return the cutter blade to its ready position. If the jammed paper cannot be freed, please contact a service representative. 2.
-
Page 28: C L E A N I N G
If there is an indent on the pictures at a regular interval, or if the back of the picture (white side) is dirty, clean the platen roller. There may be dust, grime, adhesives, etc. from the ribbon or paper on the platen roller. 1. -
Page 29: S P E C I F I C A T I O N S
Model CX-W Print type Thermal dye sublimation transfer Print mode High-speed mode High quality mode High-speed mode High quality mode 300×600dpi 300×600dpi Resolution 300×300dpi 300×300dpi 600×600dpi※ 600×600dpi※ 89×127mm 8×4 203×102mm 101×152mm 8×5 203×127mm 127×178mm 8×6 203×152mm Print size 152×203mm 8×8 203×203mm... - Page 30 Citizen Systems Japan Co., Ltd. http://www.citizen-systems.co.jp 6-1-12, Tanashi-cho, Nishi-Tokyo-shi Tokyo, 188-8511. Japan Tel: +81 (0) 424 68 4608 CITIZEN is a registered trademark of Citizen Holdings Co., Japan. CITIZEN es una marca registrada de Citizen Holdings Co., Japón.
Need help?
Do you have a question about the CX and is the answer not in the manual?
Questions and answers