
Related Manuals for Lang GCOD-AP


Summary of Contents for Lang GCOD-AP
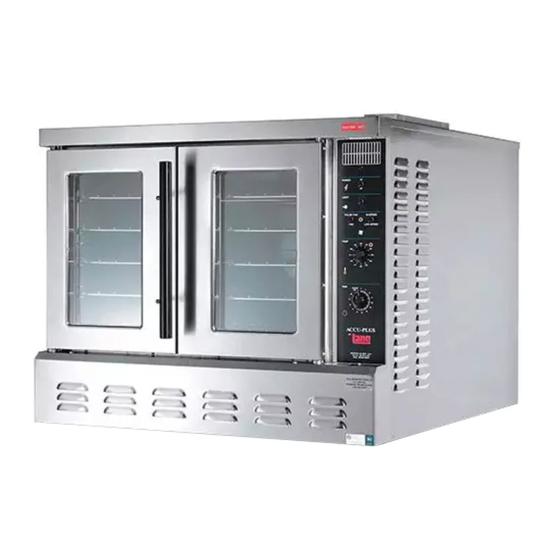
- Page 1 GAS FULL SIZE COMPUTERIZED CONVECTION OVEN GCOD-AP GCOF-AP Installation and Operation Instructions 2M-W1347 Rev. B 10/13/14 IL1564 GCOF-AP...
- Page 2 CONTROL PANEL. NO USER-SERVICABLE PARTS INSIDE. REPAIRS SHOULD BE DONE BY AUTHORIZED SERVICE PERSONNEL ONLY. NOTICE Using any part other than genuine Lang factory supplied parts relieves the manufacturer of all liability. Lang reserves the right to change specifications and product design without notice. Such revisions do not entitle the buyer to corresponding changes, improvements, additions or replacements for previously purchased equipment.
-
Page 3: Table Of Contents
PROBLEMS, QUESTIONS or CONCERNS Before you proceed consult you authorized Lang service agent directory Call the Lang Technical Service & Parts Department at 314-678-6315. TABLE OF CONTENTS Specifications ......4 Equipment Description . -
Page 4: Specifications
384mm Gas Vent Exhaust 65” 1650mm 27” 684mm IL1565 Stand Optional SPECIFICATIONS CURRENT MODEL PREVIOUS MODEL VOLTS AC AMPS NAT. PROPANE BURNER INPUT GCOD-AP-LP GCCO-AP-XD-P 60000 GCOD-AP-NAT GCCO-AP-XD-N 60000 GCOF-AP-LP GCCO-AP-P 55000 GCOF-APLP220 GCCO-AP-PE 55000 GCOF-AP-NAT GCCO-AP-N 55000 GCOF-APNATCP GCCO-AP-NCP... -
Page 5: Equipment Description
The GCOD oven cavity dimensions are 29” (72.5 cm) Wide, 20” (50.84 cm) High, 27” (53.38 cm) Deep. The interior of the oven is constructed of porcelainized stainless steel. Operation The GCOD-AP and GCOF-AP ovens are forced air convection ovens with a vented oven cavity. The air is driven by a 1/3 HP fan motor. Controls Easy to use manual control knobs. -
Page 6: Unpacking
UNPACKING Receiving the Oven Upon receipt, check for freight damage, both visible and concealed. Visible damage should be noted on the freight bill at the time of delivery and signed by the carrier’s agent. Concealed loss or damage means it does not become apparent until the merchandise has been unpacked. -
Page 7: Installation
INSTALLATION Leg Installation Legs are available separately for both the single and double deck installations. Single deck installations require a 27-inch leg or equipment cart. Double deck installations require 6-inch legs or casters. All these are available separately. Place some cardboard on the ground and with assistance carefully lay the unit on its back. -
Page 8: Leg Pad Adapter Installation
INSTALLATION cont. Leg Pad Adapter OVEN FRONT Identify the front and rear leg adapters (the front adapters have two threaded inserts, the rear has four). The leg adapters are included with each specific accessory kit. Leg to Adapter Installation: Install the leg’s threaded stud through the hole in the adapter labeled “C”... -
Page 9: Stacking The Oven
INSTALLATION cont. Stacking the Ovens Remove all the plug buttons from the top of the lower oven. Remove the stacking kit from the oven compartment of one oven and install the 1 1/4-inch plastic bushing into the top of the lower oven. Tip the top oven backwards and install two 3/8-inch socket head bolts, found in the stacking kit, into the two front leg holes that match the holes in the top of the lower oven. -
Page 10: Ventilation & Clearence
INSTALLATION continued Ventilation and Clearances Standard minimum clearance from combustible construction is as follows. 4” from side 4” from back 6” from floor • These ovens may be set directly, without legs, on a curbed base or non-combustible floor. • If the oven is set without legs on a non-combustible floor or a curbed base, maintain a 4-inch back clearance. -
Page 11: Gas Connection
INSTALLATION continued Gas Connection This appliance is manufactured for use with the type of gas indicated on the data plate. Contact the factory if the gas type does not match that which is on the data plate. All gas connections must be in accordance with local codes and comply with the National Fuel Gas Code ANSI Z223.1 latest edition. -
Page 12: Gas Conversions
INSTALLATION continued Gas Conversions Disconnect oven from power and gas. Remove bottom trim piece from oven (2 hex head bolts and 1 Phillips screw). Remove side panel from oven. Disconnect black manifold pipe from 3/8” aluminum pipe at the furrel nut. Remove two Phillips screws holding black manifold pipe to oven. -
Page 13: Initial Start-Up
INITIAL START UP Pre-Power On After the oven is installed and connected to power, prior to turning on, verify the following: • The doors open and close freely. • All racks are in the oven correctly. • All packing materials have been removed from the inside of the oven. •... -
Page 14: General Operation & Programming
If the results vary, problems may be because of changes in the product preparation. GCOF-AP / GCOD-AP Control Panel The Control panel consists of the following items. Detailed operational descriptions are given later this section. -
Page 15: Hints & Suggestions
General Operation & Programming cont. Hints & Suggestions Convection ovens constantly circulate air over and around the product. This strips away the thin layer of moisture and cool air from around the product allowing heat to penetrate more quickly. Cooking times can be shortened and cooking temperatures can be reduced. To convert standard deck oven recipes, reduce the temperature 50 degrees and the time by 25%. -
Page 16: Maintenance
MAINTENANCE • Oven interiors should be wiped down daily and thoroughly cleaned weekly using warm water and mild detergent. DO NOT use caustic cleaners. • The appliance should be thoroughly checked at six-monthly intervals by a qualified technician (heating unit, mechanical stability, corrosion...) with particular emphasis on all control and safety devices. -
Page 17: Troubleshooting
WARRANTIES. NOTICE Service on this or any other Lang appliance must be performed by qualified personnel only. Consult your Lang Authorized Service Agent Directory. You can call our toll free number 314-678-6315 or visit our website WWW.LANGWORLD.COM for the service agent nearest you. BOTH HIGH AND LOW VOLTAGES ARE PRESENT INSIDE THIS APPLIANCE WHEN THE UNIT IS PLUGGED/WIRED INTO A LIVE RECEPTACLE. - Page 19 SEE DETAIL SEE DETAIL SEE DETAIL SOME ITEMS ARE INCLUDED FOR ILLUSTRATIVE PURPOSES ONLY AND IN CERTAIN INSTANCES MAY NOT BE AVAILABLE Model: GCOD/F-AP-NAT & GCOD/F-AP-LP Gas Covection Oven SK2309 Rev. G 06/17/15...
-
Page 20: Exploded View & Parts List
PARTS LIST October 13, 2014, Rev B Model No:GCOD-AP-NAT, GCOD-AP-LP, GCOF-AP-NAT, GCOF-AP-LP GAS FULL SIZE CONVECTION OVEN Part Number Description Number 2U-71500-05 BLOWER WHEEL ECCO/GCCO Q9-60102-1404-1 GCCO MOTOR MOUNT ASSY (NO MOTOR) 2T-30401-09 STAT FXD 500 DEG OPEN PS-30200-35 REPLACEMENT MOTOR... - Page 21 24 25 DETAIL Cooling Fan Kit Assy DETAIL Pilot Burner Assembly Manifold Assembly Available in Assembly only Model: GCOD/F-NAT & GCOD/F-LP Detail A: Gas Covection Oven Pilot & Manifold Assy Detail B: GCCO Cooling Fan Kit Assy SK2310 Rev. C 12/1/10...
-
Page 22: Parts List
PARTS LIST October 13, 2014, Rev B Model No:GCOD/F-AP-NAT, GCOD/F-AP-LP GAS FULL SIZE CONVECTION OVEN, PILOT BURNER & MANIFOLD ASSEMBLY Part Number Description Number 2E-41100-07 SENSOR FLAME PROBE GCCO 2K-70101-32 STL TBE UNION 1/2\CCX1/2NPT-M 2A-80401-04 PLT BURNR ORFCE.021DRL NG GCCO-NAT 2A-80401-05 PLT BURNR ORFCE.010DRL LP GCCO-LP... - Page 23 Previous Timer Design SOME ITEMS ARE INCLUDED FOR ILLUSTRATIVE PURPOSES ONLY AND IN CERTAIN INSTANCES MAY NOT BE AVAILABLE Detail C, GCCOPAP Control Panel Detail GCCO-AP, GCOF-AP, GCOD-AP SK2386 Rev. A 11/12/2010...
- Page 24 PARTS LIST October 13, 2014, Rev B Model No:GCOD/F-AP-NAT, GCOD/F-AP-LP GAS FULL SIZE CONVECTION OVEN, CONTROL PANEL ASSY Part Number Description Number Q9-GCCOPAP PANEL GCCO ACCU-PLUS 2R-70701-28 KNB BLK 1/4BUSH2SETSCW@90 2J-31601-07 PILOT LT 28V 6 LEAD WHT 2M-60301-100 PANEL LABEL- Q9-50312-13 CONTROL FRONT T &...
Need help?
Do you have a question about the GCOD-AP and is the answer not in the manual?
Questions and answers