Table of Contents
Advertisement
Advertisement
Table of Contents

Related Manuals for Macrom M-DVD5542R


Summary of Contents for Macrom M-DVD5542R
- Page 1 M-DVD5542R M-DVD5542R DVD RECEIVER 7” DISPALY OWNER’S MANAUL...
-
Page 2: Safety Precautions
Safety Precautions Never expose this unit, amplifier, and speakers to moisture or water for preventing electric sparks or fires. Only connect the unit to a 12-volt power supply with negative grounding. Please don't change the fuse on the power cord without professional guidance, using improper fuse may cause damage to this unit or even cause fire. -
Page 3: Table Of Contents
Safety Precautions Contents (continued) Warning Safety Precautions ........1 Features ............3 Operate the unit correctly according to the Panel Controls ..........4 manual instruction to prevent unnecessary problem. Remote Controls........5-6 Caution Basic Operations .......... 7 Disc Operations ........8-11 This product is a CLASS 1 LASER PRODUCT. -
Page 4: Features
Features DVD-R/RW compatibility Button Operation Explanations It is possible to playback DVD-R/RW discs Touch panel key operation recorded with the video format and Video It is possible to operate this unit by using Recording format. touch panel key. Video CDs featuring PBC Some frequent operations compatibility 1) Move cursor... -
Page 5: Panel Controls
Panel Controls Press POWER button (6) to turn on/off the unit. 1. - Touch panel 2. - Remote sensor 3. - Mute 4. - Select the following sources: >Radio >Disc (when disc inserted) >USB (when USB connected) >AV1 (rear AV in) >AV2 (front AV in) >Bluetooth >Navigation... -
Page 6: Remote Controls
Remote Controls 1. - Select the following sources: Remote control operating range >Radio The remote control can operate within a >Disc (when disc inserted) distance of 3~5m. >USB (when USB connected) The remote control sensor is located to the >AV1 (rear AV in) left of POWER button. -
Page 7: Remote Controls
Remote Controls (continued) Replacing the lithium battery of remote control unit When the range of the operation of the card remote control becomes short or no functions while operating, replace the battery with a new lithium battery. Make sure the battery polarity replacement is correct. -
Page 8: Basic Operations
Basic Operations Turn on/off the power When parking brake applied 1. Press POWER button to turn on the unit. 1. If 'PRK SW' cable is connected to hand The unit goes back to the last status after brake switch, the video display of the TFT power on. - Page 9 Disc Operation Insert a disc Press on the panel to slide down the panel. Insert a disc into the slot, and the unit will change to disc mode automatically. Note: A - Turn to main source menu • Please confirm whether there is a disc in B - Display on screen control menu the unit before you insert another one.
-
Page 10: Disc Operations
Disc Operation (continued) Stop playback temporarily Repeat During playback, press REPT once or more. - During playback, press to pause playback. - RPT icon will appear on the display. - The sound will be muted. - For VCD/CD: Display appears RPT ONE - Display "PAUSE "... - Page 11 Disc Operation (continued) Program DVD Playback Menu - Press PROG to enter program list. Use While playback touch the center of the screen: cursor and digit button to enter number. For DVD and File disc, select title and chapter number. For VCD and CD, select track number.
-
Page 12: Tuner Operation
Disc Operation Tuner Operation (continued) CD Playback Menu Radio Menu While playback touch the center of the screen: Touch to access desired function: Touch the icon to access desired function. Display source menu. Display source menu Select previous/next preset station. Track intro play Touch to tune automatically. - Page 13 Tuner Operation (continued) TA Mode REG Mode Some RDS FM stations periodically provide Source menu -> SETTING menu ->RDS traffic information. Setting menu -> REG ON/OFF. TP (Traffic Program Identification) REG ON: AF function will implement the Broadcasting of traffic information regional code (of the PI) and only stations in TA (Traffic Announcements Identification) the current region can be tuned automatically.
-
Page 14: Map Card And Usb Operation
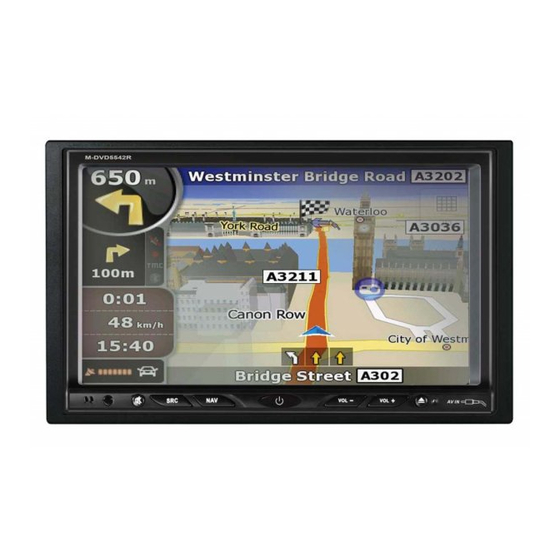
Bluetooth Operation Map Card and USB Operation Using Map Card (SD/MMC Card) Note: For your safety, avoid talking on the phone as 1. To open the panel first, press the much as possible while driving. button on the panel. Insert a map card into the corresponding slot, the unit will load Bluetooth is a wireless transmission way the map and switch to navigation mode... -
Page 15: Bluetooth Operation
Bluetooth Operation Exit Pair it, and then input the pairing code (“1234” by default). When music playback, touch A f t e r p a i r s u c c e s s fu l l y , i f y o u w a n t t o play/pause, and press key on the disconnect, press PAIR button. - Page 16 Bluetooth Operation General Notes for Bluetooth 3. ANSWER ON/OFF Set the automatic answering a call ON/OFF. 1. For N7X, N9X, PHILIPS, Sony Ericssion, When ANSWER ON and Paired OK, if there SAMSUNG mobile phones, during our test, is an incoming call, in 15 seconds, the unit after the mobile phones appear connection will answer automatically, and voice will be successful, the unit still appear waiting for...
-
Page 17: Other Modes
Other Mode AV IN mode External peripheral devices with RCA audio and video outputs can be connected with the unit. For more details, please refer to < Electrical Connections>. NAV mode Navigation system can be supported by the MAP card connected with the unit. For more details, please refer to <Navigation>. -
Page 18: Dvd Setup
DVD Setup Password: Press SETUP to display setup menu on the 1. Press number button " 0000 " on the remote screen. control, then press the ENTER button to to select setup items: confirm. SYSTEM - LANGUAGE - AUDIO - VIDEO 2. -
Page 19: Dvd Setup
DVD Setup (continued) OSD Language AUDIO Select one language that you are familiar with to display system menu. Audio Language Select one dialogue language that you are familiar with when playing back DVD discs. Note: If the DVD disc has the audio file in the selected language, the dialogues you listened to will be in the selected language. -
Page 20: System Setup
System Setup Sound Effect & TFT Setup Touch SEL on the TFT, or press SEL button on the remote control to enter SELECT menu. Touch the TFT or use remote control to adjust Audio/Video settings: Audio: EQ sound effect(Flat-Pop-Rock-Clas.-OFF)/BASS/TREBLE/BALANCE/FADER Video: BRIGHTNESS/CONTRAST/COLOR/DIM SETUP Menu Source menu ->... -
Page 21: Device Connections
Device Connections Notes of connection • If an external power amplifier is connected, please don't connect P.CONT lead to the • This unit is designed to be used in a power lead of the external power amplifier, vehicle with a 12-volt battery and negative otherwise, electric spark or other damage grounding. -
Page 22: Device Connections
Device Connections (continued) Parking Brake Cable Connections Reverse Driving Cable Connections... -
Page 23: Electrical Connections
Electrical Connections Wiring Diagram SWC (to external device for Steering Wheel Control) GPS Antenna External Microphone AUX 1 IN-R (Red) AUX 1 IN-L (White) FRONT AUDIO OUT-R (Red) FRONT AUDIO OUT-L (White) REAR AUDIO OUT-R (Red) REAR AUDIO OUT-L (White) SUB.W (Brown) USB SLOT VIDEO 1 IN(Yellow) -
Page 24: Installation Guide
Installation Guide Important: Remove the two screws on the top of the unit before installation, otherwise, the unit will not work. 1. If relevant, remove any other audio system from the car. 2. After unscrewing the four car radio attachment screws, insert the mounting sleeve into the dashboard. -
Page 25: Troubleshooting
Troubleshooting The following checklist can help you solve the problems which you may encounter when using the unit. Before consulting it, check the connections and follow the instructions in the user manual. Problem Possible cause Solution General Car ignition is not on. Turn your car key in the ignition. -
Page 26: Specifications
Specifications General AM(MW) Radio Power supply 12V DC (11V-16V) Frequency range 522-1620KHz Test voltage 14.4V, (Europe) negative ground 530-1710KHz Maximum power output 45Wx4 channels (USA) Continuous power output 20Wx4 channels (4 Usable sensitivity 30dBμ 10% T.H.D.) Suitable speaker impedance 4-8 ohm Components Pre-Amp output voltage 4.0V (CD play mode:... - Page 27 PN: 127075002311...
Need help?
Do you have a question about the M-DVD5542R and is the answer not in the manual?
Questions and answers