
Related Manuals for Electrolux WE 170 P


Summary of Contents for Electrolux WE 170 P
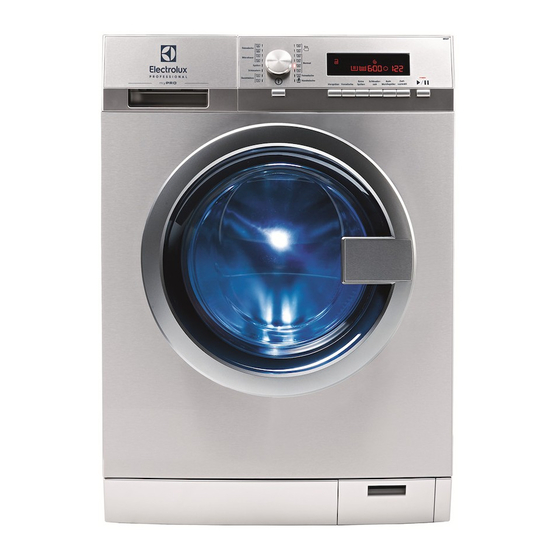
- Page 1 WE 170 P User Manual Washing Machine CAUTION: Read the instructions before using the appliance. Original Instructions.
-
Page 2: Table Of Contents
14. TECHNICAL DATA...................29 WE’RE THINKING OF YOU Thank you for purchasing an Electrolux appliance. You’ve chosen a product that brings with it decades of professional experience and innovation. Ingenious and stylish, it has been designed with you in mind. So whenever you use it, you can be safe in the knowledge that you’ll get great results every time. - Page 3 ENGLISH 1.1 Children and vulnerable people safety This appliance can be used by children aged from 8 • years and above and persons with reduced physical, sensory or mental capabilities or lack of experience and knowledge if they have been given supervision or instruction concerning use of the appliance in a safe way and understand the hazards involved.
-
Page 4: Electrical Connection
Make sure that all health and safety regulations are • obeyed when the appliance is installed in a commercial/ public environment. Do not install the appliance in a moving platform (e.g. on • a ship). Make sure that the floor where you install the appliance •... -
Page 5: Water Connection
ENGLISH Only for UK and Ireland: The appliance has a 13 amp • mains plug. If it is necessary to change the fuse in the mains plug, use a 13 amp ASTA (BS 1362) fuse. This appliance complies with the E.E.C. Directives. •... - Page 6 Service Centre. 1.8 Service Only original spare parts can ensure the safety • standards of the appliance. Only repairs undertaken by an Electrolux approved • service technician are covered by the guarantee. 1.9 Disposal Disconnect the appliance from the mains supply.
-
Page 7: Product Description
To help prevent vibration we recommend you place a waterproof wood panel, at Only appropriate accessories least 15 mm thick under the appliance, approved by Electrolux secured to at least 2 floor beams with ensure the safety standards screws, the wood panel must extend of the appliance. -
Page 8: Stacking Kit
Stacking kit Anchoring kit If you install the appliance on a concrete base, please make sure to order the correct anchoring kit. Read carefully the instructions supplied with the accessory. Stacking kit can be used only with the tumble dryers specified in the leaflet. -
Page 9: Before First Use
ENGLISH The liquid detergent can be loaded External detergent dispenser automatically from an external dispenser. Read carefully the instructions supplied with the accessory. 3. BEFORE FIRST USE 1. Make sure that all transit bolts are 4. Put a small quantity of detergent in the removed. - Page 10 Sluice button 4.2 Display The display shows: The child safety lock is activated. The child safety lock is deactivated. Extra rinse symbol. is the symbol indicating the rinse phase and + lights up when the Extra rinse is selected.
-
Page 11: Programmes
ENGLISH Softener symbol: the appliance does load softener normally. No softener symbol: the appliance doesn't load softener. The phase symbols When a programme is set, all the symbols of the phases related to the pro- gramme come on. When the programme starts, only the symbol of the phase in operation flashes. When the pahse is completed, the symbol remains steady lighted up. - Page 12 Programme Maximum Programme description Temperature load (Type of load and soil level) range Maximum spin speed Spin Time Normal 8 kg Coloured cottons Normal soil and light soil. 1400 rpm 360 sec- onds - 5 seconds Mild 4 kg...
- Page 13 ENGLISH Programme Maximum Programme description Temperature load (Type of load and soil level) range Maximum spin speed Spin Time Disinfection 8 kg This programme removes dust mites and similar 1400 rpm micro-organisms. 360 sec- The programme performs an automatic pre wash onds - 5 phase.
-
Page 14: Consumption Values
Extraction ■ ■ Disinfection ■ ■ ■ ■ ■ ■ 1) This option is automatically performed and cannot be removed from the programme. 6. CONSUMPTION VALUES WARNING! The highest hot water temperature allowed is 55°C. The data of this table are approximate. Different causes can change the data: the quantity and type of laundry, the water and ambient temperature. -
Page 15: Options
ENGLISH Programmes Load Water supply Energy Water Approxi- Remain- (kg) con- con- mate sump- sump- pro- moisture tion tion (li- gramme (kWh) tre) duration (mi- nutes) Hand wash 40 Cold 0,33 °C Standard cotton programmes Standard 60 °C Cold 0,82 cotton Standard 60 °C Cold... -
Page 16: Settings
The display shows the related indicator The related indicator comes on 7.6 Delay start With this option you can delay the start of a programme from 30 minutes to 70 hours. 8. SETTINGS 8.1 Acoustic signals – : Child lock activated. - Page 17 ENGLISH • Open the detergent dispenser. CAUTION! • Install the flap for liquid detergent in the compartment Make sure that no laundry stays between 9.3 Using detergent and the seal and the door. There is a risk of water leakage or damage to the laundry. additives 9.2 Installing the flap for liquid 1.
-
Page 18: Setting A Programme
9.5 Liquid or powder detergent • Position A for powder detergent (factory setting). • Position B for liquid detergent. When you use the liquid detergent: • Do not use gelatinous or thick liquid detergents. • Do not put more liquid then the maximum level. -
Page 19: Starting A Programme
ENGLISH 9.8 Coin operated machine 9.10 Starting a programme with the delay start 1. Press Delay start repeatedly until the display shows the delay you want to set. The related indicator comes on the display 2. Press • The appliance starts the countdown. -
Page 20: Hints And Tips
• A tune sounds (if it is activated). If the appliance is connected to a coin operated machine, • In the display comes on. you can interrupt a • The indicator of button goes off. programme only 5 minutes •... -
Page 21: Care And Cleaning
ENGLISH • Be careful with the curtains. Remove • Obey the instructions that you find on the hooks or put the curtains in a the on packaging of these products. washing bag or pillowcase. • Use the correct products for the type •... -
Page 22: Cleaning The Drum
To remove rust particles use only special Regularly examine the seal and remove all products for washing machine. Do this objects from the inner part. separately from the laundry wash. 11.5 Cleaning the drum Always obey the instructions that you find on the Regularly examine the drum to prevent packaging of the product. - Page 23 ENGLISH 11.7 Cleaning the drain filter WARNING! Do not clean the drain filter if the water in the appliance is hot.
- Page 24 11.8 Cleaning the inlet hoses and the valve filters Clean regularly both (for hot and for cold water) inlet hoses and both valve filters.
-
Page 25: Emergency Drain
ENGLISH 45° 20° 11.9 Emergency drain 0° C, remove the remaining water from the inlet hose and the drain pump. Because of a malfunction, the appliance 1. Disconnect the mains plug from the cannot drain the water. mains socket. If this occurs, do steps (1) through (9) of 2. -
Page 26: Troubleshooting
12. TROUBLESHOOTING • - Detergent overdosering. WARNING! Refer to Safety chapters. • – Check the electrical connection 12.1 Introduction first. – No communication with the coin The start of the appliance does not occur operated machine or the coin or it stops during operation. - Page 27 ENGLISH Problem Possible solution Make sure that the inlet hoses have no kinks or bends. Make sure that the connections of the water inlet hoses are correct. The appliance does not Make sure that the drain hose is in the correct position. The fill with water and drain hose may be too low.
-
Page 28: Emergency Door Opening
Problem Possible solution Add more laundry in the drum. The load may be too small. The cycle is shorter than The appliance calculates a new time according to the laundry the time displayed. load. See the ‘Consumption Values’ chapter. -
Page 29: Technical Data
ENGLISH 5. Take out the laundry and then close the appliance door. 6. Close the filter flap. 14. TECHNICAL DATA Dimension Width/ Height/ Depth/ 600 mm/ 850 mm/ 605 mm/ 639 Total depth Electrical connection Voltage 230-240 V Overall power 2200 W Fuse 13 A... - Page 30 Return the product to your local recycling facility or contact your municipal office.
- Page 31 ENGLISH...
Need help?
Do you have a question about the WE 170 P and is the answer not in the manual?
Questions and answers