Table of Contents
Advertisement
Quick Links
Advertisement
Table of Contents

Related Manuals for Electrolux WE 170 P


Summary of Contents for Electrolux WE 170 P
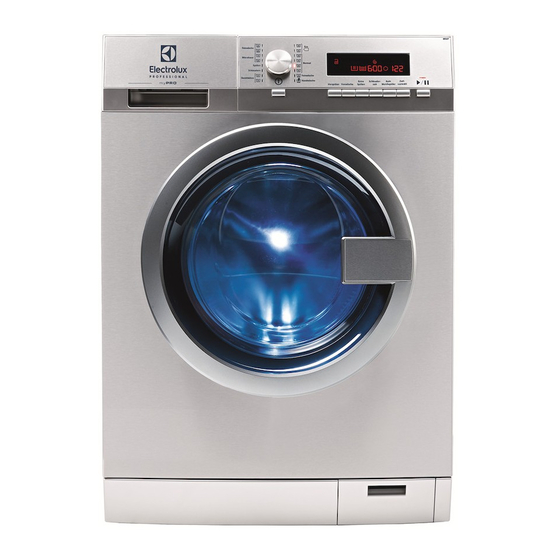
- Page 1 User Manual Washing Machine WE 170 P 157016025-A-422021 Original Instructions.
-
Page 2: Table Of Contents
15. ENVIRONMENTAL CONCERNS..............29 WE’RE THINKING OF YOU Thank you for purchasing an Electrolux Professional appliance. You’ve chosen a product that brings with it decades of professional experience and innovation. Ingenious and stylish, it has been designed with you in mind. So whenever you use it, you can be safe in the knowledge that you’ll get great results every time. -
Page 3: Safety Information
ENGLISH SAFETY INFORMATION Before the installation and use of the appliance, carefully read the supplied instructions. The manufacturer is not responsible for any injuries or damage that are the result of incorrect installation or usage. Always keep the instructions in a safe and accessible location for future reference. - Page 4 permits washing in automatic washing machines, both for domestic purposes and for professional purposes in institutions and organizations (including mini-hotels, hotels, kindergartens, schools, medical facilities, factories and industrial enterprises, laundries, beauty salons, catering establishments, sports clubs, fitness centers and others similar institutions and organizations).
- Page 5 ENGLISH Do not install the appliance where the appliance door • can not be fully opened. Do not put a container to collect possible water leakage • under the appliance. Contact the Authorised Service Centre to ensure which accessories can be used. 1.3 Electrical Connection The appliance must be correctly earthed.
- Page 6 Before connection to new pipes, pipes not used for a • long time, where repair work has been carried out or new devices fitted (water meters, etc.), let the water flow until it is clean and clear. The operating water pressure (minimum and maximum) •...
- Page 7 ENGLISH To replace the internal lighting, contact the Authorised • Service Centre. 1.8 Service To repair the appliance contact the Authorised Service • Centre. Use original spare parts only. Please note that self-repair or non-professional repair • can have safety consequences and might void the guarantee.
-
Page 8: Product Description
Flap for liquid detergent To slow down the liquid detergent flow. 2.3 Available from your authorized vendor Only appropriate accessories approved by Electrolux ensure the safety standards of the appliance. If unapproved parts are used, any claims will be invalidated. - Page 9 ENGLISH Read carefully the instructions supplied Stacking kit with the accessory. Anchoring kit If you install the appliance on a concrete base, please make sure to order the Stacking kit can be used correct anchoring kit. only with the tumble dryers Read carefully the instructions supplied specified in the leaflet.
-
Page 10: Before First Use
3. BEFORE FIRST USE 1. Make sure that all transit bolts are 4. Put a small quantity of detergent in the removed. compartment for washing phase. 2. Make sure that the electrical and 5. Set and start a programme for cotton water connection are available. - Page 11 ENGLISH 4.2 Display The display shows: The child safety lock is activated. The child safety lock is deactivated. Extra rinse symbol. is the symbol indicating the rinse phase and + lights up when the Extra rinse is selected. Spin time indicator and symbol. The digit indicates minutes and seconds.
-
Page 12: Programmes
Softener symbol: the appliance does load softener normally. No softener symbol: the appliance doesn't load softener. The phase symbols When a programme is set, all the symbols of the phases related to the pro- gramme come on. When the programme starts, only the symbol of the phase in operation flashes. When the pahse is completed, the symbol remains steady lighted up. - Page 13 ENGLISH Programme Maximum Programme description Temperature range load (Type of load and soil level) Reference spin speed Spin Time Delicate fabrics such as acrylics, viscose and Delicates 4 kg mixed fabrics requiring gentler washing. Normal 1200 rpm 120 sec- soil. onds - 5 seconds Machine washable wool, hand washable wool...
-
Page 14: Consumption Values
Programme options compatibility Programme ■ ■ ■ ■ ■ ■ ■ ■ ■ ■ ■ ■ Normal ■ ■ ■ ■ ■ ■ Delicates 30°C ■ ■ ■ ■ Handwash ■ ■ ■ ■ ■ ■ Synthetics 40°-60°C ■ ■ ■... -
Page 15: Options
ENGLISH Programmes Load Water supply Energy Water Approximate (kg) con‐ consump‐ programme du‐ sump‐ tion (litre) ration (minutes) tion (kWh) Normal 40 °C Hot and cold 0.20 Synthetics 40 °C Hot and cold 0.08 Delicates 30 °C Cold 0.20 Handwash 40 °C Cold 0.33 1) This programme at 60 °C with a load of 8 kg is the reference programme for energy label... -
Page 16: Settings
8. SETTINGS 8.1 Acoustic signals – : Child lock activated. – : Child lock deactivated. The acoustic signals operate when: You can activate this option: • You activate the appliance. • You select a programme. • After you press : the options and •... - Page 17 ENGLISH 9.2 Installing the flap for liquid 2. Put the detergent and the fabric conditioner into the compartments. detergent 3. Carefully close the detergent drawer • Open the detergent dispenser. • Install the flap for liquid detergent in the compartment 9.3 Using detergent and additives 1.
- Page 18 When you use the liquid detergent: • Do not use gelatinous or thick liquid detergents. • Do not put more liquid then the maximum level. • Do not set the prewash phase. • Do not set the delay start. 9.6 Activating the appliance 2.
- Page 19 ENGLISH 9.11 Interrupting a programme • The programme starts and the door locks. and changing the options • The drain pump can operate for a short time when the appliance fills You can change only some options before water. they operate. 1.
-
Page 20: Hints And Tips
3. Close the water tap. Press the button to activate the 4. Press the button for some seconds appliance again. to deactivate the appliance. • After 5 minutes from the end of the Keep the door ajar, to prevent the mildew washing programme and odours. - Page 21 ENGLISH • unsatisfactory washing results, • the wash load to turn grey, • greasy clothes, • mould in the appliance. Excessive detergent may cause: • sudsing, • reduced washing effect, • inadequate rinsing, • a greater impact for the environment. 10.3 Detergent type and 10.4 Ecological hints quantity.
-
Page 22: Care And Cleaning
11. CARE AND CLEANING drum. Perform a maintenance wash WARNING! regularly. To do this: Refer to Safety chapters. • Remove all laundry from the drum. • Select the cotton programme with the 11.1 External cleaning highest temperature with a small quantity of detergent. - Page 23 ENGLISH 11.6 Cleaning the detergent dispenser 11.7 Cleaning the drain filter Do not clean the drain filter if the water in the appliance is hot. Regularly check the drain pump filter and make sure that it is clean. Repeat the steps 2 and 3 until the water stops flowing out.
- Page 24 180°...
- Page 25 ENGLISH 11.8 Cleaning the inlet hoses and the valve filters Clean regularly both (for hot and for cold water) inlet hoses and both valve filters. 45° 20° 11.9 Emergency drain 11.10 Frost precautions Because of a malfunction, the appliance If the appliance is installed in an area cannot drain the water.
-
Page 26: Troubleshooting
WARNING! Make sure that the temperature is more than 0 °C before you use the appliance again. The manufacturer is not responsible for damages caused by low temperatures. 12. TROUBLESHOOTING • - Detergent overdosing. WARNING! Refer to Safety chapters. • –... - Page 27 ENGLISH Problem Possible solution The appliance does not • Make sure that the water tap is open. fill with water properly. • Make sure that the pressure of the water supply is not too low. For this information, contact your local water authori- •...
-
Page 28: Emergency Door Opening
Problem Possible solution The washing results are • Increase the detergent quantity or use a different deter- not satisfactory. gent. • Use special products to remove the stubborn stains be- fore you wash the laundry. • Make sure that you set the correct temperature. •... -
Page 29: Technical Data
ENGLISH 14. TECHNICAL DATA Dimension Width/ Height/ Total 600 mm/ 850 mm/ 605 mm/ 639 depth Electrical connection Voltage 230 V Overall power 2200 W Fuse 10 A Frequency 50 Hz Level of protection against ingress of solid parti- IPX4 cles and moisture ensured by the protective cover, except where the low voltage equipment has no protection against moisture...
Need help?
Do you have a question about the WE 170 P and is the answer not in the manual?
Questions and answers