Table of Contents
Advertisement
Quick Links
Advertisement
Table of Contents

Summary of Contents for Sangean RCR-28
- Page 1 RCR-28 Version 1...
- Page 2 AC Adapter are stated on the final page of the manual, or please contact Sangean for the correct AC Adapter and specifications. For customers in the US and Canada, please call 888-726-4326 or 562-941-9900. For all other areas, please contact us via info@sangean.com.tw.
-
Page 3: Important Safety Instructions
IMPORTANT SAFETY INSTRUCTIONS Read these instructions. Keep these instructions. Heed all warnings. Follow all instructions. Do not use this apparatus near water. Clean only with dry cloth. Do not block any ventilation openings. Install in accordance with the manufacturer’s instructions. Do not install near any heat sources such as radiators, heat registers, stoves, or other apparatus (including amplifiers) that produce heat. - Page 4 Your radio is equipped with the DOE (Department of Energy) new energy saving AC Adapter. Sangean suggest that you keep your AC Adapter at least 12 inches away from the radio while listening to the AM Band in order to eliminate any interference caused by the AC Adapter.
-
Page 6: Lcd Display
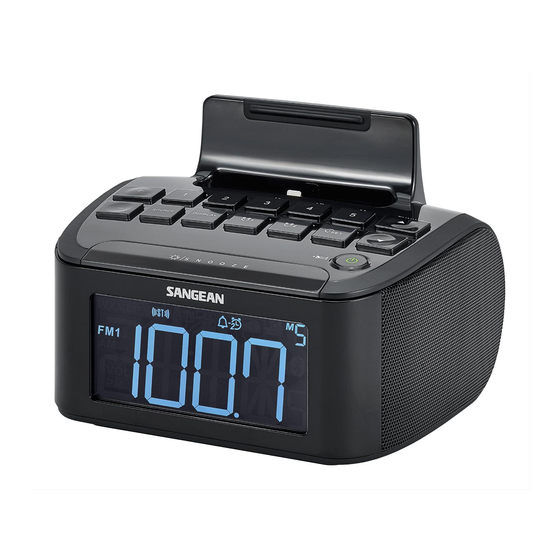
Control Preset 1 button Preset 2 button Preset 3 button/Rewind button iPod/iPhone dock connector Preset 4 button/Play/Pause button Preset 5 button/Fast-forward button Tuning up/down button Standby button/Sleep button Time setting button Alarm 2 button Alarm 1 button Display button/Stereo/Mono button Source button/Step button Snooze/Dimmer button Volume up/down button... -
Page 7: Using The Radio For The First Time
Using the radio for the first time Using the AC power adaptor The AC power adaptor required for this unit should be 7.5 volts DC at 1.5A center pin positive. Insert the adaptor plug into the DC socket on the rear of the radio. Plug the adaptor into a standard electrical outlet. -
Page 8: Presetting Am/Fm Stations
Radio operation-Manual tuning AM/FM 1. Fully extend the FM wire antenna located on the rear of your clock radio. Place the wire antenna so that it is as straight as possible extending either above or below the radio. 2. Press the Standby button to turn on your radio. 3. -
Page 9: Ipod/Iphone Docking
Recalling AM/FM stations 1. Press the Source button for AM or FM 1 or 2 frequency band 2. Press and release one of the Preset buttons and the preset number and frequency will appear on the display. FM stereo/mono If the FM radio station being listened to has a weak signal, some hiss may be audible. It is possible to reduce this hiss by forcing the radio to play the station in mono rather than stereo. -
Page 10: Search Function
Navigating your iPod/iPhone You can only navigate full menus of your iPod/iPhone on the device itself. Playing a file on your iPod/iPhone 1. If your iPod/iPhone was previous playing, when you connect the device to your radio, it will continue playing from where was previously stopped 2. -
Page 11: When The Alarm Sounds
4. Press the Tuning up/down button to select the required alarm volume and press the Alarm button to confirm the setting. Once the alarm is set, it will automatically go off the next day at the same time. The alarm has now been set. Symbol for active alarm (such as ) is shown on the display. -
Page 12: Dimmer Control
Sleep timer - radio auto shut off Your radio can be set to turn off automatically after a preset time has elapsed. The Sleep Timer setting can be adjusted between 15, 30, 45, 60, 90 and 120 minutes. 1. Press and hold the Standby button to enter the Sleep Timer setting. Sleep timer icon will show on the display. -
Page 13: Auxiliary Input Socket
3. Continue pressing and holding the Source button until you hear a beep. Rotate the Tuning up/down button until the FM range setting (e.g. F00) shows on the display. Then press the Source button to select the desired FM range. FM range setting is then completed. -
Page 14: Headphone Socket
Headphone socket A 3.5mm headphone socket located on the rear of your radio is provided for use with either headphones or an earpiece. Inserting Headphones or ear buds will automatically mute the internal speakers. Warning: Excessive sound levels from ear buds and headphones can cause hearing loss. Always listen at reasonable levels to avoid hearing loss. -
Page 15: Specifications
Antenna System FM Wire Antenna/AM Built-in Ferrite Bar USB socket: 5V/1A Max. Sangean reserves the right to amend the specification without notice. If at any time in the future you should need to dispose of this product please note that: Waste electrical products should not be disposed of with household waste.


