Sangean RCR-22 Manual
Hide thumbs
Also See for RCR-22:
- User manual ,
- Operating instruction (78 pages) ,
- Instruction manual (10 pages)

Related Manuals for Sangean RCR-22


Summary of Contents for Sangean RCR-22
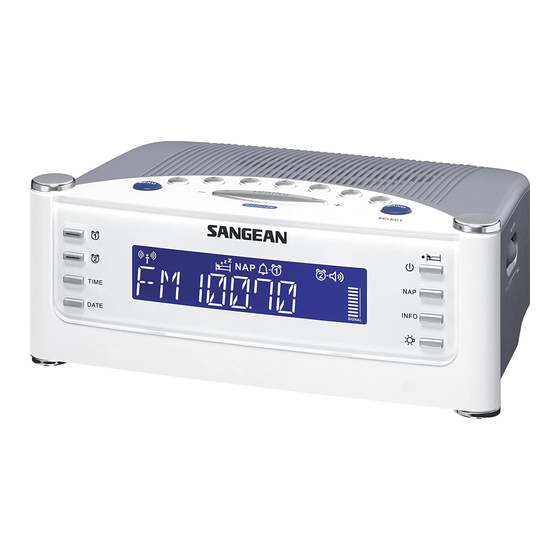
- Page 1 User Manual of Product 1: Sangean RCR-22 Atomic Clock with FM-RDS / AM / Aux-in Digital Tuning Clock Radio, silver, one size User Manual of Product 2: Sangean RCR-5BK AM/FM Digital Tuning Clock Radio...
- Page 2 RCR-22 Revision 1...
- Page 3 Important Safety Instructions Read these instructions. Keep these instructions. Heed all warnings. Follow all instructions. Do not use this apparatus near water. Clean only with dry cloth. Do not block any ventilation openings. Install in accordance with the manufacturer’s instructions. Do not install near any heat sources such as radiators, heat registers, stoves, or other apparatus (including amplifiers) that produce heat.
- Page 5 Controls Menu button Preset button Tuning up/down button/Snooze button Band/Select button Time capsule Date button Time button Alarm 2 button Alarm 1 button Display Power button/Sleep button Nap button Info button Light button Reset button Light level control Aux in socket Headphone socket LCD display Time and frequency indicator...
-
Page 6: Using The Clock Radio For The First Time
Using the clock radio for the first time 1. Place your clock radio on a flat surface. 2. Fully extend the wire aerial located on the rear of your clock radio. Place the wire antenna so that it is straight as possible extending either above or below the radio. 3. - Page 7 Change date format 1. Press the Menu button to enter the setting. 2. Press the Tuning up or down until date format is highlighted on the display. Press the Band/Select/ button to enter the setting. 3. Press the Tuning up/down button to choose your desired format. Press Band/Select button to confirm the setting.
-
Page 8: Setting Up The Tuning Step Increment
Recalling stations: 1. Press the Band button for AM or FM. 2. Press and release one of the PRESET buttons (from 1 to 7) and the preset number and frequency will appear on the display. Setting up the tuning step increment 1. - Page 9 3. Press the TUNING up/down button until DCF77 (European version), WWVB (US version) or JJY40/60 (Japan version) appeared on the display. Press the Band/Select button to confirm the setting. And the clock time of the radio will set up automatically to the Radio-controlled clock time. 4.
-
Page 10: Alarm Operation
Alarm operation There are two alarms which can each be set to wake you to AM/FM radio or buzzer alarm. The alarms may be set while the unit is in standby mode or while playing. When the alarm light is on, it means the indicated alarm will active in 24 hours. - Page 11 Snooze 1. When the alarm sounds, press any button other than the Standby button will silence the alarm for 5 minutes. “ ’ will appear on the display. 2. To adjust the silence time for the snooze timer, press the Menu button to enter the menu setting. 3.
-
Page 12: Software Version
3. Press the TUNING up/down button to choose the Time zone setting for your area, then press the SELECT button to confirm the setting. The options for European countries are –2H, -1H, 0, +1H, +2H, +3H The options for the US are EST, CST, MST, PST, ALAS, HAW. Note: When switching on the radio after a power disconnection, you will need to complete the time zone setting before the normal operation of the radio. -
Page 13: Auxiliary Input Socket
3. Press the Tuning up/down button to select ‘YES’, and press the Select button to confirm the setting. A full reset will be performed. The station list and presets will be set to empty. Alarms will be cancelled and timer and sleep timer settings will be set to their default values. RESET the radio If your radio fails to operate correctly or some digits on the display are missing or incomplete, please carry out the following procedure. -
Page 14: Specifications
Specifications Power supply: 120 Volt/60 Hz (USA version); 230 Volt/50Hz (Europe version) Output power: 800 mW (max) Power consumption: 7W (max) Frequency coverage: FM 87.5 – 108.0 MHz AM 520 – 1710 kHz (USA version); AM 522 – 1710 kHz (Europe version) The company reserves the right to amend the specification without notice. - Page 15 RCR-5 中文 Revision 2...
-
Page 16: Important Safety Instructions
Important safety instructions Read and understand all safety and operating instructions be- fore the radio is operated. Retain instruction: The safety and operating instructions should be retained for future reference. Heed warnings. All warnings on the appliance and operating in- structions should be followed. - Page 17 Power sources: The radio should be operated only from the type of power source indicated on the marking label. If you are not sure of the type of power supply to your home, consult your radio dealer or power company. Power cords: The power cord should be positioned so it is not walked on, pinched, or items placed on top of it.
- Page 18 Do not attempt to service the receiver yourself. Removing the cover may expose you to dangerous voltage, and will void the warranty. Refer all servicing to authorized service personnel. Object and Liquid Entry-Never push objects of any kind into this radio through opening as they may touch dangerous volt- age points or short-out parts that could result in a fire or electric shock.
-
Page 20: Lcd Display
Controls Power on / off and Sleep Timer button Band / Step button NAP TIMER button STATION PRESETS TUNING Up / Down and Snooze TIME SET / DISPLAY button Alarm 2 button Alarm 1 button LCD Display Volume Control knob Headphones socket AUX in Display Backlight Adjustment button... -
Page 21: Operation
Operation Clock Setting (date and time) Clock time has to be set before alarm setting. 1. Press and hold the TIME SET button for more than 2 seconds, the display will show , and flash the year digits. 2. Press TUNING Up/Down button to set the year. 3. -
Page 22: Radio Operation
Radio operation Turn on the radio with the POWER button. Tune into desired stations Station selection 1. Press the TUNING up/down button, to tune into the frequency of your desired stations 2. Scanning tuning- Press and hold the TUNING up/down button for more than 0.5 seconds and release, the radio will search for the next station. -
Page 23: Alarm Clock
Alarm Clock There are two alarms which can each be set to wake you to AM/FM radio or buzzer alarm. The alarms may be set while the unit is in standby mode or while playing. Ensure that the time is set correctly before setting the alarms. -
Page 24: When The Alarm Sounds
4. Press the Tuning up/down to choose the required alarm type, and then press the Display/ Time set button to confirm the setting. The alarm can be set to buzzer, FM or AM. When radio mode is selected, the radio frequency on the display will begin to flash. Press the Tuning up/down to adjust the required radio frequency or the required preset number for the radio alarm, then press the Display/Time set button to confirm the setting. -
Page 25: Nap Timer
Snooze To interrupt the sounding alarm (radio or beep tone), press the SNOOZE button. The alarm stops and begins again with interval of 5 minutes. The alarm will continue for an hour whatever being inter- rupted. Nap timer With the NAP button, you can select the period for the short term alarm in 5 minutes steps from 5-120 minutes. -
Page 26: Calendar Display
Calendar Display Press the TIME SET/DISPLAY button to see the date, and press it again to see the year. The display will go back to the clock in 10 seconds. 24/12 time format/Date format/FM AM step setting 1. Power off the radio. 2. -
Page 27: Aux In Socket
AUX IN socket Plug in external audio devices such as CD player to the AUX IN socket (on the side of the radio), then play your device and press the BAND button repeatedly until you see “AU” on the display. The radio will amplify and play out the signal form your device. -
Page 28: Factory Reset
Factory reset If your radio fails to operate correctly, or some digits on the display are missing/incomplete or you simply just want to restore to original factory setting, carry out the following procedure. 1. Power off the radio. 2. Press BAND button and preset 5 button simultaneously until 'dEF' shown on the display and the beep sound is heard.
Need help?
Do you have a question about the RCR-22 and is the answer not in the manual?
Questions and answers
My Sangean RCR22 clock radio has no volume or rather the volume control does nothing, The box says that there is a loudness control but I don't see it. I have reset the unit and also unplugged and re-started it but it had no effect.
If the volume control on your Sangean RCR-22 clock radio is not working, you can try performing a factory reset. Follow these steps:
1. Press the Menu button to enter the menu setting.
2. Press the Tuning up/down button until "FACTORY" appears on the display.
3. Press the Select button to enter the setting.
4. Press the Tuning up/down button to select "YES."
5. Press the Select button to confirm the reset.
This will restore the radio to its original factory settings, which may resolve the issue. If the problem persists, consider checking the power connection or consulting an electrician if needed.
This answer is automatically generated