Friedrich OES series Installation & Operation Manual
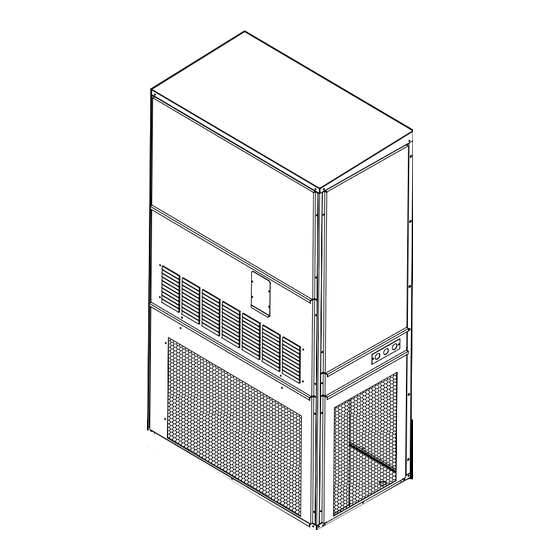
Wall-mount outdoor wall-mounted air conditioners / heat pumps
Hide thumbs
Also See for OES series:
- Installation & operation manual (24 pages) ,
- Specification (2 pages)

Related Manuals for Friedrich OES series


Summary of Contents for Friedrich OES series
- Page 1 Wall-Mount Outdoor Wall-mounted Air Conditioners / Heat Pumps OES / OHS Series Installation & Operation Manual 920-138-02 (3-04)
-
Page 2: Table Of Contents
920-138-02 (3-04) TABLE OF CONTENTS I. General Specifications Model Number Identification Guide ............. 3 Unit Dimensions . -
Page 3: General Specifications
Wall-Mount Model Identification Guide BASIC MODEL CONFIGURATION OPTIONS – A Family Engineering Revision Digit O = Friedrich Wall-Mount Future Revision Digit System Type E = Cooling with or without electric heat Ventilation Options H = Heat Pump X = Manual fresh air damper (standard) -
Page 4: Installation
920-138-02 (3-04) DANGER: Before installing or servicing system, always turn off main power to system. There may be more than one (1) disconnect switch. Turn off auxiliary heater power if applicable. Electrical shock can cause personal injury or death. II. INSTALLATION Understand the signal words DANGER, WARNING, and CAUTION. -
Page 5: Indoor Air Requirements
The unit may be applied in either a free return air configuration • Seven-conductor thermostat cable for OHS series, and or a ducted return air configuration. The design and construction 5-conductor thermostat cable for OES series. (20 gage of the indoor-air system must provide adequate air distribution wire minimum). -
Page 6: Filters
500 FPM for return air grilles, and 400 FPM for filter to ensure that the intake and discharge air do not recirculate grilles. It is recommended that the proper Friedrich return air (also called short-circuit). grille kit be installed in applications where no return duct is used. -
Page 7: Mounting Preparations
920-138-02 (3-04) MOUNTING PREPARATIONS Figure 4 Forming the Duct Flanges Duct Flanges as Shipped To minimize the possibility of shipping damage, all units are shipped with field formed duct flanges. These flanges must all be formed into place prior to mounting the unit. The perforated bend lines of the duct flanges provide a location for field hand bending/forming to occur in a repeatable manner. -
Page 8: Mounting The Unit
Replacement Installation of the weight load, and the side brackets hold the unit in place Friedrich mounting brackets are removable and can be (See Figures 6 and 7). mounted in two ways to ensure the bracket holes are in line Friedrich recommends a 1 inch clearance to combustible with the studs. - Page 9 920-138-02 (3-04) Wall Mounting Instructions Figure 7 Factory Wall Structure supplied rain flashing. Mount on unit before installing SUPPLY AIR SUPPLY AIR Supply Air OPENING OPENING Duct RETURN AIR RETURN AIR Return Air OPENING OPENING Opening Bottom mounting Concrete Block Wall Wood Frame Wall bracket.
-
Page 10: Rain Flashing Installation
920-138-02 (3-04) Rain Flashing Installation Figure 9 Seal both sides of the rain flashing with a bead of silicone caulking along its entire length. Mounting Screws Rain Flashing (Supplied) Front of unit Mounting Face Duct Opening in Wall Wall Structure Foam air seal SUPPLY AIR Duct Flange... -
Page 11: Thermostat Wiring
920-138-02 (3-04) THERMOSTAT WIRING Attach thermostat wires to low-voltage terminal block on left side of control box in locations indicated in Figure 3. Figure 10 – Thermostat Wiring Unit Terminal Compressor Auxiliary Common Heat Reversing Emergency Valve Heat NOTE: B and E terminals are used only on OHS models Thermostat Terminal C or X... -
Page 12: Electrical Data Tables
920-138-02 (3-04) Table 3 - Electrical Data Air Conditioners Multiple Circuits Single Circuit HACR Groung Wire HACR / Max Wire Size Groung Wire / Max Wire Factory Size Voltage / Hz Voltage Breaker Size (field) Size (field) Breaker Size Circuit (field) / Ph Range... - Page 13 920-138-02 (3-04) Table 4 - Electrical Data Heat Pumps Multiple Circuits Single Circuit HACR Groung Wire HACR / Max Wire Size Groung Wire / Max Wire Factory Size Voltage / Hz Voltage Breaker Size (field) Size (field) Breaker Size Circuit (field) / Ph Range...
-
Page 14: Standard Ventilation Package
920-138-02 (3-04) STANDARD VENTILATION PACKAGE Manual Fresh Air Damper (XX) General Description Figure 11 During blower operation, the damper allows up to 15% outside air of the total airflow rating. The damper is field adjustable and provides no pressure relief. Operation The damper has three fixed positions. -
Page 15: Optional Ventilation Packages
920-138-02 (3-04) OPTIONAL VENTILATION PACKAGES The following ventilation packages are optional equipment installed at the factory. Consult your dealer or distributor for chassis option details. Commercial Room Ventilator General Description CRV Position adjustment (1 1⁄2 - 5 Ton Chassis) The CRV has a built in exhaust system, which provides pressure 1) Remove upper left side panel of unit.* relief. - Page 16 920-138-02 (3-04) Economizer (XE) General Descrption Figure 14 The economizer provides free cooling when outside conditions Factory Installed Economizer Components are cool and dry enough to satisfy cooling requirements and it is not necessary for the compressor to run. Between 0% Sensor and 100% outside air can be introduced.
- Page 17 920-138-02 (3-04) Table 7 - Enthaply Set Points Outdoor Temperature (°F) >90% >90% >90% <10% >90% >90% Enthalpy Setting <10% >90% >90% <10% <10% >90% * The economizer control makes the decision to economize at outdoor temperatures and enthalpy settings shown above. At %RH above the setting, the econo- mizer will not open.
-
Page 18: Start Up
920-138-02 (3-04) III. START UP (OHS only) mode as follows: Set fan control to ON. If fan runs, return SEQUENCE OF OPERATION control to AUTO setting. This verifies fan is COOLING - Any call for cooling from the thermostat completes working properly. -
Page 19: Model Information Form
920-138-02 (3-04) FOR THE RECORD Record the model and serial number of your Wall-Mount and complete the information in the spaces provided below. This information will be necessary should the equipment ever require service or repair. SERVICE INFORMATION WALL-MOUNT MODEL #: WALL-MOUNT SERIAL #: IF WALL-MOUNT WAS PURCHASED INSTALLED IN A MANUFACTURED STRUCTURE DATE OF PURCHASE:... -
Page 20: Warranty Information
(5) years from the date of original installation, FRIEDRICH will repair or replace, at its option, any defective part without charge for the part. - Page 21 (1) year from the date of original installation, FRIEDRICH will repair or replace, at its option, any defective part without charge for the part.
- Page 22 920-138-02 (3-04)
- Page 23 920-138-02 (3-04)
- Page 24 FRIEDRICH AIR CONDITIONING CO. Post Office Box 1540 • San Antonio, Texas 78295-1540 4200 N. Pan Am Expressway • San Antonio, Texas 78218-5212 (210) 357-4400 • FAX (210) 357-4480 www.friedrich.com Printed in the U.S.A. 920-138-02 (3-04)
Need help?
Do you have a question about the OES series and is the answer not in the manual?
Questions and answers