
Related Manuals for KitchenAid KOMS155MBL


Summary of Contents for KitchenAid KOMS155MBL
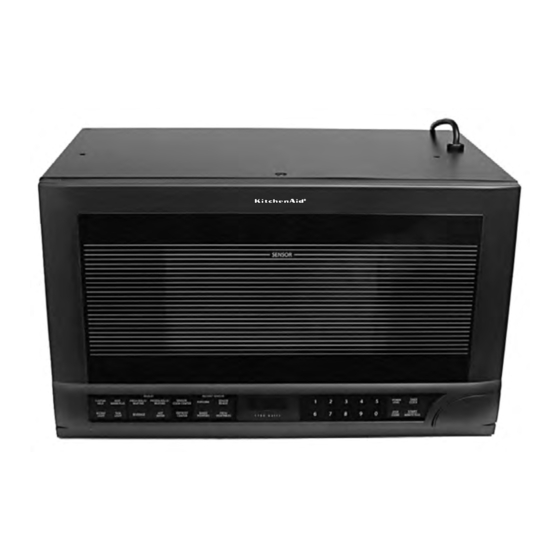
- Page 1 KAC-36 TECHNICAL EDUCATION OVER-THE-COUNTER MICROWAVE OVEN Model KOMS155MBL JOB AID 4317340...
- Page 2 FORWARD This KitchenAid Job Aid, “Over-The-Counter Microwave Oven,” (Part No. 4317340), provides the technician with information on the installation, operation, and service of the Over-The-Counter Microwave Oven. It is to be used as a training Job Aid and Service Manual. For specific information on the model being serviced, refer to the “Use and Care Guide,”...
-
Page 3: Table Of Contents
To Avoid Possible Exposure To Excessive Microwave Energy ........1-5 R.F. Leakage Test ......................1-6 Precautions To Be Observed When Troubleshooting ............1-7 KitchenAid Model & Serial Number Designations .............. 1-8 Model & Serial Number Label And Wiring Diagram Locations .......... 1-9 Specifications ........................1-10 KitchenAid Microwave Oven Warranty ................ - Page 4 Page COMPONENT TESTING ......................5-1 Door Switches ........................5-1 Turntable Motor ......................... 5-2 HV Capacitor ........................5-2 Humidity Sensor ........................ 5-3 Cavity & Magnetron Temperature Fuses ................5-3 Line Fuse ........................... 5-4 Cooling Fan Motor ......................5-4 High Voltage Transformer ....................5-5 High Voltage Diode ......................
-
Page 5: General
GENERAL SAFETY FIRST Your safety and the safety of others is very important. We have provided many important safety messages in this Job Aid and on the appliance. Always read and obey all safety messages. This is the safety alert symbol. This symbol alerts you to hazards that can kill or hurt you and others. - Page 6 For continued protection against radiation emission, replace only with these types of switches: Primary (Interlock) Switch: SZM-V16- FA-63 or VP-533A-OF; Secondary (Interlock) Switch: SZM-V01-FA-32; Interlock (Monitor) Switch: SZM-VI6-FA-62 or VP-532A-OF; Oven Lamp Switch: SZM-V6-FA-31 or VP-331 A-OD. It is neither necessary nor advisable to attempt Electrical Shock Hazard measurement of high voltage.
- Page 7 ELECTROSTATIC DISCHARGE • Before removing the part from its package, touch the antistatic bag to a green ground (ESD) SENSITIVE ELECTRONICS connection point or unpainted metal in the ESD problems are present everywhere. ESD appliance. may damage or weaken the electronic control •...
-
Page 8: Warning To Service Technicians
WARNING TO SERVICE TECHNICIANS To avoid possible exposure to microwave ra- KitchenAid microwave ovens have a monitor- diation or energy, visually check the oven for ing system designed to assure proper opera- damage to the door and door seal before tion of the safety interlock systems. -
Page 9: Precautions To Be Observed Before And During Servicing To Avoid Possible Exposure To Excessive Microwave Energy
PRECAUTIONS TO BE OBSERVED BEFORE AND DURING SERVICING TO AVOID POSSIBLE EXPOSURE TO EXCESSIVE MICROWAVE ENERGY Do not operate or allow the oven to be the magnetron, wave guide or transmis- operated with the door open. sion line, and cavity for proper alignment, integrity, and connections. -
Page 10: R.f. Leakage Test
R.F. LEAKAGE TEST EQUIPMENT NOTE: Enter leakage readings in space BE- FORE and AFTER on the service document. • Electromagnetic energy leakage monitor (NARDA 8100B, HOLADAY H 1501 ). All microwave ovens exceeding the emission level of 4 mw/cm must be reported to Dept. of •... -
Page 11: Precautions To Be Observed When Troubleshooting
PRECAUTIONS TO BE OBSERVED WHEN TROUBLESHOOTING The microwave oven is a high voltage, high WARNING current appliance. It is free from danger during Never touch any circuit wiring with your ordinary use, but extreme care should be taken hand, or with an insulated tool during opera- during repair. -
Page 12: Kitchenaid Model & Serial Number Designations
KITCHENAID MODEL & SERIAL NUMBER DESIGNATIONS MODEL NUMBER MODEL NUMBER INTERNATIONAL SALES IND. OR MARKETING CHANNEL IF PRESENT PRODUCT GROUP K = KITCHENAID BRAND PRODUCT IDENTIFICATION BH = BUILT-IN HIGH-SPEED OVEN BM = BUILT-IN MICROWAVE CM = COUNTERTOP MICROWAVE OM = OVER THE COUNTER MICROWAVE... -
Page 13: Model & Serial Number Label And Wiring Diagram Locations
MODEL & SERIAL NUMBER LABEL AND WIRING DIAGRAM LOCATIONS The Model/Serial Number label and Wiring Diagram locations are shown below. Model & Serial Number Label Location Wiring Diagram Location (Inside Right Side Of Cabinet) -
Page 14: Specifications
SPECIFICATIONS MODEL KOMS155MBL / WH/BT/SS Dimensions/Specifications WH = White, BL = Black , Colors BT = Biscuit, SS = Stainless 23 7/8" W X 14 1/16" H X 15 9/16"D Outside Dimensions 17 1/2" W X 9 7/8" H X 14 5/16"D... - Page 15 MODEL KOMS155MBL / WH/BT/SS OVEN INTERIOR FEATURES Capacity 1.5 Cubic Feet Finish Painted Acrylic Cooking Power 1100 Watts (IEC-705 Rating) Turntable Glass turntable diameter 14" Cooling Fan Automatic - On if oven is operating, Off if door open Rack Automatic - Turns on when oven Light door is open or oven is operating.
-
Page 16: Kitchenaid Microwave Oven Warranty
G. Replacement parts or repair labor costs for units operated outside the United States. KITCHENAID OR KITCHENAID CANADA DO NOT ASSUME ANY RESPONSIBILITY FOR INCIDENTAL OR CONSEQUENTIAL DAMAGES. Some states or provinces do not allow the exclusion or limitation of incidental or consequential damages, so this exclusion or limitation may not apply to you. -
Page 17: Installation Information
INSTALLATION INFORMATION REMOVING THE MICROWAVE OVEN While supporting the microwave oven, WARNING pull down on the two latching arms at the bottom of the oven to release them from Excessive Weight Hazard the mounting panel hooks, and remove Use two or more people to move and the oven from the wall. - Page 18 — NOTES —...
-
Page 19: Theory Of Operation
THEORY OF OPERATION MICROWAVE OPERATING SEQUENCE OFF CONDITION Microwave power operation is as follows (the indicated power is approximate): Closing the door activates the secondary (door sensing) interlock switch, and the primary in- VARI-MODE ON TIME OFF TIME terlock switch. The monitor switch contacts are HIGH (100% power) 32 sec. - Page 20 SENSOR COOKING CONDITION When baked potatoes are at room tem- perature, and begin cooking, vapor is Using the Sensor Cooking function, the foods emitted very slowly. As the potatoes are are cooked without figuring time, power level, heated, moisture and humidity are more or quantity.
- Page 21 Cooking Sequence NOTE: The 16 seconds is the cooling time required to remove any vapor from the Operate the oven in the Sensor Cooking oven cavity and sensor. During this first mode by referring to the Use and Care stage, do not open the door, or touch the Guide that was supplied with the unit.
-
Page 22: The Absolute Humidity (Ah) Sensor Circuit
THE ABSOLUTE HUMIDITY (AH) SENSOR CIRCUIT The Absolute Humidity Sensor includes two With this voltage given, switches SW1 to SW5 thermistors, as shown in the illustration below. in the LSI are turned on in such a way as to One thermistor is housed in the closed vessel change the resistance values in parallel with filled with dry air, while another in the open resistors R53 - R57. -
Page 23: Component Access
COMPONENT ACCESS This section instructs you on how to service each component inside the Over-The-Counter Microwave Oven. The components and their locations are shown below. COMPONENT LOCATIONS Cooling Fan Motor Oven Lamp Magnetron Temperature Cavity Fuse Temperature Fuse Magnetron Humidity Sensor HV Diode Line Fuse... -
Page 24: Removing The Cabinet
REMOVING THE CABINET Facing the rear of the unit, remove the four WARNING rear cabinet screws. Electrical Shock Hazard Disconnect power before servicing. Replace all parts and panels before operating. Failure to do so can result in death or electrical shock. Rear Screw (1 of 4) Pull the cabinet back and unhook the slots Unplug microwave oven or disconnect... -
Page 25: Removing The Control Board
REMOVING THE CONTROL BOARD Disconnect the following connectors from WARNING the control board: a) 3-wire connector from CN-F. b) 2-wire connector from CN-B. c) 11-wire connector from CN-C. d) 5-wire connector (with red & red-brown wires) from CN-A. e) Connector with 2 gry & 2 wht wires at Electrical Shock Hazard relay RY1. -
Page 26: Removing The Door Interlock Switch Assembly
REMOVING THE DOOR INTERLOCK SWITCH ASSEMBLY Remove the two mounting screws and WARNING star washers from the door interlock switch bracket. Screw & Star Washer Electrical Shock Hazard Disconnect power before servicing. Latching Arm Replace all parts and panels before operating. - Page 27 Unlatch the interlock switch you are re- moving from the bracket and slide it off the alignment pin. Be careful not to break the Red (NC) locking arm or the pin on the bracket. Primary Green (NO) Interlock Switch Primary Interlock Switch Red (NC)
-
Page 28: Removing The Line Fuse And Oven Lamp
REMOVING THE LINE FUSE AND OVEN LAMP To remove the line fuse, unsnap it from WARNING its holder. Electrical Shock Hazard Line Fuse Disconnect power before servicing. Replace all parts and panels before operating. To remove the oven lamp: Failure to do so can result in death or a) Turn the lampholder counterclockwise electrical shock. -
Page 29: Removing An Accent Or Task Lampholder And The Turntable Motor
REMOVING AN ACCENT OR TASK LAMPHOLDER AND THE TURNTABLE MOTOR To remove an accent or a task WARNING lampholder: a) Turn the lampholder counterclockwise and unhook it from the mounting bracket. b) Remove the bulb from the lampholder. c) Cut the wires near the lampholder. Electrical Shock Hazard d) Splice the wires from the new lampholder to the wiring harness with... -
Page 30: Removing The Humidity Sensor & Cavity Temperature Fuse
REMOVING THE HUMIDITY SENSOR & CAVITY TEMPERATURE FUSE b) Disconnect the 3-wire sensor connec- WARNING tor (red, black, & white wires) from the control board at CN-F. Electrical Shock Hazard Disconnect power before servicing. Replace all parts and panels before operating. - Page 31 To remove the cavity temperature fuse: a) Remove the screw and unhook the Screw fuse from the unit. b) Disconnect the two wire connectors from the fuse terminals. REASSEMBLY NOTE: Reconnect the wires to the cavity temperature fuse terminals before mounting it to the unit.
-
Page 32: Removing The Magnetron Temperature Fuse And The Magnetron
REMOVING THE MAGNETRON TEMPERATURE FUSE AND THE MAGNETRON Carefully lift the adhesive side of the foam WARNING pad off the top of the chassis and remove the pad from the opening. Electrical Shock Hazard Disconnect power before servicing. Foam Pad Replace all parts and panels before operating. - Page 33 To remove the magnetron: Locking Arm a) Remove the screw from the oven lamp shroud, unhook the locking arm, and position the shroud so you can access the left magnetron screws. b) Disconnect the two wire connectors from the magnetron terminals. Shroud Screw c) Remove the one top and four side screws from the magnetron and re-...
-
Page 34: Removing The High Voltage Capacitor & Diode, And The Cooling Fan Motor
REMOVING THE HIGH VOLTAGE CAPACITOR & DIODE, AND THE COOLING FAN MOTOR Position the unit on its back panel. WARNING Remove the six screws from the bottom panel and tilt the panel down as far as the wiring will allow. Remove the bottom screw from the mount- ing bracket for the high voltage capacitor and diode, and the cooling fan motor. - Page 35 Carefully lift the left side of the foam pad at 12. To remove the high voltage capacitor, the top of the chassis, and fold it back remove the mounting screw from the ca- under the right chassis bracket. pacitor bracket, and remove the capacitor. Remove the screw from the top of the high 13.
- Page 36 14. To remove the cooling fan motor: b) Pull the fan blade off the motor shaft. c) Remove the two screws from the motor a) Disconnect the 2-wire connector from and remove it from the bracket. the motor terminals. Fan Motor Screws Fan Blade 2-Wire Connector...
-
Page 37: Removing The High Voltage Transformer
REMOVING THE HIGH VOLTAGE TRANSFORMER WARNING High Voltage Transformer Electrical Shock Hazard Disconnect power before servicing. Replace all parts and panels before operating. Failure to do so can result in death or electrical shock. High Voltage Transformer Connections Unplug microwave oven or disconnect Position the unit on its back panel. -
Page 38: Removing The Oven Door Assembly
REMOVING THE OVEN DOOR ASSEMBLY Remove the screw from each end of the WARNING front trim. Electrical Shock Hazard Disconnect power before servicing. Replace all parts and panels before operating. Failure to do so can result in death or Front Trim electrical shock. - Page 39 Position the unit in its upright position. 12. Lift the door so that the top and bottom pins are out of the hinge holes, and re- 10. Open the oven door. move the door and control panel. 11. Use a small-bladed screwdriver and pry the hinge covers out of the door.
-
Page 40: Removing The Oven Door & Control Panel And The Display Assembly
REMOVING THE OVEN DOOR & CONTROL PANEL AND THE DISPLAY ASSEMBLY Use a putty knife and pry along the bottom WARNING outer edge of the door choke to release the clips from the tabs. Carefully pull out on the choke as you release the tabs. Work counterclockwise around the choke until you are able to remove it. - Page 41 Remove the four screws (2 at the top, and 11. Use a small-bladed screwdriver and pry 2 at the bottom) from the inner door panel. the 11-wire display connector away from the board connector. Start at the bottom, and press to release the locking tabs along the inner door panel 12.
- Page 42 — NOTES — 4-20...
-
Page 43: Component Testing
COMPONENT TESTING • Conduct a microwave energy test after per- Before testing a component, be sure to ob- forming any tests or repairs to the micro- serve the following conditions: wave. • Discharge the high voltage capacitor before • Check that all wire leads are in the correct conducting any of the following tests. -
Page 44: Turntable Motor
WARNING Electrical Shock Hazard Disconnect power before servicing. Replace all parts and panels before operating. Failure to do so can result in death or electrical shock. HV CAPACITOR TURNTABLE MOTOR Refer to page 4-7 for the procedure for servicing Refer to page 4-12 for the procedure for servic- the turntable motor. -
Page 45: Humidity Sensor
WARNING Electrical Shock Hazard Disconnect power before servicing. Replace all parts and panels before operating. Failure to do so can result in death or electrical shock. CAVITY & MAGNETRON HUMIDITY SENSOR TEMPERATURE FUSES Magnetron Cavity Temperature Fuse Temperature Fuse Refer to page 4-8 for the procedure for servic- Refer to pages 4-8 and 4-10 for the procedures ing the humidity sensor. -
Page 46: Line Fuse
WARNING Electrical Shock Hazard Disconnect power before servicing. Replace all parts and panels before operating. Failure to do so can result in death or electrical shock. COOLING FAN MOTOR LINE FUSE Refer to page 4-6 for the procedure for servic- Refer to page 4-12 for the procedure for servic- ing the line fuse. -
Page 47: High Voltage Transformer
WARNING Electrical Shock Hazard Disconnect power before servicing. Replace all parts and panels before operating. Failure to do so can result in death or electrical shock. HIGH VOLTAGE TRANSFORMER HIGH VOLTAGE DIODE Secondary Terminal – – Primary Terminals Refer to page 4-12 for the procedure for servic- ing the high voltage diode. -
Page 48: Magnetron
WARNING Electrical Shock Hazard Disconnect power before servicing. Replace all parts and panels before operating. Failure to do so can result in death or electrical shock. MAGNETRON Refer to page 4-10 for the procedure for servic- ing the magnetron. Unplug microwave oven or disconnect power. -
Page 49: Diagnosis & Troubleshooting
DIAGNOSIS & TROUBLESHOOTING TROUBLESHOOTING 4. Disconnect the leads to the primary of the IMPORTANT: If the oven becomes inopera- power transformer. tive because of a blown monitor fuse, check the monitor switch, relay RY1, secondary interlock 5. Ensure that the leads remain isolated from relay RY2, secondary (door sensing) interlock other components and oven chassis by using insulation tape. -
Page 50: Touch Control Panel Assembly Test
TOUCH CONTROL PANEL ASSEMBLY TEST 1. In connection with pads: The touch control panel consists of semicon- ductor circuits. Unlike conventional microwave a) When touching the pads, a certain ovens, proper maintenance cannot be per- group of pads do not produce a signal. formed with only a voltmeter and ohmmeter. -
Page 51: Key Unit Test
KEY UNIT TEST 1. Disconnect the power supply cord. Use the Key Unit matrix, shown below, and place a jumper wire between the pins that 2. Open the door and block it open. correspond to the STOP/CLEAR keypad 3. To discharge the high voltage capacitor, making momentary contact. -
Page 52: Relay Test
RELAY TEST 1. Disconnect the power supply cord. RY1, RY2, RY3 & RY4 RELAYS 2. Remove the unit from the wall (see page These relays are operated by DC voltage. 2-1). Check the voltage at the relay coil with a DC 3. -
Page 53: Defrost Center Test
DEFROST CENTER TEST 1. Open the oven door. 6. Touch the START keypad. The oven is now in the Defrost Center cooking mode. 2. Place one cup of water in the center of the turntable tray in the oven cavity. 7. -
Page 54: Absolute Humidity (Ah) Sensor
ABSOLUTE HUMIDITY (AH) SENSOR CHECKING THE INITIAL WATER LOAD COOKING TEST SENSOR COOKING CONDITION IMPORTANT: The oven should be fully as- sembled before performing the test procedure. IMPORTANT: The oven should be fully as- sembled before performing the test procedure. 1. - Page 55 TESTING THE AH SENSOR CHECKING THE CONTROL UNIT AND/OR CONTROL UNIT 1. Disconnect the power supply cord. NOTE: To determine if the sensor is defective, 2. Remove the cabinet (see page 4-2). the simplest method is to replace it with a new 3.
- Page 56 10. Disconnect the power supply cord. 16. Reconnect all of the leads that were re- moved from components during testing and 11. Remove the cabinet. repairing. 12. Open the door and block it open. 17. Reinstall the cabinet. 13. To discharge high voltage capacitor, wait 18.
-
Page 57: Wiring Diagrams
WIRING DIAGRAMS SCHEMATIC DIAGRAM D1-D4 1N4002 CN-C – – Q1 2SB1238 R1 680 1w R5 680 1w – AC(N) 10 /35v OVEN LAMP TURNTABLE OVEN LAMP MOTOR TURNTABLE FAN MOTOR MOTOR FAN MOTOR KRC243M AC(H) BUZZER MICRO MICRO KRA101M HOOD LAMP HOOD LAMP HOOD COMMON... -
Page 58: Wiring Diagram
WIRING DIAGRAM... -
Page 59: Product Specifications
WARRANTY INFORMATION SOURCES IN THE UNITED STATES: FOR PRODUCT SPECIFICATIONS AND WARRANTY INFORMATION CALL: FOR WHIRLPOOL PRODUCTS: 1-800-253-1301 FOR KITCHENAID PRODUCTS: 1-800-422-1230 FOR ROPER PRODUCTS: 1-800-447-6737 FOR TECHNICAL ASSISTANCE WHILE AT THE CUSTOMER’S HOME CALL: THE TECHNICAL ASSISTANCE LINE: 1-800-253-2870...
Need help?
Do you have a question about the KOMS155MBL and is the answer not in the manual?
Questions and answers