American Dynamics Illustra Flex Series Quick Start Manual
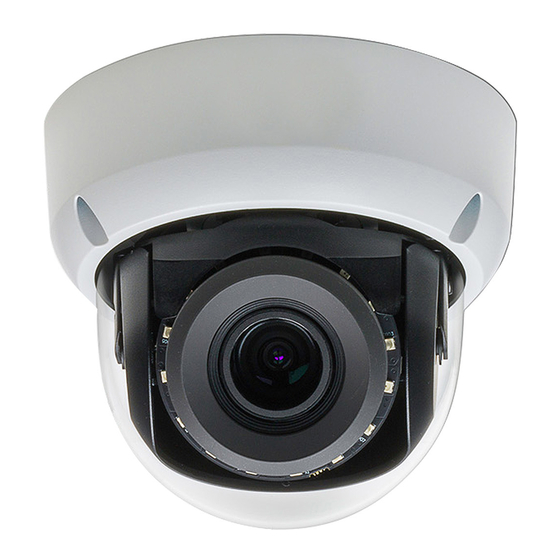
1mp & 3mp indoor dome
Hide thumbs
Also See for Illustra Flex Series:
- User manual (52 pages) ,
- Quick start manual (20 pages) ,
- User manual (48 pages)
Table of Contents
Advertisement
Quick Links
Download this manual
See also:
User Manual
Advertisement
Table of Contents

Subscribe to Our Youtube Channel
Related Manuals for American Dynamics Illustra Flex Series


Summary of Contents for American Dynamics Illustra Flex Series
-
Page 1: Quick Start Guide
Illustra Flex Series 1MP & 3MP Indoor Dome Quick Start Guide 8200-1027-08 B0... - Page 2 The dealer through whom you originally purchased this product is your point of contact if you need service or support. Our dealers are empowered to provide the very best in customer service and support. Dealers should contact American Dynamics at (800) 507-6268 or (561) 912-6259 or on the Web at www.americandynamics.net.
-
Page 3: Table Of Contents
Illustra Flex 1MP & 3MP Indoor Dome Table of Content WARNING ............................... 4 Preface ................................5 1. Product Overview ........................... 6 1.1 Physical Characteristics ........................6 2. Installation and Connection ......................10 2.1 Unpack Everything ..........................10 2.2 Installation ............................10 2.2.1 Checking Appearance ...................... -
Page 4: Warning
Illustra Flex 1MP & 3MP Indoor Dome WARNING This unit operates at DC 12V/ AC 24V/ PoE. Installation and service should be performed only by qualified and experienced technicians and comply with all local codes and rules to maintain your warranty. ... -
Page 5: Preface
Illustra Flex 1MP & 3MP Indoor Dome Preface This user manual is designed as a reference for the installation and manipulations of the unit including the camera’s features, functions, and detailed explanation of the menu tree. The reader is supposed to be able to get following information in the manual. -
Page 6: Product Overview
Illustra Flex 1MP & 3MP Indoor Dome 1. Product Overview 1.1 Physical Characteristics 1-1: P IGURE HYSICAL DIMENSION... - Page 7 Illustra Flex 1MP & 3MP Indoor Dome 1-2: P IGURE ICTORIAL NDEX 1-1: P ABLE ICTORIAL NDEX EFINITION Index # Description Camera bottom case Tilt adjustment bracket and thumbnuts, notches(X2) Notches (x2) Inner liner Loosen the screw to take off camera housing Camera housing Dome cover...
- Page 8 Illustra Flex 1MP & 3MP Indoor Dome 1-3: I & I IGURE NTERIOR UTTONS NLETS 1-2: I ABLE NTERIOR UTTONS EFINITIONS To reset to factory default by pressing and holding the DEFAULT button for 5 seconds RESET To reboot the unit 1-4: E IGURE XTERIOR...
- Page 9 Illustra Flex 1MP & 3MP Indoor Dome 1-3: E ABLE XTERIOR EFINITION Au/I Audio in Au/O Audio out Alarm in Alarm out 1-4: E ABLE XTERIOR EFINITION DC 12V Network indoor dome camera can operate on DC 12V / AC 24V AC 24V...
-
Page 10: Installation And Connection
Illustra Flex 1MP & 3MP Indoor Dome 2. Installation and Connection 2.1 Unpack Everything Check everything in the packing box matches to the order form and the packing slip. In addition to this manual, items below are included in the packing box. ... -
Page 11: Disassembling The Camera
Illustra Flex 1MP & 3MP Indoor Dome 2.2.2 Disassembling the Camera Please refer to the figure 2-1 for pictorial index. Gently press the button to take off camera off camera housing (4). Remove the inner liner (3) by gently pulling it free of the two notches (2) in the housing. Set the camera a housing (5) and inner liner (3) aside. -
Page 12: Mounting The Camera
Illustra Flex 1MP & 3MP Indoor Dome 2.2.4 Mounting the camera Please place the mounting template as supplied on the mounting surface and mark the holes. Drill two holes, and then insert the screw anchors into the holes. Next, take off the camera housing. Connect the Safety Wire (fall prevention wire, not supplied) with one end to the ceiling and the other to the safety-cord screw of the unit. -
Page 13: Adjusting The Position
Illustra Flex 1MP & 3MP Indoor Dome Warning Depending on the material of your mounting surface, you may require different screws and anchors than those as supplied. To prevent the unit from falling off, ensure that it is secured to a firm place (ceiling slab or channel) with a safety wire (not supplied) strong enough to sustain the total weight of the unit. -
Page 14: Adjusting Zoom And Focus
Illustra Flex 1MP & 3MP Indoor Dome 2.2.6 Adjusting Zoom and Focus Loosen the zoom lever (D) / locking screw by turning it counter-clockwise. Rotate the zoom ring to achieve the desired picture. Loosen the focus lever (E) / locking screw by turning it counter-clockwise. Rotate the focus ring to adjust the focus. -
Page 15: System Requirements
Illustra Flex 1MP & 3MP Indoor Dome 2.2.9 System Requirements Below table lists the minimum requirement to implement and operate a Illustra Flex Indoor Dome. 2-1: S ABLE YSTEM EQUIREMENTS System Hardware Intel Pentium 4 2.4GHz or equivalent 1 GB or above Display NVIDIA GeForce 6 Series or ATI Mobility Radeon 9500 System Software... -
Page 16: Connection
Illustra Flex 1MP & 3MP Indoor Dome 2.3 Connection 2.3.1 Default IP address Since this is a network-based unit, an IP address must be assigned at the very first. The unit’s default IP address is 192.168.1.168 and sub mask is 255.255.255.0. However, if you have a DHCP server in your network, the unit would obtain an IP address automatically from the DHCP server so that you don’t need to change the camera’s IP address. - Page 17 Illustra Flex 1MP & 3MP Indoor Dome 2.3.2.2 Viewing Preparation Images of the unit can be viewed through Microsoft Internet Explorer 8 or above. Before viewing, follow these steps to enable the display. Enable Cookies as instructions below In Internet Explorer, click Internet Options on the Tools menu. ...
- Page 18 Illustra Flex 1MP & 3MP Indoor Dome Scroll down to the ActiveX controls and plug-ins radio buttons and set as follows: 【Download signed ActiveX controls】 Prompt (recommended) 【Download unsigned ActiveX controls】 Prompt 【Initialize and script ActiveX not marked as safe for scripting】 Prompt 2-9: S IGURE ECURITY...
- Page 19 Illustra Flex 1MP & 3MP Indoor Dome 【Run ActiveX controls and plug-ins】 Enable 【Script ActiveX controls marked safe for scripting*】 Enable 2-11: S IGURE ECURITY ETTINGS Press OK to save the settings. Close all Microsoft Internet Explorer Windows and restart a new window. This will allow the new settings taking effect.
-
Page 20: Using The Illustra Connect Tool To Manage Cameras
Illustra Flex 1MP & 3MP Indoor Dome 2.4 Using the illustra Connect Tool to Manage Cameras In addition to using the IE browser to access your camera, you can alternatively use the provided tool, illustra Connect. illustra Connect is a management tool designed to manage your network cameras on the LAN. It can: ...
Need help?
Do you have a question about the Illustra Flex Series and is the answer not in the manual?
Questions and answers