Sign In
Upload
Manuals
Brands
APRILIA Manuals
Scooter
ATLANTIC 200
APRILIA ATLANTIC 200 Manuals
Manuals and User Guides for APRILIA ATLANTIC 200. We have
3
APRILIA ATLANTIC 200 manuals available for free PDF download: Manual, Workshop Manual
APRILIA ATLANTIC 200 Workshop Manual (226 pages)
Brand:
APRILIA
| Category:
Scooter
| Size: 8.07 MB
Table of Contents
General Information 1
9
General Information
8
Table of Contents
9
Manual Layout
10
Conventions Used in the Manual
10
Safety Information
11
General Rules
12
Basic Safety Rules
12
Dangerous Elements
15
Warnings Concerning Fuel, Lubricants, Coolant and Other Component Parts
15
Running-In
19
Running-In Recommendations
19
Vehicle Identification Data
20
Serial Numbers Location
20
Using Tools and Spare Parts
21
Spare Parts
21
Technical Data
22
Decals Instructions
24
Products
26
Lubricant Chart
26
Use of Products
27
Tightening
28
General Tightening Torque Settings
28
Routine Maintenance 2
30
Routine Maintenance
31
Introduction
31
Routine Maintenance Table
32
Points to be Lubricated
33
Lubrication
33
Tightening
34
Nut, Bolt, Screw Tightening
34
Fastening Elements
35
Battery
37
Checking and Cleaning the Terminals
38
Checking the Battery Electrolyte Level
39
Recharging the Battery
40
Long Inactivity of the Battery
41
Electrical Parts
42
Spark Plugs
43
Air Cleaner
45
Tubes
46
Fuel System
46
Coolant
47
Checking and Topping up the Coolant Level
47
Cleaning the Radiator
48
Brake Fluid
49
Checking and Topping up the Brake Fluid
49
Changing the Brake Fluid
51
Checking the Brake Pad Wear
52
Bleeding the Braking Systems
53
Engine Oil
56
Checking the Engine Oil Level and Topping up
56
Changing the Engine Oil and the Oil Filter
57
Transmission Oil
58
Checking and Topping up the Transmission Oil
58
Changing the Transmission Oil
59
Throttle
60
Idling Adjustment
62
Front End
63
Steering
63
Front Suspension
64
Rear Axle
65
Checking the Engine Axle
65
Rear Suspension Inspection
66
Wheels
67
Exhaust System
69
Exhaust Manifold Nuts
69
Fuel System 4
74
Fuel Supply
75
Fuel Supply Diagram
75
Changing the Fuel Filter
76
Removing the Fuel Tank
77
Removing the Fuel Sensor
78
Air Filter
79
Removing the Air Box
79
Removing the Air Cleaner
80
Carburetor
81
Removing the Carburetor
81
Carburetor Disassembly
83
Assembling the Carburetor
86
Checking the Automatic Starter
91
Adjusting the Idling Mixture
92
Table of Contents
95
Cooling System Diagram
96
Coolant
97
Changing Coolant
97
Radiator
98
Removing the Radiator
98
Removing the Electric Fan
100
Water Temperature Sensor
102
Removing the Water Temperature Sensor
102
Removing the Expansion Reservoir
103
Engine 6
105
Exhaust System
106
Exhaust Silencer Removal
106
Exhaust System Removal
107
Engine Components that Can be Removed Leaving the Engine in the Frame
108
Engine
109
Engine Removal
109
Installing the Engine into the Frame
112
Chassis
115
Chassis 7
116
Bodywork
118
Saddle Removal
120
Removing the Rear Side Panels
121
Luggage Rack Removal
122
Tail Removal
123
Removing the Number Plate Holder
124
Removing the Central Tunnel
125
Air Dam Removal
127
Legshield Removal
129
Front Cover Removal
130
Screen Removal
131
Rear-View Mirror Removal
132
Removing the Side Fairings
133
Front Mudguard Removal
134
Rear Mudguard Removal
135
Helmet Compartment Removal
136
Handlebar Cover Removal
137
Splashguard Removal
139
Battery Removal
140
Engine Control Unit Removal
141
Voltage Regulator Removal
142
Removing the Right Switch
143
Removing the Left Switch
144
Dashboard Removal
145
Headlight Removal
147
Removing the Front Direction Indicators
148
Removing the Tail Light Unit
149
Coil Removal
150
Controls
151
Throttle Control Removal
151
Removing the Rear Brake Master Cylinder
152
Frame
153
Handlebar Removal
153
Removing the Dashboard/Windshield Mounting Bracket
154
Side Stand Removal
157
Centre Stand Removal
158
Frame Removal
159
Front Wheel
161
Front Wheel Diagram
161
Front Wheel Removal
162
Front Wheel Disassembly
164
Inspecting the Front Wheel Components
165
Refitting the Front Wheel
166
Rear Wheel
167
Rear Wheel Diagram
167
Rear Wheel Removal
168
Brakes
170
Brakes Diagram
170
Replacing the Front Brake Pads
171
Front Brake Disc Inspection
172
Front Brake Disc Removal
173
Replacing the Rear Brake Pads
174
Rear Brake Disc Inspection
175
Rear Brake Disc Removal
176
Proportioning Valve Removal
177
Headstock
178
Headstock Removal
178
Component Inspection
179
Front Fork
180
Front Fork Diagram
180
Removing the Stanchion Tubes and Sliders
181
Disassembling the Stanchion Tubes and Sliders
182
Draining the Front Fork
185
Filling the Fork
187
Component Inspection
189
Refitting the Stanchion Tubes and Sliders
190
Rear Suspension
192
Shock Absorber Removal
192
Electrical System
195
Electrical System 8
196
Layout of Components
197
Layout of Electrical Components
197
Foreword
198
Battery
199
Ignition System and Stand Logic
201
Charge System
204
Charge System and Power Supply
204
Starter Circuit
206
Atlantic 125
207
Sensors
209
Sensor Circuit
209
Fan and Rear Top Box Light
212
Fan and Rear Top Box Light System
212
Light Circuit
214
Visual and Acoustic Signals
216
Visual and Acoustic Signalling System
216
Bulb Replacement
218
Replacing the Fuses
221
Beam Setting
222
Beam Height Setting
222
Beam Horizontal Setting
223
Wiring Diagram
224
Advertisement
APRILIA ATLANTIC 200 Manual (252 pages)
Brand:
APRILIA
| Category:
Scooter
| Size: 5.89 MB
Table of Contents
Belangrijkste Componenten
23
Technische Gegevens
68
Tekniske Informationer
86
Tekniske Specifikationer
152
Safety Information
170
Technical Information
170
General Advice
170
Arrangement of the Main Elements
180
Arrangement of the Controls / Instruments - Key
182
Instruments and Indicators - Key
182
Key Controls
185
Main Components
191
Technical Data
236
APRILIA ATLANTIC 200 Manual (104 pages)
Brand:
APRILIA
| Category:
Scooter
| Size: 3.04 MB
Table of Contents
Foreword
2
Introduction
2
Safety Warnings
3
General Safety Rules
3
Brake Fluid
4
Clutch Fluid
4
Coolant
4
Battery Hydrogen Gas
4
And Electrolyte
4
Warnings - Precautions - General Advice
5
Reporting of Defects that Affect Safety
5
Road Regulations and Use of the Vehicle
5
Noise Emission Warranty
5
Information on the Noise and Exhaust Gas Emission Control System
5
Tampering Warning
5
Vehicle Identification Number (V.I.n.) (Frame Number)
6
Information Contained in the Vehicle Identification Number
6
Position of the Adhesive Warning Labels
8
Adhesive Warning Labels Chart
9
Aprilia S.p.a. - Emission Control System Warranty Statement
13
Aprilia S.p.a. - Limited Warranty on Emission Control System
14
General Instructions
16
Table of Contents
17
Contents
17
Basic Safety Rules
20
Clothing
25
Accessories
26
Load
26
Arrangement of the Main Elements
28
Arrangement of the Controls/Instruments
30
Arrangement of the Controls/Instruments Key
30
Instruments and Indicators Key
30
Instruments and Indicators
30
Instruments and Indicators Chart
31
Key Controls
33
Controls on the Left Side of the Handlebar
33
Controls on the Right Side of the Handlebar
34
Ignition Switch
35
Steering Lock
35
Auxiliary Features
36
Digital Clock/Date
36
Bag Hook
36
Tool Kit
37
Unlocking/Locking the Saddle
37
Glove Compartment
37
Power Socket
38
Main Components
39
Fuel
39
Lubricants
41
Brakes
42
Brake Fluid - Recommendations
42
Disc Brakes
43
Checking Brake Fluid Level
43
Coolant
44
Checking and Topping up
45
Tires
46
Muffler/Exhaust Silencer
48
Instructions for Use
49
Getting on and off the Vehicle
49
Instructions for Use
51
Pre-Ride Checks Chart
51
Starting
52
Moving off - Riding
54
Running-In
56
Stopping
57
Placing the Vehicle on the Stand58
58
Suggestions to Avoid Theft
59
Maintenance
60
Periodic Maintenance Chart
61
Identification Data
63
Helmet Case
64
Checking and Topping up Engine Oil Level
65
Checking and Topping up Transmission Oil Level
66
Air Cleaner
67
Checking the Brake Pads for Wear
69
Rear Brake Caliper
69
Checking the Stand
70
Checking the Switches
70
Checking the Front and Rear Suspension
71
Rear Suspension Adjustment
71
Checking the Steering
72
Checking Engine Pivot Shaft
73
Removing the Right and Left Inspection Covers
73
Removing the Rearview Mirrors
73
Removing the Front Cover
74
Removing the Headlight Fairing
75
Adjusting Idling Speed
75
Throttle Twistgrip Adjustment
76
Spark Plug
76
Battery
78
Long Inactivity of the Battery
78
Removing the Battery Cover
79
Checking and Cleaning the Battery
79
Lead Connections and Terminals
79
Removing the Battery
79
Checking Battery Fluid Level
80
Charging the Battery
80
Installing the Battery
80
Replacing the Fuses
81
Arrangement of Auxiliary Fuses (Front Cover)
81
Arrangement of Main Fuses (Battery Compartment)
82
Vertical Adjustment of the Headlight Beam
82
Horizontal Adjustment of the Headlight Beam
83
Bulbs
83
Replacing the Bulbs of the Front Direction Indicators
84
Replacing the Headlight Bulbs
84
High Beam and Low Beam Bulbs
85
Replacing the Parking Light Bulb85
85
Replacing the Taillight Bulb
86
Replacing the License Plate Bulb87
87
Replacing the Helmet
87
Compartment Light Bulb
87
Transport
88
Draining the Fuel Tank
88
Cleaning
89
Technical Specifications
92
Lubricant Chart
95
Authorised Dealers and Service Centres
96
Importers
97
Electrical Diagram - Atlantic 200
101
Electrical Diagram Key - Atlantic 200
102
Cable Colours
102
Advertisement
Advertisement
Related Products
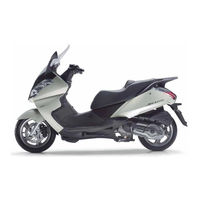
APRILIA ATLANTIC 200 - 2003
APRILIA ATLANTIC 200 - 05-2003
APRILIA LEONARDO 250 - 1999
APRILIA LEONARDO 250 - 2003
APRILIA ATLANTIC 125 - 05-2003
APRILIA ATLANTIC 300 I.E.
APRILIA ATLANTIC 250 I.E. - 10-2006
APRILIA ATLANTIC 400 SPRINT - 10-2006
APRILIA ATLANTIC 500 - 02-2002 PART2
APRILIA ATLANTIC 500 - 02-2002 PART4
APRILIA Categories
Motorcycle
Scooter
Bicycle
Engine
Hair Dryer
More APRILIA Manuals
Login
Sign In
OR
Sign in with Facebook
Sign in with Google
Upload manual
Upload from disk
Upload from URL