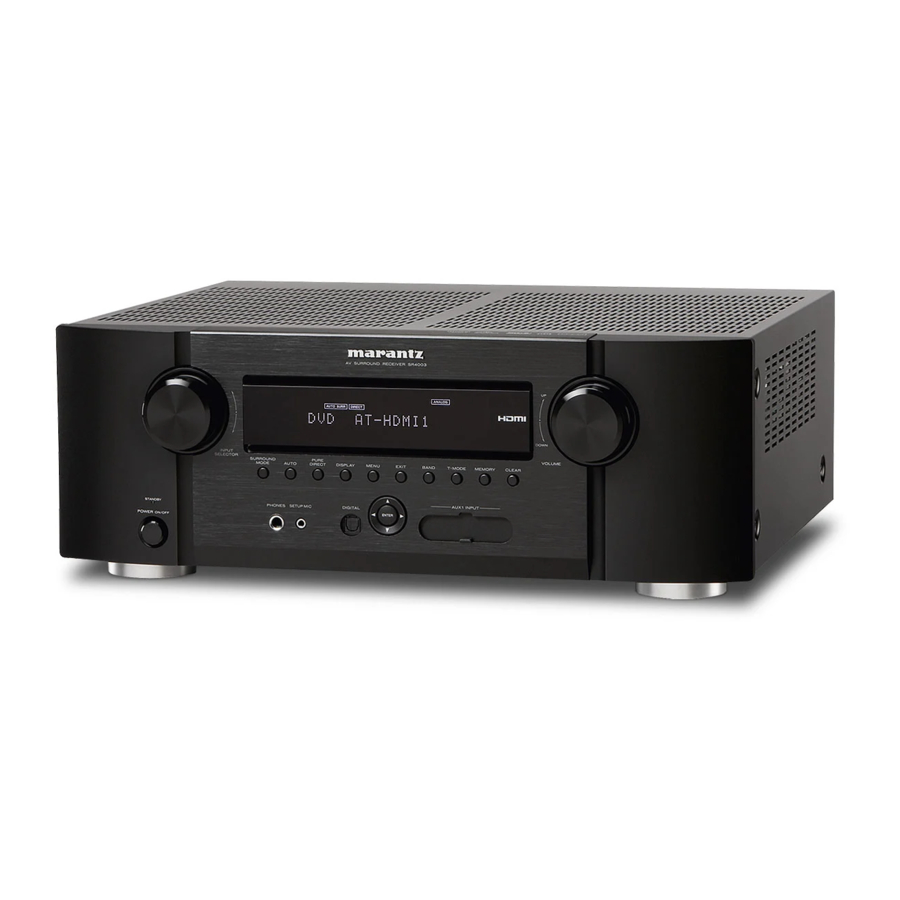
Marantz SR4003 User Manual
Marantz av surround receiver user guide
Hide thumbs
Also See for SR4003:
- Specification sheet (2 pages) ,
- Mode d'emploi (42 pages) ,
- Guía del usuario (42 pages)
Table of Contents
Advertisement
Advertisement
Table of Contents

Related Manuals for Marantz SR4003


Summary of Contents for Marantz SR4003
- Page 1 ESPAÑOL FRANÇAIS ENGLISH AV Surround Receiver SR4003...
-
Page 2: Declaration Of Conformity
(1) This device may not cause harmful interference, and (2) this device must accept any interference received, including interference that may cause undesired operation. U.S. Responsible Party: Marantz America, Inc. 100 Corporate Drive, Mahwah, NJ, 07430, U.S.A. TEL: 201-741-6500... -
Page 3: Important Safety Instructions
IMPORTANT SAFETY INSTRUCTIONS READ BEFORE OPERATING EQUIPMENT This product was designed and manufactured to meet strict quality and safety standards. There are, however, some installation and operation precautions which you should be particularly aware of. 1. Read these instructions. 2. Keep these instructions. 3. -
Page 4: Table Of Contents
This remarkable component has been engineered to provide you with many years of home theater enjoyment. Please take a few minutes to read this manual thoroughly before you connect and operate the SR4003. As there are a number of connection and confi guration options, you are encouraged to discuss your own particular home theater setup with your Marantz authorized dealer. -
Page 5: Features
II (Cinema and Music). • Improved Station Name Input Method, 50 Presets In addition, Marantz has focused on the future. By • Auto Adjust Function for Speaker Distance Settings utilizing pre-out jacks, 7.1 direct inputs, the unit is (Delay Time) tomorrow’s technology, today! -
Page 6: Operation Of Remote Controller
5m from the infrared receptor window on the front of the unit. Remove the battery cover. 60° SR4003 Remote controller Load the two new size “AAA” batteries inside the battery compartment while taking care to align their polarities correctly with the polarity... -
Page 7: Names And Functions
ENGLISH NAMES AND FUNCTIONS FRONT PANEL u i o !0 !1 DISP MULTI AUTO TUNED V – OFF NIGHT PEAK ANALOG DIGITAL SLEEP AUTO SURR DIRECT DISC 6.1 MT X 6.1 SPKR B POWER switch and STANDBY indicator When this switch is pressed once, the unit turns ON When this button is pressed once, “SOURCE and the display illuminates. -
Page 8: Fl Display And Indicator
FL DISPLAY AND INDICATOR j l ¡1 ¡0 ¡2 DISP AUTO TUNED V – OFF NIGHT PEAK SLEEP AUTO SURR DIRECT DISC 6.1 MTX 6.1 SPKR B ¡9 ¡8 DISP (Display Off) indicator NIGHT mode indicator This indicator is illuminated when this unit is in the This indicator is illuminated when this unit is in the display off mode. -
Page 9: Remote Controller
ENGLISH REMOTE CONTROLLER The provided remote controller is a universal (When AMP mode is selected) These buttons are used to turn the unit on or off. remote controller. The POWER button, numeric buttons and control buttons are used in common across different input source components. - Page 10 ¤0 ¤3 Numeric buttons TOP button These buttons are used to switch between 0 to +10 This button is used during setup to return to the top of the source components. screen of the Setup Main Menu. If the source is set to the amplifi er, these buttons are used to perform operations.
-
Page 11: Rear Panel
The 2 video output channels can be used to be connected to video tape recorders for making recordings. Connect to a Marantz component equipped with remote control (RC-5) terminals. HDMI INPUT/OUTPUT This unit has 3 HDMI inputs and 1 HDMI output. The input function can be selected from the OSD menu system. -
Page 12: Basic Connections
BASIC CONNECTIONS SPEAKER PLACEMENT The ideal surround speaker system for this unit is 7- speaker systems, using front left and right speakers, a center speaker, surround left and right speakers, a surround back left and right speakers, and a subwoofer. For best results we recommend that all front speakers be of the same type, with identical or similar driver units. -
Page 13: Connecting Speakers
CENTER CENTER SWITCHED SWITCHED 1.25A 150W 1.25A 150W MODEL NO. SR4003 MODEL NO. SR4003 Caution: • Be sure to use speakers with the specifi ed impedance as shown on the rear panel of this unit. • To prevent damage to circuitry, do not... -
Page 14: Connecting Audio Components
CENTER CENTER SWITCHED SWITCHED 1.25A 150W 1.25A 150W MODEL NO. SR4003 MODEL NO. SR4003 ENGLISH CONNECTING DIGITAL AUDIO COMPONENTS • There are 4 digital inputs, 2 coaxial jacks and 2 optical jacks, on the rear panel. You can use these jacks to input PCM, Dolby Digital and DTS bitstream signals from a CD, DVD, or other digital source components. -
Page 15: Connecting Video Components
AC OUTLETS 120V 120V 60Hz 60Hz CENTER CENTER SWITCHED SWITCHED FRONT FRONT 1.25A 150W 1.25A 150W MODEL NO. SR4003 PRE OUT PRE OUT Video S-VIDEO Analog Audio VIDEO AUDIO S-VIDEO Digital Audio (coaxial) Digital Audio (optical) VIDEO, S-VIDEO , COMPONENT JACKS There are 3 types of video jacks on the rear panel. -
Page 16: Connecting Hdmi Components
An HDMI cable (sold separately) is used to connect the HDMI jack on the unit with the HDMI jack on a DVD player, TV, projector or other component. To transmit MODEL NO. SR4003 MODEL NO. SR4003 multichannel audio via HDMI, the connected player must support multichannel audio transmission through its HDMI jack. -
Page 17: Connecting The Antenna Terminals
CENTER SWITCHED SWITCHED Release the lever. 1.25A 150W 1.25A 150W MODEL NO. SR4003 MODEL NO. SR4003 CONNECTING AN FM OUTDOOR ANTENNA Notes: • Keep the antenna away from noise sources (neon Place the antenna on stable surface. signs, busy roads, etc.). -
Page 18: Basic Operation
SELECTING AN INPUT SOURCE BASIC OPERATION Before you can listen to any input media, you must fi rst select the input source on the unit. AMP OPERATION Example : DVD TURNING ON THE UNIT Connect the AC power cord to the wall outlet. Turn on the power to the devices that are connected to the unit. -
Page 19: Tuner Operation
ENGLISH MANUAL TUNING TUNER OPERATION Frequency scan step for AM is selectable. Default setup is 10 kHz step, if your country’s standard is 9 kHz step, Press BAND button on the remote controller more than 6 seconds. Scan step will change. Note: Preset memory for the tuner will clear by changing this setup. -
Page 20: Remote Controller Operation
To control the unit by your remote controller, you have to select the device AMP or TUNER by pressing the SOURCE button. Please refer below for the details in AMP and TUNER mode. AMP MODE SOURCE ON/OFF Turns the SR4003 on and off POWER OFF Turns the SR4003 off POWER ON Turns the SR4003 on Z.SPKR... -
Page 21: Advanced Connections
ENGLISH ADVANCED CONNECTIONS CONNECTING MULTI CHANNEL AUDIO COMPONENT The 7.1CH INPUT jacks are for multichannel audio source such as a Super Audio CD multichannel player, DVD audio player or external decoder. If you use these jacks, switch on the 7.1CH INPUT and set the 7.1CH INPUT level by using the SETUP MAIN MENU. -
Page 22: Connecting The Remote Control Jacks
Then the signal is sent to the connected device through this terminal. Therefore you need to aim the remote signal only to the unit. Also, if a Marantz power RC OUT amplifi er (some models excluded) is connected to OPTION one of these terminals, the power amplifi... -
Page 23: Setup
ENGLISH SETUP After all components are connected, initial setup must be performed. ON SCREEN DISPLAY MENU SYSTEM This unit incorporates an on-screen menu system, which makes various operations possible by using the cursor (3, 4, 1, 2) and ENTER buttons on the remote control or on the front panel. -
Page 24: Input Setup
Notes: 1 INPUT SETUP (ASSIGNABLE DIGITAL • When the TUNER is fi xed to the analog input, you INPUT AND COMPONENT VIDEO INPUT) can not select any digital input. Use this menu to select the input jack to be assigned •... - Page 25 Set the distance from the surround back right home theater confi guration. If you are unsure, have speaker to your normal listening position. your Marantz dealer perform the installation for you. They are trained professionals familiar with even Notes: the most sophisticated custom installations. Marantz •...
- Page 26 MRAC (Marantz Room Acoustic Calibration) Speaker settings that were diffi cult by MANUAL setup can now be made by automatically measuring speaker characteristics using the including microphone. 2-1 SPEAKER SETUP SPEAKER SETUP : AUTO SET MICROPHONE SPEAKERS CHECK SPEAKERS LEVEL...
-
Page 27: Preference
ENGLISH Notes: 3 PREFERENCE • The measured speaker distance may differ from the actual distance from speakers. Nevertheless, the measured value is suitable for the speakers. • To make changes to individual speakers, select 2. SPEAKER SETUP on the SETUP MAIN MENU, then select MANUAL for 2-1 SPEAKER SETUP. -
Page 28: Pl Iix (Pro Logic Iix) Music Parameter
5 PL IIx (PRO LOGIC IIx) 6 CS II (CIRCLE SURROUND II) PARAMETER MUSIC PARAMETER Pro Logic IIx-Music mode creates a rich and enveloping surround ambience from stereo sources such as CDs. In this mode, this unit include three controls to fi ne- tune the soundfi... -
Page 29: Advanced Operation
ENGLISH ADVANCED OPERATION AMP OPERATION USING THE SLEEP TIMER DISPLAY MODE You can select the display mode for the front display To program this unit for automatic standby, press the of the unit. SLEEP button on the remote controller. To select this mode, press the DISPLAY on the front Each press of the button will increase the time before panel or the remote controller. - Page 30 SELECTING ANALOG AUDIO INPUT OR DIGITAL SELECTING THE SURROUND MODE AUDIO INPUT Example: AUTO SURROUND If you have already assigned the digital inputs, you can temporarily select the audio input mode for each To select the surround mode during playback, press input source as following procedures.
- Page 31 ENGLISH ATTENUATION TO ANALOG INPUT SIGNAL If the selected analog audio input signal is greater than the capable level of internal processing, the “PEAK” indicator will light up on the front display. If this happens, you should press the ATT button on the remote controller.
- Page 32 VIDEO ON/OFF VIDEO CONVERT When no video signal is connected to the unit or When this function is activated, the video or a DVD, etc., is connected directly to your TV, the S-video signal can be emitted from the video, S-video unnecessary video circuit can be turned off by or component video output terminal.
-
Page 33: Surround Speaker B System
ENGLISH SURROUND SPEAKER B SYSTEM TUNER OPERATION (PRESET MEMORY) The Surround Speaker B system is a function which With this unit you can preset up to 50 FM/AM stations allows you to listen to the same source in a room other in any order. - Page 34 CLEARING STORED PRESET STATIONS SORTING PRESET STATIONS You can remove preset stations from the memory using the following procedure. V – OFF NIGHT PEAK ANALOG SURROUND DIGITAL DIGITAL DISC 6.1 MT X 6.1 SPKR B If you have stations memorized, and there is a gap in the sequential order: I.e.
-
Page 35: Remote Controller Operation
Press the desired operation buttons to play the selected component. • For details, refer to the component’s user guide. • It may not be possible to operate some models. CONTROLLING A MARANTZ TV (TV MODE) SOURCE ON/OFF Turns the TV on and off... - Page 36 AMP function enabled BASS-/+ AMP function enabled (*) RC004SR dose not have the PRESET code library for this key CONTROLLING A MARANTZ TAPE DECK (TAPE MODE) SOURCE ON/OFF Turns the TAPE deck on and off POWER ON Turns the TAPE deck on...
-
Page 37: Basic Operation (Remote Controller)
DVD, VCR (VCR deck), DSS (satellite broadcasting tuner), TUNER, CD, CD-R, DMP, TAPE (tape deck), AUX1, AUX2, and AMP (amplifi er). Learning is not necessary for Marantz products. You PROGRAMMING WITH THE 4-DIGIT CODE can use these products without setting any codes. - Page 38 Place the remote controller so that its infrared signal transmitter is facing the infrared signal Repeat steps same SOURCE. receiver on the Marantz remote controller at a distance of about 0.05 m (2 inches). Repeat steps When you have finished programming the...
-
Page 39: Troubleshooting
If your trouble cannot be recovered with the remedy actions listed in the following table, malfunction of the internal circuitry is suspected; immediately unplug the power cable and contact your dealer, nearest Marantz authorized dealer or the Marantz Service Center in your country. -
Page 40: Front Key (Button) Lock Of The Unit
HDMI SYMPTOM CAUSE The display does not appear The connected monitor or projector does not support HDCP. over an HDMI connection. The HDMI input of on the TV is not on. The HDMI output on the source component (DVD, Set Top Box, etc.) is not on. -
Page 41: Others
ENGLISH OTHERS SURROUND MODE This unit is equipped with many surround modes. These are provided to reproduce a variety of surround sound effects, according to the content of the source to be played. The available surround modes may be restricted depending on the input signal and speaker setup. The relation between the selected surround mode and the input signal The surround mode is selected with the surround mode selector on this unit or the remote controller. - Page 42 AUTO EX/ES When this mode is selected, the unit determines This mode provides 6.1 channel surround for DOLBY whether the digital input signal is Dolby Digital, Dolby DIGITAL EX, DTS-ES encoded source material such Digital Surround EX, DTS, DTS-ES, DTS 96/24 or as DVD.
-
Page 43: Description
ENGLISH CIRCLE SURROUND II STEREO (CSII-CINEMA, CSII-MUSIC, CSII-MONO) This mode bypasses all surround processing. Circle Surround is designed to enable multichannel In stereo program sources, the left and right channels surround sound playback of non-encoded and play normally when PCM-audio or analog stereo is multichannel encoded material. - Page 44 • Neo:6 technology allows various sound elements 2. Full backward compatibility with all existing within a channel or channels to be steered decoders. (Existing decoders will output a 48 kHz separately, and in a way which follows naturally signal) from the original presentation. 3.
-
Page 45: Technical Specifications
In the event of diffi culty, refer to your dealer or write directly to the nearest location to you that is listed on the Marantz Authorized Service Station list. If writing, please include the model and serial number of the equipment together with a full description of what you think is abnormal about the equipment’s behaviour. - Page 46 KRELL ... 3010 LUXMAN ... 3035, 3036, 3037, 3038 LX I ... 3012, 3020, 3014 MAGNAVOX ... 3010, 3039, 3040 MARANTZ ... 3010, 3041, 3042, 3043 MATHES ... 3012, 3020 MCS ... 3012, 3020 MGA ... 3023 MISSION ... 3010 MITSUBISHI ...
- Page 47 SONY ... 3039, 3079, 3080, 3081, 3082, 3097 Magnavox ...2007, 2011, 2023, 2025 3098, 3099, 3100, 3101 Marantz ... 2025 SYLVANIA ... 3010 Marantz (Blu-ray) ... 2064 SYMPHONIC ... 3083 Mitsubishi ...2011, 2015 TEAC ... 3016, 3042, 3057, 3083, 3084 Onkyo ... 2062 3085, 3086 Oritron ...
- Page 48 You can find your nearest authorized distributor or dealer on our website. is a registered trademark. Printed in China 06/2008 541110122025M mzh-d...