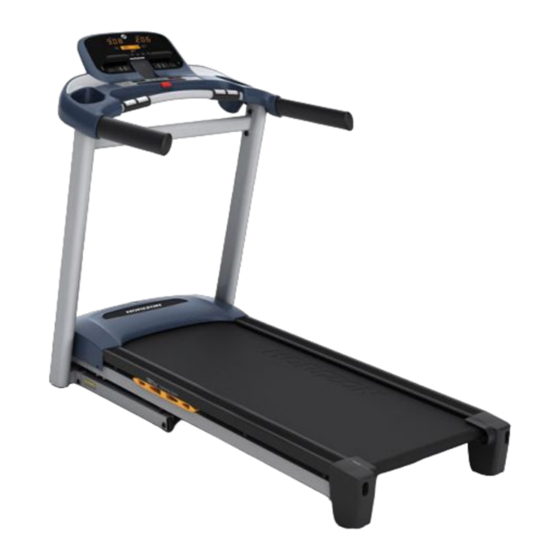
Summary of Contents for Horizon Fitness CT5.1
- Page 1 TREADMILL OWNER’S MANUAL MANUEL D’UTILISATION DU TAPIS ROULANT Read the TREADMILL gUIDE before using this OWNER’S MANUAL. Lire le gUIDE DU TAPIS ROULANT avant de se servir du présent MANUEL D’UTILISATION.
- Page 3 ENTER YOUR SERIAL NUMBER IN THE BOX BELOW: SERIAL NUMBER: Horizon CT5.1 TrEADMiLL MODEL NAME: » Refer to the SERIAL NUMBER and MODEL NAME when calling for service.
- Page 4 SPEAKERS TOUCH PAD PANEL AND DISPLAY WINDOWS WATER BOTTLE HOLDER GRIP PULSE HANDRAILS ON/OFF SWITCH SAFETY KEY PLACEMENT CIRCUIT BREAKER CONSOLE MAST POWER CORD FOOT LOCK LATCH (UNDERNEATH DECK) MOTOR COVER RUNNING BELT / RUNNING DECK SIDE RAIL TRANSPORT WHEEL ROLLER END CAP REAR ROLLER UNDERNEATH FOOT LATCH...
-
Page 5: Pre-Assembly
PrE ASSEMBLY TooLS inCLUDED: F Screwdriver UnPACKinG F 6 mm T-Wrench F 5 mm L-Wrench Place the treadmill carton on a level flat surface. It is recommended that you place a F 4 mm L-Wrench protective covering on your floor. Take CAUTION when handling and transporting this unit. -
Page 6: Assembly Step
ASSEMBLY STEP 1 Cut the yellow banding straps and lift the HArDWArE BAG 1 CONTENTS : running deck upward until the foot latch locks. Remove all contents from BOLT (A) SPRING WASHER (B) FLAT WASHER (C) underneath the running deck. 20 mm 15 mm 15 mm... - Page 7 ASSEMBLY STEP 2 Open hardware bag 2. HArDWArE BAG 2 CONTENTS : Pull lead wire through right console BOLT (A) SPRING WASHER (B) FLAT WASHER (C) mast. After pulling the lead wire through the 20 mm 15 mm 15 mm mast, the top of the console cable should Qty: 4 Qty: 4...
- Page 8 ASSEMBLY STEP 3 Disengage the deck lock latch with your HArDWArE BAG 3 CONTENTS : foot to lower the running deck. Open hardware bag 3. BOLT (D) FLAT WASHER (E) 25 mm 16 mm Qty: 2 Qty: 2 gently place the console on top of the console masts.
- Page 9 ASSEMBLY STEP 4 Open hardware bag 4. HArDWArE BAG 4 CONTENTS : Align support bar with holes in console BOLT (H) masts. 15 mm Qty: 4 Insert bolts (h) into all 4 holes of the support bar. Note: look into holes in the right mast before inserting bolts to avoid pinching cables.
- Page 10 ASSEMBLY STEP 5 Open hardware bag 5. HArDWArE BAG 5 CONTENTS : Slide right bottom console cover up SCREW (G) console mast and align screw holes. Attach 15 mm Qty: 4 bottom console cover to console using 2 screws (g). Repeat on other side.
-
Page 11: Treadmill Operation
TREADMILL OPERATION This section explains how to use your treadmill’s console and programming. The BASIC OPERATION section in the TREADMILL gUIDE has instructions for the following: • LoCATion oF THE TrEADMiLL • USinG THE SAFETY KEY • FoLDinG THE TrEADMiLL •... - Page 12 TIME DISTANCE CALORIES HEART RATE INCLINE SPEED % COMPLETE SCAN SAVED MANUAL WEIGHT SAVED SAVED WEIGHT SAVED SAVED INTERVALS LOSS HILLS ROLLING MANUAL INTERVALS LOSS HILLS ROLLING M y K E Y S ™ M y K E Y S ™...
-
Page 13: Console Operation
ConSoLE oPErATion Note: There is a thin protective sheet of clear plastic on the overlay of the console that should be removed before use. A) LArGE LED WinDoWS: time & distance. B) LCD WinDoW: calories, heart rate, incline, speed, % complete, and scan. C) FEEDBACK LEDS: indicate what workout feedback is currently being displayed in the lcd window. -
Page 14: Finishing Your Workout
MYKEYS KEY oPErATion ™ You can program the MyKeys to your desired speed or incline values. The SPEED MyKeys defaults are: The INCLINE MyKeys defaults are: Slow = 1 mph Low = 0% Med = 3 mph Med = 3% Fast = 5 mph High = 6% To change the default value of any MyKEY, while in a program, first select the speed or incline level you would like to save, then... -
Page 15: Getting Started
ProGrAMS MAnUAL: Allows “on the fly” manual speed and incline changes. Time-based goal. inTErVALS: Improves your strength, speed and endurance by increasing and decreasing the speed throughout your workout to involve your heart and other muscles. WEiGHT LoSS: Promotes weight loss by increasing and decreasing the speed, while keeping you in your fat burning zone. HiLLS: Simulates running up and down hills to improve stamina. - Page 16 SAVinG A WorKoUT If you had an especially challenging workout, you may want to save that one for the future. 1) At the end of your workout, the console will prompt you if you would like to save your completed workout by scrolling save workout.
-
Page 17: Limited Home-Use Warranty
LIMITED HOME-USE WARRANTY... - Page 18 LABor • 1 YEAr • Incidental or consequential damages. Horizon Fitness Horizon Fitness shall cover the labor cost for the repair of the is not responsible or liable for indirect, special or device for a period of one year from the date of the original...
- Page 19 • Any attempt to repair this equipment creates a risk of • A Horizon Fitness authorized service center must receive injury. Horizon Fitness is not responsible or liable for any all equipment for which a warranty claim is made. This...
- Page 20 TW 586429 TW 494765 US 7104930 CN 03206094.7 CN 01230904.4 US 6682460 CT5.1 Rev. 1.3 | © 2009 Horizon Fitness | Designed & Engineered in the U.S.A. | Made in China | Conçu et développé aux États-Unis. | Fabriqué en Chine...


