Table of Contents
Advertisement
Advertisement
Table of Contents

Related Manuals for Kurzweil MPS20


Summary of Contents for Kurzweil MPS20
-
Page 2: Important Safety Instructions
IMPORTANT SAFETY INSTRUCTIONS 1. Read these instructions. 2. Keep these instructions. 3. Heed all warnings. 4. Follow all instructions. 5. Do not use this apparatus near water. 6. Clean only with dry cloth. 7. Do not block any of the ventilation openings. Install in accordance with the manufacturerʼs instructions. - Page 3 RADIO AND TELEVISION INTERFERENCE WARNING: Changes or modifications to the instrument not expressly •Reorient or relocate the receiving antenna. approved by Kurzweil could void your authority to operate the •Increase the separation between the instrument and the receiver. instrument. •Connect the instrument into an outlet on a circuit other than the one to which the receiver is connected.
-
Page 4: Table Of Contents
Table of Contents Chapter 1 Introduction Primary Features ! ....................... Chapter 2 Getting Started Setting Up the MPS20! ....................Volume! ......................Connecting the Power Supply! ................Music Rack! ....................... Assembling the Stand! ..................Quick Start! ....................... Chapter 3 MPS20 Overview Front Panel! ...................... - Page 5 Chapter 6 Layering Layer Mode! ......................Layer Mode Navigation Buttons! ............... Selecting a Voice! ....................Layer Mode Parameters! ................... Layer Voice! ....................Layer Volume! .................... Layer Transposition! ................... Saving Layered Voices! ..................Save Button! ....................Favorites Buttons ! ..................Changing Layered Voices! ................
- Page 6 Erasing/Recording over Tracks ! ..............Punch-Ins! ....................Chapter 11 MIDI MIDI Channels! ....................MIDI In and Out Ports ! ..................USB MIDI Connection! ..................Appendices MIDI Implementation Chart! ..................Rhythm Patterns ! ..................... Voice List! ......................... MPS20 Features! ..................... Table of Contents...
-
Page 7: Chapter 1 Introduction
Congratulations on your purchase of the Kurzweil MPS20. You are certain to enjoy many hours exploring the variety of features as well as the beautiful preset voices. The MPS20 is designed with the same sound technology from the world acclaimed PC3 Series keyboard. Primary Features... -
Page 8: Chapter 2 Getting Started
Warranty Card MPS20 User's Manual (this manual) If you are missing any of the above, please contact your Kurzweil dealer. It is always a good idea to save the MPS20's carton, in case you need to ship it. Before you connect cables and turn on the power, place the MPS20 on a stable surface. -
Page 9: Connecting The Power Supply
Connecting the Power Supply The MPS20's power is supplied by a DC power adapter. Before connecting the MPS20's power adapter, make sure that the power switch (located on the upper right end of the instrument) is in the off position (not pushed in). -
Page 10: Music Rack
2) Attaching the Music Rack. There is an opening on the back of the MPS20 for the music rack. To install it, stand at the front of the MPS20 keyboard, position the music rack so that its center lines up with center of the LED display. -
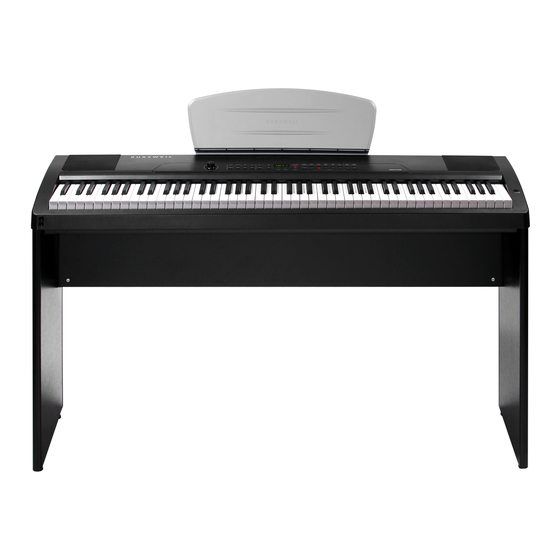
Page 11: Assembling The Stand
Install the four plastic caps over the screw holes after tightening the screws. 3) Securing the MPS20 to the stand. Lower the MPS20 onto the stand and install the four 1.5cm screws up through the brackets on the stand into the bottom of the MPS20. Getting Started... -
Page 12: Quick Start
Getting Started Chapter 2 After the MPS20 is set up and the power adapter connected, press the power switch. While the unit is performing its power-up routine, the LED display and some of the button LEDs flash. After 1 Grand Piano a couple of seconds, the display scrolls . -
Page 13: Chapter 3 Mps20 Overview
As shown in the above illustration, the power switch is located at the upper right end of the MPS20. Turn the power on and off by pressing the switch. (The power switch button pushed in is the On position and out is the Off position.) Headphone Jacks The MPS20 has two 1/4"... -
Page 14: Front Panel Display, Buttons And Controls
MPS20 Overview Chapter 3 Front Panel Display, Buttons and Controls Here is a quick overview of the MPS20's front panel. A description of its individual features follows. Recording Bank Category Play/Stop LEDs Display Save Split Piano Demo Select Tempo Layer... -
Page 15: Voice, Rhythm, And Piano Buttons
Favorites and Demo Buttons Favorites 1 through 6 Select a [Favorites] button to store favorite voices, layers and splits. Demo Button Press this button to enter Demo Mode to play one of the many demo songs stored in the MPS20. MPS20 Overview... -
Page 16: Recording And Play/Stop Buttons
Mode. Split Button Layer Button Press the [Split] button to enter Split Mode and create split voices. Press the [Layer] button to enter Layer Mode and create layered voices. Volume Control Volume Adjusts the volume of the MPS20. MPS20 Overview... -
Page 17: Rear Panel
Use these 1/4" jacks to connect the MPS20 to external audio equipment. Use 1/4" mono (unbalanced) cables. MIDI In & Out Use the MIDI In and Out ports to connect the MPS20 to other MIDI devices to receive and send MIDI data. Switch Pedal (Sustain Pedal) Connect the included piano-style pedal to this jack and use it as a sustain pedal. -
Page 18: Front Panel Buttons
Front Panel Buttons Single Buttons There are 32 buttons on the MPS20 Front Panel. Most buttons have LEDs that light up when the button is pressed and remain lit to show the button is active. Four buttons do not have LEDs,... -
Page 19: Quick Parameter Buttons
[Next] button to decrease or increase the tempo. If no action is performed after pressing the Tempo button, the button will time out and the MPS20 exits the Tempo quick parameter and returns to its previous state. You can also exit the Tempo quick parameter by pressing the [Tempo] button again. -
Page 20: Chapter 4 Demo Mode
Demo Mode Chapter 4 The MPS20 has 51 prerecorded grand piano songs performed in a variety of classic styles that demonstrate the quality of its Grand Piano voice. Playing Demo Songs Press the [Demo] button to enter Demo Mode. The first demo song, Brahms-Rhapsody, begins to play and its song number and name scrolls across the display. -
Page 21: Demo Song List
Demo Song List Song Name Composer Rhapsody J. Brahms Prelude I J. S. Bach Invention No. 4 J. S. Bach Invention No. 8 J. S. Bach Prelude II J. S. Bach Aria Goldberg J. S. Bach Fuga II J. S. Bach Sonatine Op.36 M. -
Page 22: Chapter 5 Voice Mode
Voice Mode Chapter 5 When you turn on the MPS20, Voice Mode is active and the Grand Piano voice is already selected and ready to play. Grand Piano is the default voice and the first voice in the Piano category. -
Page 23: Selecting Voices
If you are pressing the [Next] button and reach the last voice of the category, the MPS20 automatically advances to the first voice of the next category. If you are pressing the [Prev] button and reach the first voice of the category, the MPS20 automatically moves to the last voice of the previous category. -
Page 24: Chapter 6 Layering
In Layer Voice, use this button to select another category; it acts the same as it would in Voice Mode. If the Layer Volume or Layer Transposition parameter is active, pressing a category button returns the MPS20 to the Layer Voice parameter. Layering... -
Page 25: Selecting A Voice
Layer Transposition are remembered for the next time you layer; but are not stored in memory. They return to their default settings when you turn off the MPS20. Be sure to save your changes as one of the Favorites! Layering... -
Page 26: Layer Voice
Layering Chapter 6 Layer Voice This parameter is for the secondary voice. When you press the [Layer] button, this parameter is PRG:87 active and the secondary voice ID number, , (87, the default voice) scrolls across the display. To choose a different voice as the secondary voice, select a category and use the [Prev] or [Next] button to step through the list of voices. -
Page 27: Saving Layered Voices
Then press and hold the button at least 1.5 seconds. The layered voice is now stored in that location. At this point, the MPS20 is in Voice Mode, the just saved layered voice is active, and its ID number is in the display. -
Page 28: Chapter 7 Splitting
In Split Voice, use this button to select another category; it acts the same as it would in Voice Mode. If the Split Key, Split Volume or Split Transition parameter is active, pressing a category button returns the MPS20 to the Split Voice parameter. Splitting... -
Page 29: Selecting A Voice
Split Transposition are remembered for the next time you want to use a split voice; but are not stored in memory. They return to their default settings when you turn off the MPS20. Be sure to save your changes as one of the Favorites! -
Page 30: Split Voice
Split Transposition are remembered for the next time you want to use a split voice; but are not stored in memory. They return to their default settings when you turn off the MPS20. Be sure to save your changes as one of the Favorites! Splitting... -
Page 31: Saving Split Voices
Then press and hold the button at least 1.5 seconds. The split voice is now stored in that location. At this point, the MPS20 is in Voice Mode, the just saved split voice is active, and its ID number shows in the display. -
Page 32: Chapter 8 Function Mode
Function Mode Chapter 8 Function Mode includes parameters that allow you to change the behavior of the entire instrument. Also included is the Hard Reset function and the parameter to check the installed Operating System and Objects version. The following is a list of available parameters in function mode. -
Page 33: Touch
Default Setting: Linear Range: (see chart above) Reset: [Value Jump] button pair Tune This parameter allows you to adjust the tuning. You can easily tune the MPS20 to other instruments or recordings. Default Setting: 0, A-440 Range: -100 to 100 cents... -
Page 34: Metronome
Reset: [Value Jump] button pair Local Control This parameter is normally set to On. When you play the MPS20 keyboard you hear the resident or "local" voices. If you use your MPS20 with an external sequencer or computer, turn this setting to Off. -
Page 35: Chapter 9 Rhythm Mode
Rhythm Mode Chapter 9 There are 100 rhythm patterns stored in the MPS20. The rhythm patterns include a wide variety of musical styles. The labels directly above the category buttons list the different rhythm categories. A complete list of the available rhythm patterns begins on page 43. -
Page 36: Changing The Default Rhythm Pattern
[Favorites], the current rhythm pattern is also saved. Changing the Tempo You can change the tempo of any of the MPS20's rhythm patterns. The default tempo is 120, but it can range from 20 to 300 beats per minute. -
Page 37: Rhythm Mode Parameters
Rhythm Mode Parameters The available parameters in Rhythm Mode are: Rhythm ID and Volume. Press the [Select] or button to select a Rhythm Mode parameter. Rhythm ID The default parameter is Rhythm ID. Pressing the [Select Jump] button pair ([Select] buttons simultaneously) defaults to this parameter. -
Page 38: Chapter 10 Recording
Chapter 10 Recording a Song The MPS20 has a two track recorder. You can record two voice tracks and a rhythm pattern accompaniment. Favorites can be used to give you even more versatility while recording. For example, you can have a Favorite split voice such as Piano and Bass recorded in Track 1 and a layered favorite in Track 2. -
Page 39: Recording Track 2
When you are finished, press the [Play/Stop] button again. The [Save] button's LED starts SAVE RHYTHM AS Ux flashing and the display shows (X represents the number of the first available empty user song location). There are 20 available song locations, U1 through U20. Recording Track 2 RECORD READY Press the [Track 2] button, then the [Record] button. -
Page 40: Chapter 11 Midi
MIDI data to another MIDI device. When you connect the MIDI Out of the MPS20 to the MIDI In of another instrument, you can play the sounds of both instruments simultaneously from the MPS20 keyboard. -
Page 41: Usb Midi Connection
USB MIDI Connection In addition to the conventional MIDI In and MIDI Out ports, the MPS20 also has a USB (Universal Serial Bus) port on the rear panel. You can connect the MPS20 directly to a computer with a USB cable. This connection transmits and receives MIDI data between the MPS20 and the computer. -
Page 42: Appendices
MIDI Implementation Chart Appendices MIDI Implementation Chart Model: MPS20 Manufacturer:" Date: 10/05/2011 Young Chang Music" Version 1.0 Function Transmitted Recognized Remarks Default Basic Channel Memorized Changed 1 - 16 1 - 16 Default Mode 3 Mode 3 Use Multi mode for... -
Page 43: Rhythm Patterns
Rhythm Patterns Appendices List of Rhythm Patterns Rhythm Pattern Button Rhythm Pattern Button Latin6 Latin Ballad1 Rock & Pop Ballad2 Rock & Pop Cha Cha Latin Salsa Latin Ballad3 Rock & Pop Rumba Latin Ballad4 Rock & Pop Ballad5 Rock & Pop Samba Latin Samba 2... -
Page 44: Voice List
Voice List Appendices Voice Button Voice Button Grand Piano Piano Mellow Organ Organ Pro Piano Piano Perc Organ Organ Grand Piano 2 Piano Gregg's B Organ Piano & Strings Piano Perc Organ 2 Organ Piano & Pad Piano Melvin's Gospel Organ Piano &... - Page 45 Voice Button Voice Button Brass Fanfare Brass String Pad R&B Funk Brass Spider Web Horn Layer Brass Wispy One Brass Chorale Brass Airy Pad Solo Tenor Sax Wind Innervate Pad Jazz Flute Wind Lush Pad Fife & Drums Wind Class Pad Solo Flute Wind Bladerunner...
-
Page 46: Mps20 Features
Appendices MPS20 Features Keyboard 88-Note, Graded Hammer-Action Keyboard with adjustable touch sensitive keys 200 Expressive sounds including award winning Triple Strike Grand Piano, all Preset Programs taken from the PC3. (See page 44 for a list.) Splits/Layers Quick Split/Layer, easy access with adjustable relative volume Dual ambience and effect processors (reverberation and chorus). - Page 47 Index Headphone 7, 13 Pedal 17 Assembling the Stand 11 Audio In and Out 17 Layer Mode 24 Layer Mode Parameters 25 Bank LEDs 15, 22, 35 LEDs Bank 15, 22, 35 LED Display 14 List Demo Song 21 Category buttons 12, 15, 18, 23, 24, 28, 35, 36 Rhythm Patterns 43 CC Pedal (Volume/Expression Pedal) 17 Voice 44...
- Page 48 Saving Layered Voices 27 Saving Split Voices 31 Select buttons 18,2 5, 29, 37, 38 Select Jump buttons 18, 37 Setting Up the MPS20 8 Single buttons 18 Split button 16, 29, 30, 31 Split Key 28, 29, 30 Split Mode 28...