Table of Contents
Advertisement
Advertisement
Table of Contents

Related Manuals for Sherwood RD-7500


Summary of Contents for Sherwood RD-7500
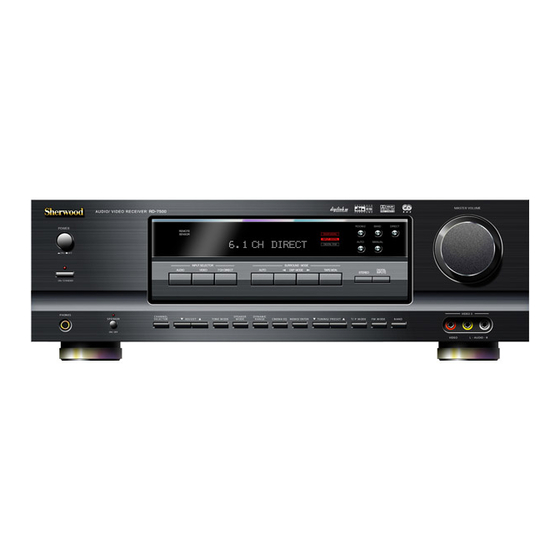
- Page 1 OPERATING INSTRUCTIONS BEDIENUNGSANLEITUNG RD-7500...
-
Page 2: Read This Before Operating Your Unit
Introduction READ THIS BEFORE OPERATING YOUR UNIT This symbol is intended to alert the user to the presence of uninsulated "dangerous voltage" within the product's enclosure that may be of sufficient magnitude to constitute a risk of electric shock to persons. CAUTION : TO REDUCE THE RISK OF ELECTRIC SHOCK, DO NOT... -
Page 3: Table Of Contents
CONTENTS Introduction READ THIS BEFORE OPERATING YOUR UNIT ...................... 2 System Connections ................................4 Front Panel Controls ................................. 9 DIGI LINK III System Remote Controls ........................11 REMOTE CONTROL OPERATION RANGE......................12 LOADING BATTERIES............................... 12 Operations LISTENING TO A PROGRAM SOURCE ........................13 SURROUND SOUND.............................. -
Page 4: System Connections
System Connections • Do not plug the AC input cord into the wall AC outlet until all connections are completed. • Be sure to observe the color coding when connecting audio and video cords. • Make connections firmly and correctly. If not, it can cause loss of sound, noise or damage to the receiver. •... -
Page 5: Connecting Audio Components
2. CONNECTING 7 CH DIRECT INPUTS • Use these jacks to connect the corresponding analog outputs of a DVD player or external decoder, etc. that has 6 or 7 chan- nel outputs. • In case of 6 channel outputs, do not connect this SURROUND BACK input to your audio component. (For details, refer to the operating instructions of the component to be connected.) 7 - CH DIRECT INPUT SURROUND... - Page 6 VCR, etc. When Sherwood DVD player such as V-756, etc. is connected to the DIGI LINK jack for system control, you should connect the DVD player to the "VIDEO 2" jacks of this unit. Because, if the PLAY button, etc. is pressed on the DVD player, the VIDEO 2 is automatically...
-
Page 7: Connecting Speakers
6. CONNECTING DIGITAL INs • The COAXIAL or the OPTICAL DIGITAL OUTs of the components that are connected to CD and VIDEO 1~3 of this unit can be connected to these DIGITAL INs. • A digital input should be connected to the components such as a CD player, LD player, DVD player, etc. capable of outputting DTS Digital Surround, Dolby Digital or PCM format digital signals, etc. - Page 8 Powered subwoofer 9. CONNECTING SYSTEM CONTROL • Connect this jack to the DIGI LINK jack of the external Sherwood component that uses the DIGI LINK II or III remote control system. DIGILINK Sherwood component with DIGI LINK II or III...
-
Page 9: Front Panel Controls
Front Panel Controls 262524 20 19 MASTER VOLUME EON PTY EON TA SEARCH POWER REMOTE SENSOR DISPLAY PTY SELECT INPUT SELECTOR SURROUND MODE STANDBY MUSIC DIGITAL AUDIO VIDEO 7CH DIRECT AUTO DSP MODE STEREO PARAMETER INPUTS ON/STANDBY VIDEO 3 PHONES CHANNEL SPEAKER DYNAMIC... - Page 10 VIDEO 3 VIDEO/AUDIO INPUT JACKS VIDEO 3 L - AUDIO - R VIDEO VIDEO 3 VIDEO L - AUDIO - R When not using the VIDEO 3 INPUT jacks, cover these jacks with the supplied cap. VIDEO AUDIO VIDEO 3 Additional video component •...
-
Page 11: Digi Link Iii System Remote Controls
DIGI LINK III System Remote Controls • You can remotely control not only this receiver but also Sherwood compatible components bearing the DIGI LINK II or III logo. • For system remote control operation, first make the DIGI LINK connections. -
Page 12: Remote Control Operation Range
REMOTE CONTROL OPERATION RANGE MASTER VOLUME EON PTY EON TA SEARCH POWER REMOTE SENSOR DISPLAY PTY SELECT INPUT SELECTOR SURROUND MODE STANDBY MUSIC DIGITAL AUDIO VIDEO 7CH DIRECT AUTO DSP MODE STEREO PARAMETER INPUTS ON/STANDBY PHONES VIDEO 3 CHANNEL SPEAKER DYNAMIC SPEAKER SELECTOR... -
Page 13: Operations
Operations LISTENING TO A PROGRAM SOURCE Before operation Select the desired input source. • Enter the standby mode. POWER INPUT SELECTOR TUNER AUDIO VIDEO < < TAPE VIDEO 1 VIDEO 2 VIDEO 3 • The STANDBY indicator lights up. When the power operation switch is in the OFF or •... - Page 14 To compensate for edgy or shrill movie When CD, VIDEO 1~3 is selected as an sound tracks. input source Select the digital or analog input CINEMA EQ connected as desired. DIGITAL INPUTS • Then “C-EQ OFF” is scrolled. • Each time this button is pressed, the corresponding •...
- Page 15 At the desired tone mode, adjust the tone Adjusting the tone(bass and treble) as desired. Enter the tone mode. ADJUST TONE MODE • At “TONE ON” mode, you can select “TONE OFF” mode and vice versa. TONE ON: When adjusting the tone for your taste. (“DIRECT”...
-
Page 16: Surround Sound
SURROUND SOUND • This receiver incorporates a sophisticated Digital Signal Processor that allows you to create optimum sound quality and sound atmosphere in your personal Home Theater. Surround modes DTS Digital Surround DTS Neo : 6™ surround DTS Digital Surround(also called simply DTS) is a multi- This mode applies conventional 2-channel signals such as channel digital signal format which can handle higher data digital PCM or analog stereo signals to the high precision... - Page 17 • When using the 7 CH DIRECT INPUTs to playback the Dolby Pro Logic sound from an additional multichannel decoder for surround Dolby Pro Logic is a specially encoded two channel sound, you can enjoy the corresponding surround sound, surround format which consists of four channels ( front left, too.
-
Page 18: Speaker Placement
Speaker placement Ideal speaker placement varies depending on the size of your room and TV or SCREEN the wall coverings, etc. The typical example of speaker placement and recommendations are as follows : CENTER SUBWOOFER FRONT (LEFT) FRONT (RIGHT) Front left and right speakers and center speaker •... - Page 19 Setting the type of speakers Depending or relationship between speakers, settings The composition of the signals output from the different possible for each speaker are as follows: channels and the frequency reponse are adjusted Front L/R Center Surr. L/R Surr. Back Subwoofer automatically according to the combination of speakers actually being used.
- Page 20 • When selecting the type of front speaker, • You can select one of 2 different speaker settings. “FRONT L 3.0(m)” (L: Large, S: Small) • When selecting the distance of front speaker, • You can adjust the distance within the range of 0~9 “FRONT L 3.0(m)”...
-
Page 21: Enjoying Surround Sound
ENJOYING SURROUND SOUND Depending on the input digital signal format, select the desired decoding mode. • Each time the AUTO button is pressed, the decoding mode changes as follows : IN-AUTO : The input digital signal format(DTS, Dolby SURROUND MODE Digital or PCM( 2 channel stereo), etc.) used AUTO by the selected digital input source is detected... - Page 22 To cancel the surround mode for stereo operation SURROUND MODE STEREO STEREO VOL. LEVEL LEVEL • Then the stereo mode is selected. • To cancel the stereo mode, select the desired surround mode with using the DSP MODE button. Adjusting the Dolby Pro Logic II Music parameters •...
-
Page 23: Adjusting Each Channel Level With Test Tone
Adjusting each channel level with test tone • The volume level of each channel can be adjusted easily with the test tone function. Note : When the 7 CH DIRECT is selected as an input source, the SPEAKER button is set to off or it is in the stereo mode, the test tone function does not work. - Page 24 Adjust the level of the selected channel as desired. • The LFE level can be adjusted within the range of -10~0 dB and other channel levels within the range of -15~+15 dB. • In general, we recommend the LFE level to be ADJUST adjusted to 0 dB.(However, the recommended LFE VOL.
- Page 25 Select the desired memory between Calling the memorized channel levels REF. 1 and REF. 2. Press the CHANNEL SELECTOR button. ADJUST CHANNEL VOL. SELECTOR LEVEL LEVEL LEVEL VOL. +, - CH.SEL LEVEL LEVEL VOL. VOL. • Now the memorized channel levels are applied. •...
-
Page 26: Listening To Radio Broadcasts
LISTENING TO RADIO BROADCASTS Select the desired band. Auto tuning Select the tuner. BAND INPUT SELECTOR AUDIO BAND FREQUENCY TUNER • Each time this button is pressed, the band is changed to FM or AM. • When pressing the BAND button without selecting <... - Page 27 Select the desired preset number (1~30) and Repeat the above steps 1 to 3 to memorize press the MEMORY/ENTER button. other stations. MEMO/ENTER TUNING/PRESET • When using the NUMERIC buttons on the remote control. MEMORY BACKUP FUNCTION Examples) For “3” : The following items, set before the receiver is turned within 2 seconds off, are memorized.
-
Page 28: Listening To Rds Broadcasts(Fm Only)
LISTENING TO RDS BROADCASTS(FM ONLY) RDS(Radio Data System) is a method for sending information signals together with the transmitter signals. Your tuner is capable of translating these signals and putting the information on the display. These codes contain the following informations. - Page 29 While the PTY indicator is flickering, EON PTY (EON: Enhanced Other select the desired program type. Networks information) PTY SELECT • Use this function to automatically search and receive the desired program type while listening to a RDS station. In the RDS mode. •...
-
Page 30: Recording
RECORDING • The analog signals from the 7 CH DIRECT inputs as well as the digital signals from the coaxial or optical digital input can be heard but cannot be recorded. • The volume and tone (bass, treble) settings have no effect on the recording signals. Start recording on the TAPE. -
Page 31: Other Functions
• While operating the sleep timer, “SLEEP” lights up. • When the sleep time is selected, all display panels • In the display OFF mode, pressing any button will of Sherwood components connected by the DIGI restore the display ON mode. LINK III are dimly lit. -
Page 32: Troubleshooting Guide
• Batteries are not loaded or exhausted. • Replace the batteries. operate. • The remote sensor is obstructed. • Remove the obstacle. Other Sherwood components do • DIGI LINK connections are not made properly. • Make proper DIGI LINK connections. not react to remote control commands. -
Page 33: Specifications
Specifications AMPLIFIER SECTION FM TUNER SECTION Power output, stereo mode, 6 Ω, THD 0.2 %, 40 Hz~20 kHz Tuning frequency range 87.5~108 MHz 2 100 W Usable sensitivity, THD 3%, S/N 26 dB 12.8 dBf Total harmonic distortion, 6 Ω, 95 W, 1 kHz 0.09% 46 dB quieting sensitivity, mono/stereo 20.2/45.3 dBf... - Page 34 RD-7500 5707-04743-011-0...