Table of Contents
Advertisement
Advertisement
Table of Contents

Related Manuals for Sherwood RD-7503


Summary of Contents for Sherwood RD-7503
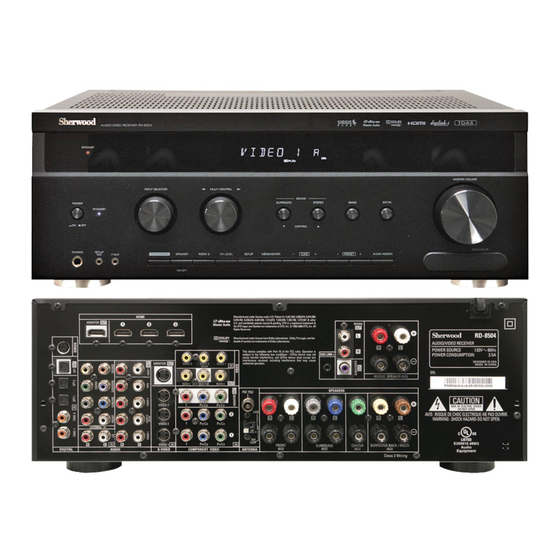
- Page 1 2008.10.29 6:21 PM 페이지 1 RD-7503...
-
Page 2: Important Safety Instructions
RD-7503(A) 2008.11.4 1:45 PM 페이지 2 IMPORTANT SAFETY INSTRUCTIONS 1. Read these instructions. 2. Keep these instructions. 3. Heed all warnings. 4. Follow all instructions. 5. Do not use this apparatus near water. 6. Clean only with dry cloth. 7. Do not block any ventilation openings. -
Page 3: Introduction
RD-7503(A) 2008.11.4 1:45 PM 페이지 3 Introduction READ THIS BEFORE OPERATING YOUR UNIT : TO REDUCE THE RISK OF ELECTRIC CAUTION SHOCK, DO NOT REMOVE COVER (OR BACK). NO USER-SERVICEABLE PARTS INSIDE. REFER SERVICING TO QUALIFIED SERVICE PERSONNEL. WARNING : TO REDUCE THE RISK OF FIRE OR ELECTRIC SHOCK, DO NOT EXPOSE THIS APPLIANCE TO RAIN OR MOISTURE. -
Page 4: Table Of Contents
RD-7503(A) 2008.11.4 1:45 PM 페이지 4 CONTENTS • IMPORTANT SAFETY INSTRUCTIONS ............2 •... -
Page 5: System Connections
RD-7503(A) 2008.11.4 1:45 PM 페이지 5 System Connections • Please be certain that this unit is unplugged from the AC outlet before making any connections. • Since different components often have different terminal names, carefully read the operating instructions of the component connected. - Page 6 Notes : • You can connect Apple iPod to this receiver via Sherwood iPod dock. If Sherwood iPod dock is connected to DIGI LINK-i jack for system control, you should connect its video and audio jacks to the "VIDEO 2" jacks of this receiver. Because, when you control your iPod with the unit's remote control, the VIDEO 2/iPod is automatically selected as an input source and the corresponding operation is performed.
- Page 7 RD-7503(A) 2008.11.4 1:45 PM 페이지 7 Continued � HDMI (High Definition Multimedia Interface) connection : (*1) • You can connect the source component (DVD player, etc.) to the display component (TV, projector, etc.) through this receiver with using a commercially available HDMI cord.
- Page 8 RD-7503(A) 2008.11.4 1:45 PM 페이지 8 CONNECTING EXTERNAL INS • Use these jacks to connect the corresponding outputs of a DVD player or external decoder, etc. that has 6, 7 or 8 channel analog audio outputs. • In case of 6 or 7 channel outputs, do not connect both of the SURROUND BACK L and R inputs or the SURROUND BACK R input of this unit.
- Page 9 RD-7503(A) 2008.11.4 1:45 PM 페이지 9 CONNECTING SPEAKERS • Be sure to connect speakers firmly and correctly according to the channel(left and right) and the polarity (+ and -). If the connections are faulty, no sound will be heard from the speakers, and if...
- Page 10 RD-7503(A) 2008.11.4 1:45 PM 페이지 10 Continued �Connecting speaker wire 1. Strip away approx. 10 mm (3/8 inch) of wire insulation, then twist the wire ends tight. Speaker placement Ideal speaker placement varies depending on the size of your room and the wall coverings, etc. The typical example of speaker placement and recommendations are as follows : ■...
- Page 11 RD-7503(A) 2008.11.4 1:45 PM 페이지 11 CONNECTING ROOM 2 OUTS • ROOM 2 playback feature allows you to play a different program source in another room as well as one source in the main room at the same time. • For ROOM 2 playback, connect the ROOM 2 OUT jacks to the amplifier, TV, etc. installed in another room, or connect the ROOM 2 speaker terminals to the speakers.
- Page 12 RD-7503(A) 2008.11.4 1:45 PM 페이지 12 CONNECTING FOR SYSTEM CONTROL • Connect this jack to the DIGI LINK-i jack of Sherwood iPod dock that allows you to control the iPod with the unit's remote control. CONNECTING SIRIUS CONNECTOR (only for North America) •...
-
Page 13: Front Panel Controls
RD-7503(A) 2008.11.4 1:45 PM 페이지 13 Front Panel Controls 1. POWER switch 2. POWER ON/STANDBY button 3. STANDBY indicator 4. INPUT SELECTOR knob 5. BAND button 6. EXTERNAL IN button 7. SURROUND MODE/CONTROL DOWN(▼) button 8. STEREO/CONTROL UP(▲) button 9. MASTER VOLUME CONTROL knob 10. - Page 14 (For information on Sherwood Audio Receiver BT-R7, contact your dealer.) • The Bluetooth word mark and logos are registered trademarks owned by Bluetooth SIG, Inc. and any use of such marks by Sherwood Corporation is under license. Other trademarks and trade names are those of their respective owners.
-
Page 15: Universal Remote Controls
RD-7503(A) 2008.11.4 1:45 PM 페이지 15 Universal Remote Controls This universal remote control can operate not only this receiver but also most popular brands of audio and video components such as iPod docks, TVs, DVD players, satellite receivers, cable boxes, etc. -
Page 16: Function Table Of Numbered Buttons
RD-7503(A) 2008.11.4 1:45 PM 페이지 16 �FUNCTION TABLE of the NUMBERED BUTTONS. (for iPod Dock) PLAY LIST UP/DOWN(</>) DOCK MODE ALBUM UP/DOWN(∨/∧) UP/DOWN(▲/▼) ENTER MENU REPEAT RANDOM PLAY/PAUSE REVERSE SKIP ( FORWARD SKIP ( �Notes : • Some functions for each component may not be available or may work differently. -
Page 17: Operating Components With Remote Control
RD-7503(A) 2008.11.4 1:45 PM 페이지 17 OPERATING COMPONENTS WITH REMOTE CONTROL Enter the setup code for each component other than this receiver. For details, refer to "Entering a setup code" on page 18. Turn on the component you want to operate. -
Page 18: Using Functions Of Remote Control
• For system remote control operation, "000" was stored previously in the memory of the device button "DOCK" for Sherwood iPod dock, "DVD" for Sherwood DVD player and "TV" for Sherwood TV respectively as its factory setup code. So, you don’t need to enter its code for each Sherwood component except in such a case that its code does not work. - Page 19 RD-7503(A) 2008.11.4 1:45 PM 페이지 19 Using a punch-through function This remote control may be programmed to operate either the AUDIO volume punch-through or the TV volume and/or TV channel punch-through in conjunction with any of the six components controlled by this remote control.
- Page 20 RD-7503(A) 2008.11.4 1:45 PM 페이지 20 Programming a macro function • The macro function enables you to program a series of button operations(up to 10) on this remote control into a single button. • You can store up to three separate macro command sequences into "M1", "M2"...
-
Page 21: Operations
RD-7503(A) 2008.11.4 1:45 PM 페이지 21 Operations �Notes: • Before operating this receiver with the supplied remote control, refer to "Universal Remote Controls" on page 15 for details about operation. • Before operating this receiver, first set this unit as desired for optimum performance, doing the OSD menu setting procedures. - Page 22 RD-7503(A) 2008.11.4 1:45 PM 페이지 22 When CD, F.AUX, VIDEO 1~ 3 is selected as an input source • If the AUDIO MODE is set to the mode other than "DIGITAL" for the corresponding input source on the INPUT SETUP menu, you cannot hear the sound from the selected digital input.
-
Page 23: Surround Sound
RD-7503(A) 2008.11.4 1:45 PM 페이지 23 SURROUND SOUND • This receiver incorporates a sophisticated Digital Signal Processor that allows you to create optimum sound quality and sound atmosphere in your personal Home Theater. Surround modes ■ DTS Digital Surround DTS Digital Surround(also called simply DTS) supports up to 5.1 discrete channels and uses less compression for high... - Page 24 RD-7503(A) 2008.11.4 1:45 PM 페이지 24 • The following modes apply conventional 2-channel signals such as digital PCM or analog stereo signals to high performance Digital Signal Processor to recreate sound fields artificially. Select one of the 7 provided surround modes according to the program source you want to play.
-
Page 25: Enjoying Surround Sound
RD-7503(A) 2008.11.4 1:45 PM 페이지 25 ENJOYING SURROUND SOUND �Notes: • Before surround playback, first perform the speaker setup procedure, etc. on the OSD menu for optimum performance. (For details, refer to "SETTING THE SPEAKER / ROOM EQ SETUP" on page 51.) •... - Page 26 RD-7503(A) 2008.11.4 1:45 PM 페이지 26 Continued �To cancel the surround mode for stereo operation �2CH downmix mode • This mode allows the multi-channel signals encoded in DTS or Dolby Digital format, etc. to be mixed down into 2 front channels and to be reproduced through only two front speakers or through headphones.
- Page 27 RD-7503(A) 2008.11.4 1:45 PM 페이지 27 Adjusting the current channel level • After adjusting each channel level with test tone, adjust the channel levels either according to the program sources or to suit your tastes. • You can adjust the current channel levels as desired. These adjusted levels are just memorized into user’s memory ("CAL"), not into preset memory("REF 1", "REF 2").
- Page 28 RD-7503(A) 2008.11.4 1:45 PM 페이지 28 Memorizing the adjusted channel levels • You can memorize the adjusted channel levels into preset memory("REF 1", "REF 2") and recall the memorized whenever you want. After performing the steps 1~4 in "Adjusting the current channel level" procedure on page 27, press the (MEMORY/)ENTER button.
-
Page 29: Listening To Radio Broadcasts
RD-7503(A) 2008.11.4 1:45 PM 페이지 29 LISTENING TO RADIO BROADCASTS Auto tuning Select the desired band. • Each time this button is pressed, the band changes as follows : → FM ST → FM MONO → AM → SIRIUS ("ST" lights up) ("ST" goes off) •... - Page 30 RD-7503(A) 2008.11.4 1:45 PM 페이지 30 Manual presetting • You can store up to 30 preferred stations in the memory. Tune in the desired station with auto or manual tuning. Press the (MEMORY/)ENTER button. • "MEM" is flickering for several seconds.
-
Page 31: Listening To Sirius Satellite Radio
RD-7503(A) 2008.11.6 11:52 AM 페이지 31 SIRIUS Satellite Radio (only for North America) • This receiver is a SIRIUS Satellite Radio Ready ® receiver. You can receive SIRIUS ® Satellite Radio by connecting to the SiriusConnect Home Tuner kit (sold separately) and subscribing the SIRIUS service. - Page 32 RD-7503(A) 2008.11.4 1:45 PM 페이지 32 Direct search • You can select a SIRIUS Satellite Radio channel directly by entering its number. In the SIRIUS mode, press the SEARCH MODE button to select the direct search mode, then press the ENTER button.
- Page 33 RD-7503(A) 2008.11.4 1:45 PM 페이지 33 Presetting channels • You can store up to 30 preferred channels in the memory. Select the desired channel with preforming channel search, direct search or category search. To memorize the channels, perform the steps 2 to 4 in "Manual presetting"...
- Page 34 RD-7503(A) 2008.11.4 1:45 PM 페이지 34 Parental lock • You can lock the channels that you do not want to receive or unlock the previously locked channels. Tune in the channel you want to lock or unlock. �When tuning in the previously locked channels.
-
Page 35: (Sirius Satellite Radio (Only For North America))
RD-7503(A) 2008.11.4 1:45 PM 페이지 35 RECORDING • The analog signals from the EXTERNAL INs as well as the digital signals from the HDMI IN, the OPTICAL or the COAXIAL DIGITAL IN can be heard but cannot be recorded. • When recording the analog signals from CD, F.AUX, VIDEO 1~3, be sure to select "ANALOG" for the AUDIO MODE. -
Page 36: Digital Audio Recording With Md Recorder
RD-7503(A) 2008.11.4 1:45 PM 페이지 36 DIGITAL AUDIO RECORDING WITH MD RECORDER • Only when the OPTICAL DIGITAL OUT of this receiver is connected to the OPTICAL DIGITAL IN of the MD recorder or CD recorder, you can enjoy high-quality sound of digital recording without converting the original signals. -
Page 37: Other Functions
RD-7503(A) 2008.11.4 1:45 PM 페이지 37 OTHER FUNCTIONS Operating the sleep timer • The sleep timer allows the system to continue to operate for a specified period of time before automatically shutting off. • To set the receiver to automatically turn off after the specified period of time. -
Page 38: Room 2 Source Playback
RD-7503(A) 2008.11.4 1:45 PM 페이지 38 ROOM 2 SOURCE PLAYBACK • This function allows enjoying one source in the main room and playing another in a different room at the same time. �Notes: • The analog signals from the EXTERNAL INs and the digital signals cannot be output to the different room, meaning no playback in a different room. -
Page 39: Osd Menu Settings
RD-7503(A) 2008.11.4 1:45 PM 페이지 39 OSD Menu Settings • The OSD (On-Screen Display) menu is a setting menu that is displayed on the monitor TV and allows you to perform the setup procedures easily. In most situations, you will only need to set this once during the installation and layout of your home theater, and it rarely needs to be changed later. - Page 40 RD-7503(A) 2008.11.4 1:45 PM 페이지 40 Confirm your selection. �When selecting the SYSTEM SETUP �When selecting the SPEAKER /ROOM EQ SETUP �When selecting the SOUND PARAMETER • For the setting details, see page in �. • Adjust the setting(s) in each setting category to your preference.
-
Page 41: Setting The System Setup
RD-7503(A) 2008.11.4 1:45 PM 페이지 41 SETTING THE SYSTEM SETUP When selecting the items other than OSD POSITION ADJUST Press the CURSOR UP(▲)/DOWN(▼) buttons to select the desired item. Press the CURSOR LEFT(◀)/RIGHT(▶) buttons to set the selected item as desired. - Page 42 RD-7503(A) 2008.11.4 1:45 PM 페이지 42 Continued �When selecting the SUBWOOFER MODE • "SW PLUS+" mode is valid only when "FRONT" and "CENTER" are set to "FULL RANGE" and "SUBWOOFER" is set to "YES" on the SPEAKER/ROOM EQ SETUP menu. (For details, refer to "SETTING THE SPEAKER/ ROOM EQ SETUP" on page 51.)
- Page 43 RD-7503(A) 2008.11.4 1:45 PM 페이지 43 Continued ②. Press the CURSOR UP(▲)/DOWN(▼) buttons to select the desired tone mode. ③. Press the CURSOR LEFT(◀)/RIGHT(▶) buttons to adjust the selected tone as desired. ■When selecting the CINEMA EQ OFF : To turn off the cinema EQ function.
- Page 44 RD-7503(A) 2008.11.4 1:45 PM 페이지 44 When selecting the OSD POSITION ADJUST • You can adjust the position of the momentary OSD and the OSD menu that are displayed on the monitor TV. Press the CURSOR UP(▲)/DOWN(▼) buttons to select the OSD POSITION ADJUST, then press the ENTER button.
-
Page 45: Setting The Input Setup
RD-7503(A) 2008.11.4 1:45 PM 페이지 45 SETTING THE INPUT SETUP When selecting the items other than NAME, PARENTAL LOCK, EDIT LOCK MODE Press the CURSOR UP(▲)/DOWN(▼) buttons to select the desired input source, then press the ENTER button. �When selecting the menu of page 2 or page 1. - Page 46 RD-7503(A) 2008.11.4 1:45 PM 페이지 46 Continued ■When selecting the HDMI ASSIGN • You should assign the connected HDMI INs to the desired of VIDEO 1 ~ VIDEO 3. (For details, refer to "CONNECTING VIDEO COMPONENTS" on pages 6 ~ 7.) •...
- Page 47 RD-7503(A) 2008.11.4 1:45 PM 페이지 47 Continued ■When selecting the AUTO SURROUND • Depending on how to select a surround mode, you can select the auto surround mode or the manual surround mode. : The optimum surround mode will be automatically selected depending on the signal (Auto surround mode) format being input.
- Page 48 RD-7503(A) 2008.11.4 1:45 PM 페이지 48 When selecting the NAME • You can give names to the input sources other than tuner. • Up to 7 characters can be entered for each name. Press the CURSOR UP(▲)/DOWN(▼) buttons to select the desired input source, then press the ENTER button.
- Page 49 RD-7503(A) 2008.11.4 1:45 PM 페이지 49 When selecting the PARENTAL LOCK • You can select the PARENTAL LOCK on the TUNER CONFIGURATION menu only while listening to SIRIUS Satellite Radio. • You can lock the channels that you do not want to receive or unlock the previously locked channels.
- Page 50 RD-7503(A) 2008.11.4 1:45 PM 페이지 50 When selecting the EDIT LOCK CODE • You can select the EDIT LOCK CODE on the TUNER CONFIGURATION menu only while listening to SIRIUS Satellite Radio. • You can change the password to the desired.
-
Page 51: Setting The Speaker / Room Eq Setup
RD-7503(A) 2008.11.4 1:45 PM 페이지 51 SETTING THE SPEAKER / ROOM EQ SETUP • After you have installed this receiver and connected all the components, you should adjust the speaker settings for the optimum sound acoustics according to your environment and speaker layout. - Page 52 RD-7503(A) 2008.11.4 1:45 PM 페이지 52 Continued Press the CURSOR UP(▲)/DOWN(▼) buttons to select the AUTO SETUP, then press the ENTER button. Press the CURSOR UP(▲)/DOWN(▼) buttons to select the START, then press the ENTER button. • Loud test tones are output successively and then if a series of auto setup procedure has been completed, "COMPLETED"...
- Page 53 RD-7503(A) 2008.11.4 1:45 PM 페이지 53 Continued When selecting the SPEAKER CONFIGURATION Press the CURSOR UP(▲)/DOWN(▼) buttons to select the SPEAKER CONFIGURATION, then press the ENTER button. Press the CURSOR UP(▲)/DOWN(▼) buttons to select the desired speaker. Press the CURSOR LEFT(◀)/ RIGHT(▶) buttons to set the selected speaker as desired.
- Page 54 RD-7503(A) 2008.11.4 1:45 PM 페이지 54 When selecting the SPEAKER DISTANCE Press the CURSOR UP(▲)/DOWN(▼) buttons to select the SPEAKER DISTANCE, then press the ENTER button. Press the CURSOR UP(▲)/DOWN(▼) buttons to select the desired item. Press the CURSOR LEFT(◀)/RIGHT(▶) buttons to set the selected item as desired.
- Page 55 RD-7503(A) 2008.11.4 1:45 PM 페이지 55 When selecting the SPEAKER CROSSOVER • Set the crossover frequency according to the frequency characteristics of the speakers connected. (For details on the frequency characteristics, refer to the operating instructions of the speakers.) • If the frequency range of your speaker is 100 Hz ~ 20 kHz, the crossover frequency should be set to 100 Hz (or slightly higher).
- Page 56 RD-7503(A) 2008.11.4 1:45 PM 페이지 56 When selecting the ROOM EQ SETUP • The room EQ is a kind of room equalizer for your speakers. According to the acoustic characteristics of your room measured by the auto setup, the room EQ automatically adjusts the frequency response of your speakers.
-
Page 57: Setting The Ch Level Setup
RD-7503(A) 2008.11.4 1:45 PM 페이지 57 SETTING THE CH LEVEL SETUP Adjusting the current channel level • You can adjust the current channel levels as desired. These adjusted levels are just memorized into user’s memory ("CALIBRATE"), not into preset memory("REFERENCE 1", "REFERENCE 2"). - Page 58 RD-7503(A) 2008.11.4 1:45 PM 페이지 58 Memorizing the adjusted channel levels • You can memorize the adjusted channel levels into preset memory("REFERENCE 1", "REFERENCE 2") and recall the memorized whenever you want. After performing the steps 1~3 in "Adjusting the current channel level" procedure on page 57, press the CURSOR UP(▲)/DOWN(▼) buttons to select a channel (, not the MODE (memory mode) and the LFE...
-
Page 59: Setting The Sound Parameter
RD-7503(A) 2008.11.4 1:45 PM 페이지 59 SETTING THE SOUND PARAMETER When selecting the NIGHT MODE • This function compresses the dynamic range of previously specified parts of the Dolby Digital sound track (with extremely high volume) to minimize the difference in volume between the specified and non-specified parts. - Page 60 RD-7503(A) 2008.11.4 1:45 PM 페이지 60 When selecting the DOLBY PLII MUSIC • You can adjust the various surround parameters for optimum surround effect. �Note: • The parameter settings are valid only when listening in either Dolby Pro Logic II Music mode or the Dolby Pro Logic IIx Music mode.
-
Page 61: Setting The Multi Room Setup
RD-7503(A) 2008.11.4 1:45 PM 페이지 61 SETTING THE MULTI ROOM SETUP • The ROOM 2 function allows enjoying one source in the main room while playing another in a different room at the same time. Press the CURSOR UP(▲)/DOWN(▼) buttons to select the desired item. -
Page 62: Troubleshooting Guide
RD-7503(A) 2008.11.4 1:45 PM 페이지 62 Troubleshooting Guide If a fault occurs, run through the table below before taking your receiver for repair. If the fault persists, attempt to solve it by switching the receiver off and on again. If this fails to resolve the situation, consult your dealer. -
Page 63: Specifications
RD-7503(A) 2008.11.4 1:45 PM 페이지 63 Specifications �AMPLIFIER SECTION • Power output, stereo mode, 6 Ω, THD 1.0 %, 40 Hz~20 kHz • Total harmonic distortion at -3 dB, 6 Ω, 1 kHz • Intermodulation distortion 60 Hz : 7 kHz= 4 : 1 SMPTE, 6 Ω, 95 W •... -
Page 64: Setup Code Table
RD-7503(A) 2008.11.4 1:45 PM 페이지 64 Setup Code Table Admiral Aiko Akai Alaron Ambassador America Action Ampro Anam Audiovox Baysonic Belcor BenQ Bell & Howell Bradford Brockwood Broksonic Candle Carnivale Carver Celebrity Cineral Citizen Concerto Contec Craig Crosley Crown Curtis Mathes... - Page 65 RD-7503(A) 2008.11.4 1:45 PM 페이지 65 Pilot Pioneer Portland Prism Proscan Proton Pulsar Quasar Radio Shack Realistic Runco Sampo Samsung Samsux Sansei Sansui Sanyo Scimitsu Scotch Scott Sears Semivox Semp Sharp Sherwood Shogun Signature Sony Soundesign Squareview Starlite Supreme Sylvania...
- Page 66 RD-7503(A) 2008.11.4 1:45 PM 페이지 66 Headquarter Hitachi Jensen Kenwood Kodak Lloyd’s Logik MGN Technology Magnasonic Magnavox Magnin Marantz Marta Matsushita Memorex Minolta Mitsubishi Motorola Multitech Nikko Noblex Olympus Opimus Orion Panasonic Penny Pentax Philco Philips Pilot Pioneer Profitronic Proscan...
- Page 67 RD-7503(A) 2008.11.4 1:45 PM 페이지 67 Hitachi 004 (TV use 008) 034 Lloyds Megavox 016 (TV use 010) 004 (TV use 008) Magnin Memorex 028 (TV use 042) Mitsubishi 027 (TV use 041) Orion Panasonic 004 (TV use 008) 028 (TV use 042)
- Page 68 RD-7503(A) 2008.11.4 1:45 PM 페이지 68 Tusa TV86 Unika Universal Viewstar Zenith Zentek AlphaStar Chaparral Echostar Expreevu General Instrument Hitachi Hughes Net.Sys Jerrold Megavox Memorex Next Level Panasonic Philips Primestar Radio Shack Realistic Sherwood Sony Star Choice Toshiba Uniden Zenith...
- Page 69 2008.10.29 6:21 PM 페이지 2 RD-7503 5707-00000-172-0S...