
Related Manuals for Sherwood RD-6505


Summary of Contents for Sherwood RD-6505
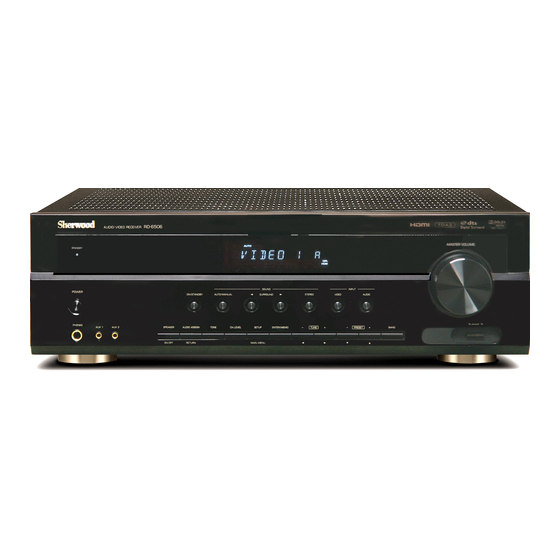
- Page 1 6505(E) cover_cover.qxp 2010-05-24 오전 9:57 페이지 1 OPERATING INSTRUCTIONS RD-6505 AUDIO/VIDEO RECEIVER...
-
Page 2: Introduction
RD-6505(E)_ENG_100517_RD-6505(E)_ENG 2010-05-24 오전 9:59 페이지 2 Introduction READ THIS BEFORE OPERATING YOUR UNIT This symbol is intended to alert the user to the presence of uninsulated "dangerous voltage" within the product's enclosure that may be of sufficient magnitude to constitute a risk of electric shock to persons. -
Page 3: Table Of Contents
RD-6505(E)_ENG_100517_RD-6505(E)_ENG 2010-05-24 오전 9:59 페이지 3 CONTENTS Introduction • READ THIS BEFORE OPERATING YOUR UNIT System Connections Front Panel Controls Remote Controls • REMOTE CONTROL OPERATION RANGE • LOADING BATTERIES Operations • LISTENING TO A PROGRAM SOURCE • SURROUND SOUND •... -
Page 4: System Connections
RD-6505(E)_ENG_100517_RD-6505(E)_ENG 2010-05-24 오전 9:59 페이지 4 System Connections • Please be certain that this unit is unplugged from the AC outlet before making any connections. • Since different components often have different terminal names, carefully read the operating instructions of the component connected. - Page 5 RD-6505(E)_ENG_100517_RD-6505(E)_ENG 2010-05-24 오전 9:59 페이지 5 CONNECTING VIDEO COMPONENTS • The jacks of VIDEO 1 may also be connected to a DVD recorder or other digital video recording component. For details, refer to the operating instructions of the component to be connected.
- Page 6 RD-6505(E)_ENG_100517_RD-6505(E)_ENG 2010-05-24 오전 9:59 페이지 6 Continued ■HDMI (High Definition Multimedia Interface) connection : (*) • You can connect the source component (DVD player, etc.) to the display component (TV, projector, etc.) through this receiver with using a commercially available HDMI cord.
- Page 7 RD-6505(E)_ENG_100517_RD-6505(E)_ENG 2010-05-24 오전 9:59 페이지 7 CONNECTING DIGITAL INS • The OPTICAL and the COAXIAL DIGITAL OUTs of the components that are connected to CD and VIDEO 1~VIDEO 2 of this unit can be connected to these DIGITAL INs. • A digital input should be connected to the components such as a CD player, DVD player, etc.
- Page 8 RD-6505(E)_ENG_100517_RD-6505(E)_ENG 2010-05-24 오전 9:59 페이지 8 CONNECTING SPEAKERS • Be sure to connect speakers firmly and correctly according to the channel(left and right) and the polarity(+ and -). If the connections are faulty, no sound will be heard from the speakers, and if the polarity of the speaker connection is incorrect, the sound will be unnatural and lack bass.
- Page 9 RD-6505(E)_ENG_100517_RD-6505(E)_ENG 2010-05-24 오전 9:59 페이지 9 Speaker placement Ideal speaker placement varies depending on the size of your room and the wall coverings, etc. The typical example of speaker placement and recommendations are as follows : ■Front left and right speakers and center speaker •...
-
Page 10: Front Panel Controls
RD-6505(E)_ENG_100517_RD-6505(E)_ENG 2010-05-24 오전 9:59 페이지 10 Front Panel Controls 15 16 17 18 19 1. POWER switch 13. STEREO button 2. STANDBY indicator 14. SPEAKER button 3. POWER ON/STANDBY button 15. AUDIO ASSIGN button 4. REMOTE SENSOR 16. TONE MODE button 5. - Page 11 RD-6505(E)_ENG_100517_RD-6505(E)_ENG 2010-05-24 오전 9:59 페이지 11 ■AUX IN JACK • The AUX 1, 2 IN jacks can be connected to additional audio components such as an MP3 player, etc. ■Note : • When connecting these jacks to an MP3 player, etc., you should use the stereo mini cord, not a mono mini cord.
-
Page 12: Remote Controls
RD-6505(E)_ENG_100517_RD-6505(E)_ENG 2010-05-24 오전 9:59 페이지 12 Remote Controls CURSOR CONTROL( , , , ), ENTER buttons... -
Page 13: Remote Control Operation Range
RD-6505(E)_ENG_100517_RD-6505(E)_ENG 2010-05-24 오전 9:59 페이지 13 REMOTE CONTROL OPERATION RANGE • Use the remote control unit within a range of about 7 meters (23 feet) and angles of up to 30 degrees aiming at the remote sensor. LOADING BATTERIES Remove the cover. -
Page 14: Operations
RD-6505(E)_ENG_100517_RD-6505(E)_ENG 2010-05-24 오전 9:59 페이지 14 Operations ■Note : Before operating this receiver, first set this unit as desired for optimum performance, doing the system setup procedures. (For details, refer to "System Setup" on page 27.) LISTENING TO A PROGRAM SOURCE Before operation Select the desired input source. - Page 15 RD-6505(E)_ENG_100517_RD-6505(E)_ENG 2010-05-24 오전 9:59 페이지 15 Adjusting the tone (bass and treble) Operate the selected component for playback. • When playing back the program sources with surround Enter the tone mode. sound, refer to “ENJOYING SURROUND SOUND” on page 17.
-
Page 16: Surround Sound
RD-6505(E)_ENG_100517_RD-6505(E)_ENG 2010-05-24 오전 9:59 페이지 16 SURROUND SOUND • This receiver incorporates a sophisticated Digital Signal Processor that allows you to create optimum sound quality and sound atmosphere in your personal Home Theater. Surround modes ■DTS Digital Surround • The following modes apply conventional 2-channel... -
Page 17: Enjoying Surround Sound
RD-6505(E)_ENG_100517_RD-6505(E)_ENG 2010-05-24 오전 9:59 페이지 17 ENJOYING SURROUND SOUND ■Note: Before surround playback, first perform the speaker setup procedure, etc. on the SETUP menu for optimum performance. (For details, refer to "SETTING THE SPEAKER SETUP" on page 32.) Depending on how to select a surround mode, select the auto surround mode or the manual surround mode. - Page 18 RD-6505(E)_ENG_100517_RD-6505(E)_ENG 2010-05-24 오전 9:59 페이지 18 When adjusting the sound parameters • While playing digital signals from Dolby Digital or DTS program source or listening in Dolby Pro Logic II Music mode, you can adjust their parameters for optimum surround effect.
- Page 19 RD-6505(E)_ENG_100517_RD-6505(E)_ENG 2010-05-24 오전 9:59 페이지 19 Adjusting each channel level with test tone • The volume level of each channel can be adjusted easily with the test tone function. ■Note : When the SPEAKER button is set to off, the test tone function does not work.
- Page 20 RD-6505(E)_ENG_100517_RD-6505(E)_ENG 2010-05-24 오전 9:59 페이지 20 Adjusting the current channel level • After adjusting each channel level with test tone, adjust the channel levels either according to the program sources or to suit your tastes. • You can adjust the current channel levels as desired. These adjusted levels are just memorized into user’s memory ("CAL"), not into preset memory("REF 1", "REF 2").
- Page 21 RD-6505(E)_ENG_100517_RD-6505(E)_ENG 2010-05-24 오전 9:59 페이지 21 Recalling the memorized channel levels Memorizing the adjusted channel levels • You can memorize the adjusted channel levels into Press the CHANNEL LEVEL button. preset memory("REF 1", "REF 2") and recall the memorized whenever you want.
-
Page 22: Listening To Radio Broadcasts
RD-6505(E)_ENG_100517_RD-6505(E)_ENG 2010-05-24 오전 9:59 페이지 22 LISTENING TO RADIO BROADCASTS Auto tuning Manual tuning • Manual tuning is useful when you already know the Select the desired band. frequency of the desired station. • After selecting the desired band, press the TUNING UP(+) / DOWN(-) buttons repeatedly until the right frequency has been reached. - Page 23 RD-6505(E)_ENG_100517_RD-6505(E)_ENG 2010-05-24 오전 9:59 페이지 23 Manual presetting Tuning to preset stations • You can store up to 30 preferred stations in the memory. • After selecting the tuner as an input source, select the desired preset number. Tune in the desired station with auto or manual tuning.
-
Page 24: Recording
RD-6505(E)_ENG_100517_RD-6505(E)_ENG 2010-05-24 오전 9:59 페이지 24 RECORDING • The digital signals from the coaxial, optical digital input or HDMI IN can be heard but cannot be recorded. • When recording the analog signals from CD, VIDEO 1~2, be sure to select the analog input. - Page 25 RD-6505(E)_ENG_100517_RD-6505(E)_ENG 2010-05-24 오전 9:59 페이지 25 Dubbing the audio and video signals separately onto VIDEO 1 Example) When dubbing the VIDEO 2 video signal and the CD audio signal separately onto VIDEO 1. Select VIDEO 2 as a video recording source.
-
Page 26: Other Functions
RD-6505(E)_ENG_100517_RD-6505(E)_ENG 2010-05-24 오전 9:59 페이지 26 OTHER FUNCTIONS Operating the sleep timer • The sleep timer allows the system to continue to operate for a specified period of time before automatically shutting off. • To set the receiver to automatically turn off after the specified period of time. -
Page 27: System Setup
RD-6505(E)_ENG_100517_RD-6505(E)_ENG 2010-05-24 오전 9:59 페이지 27 System Setup SETUP ENTER / MEMO TUNE PRESET Turn the setup menu on. Confirm your selection. • When selecting "SYSTEM", see "SETTING THE SYSTEM" on page 29. • When selecting "INPUT", see "SETTING THE INPUT"... - Page 28 RD-6505(E)_ENG_100517_RD-6505(E)_ENG 2010-05-24 오전 9:59 페이지 28 ■Setup menu flow • The setup menu flow is as follows : HDMI : OFF D.IN : OPT COX1 COX2 D.IN : OPT COX1 COX2 VID 2 CFG D.IN : OPT COX1 COX2 • When "RETURN" is selected on a sub-menu, it will returns to the previous menu.
-
Page 29: Setting The System
RD-6505(E)_ENG_100517_RD-6505(E)_ENG 2010-05-24 오전 9:59 페이지 29 SETTING THE SYSTEM HDMI : OFF Press the CURSOR UP(▲)/DOWN(▼) buttons Press the CURSOR LEFT(◀)/RIGHT(▶) to select the desired item. buttons to set the selected item as desired When selecting the SUBWOOFER mode • "SW +" mode is effective only when "FRONT" and "CENTER" are set to "L" and "SUB- W" is set to "Y" on the SPK SET menu. - Page 30 RD-6505(E)_ENG_100517_RD-6505(E)_ENG 2010-05-24 오전 9:59 페이지 30 When selecting the HDMI • The HDMI connection can carry uncompressed digital video signals and digital audio signals. Depending on whether the digital audio signals input into the HDMI IN are output from the HDMI MONITOR OUT of this receiver or not, you should set the HDMI correctly.
-
Page 31: Setting The Input
RD-6505(E)_ENG_100517_RD-6505(E)_ENG 2010-05-24 오전 9:59 페이지 31 SETTING THE INPUT D.IN : OPT COX1 COX2 D.IN : OPT COX1 COX2 VID 2 CFG D.IN : OPT COX1 COX2 • D.IN (DIGITAL IN) : To assign the connected DIGITAL INs to the desired input. -
Page 32: Setting The Speaker Setup
RD-6505(E)_ENG_100517_RD-6505(E)_ENG 2010-05-24 오전 9:59 페이지 32 SETTING THE SPEAKER SETUP • After you have installed this receiver and connected all the components, you should adjust the speaker settings for the optimum sound acoustics according to your environment and speaker layout. - Page 33 RD-6505(E)_ENG_100517_RD-6505(E)_ENG 2010-05-24 오전 9:59 페이지 33 Press the CURSOR LEFT(◀)/ RIGHT(▶) buttons to set the selected speaker as desired. • Depending on your speaker type, you can select one of these following speaker types. L(Large) : Select this when connecting speakers that can fully reproduce sounds below crossover frequency.
- Page 34 RD-6505(E)_ENG_100517_RD-6505(E)_ENG 2010-05-24 오전 9:59 페이지 34 When selecting the DISTANCE Press the CURSOR UP(▲)/DOWN(▼) buttons Press the CURSOR LEFT(◀)/RIGHT(▶) to select the DISTANCE, then press the ENTER buttons to set the selected item as desired. button. ■When selecting the desired unit •...
- Page 35 RD-6505(E)_ENG_100517_RD-6505(E)_ENG 2010-05-24 오전 9:59 페이지 35 When selecting the CROSSOVER • When speakers are set to "S (Small)", be sure to set their crossover frequency correctly according to their frequency characteristics. Press the CURSOR UP(▲)/DOWN(▼) buttons Press the CURSOR LEFT(◀)/RIGHT(▶) to select the "X-OVER", then press the ENTER...
-
Page 36: Setting The Ch Level
RD-6505(E)_ENG_100517_RD-6505(E)_ENG 2010-05-24 오전 9:59 페이지 36 SETTING THE CH LEVEL ■Note : Depending on the speaker settings ("N (No)"), some channels cannot be selected. Adjusting the current channel level • You can adjust the current channel levels as desired. These adjusted levels are just memorized into user’s memory("CAL"), not into preset memory ("REF 1", "REF 2") - Page 37 RD-6505(E)_ENG_100517_RD-6505(E)_ENG 2010-05-24 오전 9:59 페이지 37 Memorizing the adjusted channel levels Recalling the memorized channel levels • You can memorize the adjusted channel levels into Press the CURSOR UP(▲)/DOWN(▼) buttons preset memory("REF 1", "REF 2") and recall the to select the "MODE ~ ".
-
Page 38: Setting The Parameter
RD-6505(E)_ENG_100517_RD-6505(E)_ENG 2010-05-24 오전 9:59 페이지 38 SETTING THE PARAMETER • NIGHT M(NIGHT MODE) : To adjust the dynamic range compression that makes faint sound easier to hear at low volume levels. • PLII MSC(DOLBY PLII MUSIC) : To adjust the various surround parameters for optimum surround effect. - Page 39 RD-6505(E)_ENG_100517_RD-6505(E)_ENG 2010-05-24 오전 9:59 페이지 39 When selecting the DOLBY PLII MUSIC • You can adjust the various surround parameters for optimum surround effect. ■Note: The parameter settings are valid only when listening in Dolby Pro Logic II Music mode.
-
Page 40: Troubleshooting Guide
RD-6505(E)_ENG_100517_RD-6505(E)_ENG 2010-05-24 오전 9:59 페이지 40 Troubleshooting Guide If a fault occurs, run through the table below before taking your receiver for repair. If the fault persists, attempt to solve it by switching the receiver off and on again. If this fails to resolve the situation, consult your dealer. -
Page 41: Specifications
RD-6505(E)_ENG_100517_RD-6505(E)_ENG 2010-05-24 오전 9:59 페이지 41 Specifications ■ AMPLIFIER SECTION • Power output, stereo mode, 6 Ω, THD 0.7%, 40 Hz~20 kHz 2x100 W • Total harmonic distortion, 6 Ω, 100 W, 1 kHz 0.09 % • Intermodulation distortion 60 Hz : 7 kHz= 4 : 1 SMPTE, 6 Ω, 100 W 0.1 %... - Page 42 6505(E) cover_cover.qxp 2010-05-24 오전 9:57 페이지 2 RD-6505 AUDIO/VIDEO RECEIVER 5707-00000-345-0S...