Lexmark 2500 Series Getting Started Manual
Lexmark printer getting started
Hide thumbs
Also See for 2500 Series:
- User manual (85 pages) ,
- Maintenance manual (4 pages) ,
- User manual (84 pages)
Table of Contents
Advertisement
2500 Series All-In-One
Getting Started
December 2006
www.lexmark.com
Lexmark and Lexmark with diamond design are trademarks of Lexmark International, Inc., registered in the United States and/or other countries.
All other trademarks are the property of their respective owners.
© 2007 Lexmark International, Inc.
All rights reserved.
740 West New Circle Road
Lexington, Kentucky 40550
Advertisement
Table of Contents
Troubleshooting

Related Manuals for Lexmark 2500 Series


Summary of Contents for Lexmark 2500 Series
-
Page 1: Getting Started
Getting Started December 2006 www.lexmark.com Lexmark and Lexmark with diamond design are trademarks of Lexmark International, Inc., registered in the United States and/or other countries. All other trademarks are the property of their respective owners. © 2007 Lexmark International, Inc. -
Page 2: Safety Information
Refer service or repairs, other than those described in the user documentation, to a professional service person. This product is designed, tested, and approved to meet strict global safety standards with the use of specific Lexmark components. The safety features of some parts may not always be obvious. Lexmark is not responsible for the use of other replacement parts. -
Page 3: Table Of Contents
Understanding the parts of the printer...10 Using the control panel buttons...12 Learning about the software...13 Using the printer software...13 Using the Lexmark Imaging Studio...13 Using the Solution Center...15 Using Print Properties...16 Using the Toolbar...16 Resetting printer software settings to defaults...18 Loading paper and original documents...19... - Page 4 Scanning...31 Scanning using the control panel...31 Customizing scan settings using the computer...31 Faxing...33 Maintaining the printer...35 Changing print cartridges...35 Achieving better print quality...37 Ordering print cartridges...40 Ordering paper and other supplies...40 Troubleshooting...42 Setup troubleshooting...42 Print troubleshooting...44 Copy troubleshooting...47 Scan troubleshooting...48 Fax troubleshooting...50...
-
Page 5: Finding Information About The Printer
Getting Started booklet or a Setup Solutions booklet, see the User's Guide instead. Where to find You can find this document in the printer box or on the Lexmark Web site at www.lexmark.com. booklet Where to find You can find this document in the printer box or on the Lexmark Web site at www.lexmark.com. - Page 6 Click Yes. An icon of the User's Guide appears on your desktop, and the User's Guide appears on the screen. You can also find this document on the Lexmark Web site at www.lexmark.com. Where to find While in any Lexmark software program, click Help,...
-
Page 7: Customer Support
Finding information about the printer Where to find (rest of world) Telephone numbers and support hours vary by country or region. Visit our Web site at www.lexmark.com. Select a country or region, and then select the Customer Support link. Note: For additional information about contacting Lexmark, see the printed warranty that shipped with your printer. - Page 8 Record the following information (located on the store receipt and the back of the printer), and have it ready when you contact us so that we may serve you faster: • Machine Type number • Serial number • Date purchased •...
-
Page 9: Setting Up The Printer
Cartridges to be installed into the printer. Note: Cartridge combinations vary depending on the product purchased. Attaches to the power supply port located at the back of the printer. Note: Your power cord may look different from the one shown. •... -
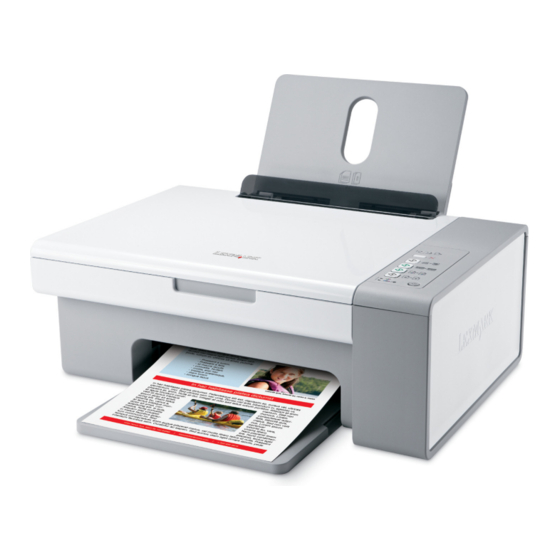
Page 10: Learning About The Printer
Learning about the printer Understanding the parts of the printer Use the Paper support Load paper. Control panel Operate the printer. For more information, see “Using the control panel buttons” on page 12. Paper exit tray Hold paper as it exits. - Page 11 Hold up the scanner unit. Print cartridge carrier Install, replace, or remove a print cartridge. Power supply with port Connect the printer to a power source. USB port Connect the printer to a computer using a USB cable. Learning about the printer...
-
Page 12: Using The Control Panel Buttons
Start a 4 x 6 color photo copy. Start a color copy of a document or photo. Start a black-and-white copy of a document or photo. • Turn the printer on or off. • Cancel a print, copy, or scan job in progress. •... -
Page 13: Learning About The Software
Learning about the software This chapter tells how to use the printer with Windows operating systems. If you are using a Macintosh operating system, see the Mac Help: From the Finder desktop, double-click the Lexmark 2500 Series folder. Double-click the printer Help icon. - Page 14 From the bottom left corner of the Welcome screen, Click Setup and diagnose printer • • • • Setup and manage faxes Set printer fax settings for: • • • • Check ink levels. Order print cartridges. Find maintenance information.
-
Page 15: Using The Solution Center
Using the Solution Center The Solution Center provides help, as well as information about the printer status and ink level. To open the Solution Center, use one of these methods: Method 1 From the desktop, double-click the Lexmark Imaging Studio icon. -
Page 16: Using Print Properties
Using Print Properties Print Properties is the software that controls the printing function when the printer is connected to a computer. You can change the settings in Print Properties based on the type of project you want to create. You can open Print... - Page 17 Preview a Web page before printing. Select Page Setup options. Select Options to customize the toolbar appearance or select a different setting for printing photos. Access links to the Lexmark Web site. Access Help for additional information. Uninstall the Toolbar. Learning about the software...
-
Page 18: Resetting Printer Software Settings To Defaults
Windows 2000, Windows XP, or Windows Vista users: Click Start Settings Printers or Printers and Faxes. Right-click the Lexmark 2500 Series icon. Click Printing Preferences. Click the Save Settings menu. From the Restore section, select Factory Settings (Defaults). Note: Factory default settings cannot be deleted. -
Page 19: Loading Paper And Original Documents
If you are using specialty paper, you follow the instructions that came with it. • You do not force paper into the printer. Before loading paper the first time, slide the paper guides out toward the edges of the paper support. - Page 20 Place the original document or item facedown on the scanner glass in the lower right corner. Note: Photos should be loaded as shown. Close the top cover to avoid dark edges on the scanned image. Loading paper and original documents...
-
Page 21: Printing
Click OK. Click OK or Print. Printing a Web page You can use the Toolbar to create a printer-friendly version of any Web page. Load paper. Open a Web page using Microsoft Internet Explorer 5.5 or later. If you want to check or change your print settings: From the toolbar area, click Lexmark Adjust the print settings. -
Page 22: Printing Photos Or Images From A Web Page
Click Edit. Make your selections. Follow the instructions on the screen. When you are finished making changes, click Done. Select the size you want, the blank paper size in the printer, and the number of copies. Click Print Now. Printing... -
Page 23: Working With Photos
Working with photos • For best results, use Lexmark Premium Photo Paper or Lexmark Photo Paper. • To prevent smudging, avoid touching the surface of a printed photo. For best results, remove each printed sheet individually from the paper exit tray, and allow the prints to dry at least 24 hours before stacking, displaying, or storing. -
Page 24: Printing Photos Using The Computer
Insert your CD or any photo storage device into the computer. If you are using Windows XP or Windows Vista, a “What do you want Windows to do?” screen appears. Click Transfer Photos to your computer using the Lexmark Imaging Studio. Click Select photos to print. -
Page 25: Creating Photo Projects
If you are using Windows XP or Windows Vista, a “What do you want Windows to do?” screen appears. Click Transfer Photos to your computer using the Lexmark Imaging Studio. Click Select photos to print. Click Deselect All. Click to select the photo(s) you want to print. -
Page 26: Creating And Viewing A Slideshow
Click Create E-mail to create an e-mail message with your photo greeting card(s) attached. Creating and viewing a slideshow From the desktop, double-click the Lexmark Imaging Studio icon. Click Slideshow. Click and drag the photos you want to include in the slideshow to the “Photos in Your Slideshow” area. - Page 27 From the Poster Size drop-down list, select the poster size. If you want to rotate the poster so that it fits better on the printed pages, click Rotate 90 degrees. Click Print Now in the bottom right corner of the screen. Working with photos...
-
Page 28: Copying
Copying Copying using the control panel Making a copy Load paper. Load an original document facedown on the scanner glass. Press to start a color copy or Copying 4 x 6 photos Load a 4 x 6 (10 x 15 cm) photo card with the glossy or printable side facing you. (If you are not sure which side is the printable side, see the instructions that came with the paper.) Place a photo facedown on the scanner glass in the lower right corner. -
Page 29: Copying Using The Computer
Copying using the computer Copying a document using the computer Load an original document facedown on the scanner glass. From the desktop, double-click the Lexmark Imaging Studio icon. From the left pane of the Welcome screen, click Copy. Select the Document option. -
Page 30: Copying A Photo Using The Computer
Copying a photo using the computer Place the photo facedown on the scanner glass. From the desktop, double-click the Lexmark Imaging Studio icon. From the left pane of the Welcome screen, click Copy. Select Photo. Click Start. The photo appears in the right pane. -
Page 31: Scanning
Scanning Note: Make sure the printer is connected to a computer, and both the printer and computer are on. Scanning using the control panel Load an original document facedown on the scanner glass. Press to begin scanning. The Save Photo dialog appears on your computer screen. - Page 32 Setting Select area to be scanned Convert the image to text with OCR Select this to convert your image to text. Always use these settings when scanning Options You can select the area to be scanned by choosing a paper size from the drop-down list.
-
Page 33: Faxing
Faxing Make sure: • The printer is connected to a computer that is equipped with a fax modem. • The computer is connected to a working phone line. • Both the printer and the computer are turned on. Sending a fax using the software You can scan a document to the computer and then fax it to someone using the software. - Page 34 Click the Receiving Faxes tab. From the “Incoming Calls” area, select Automatically. To set the number of telephone rings before the printer automatically receives faxes, select a setting from the “Rings before pickup” drop-down list. Click OK to save the settings.
-
Page 35: Maintaining The Printer
Make sure the printer is on. Lift the scanner unit. The print cartridge carrier moves and stops at the loading position, unless the printer is busy. Press down on the cartridge carrier lever to raise the cartridge carrier lid. Remove the used print cartridge. - Page 36 Insert the black cartridge or the photo cartridge in the left carrier. Insert the color cartridge in the right carrier. Close the lids. Lift the scanner unit, gently push the scanner support towards the cartridge carriers, and carefully lower the scanner unit until it is completely closed. Load paper. Maintaining the printer...
-
Page 37: Achieving Better Print Quality
• Use the appropriate paper for the document. If you are printing photos or other high quality images, for best results use Lexmark Premium Photo Paper or Lexmark Photo Paper. • Use a paper that is a heavier weight or bright white. -
Page 38: Cleaning The Print Cartridge Nozzles
Click Print. The alignment page prints. Open the top cover of the printer. Place the printed alignment page facedown on the scanner glass in the lower right corner, and then close the top cover. Press After a few seconds, an Alignment Success dialog appears on your computer screen. -
Page 39: Wiping The Print Cartridge Nozzles And Contacts
If the print quality does not improve, clean the print nozzles. For more information, see “Cleaning the print cartridge nozzles” on page 38. Repeat step 9 up to two more times. If print quality is still not satisfactory, replace the print cartridges. Maintaining the printer... -
Page 40: Ordering Print Cartridges
Item Color cartridge Black cartridge Photo cartridge Ordering paper and other supplies To order supplies or to locate a dealer near you, visit our Web site at www.lexmark.com. Notes: • For best results, use only Lexmark print cartridges. • For best results when printing photos or other high-quality images, use Lexmark photo papers. - Page 41 Lexmark PerfectFinish Photo Paper Note: Availability may vary by country or region. For information on how to purchase Lexmark Premium Photo Paper, Lexmark Photo Paper, or Lexmark PerfectFinish Photo Paper in your country or region, go to www.lexmark.com. Maintaining the printer Paper size •...
-
Page 42: Troubleshooting
Power button is not lit Check power connection Disconnect the power cord from the wall outlet, and then from the printer. Plug the cord all the way into the power supply on the printer. Plug the cord into an electrical outlet that other electrical devices have been using. -
Page 43: Page Does Not Print
Check the USB cable for any obvious damage. connected Firmly plug the square end of the USB cable into the back of the printer. Firmly plug the rectangular end of the USB cable into the USB port of the computer. -
Page 44: Print Troubleshooting
Plug the power cord into the wall outlet. Press Software may not be Uninstall the printer software, and then reinstall it. For more information, see installed correctly “Removing and reinstalling the software” on page 55. If the software still does not install correctly, visit our Web site at www.lexmark.com to check for the latest software. -
Page 45: Poor Text And Graphic Quality
Check paper • Use the appropriate paper for the document. If you are printing photos or other high-quality images, for best results use Lexmark Premium Photo Paper or Lexmark Photo Paper. • Use a paper that is a heavier weight or bright white. -
Page 46: Print Speed Is Slow
Each paper brand accepts ink differently and prints with color variations. If you are printing paper photos or other high-quality images, for best results use Lexmark Premium Photo Paper or Lexmark Photo Paper. Check paper condition Use only new, unwrinkled paper. -
Page 47: Copy Troubleshooting
Select a lower print From the software application, click File quality Click Properties, Preferences, Options, or Setup. Click Quality/Copies. From the Quality/Speed area, select a lower print quality. Software may not be For more information, see “Software may not be installed correctly” on page 43. installed correctly Partial document or photo prints Check document... -
Page 48: Scan Troubleshooting
Poor copy quality • Blank pages • Checkerboard pattern • Distorted graphics or pictures • Missing characters • Faded print • Dark print Check the control If one of the lights is blinking, see “Blinking lights on the control panel” on page 53. panel for any blinking lights Check ink... -
Page 49: Scanner Does Not Respond
Check the USB cable for any obvious damage. connected Firmly plug the square end of the USB cable into the back of the printer. Firmly plug the rectangular end of the USB cable into the USB port of the computer. -
Page 50: Fax Troubleshooting
Adjust the quality of the Load an original document facedown on the scanner glass. scan From the desktop, double-click the Lexmark Imaging Studio icon. From the left pane of the Welcome screen, click Scan. Click Custom Settings. Select a higher scan resolution. -
Page 51: Paper Jams
• “Printer does not feed paper, envelopes, or specialty media” on page 52 • “Banner paper jams” on page 52 Paper jams Is the jam in the paper Press support? Firmly grasp the paper, and gently pull it out. Press... -
Page 52: Banner Paper Jams
• Use only the number of sheets needed for the banner. printing checklist • Select the following settings to enable the printer to feed paper continuously without jamming: With a document open, click File Click Properties, Preferences, Options, or Setup. -
Page 53: Blinking Lights On The Control Panel
Blinking lights on the control panel The printer may: blinks rapidly • • The print cartridge carriers are stuck. blinks slowly The color print cartridge needs to be replaced soon. light is blinking To order supplies, see “Ordering paper and other supplies” on page 40. -
Page 54: Error Messages
Note: A variable amount of ink remains in the black (or photo) print cartridge. Follow these steps to replace the black (or photo) print cartridge in your printer: To order supplies, click Order Ink on your computer screen. You can also see “Ordering paper and other supplies”... -
Page 55: Removing And Reinstalling The Software
“Ordering paper and other supplies” on page 40 in this guide. Removing and reinstalling the software If the printer is not functioning properly, or if a communications error message appears when you try to use the printer, you may need to remove and reinstall the printer software. -
Page 56: Index
4x6 color copy 28 4x6 Copy 12 Black Copy 12 Cancel 12 Color Copy 12 Paper Feed 12 Power 12 Scan 12 buttons, Lexmark Imaging Studio Copy 13 E-mail 13 Fax 13 Photo Greeting Cards 13 Photo Packages 13 Poster 13 Scan 13... - Page 57 Photo Packages 13 Scan 13 Slideshow 13 Transfer Photos 13 using 13 View / Print Photo Library 13 Lexmark Imaging Studio, using 13 loading documents on the scanner glass 19 paper 19 photos on the scanner glass 19 magazine articles, loading on the...
- Page 58 43 power button is not lit 42 software does not install 42 slideshow creating and viewing 26 software Lexmark Imaging Studio 13 Print Properties 16 removing and reinstalling 55 Solution Center 15 Toolbar 16 using 13...