Table of Contents
Advertisement
Quick Links
Advertisement
Table of Contents

Related Manuals for Kodak DryView 8900


Summary of Contents for Kodak DryView 8900
- Page 1 Kodak DryView 8900 Laser Imager Release 3 User Guide...
- Page 2 Eastman Kodak Company 343 State Street Rochester, NY 14650 © Eastman Kodak Company, 2006 Kodak and DryView are trademarks of Eastman Kodak Company. 5E6155 Catalog number 1275593 Rev. F...
-
Page 3: Table Of Contents
1 Safety and Related Information Safety, Warnings, and Cautions ... 1-1 Safety Labels ... 1-6 Safety and Health Compliance... 1-11 Safety ... 1-11 EMC... 1-12 EU Directives ... 1-17 CE Marking... 1-18 User Guide Conventions ... 1-18 Please Note ... 1-19 2 Overview Product Description ... - Page 4 Table of Contents Film Drawers and Front Door Manual Override Latches...3-14 Opening the Hood...3-16 Loading Film Cartridges ...3-18 Recycling Empty Film Cartridges...3-19 Requesting a Calibration Test Print...3-19 Requesting a Density Test Print ...3-19 Requesting a QC Step Wedge ...3-20 Printing a DVM (DryView Mammography) Test Pattern...3-20 Evaluating DVM Test Patterns ...3-21 Automatic Image Quality Control (AIQC)...3-21 Operating in Manual Mode ...3-21...
- Page 5 Clearing Film Jams from Area 5 ... 4-31 Clearing Film Jams from Area 6 ... 4-32 Calling for Support... 4-33 5 Specifications Dimensions ... 5-1 Electrical... 5-1 Laser Specifications... 5-2 Operating Environment ... 5-2 Storage Environment ... 5-2 Environmental Effects... 5-2 Film Sizes ...
- Page 6 Running a Daily QC Test...A-5 Appendix B: Warranty and Limitation of Liability Important Notice to Purchaser...B-1 End User License Agreement (EULA) ...B-2 Eastman Kodak Company Health Group Software End User License Agreement ...B-2 License ...B-2 Limited Warranty ...B-3 Limitation of Remedies ...B-4 General...B-4...
-
Page 7: Safety And Related Information
Always call an Authorized Service Provider of Kodak products for any service or repair. • Do not operate equipment with a damaged power cord. - Page 8 Safety and Related Information WARNING This equipment is not contained in a sealed cabinet. Do not use this equipment in locations where it can come in contact with liquids, including body fluids. CAUTION Do not use a cell phone within 2 meters of a laser imager. This proximity includes any imager behind a wall adjacent to your location.
- Page 9 Safety and Related Information CAUTION This equipment is intended to connect to other medical devices. Only an Authorized Service Provider of Kodak products may perform installation and service maintenance. This device is NOT to be located within the patient environment. Therefore, the equipment must not be located closer than 1.83 meters from a patient bed or chair.
- Page 10 CAUTION Lithium batteries should only be replaced by an Authorized Service Provider of Kodak products. The laser imager uses a lithium battery to power the clock and calendar circuitry. THERE IS A DANGER OF EXPLOSION IF THE BATTERY IS REPLACED INCORRECTLY.
- Page 11 Covers with this label may only be removed by an Authorized Service Provider of Kodak products. USE OF CONTROLS OR ADJUSTMENTS, OR PERFORMANCE OF PROCEDURES OTHER THAN THOSE SPECIFIED HEREIN, MAY RESULT IN EYE DAMAGE.
-
Page 12: Safety Labels
Safety and Related Information Safety Labels Safety labels are attached to the laser imager in compliance with international standards. Laser Radiation Warning Labels Laser Interlock. This warning label indicates that laser energy is present. Defeating interlocks allows the laser imager to run with the laser energized. - Page 13 Safety and Related Information High Voltage Warning Label This warning label indicates that high voltage is present under panels or enclosures where labels are attached. These panels may only be removed by an Authorized Service Provider of Kodak products. January 10, 2006 5E6155...
- Page 14 These panels may only be removed by an Authorized Service Provider of Kodak products. AVOID DIRECT EXPOSURE TO THE LASER BEAM. EXPOSURE TO LASER ENERGY MAY RESULT IN PERMANENT EYE DAMAGE. DEFEATING INTERLOCKS ALLOWS THE LASER IMAGER TO RUN WITH THE LASER ENERGIZED.
- Page 15 Safety and Related Information Hazardous Voltage. This warning label indicates that high voltage is present under panels where the label is attached. Only an Authorized Service Provider of Kodak products should attempt access. Static Sensitive Equipment. This label identifies static-sensitive components.
- Page 16 Safety and Related Information 1-10 Processor Drum Cover Label Processor drum cover pictogram. This pictogram illustrates the processor drum cover open. When open, take caution to avoid heat and use of sharp objects. Caution - hot surface pictogram. This pictogram advises to use care near the processor drum to avoid possible burns.
-
Page 17: Safety And Health Compliance
Safety and Health Compliance Safety January 10, 2006 Safety and Related Information This equipment has been tested for and complies with the following Safety and Emissions Standards. Certificates of Compliance and Declarations of Conformity have been issued as shown below. United States 21 CFR 900.12(e) Mammography Quality Standards Act;... -
Page 18: Emc
Safety and Related Information 1-12 IEC 60825-1: Safety of laser products - Part 1: Equipment classification, requirements and user’s guide. Europe EN60950-1: Safety of Information Technology Equipment, including Electrical Business Equipment (IEC 60950: 1991, Modified) (Includes Amendment A1, A2, A3, A4, and A11). EN60601-1-1: Medical electrical equipment - Part 1: General requirements for safety - Section 1: Collateral standard: Safety requirements for medical electrical systems, Clause 19. - Page 19 Guidance and Manufacturer’s Declaration for Electromagnetic Emissions The Kodak DryView 8900 Laser Imager is intended for use in the electromagnetic environment specified below. The customer or user of the Kodak DryView 8900 Laser Imager should assure that it is used in such an environment. Emissions Test...
- Page 20 Guidance and Manufacturer’s Declaration for Electromagnetic Immunity The Kodak DryView 8900 Laser Imager is intended for use in the electromagnetic environment specified below. The customer or user of the laser imager should assure that it is used in such an environment.
- Page 21 Guidance and Manufacturer’s Declaration for Electromagnetic Immunity The Kodak DryView 8900 Laser Imager is intended for use in the electromagnetic environment specified below. The customer or user of the Kodak DryView 8900 Laser Imager should assure that it is used in such an environment. Immunity...
- Page 22 Kodak DryView 8900 Laser Imager The Kodak DryView 8900 Laser Imager is intended for use in an electromagnetic environment in which radiated RF disturbances are controlled. The customer or the user of the Kodak DryView 8900 Laser Imager can help prevent...
-
Page 23: Eu Directives
In the European Union, this symbol indicates that when the last user wishes to discard this product, it must be sent to appropriate facilities for recovery and recycling. Contact your local Kodak representative or refer to www.kodak.com/go/recycle for additional information on the collection and recovery programs available for this product. -
Page 24: Ce Marking
User Guide Conventions 1-18 Documents concerning the conformance of this product to Council Directive 93/42/EEC of 14 June 1993 concerning Medical Devices can be obtained from the Eastman Kodak Company, Health Group European Representative at: Kodak GmbH Product Safety 70323 Stuttgart... -
Page 25: Please Note
Eastman Kodak Company reserves the right to change this information without notice and makes no warranty, express or implied, with respect to this information. Kodak shall not be liable for any loss or damage, including consequential or special damages, resulting from the use of this information, even if loss or damage is caused by Kodak's negligence or other fault. -
Page 27: Overview
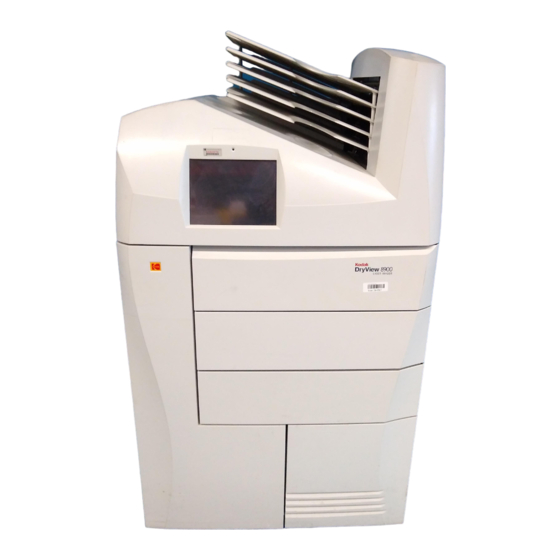
Overview Product Description January 10, 2006 The Kodak DryView 8900 Laser Imager is a continuous-tone laser imager with an internal photothermographic film processor. Heat, rather than photo chemicals, is used to develop the film. The laser imager receives the digital image data through a DICOM medical imaging protocol. -
Page 28: System Components
Overview System Components System Components Touch screen local panel. The local panel is your interface to the laser imager. The panel accepts your commands and gives you status information about imager functions. Film drawers. Your imager may be configured for one, two, or three film drawers. -
Page 29: How The Laser Imager Works
How the Laser Imager Works January 10, 2006 Film transport. The film transport moves the film through the laser imager. Film platen. The film platen positions the film and holds the film stationary for imaging. Optics module. The optics module writes (exposes) the image onto the film while the film is positioned on the film platen. - Page 30 Overview 5. The platen rollers move the film into the vertical transport rollers, which move the film into the film processor. 6. As the film passes over the processor drum, the heat generated by the drum develops the film. 7. If no sorter is present, the film will be placed on the top hood. If the imager is configured with a sorter, the film transport rollers move the exposed film through the densitometer to the sorter and out to one of the six bins.
-
Page 31: Operation And Maintenance
Operation and Maintenance System Power Up, Shut Down, and Energy Save Power Up January 10, 2006 To power up the laser imager, press and hold the power switch to the ON position for about 2 seconds. The green indicator light above the local panel glows when the power is on. -
Page 32: Restart / Shut Down
Operation and Maintenance Restart / Shut Down Energy Save Shut down the laser imager if you do not expect to use it for an extended period of time (three days or longer). To shut down or restart the laser imager: 1. -
Page 33: Levels Of User Access
Key Operator ID and passcode. Refer to “Key Operator Information” on page Level 3 First Call First Call Service providers are Kodak-trained and Service certified self-maintenance customers. Level 3 First Call provides access to all Level 1 and 2 features and functions. -
Page 34: Using The Touch Screen Local Panel
Operation and Maintenance Using the Touch Screen Local Panel Status Screen The local panel provides touch-screen controls. To select a menu choice, touch the center of the button. NOTE: Use only your finger when selecting buttons on the screen. Using hard objects, such as pens or pencils, can damage the surface of the touch screen. - Page 35 January 10, 2006 Film supply drawer button. The film supply drawers are accessed from the front of the laser imager. Touch any drawer button to close the film cartridge and open the drawer. The button also provides film information related to the currently installed cartridge: •...
-
Page 36: Main Menu
Operation and Maintenance Main Menu Main Menu Job Management. When touched, the local panel displays the Job Management screen (see page 3-11). Image Sources. When touched, the local panel displays the Image Sources screen (see page 3-13). Service. When touched, the local panel displays the Service screen. -
Page 37: Door Control Screen
Door Control Screen January 10, 2006 System Information. When touched, the local panel displays the System Information screen (see on page 3-9). System Functions. When touched, the local panel displays the System Functions screen (see page 3-8). Door Control. When touched, the local panel displays the Door Control screen (see “Door Control Screen”... -
Page 38: System Functions Screen
Operation and Maintenance System Functions Screen System Functions Sorter (Enabled/Disabled). If your imager is configured with no sorter, this button will be absent. When touched, the sorter is enabled or disabled. When disabled, the laser imager sends all film to bin 1. Audible Alarm (Enabled/Disabled). -
Page 39: System Information Screen
System Information Screen January 10, 2006 Calibration. When touched, Calibration test print is selected. When the Print button is touched, the laser imager prints a Calibration test print from the selected film drawer. QC Step Wedge for DVM. This button is present only if the mammography upgrade is installed and enabled. -
Page 40: Version Information
Prints to PM: The number of prints before a Preventive Maintenance is due. Serial Number: The laser imager serial number. K#Number: The laser imager Kodak number. Service Phone: The Kodak Service telephone number. Version Information (Displays software component versions) 5E6155 “Version Information”... -
Page 41: Job Management Screen
Job Management Screen January 10, 2006 Job Management List of modalities that have active print jobs in the queue. View List. When touched, the Active Queue screen displays all print jobs currently in the queue (see Open Associations. Represents the number of modalities currently communicating actively with the laser imager. -
Page 42: View List
Operation and Maintenance View List 3-12 Identifies the number of print jobs in a queue, having one of the following statuses: a. Active. Printing is ongoing or will start as soon as current prints move further through the laser imager. b. -
Page 43: Image Sources Screen
Image Sources Screen January 10, 2006 Image Sources List of all modalities that have sent print jobs to the laser imager. The list identifies the sorter bin (if the imager is configured with a sorter), Dmax value, and print priority designation (Normal, Low, or Stat) with which the modality is associated. -
Page 44: Operation
Operation and Maintenance Operation Opening the Left Front Door Opening the Right Front Door Opening the Film Drawers Film Drawers and Front Door Manual Override Latches 3-14 When open, the left front door provides access to the film transport areas. Use the Door Control screen on the local panel to open the left front door in normal situations (see “Door Control Screen”... - Page 45 Left door manual override latch Door Right door January 10, 2006 Manual Override Latches To manually open the drawers and left front door: 1. Minimize film exposure by making the room as dark as possible. 2. Lift the desired override latch. 3.
-
Page 46: Opening The Hood
Operation and Maintenance Opening the Hood 3-16 Opening the hood provides access to clear film jams in the top of the imager. CAUTION Whenever you raise or lower the hood, grasp the hood only in the area of the recessed slot below the local panel to avoid the possibility of pinching your fingers. - Page 47 January 10, 2006 To open the hood: 1. Grasp the hood at the recessed slot below the local panel. 2. Raise the hood until the support rod locks into the top slot. To close the hood: 1. Raise the hood slightly and push the rod slightly to the rear from the slot.
-
Page 48: Loading Film Cartridges
Operation and Maintenance Loading Film Cartridges 3-18 You can monitor the number of sheets left in a film cartridge by looking at the film drawer icon on the Status screen. When a film cartridge runs out of film, the appropriate film drawer icon flashes, and a large zero appears in the drawer icon. -
Page 49: Recycling Empty Film Cartridges
Requesting a Density Test Print January 10, 2006 Return your empty Kodak DryView film cartridges to Kodak for reuse and recycling. Returned cartridges are carefully inspected. Only components that meet strict quality standards are reused. Components that do not meet the standards are sent to recycling centers for reclamation. -
Page 50: Requesting A Qc Step Wedge
Operation and Maintenance Requesting a QC Step Wedge Printing a DVM (DryView Mammography) Test Pattern List of Test Patterns 3-20 To request a QC Step Wedge: 1. Request a Calibration Test Print (see Print”) to put the AIQC system in control. 2. -
Page 51: Evaluating Dvm Test Patterns
3. If you see an artifact, reprint the image. a. If the same artifact appears in a consistent location, the imager may be malfunctioning. Call an authorized service provider of Kodak products. b.If the artifact does not repeat in the same location, the cause is probably a film defect. - Page 52 Operation and Maintenance A film calibration failure is often film related. If you load a new film cartridge, the error is usually corrected. If the error reoccurs with a new film cartridge, call for support (see “Calling for Support” on page 4-33).
-
Page 53: Operator Maintenance
Install a new filter after every 20,000 film cycles. NOTE: Authorized Service Providers of Kodak products routinely install new filters during the 20,000 film cycle Preventive Maintenance procedure. You only need to change filters if you do not have Kodak’s Preventive Maintenance Plan. - Page 54 Operation and Maintenance Duct filter door Wire latch 3-24 Lever Lower right front door Filter Replacing the Charcoal Filter To install new filter: 1. Open the lower right front door. 2. Remove the duct filter door. a. Press in on the door lever. b.Disconnect the wire latch.
-
Page 55: Preventive Maintenance
To maintain optimum performance from the laser imager, Kodak recommends that preventive maintenance be completed by an Authorized Service Provider of Kodak products after every 20,000 film cycles. The Status screen displays a “Preventive Maintenance” icon when the film count reaches 20 ,000 sheets of film. -
Page 56: Key Operator Information
• The system times out and returns to the Status screen (the default access time is 2 minutes). NOTE: Access time can be set by an Authorized Service Provider of Kodak products from 30 to 300 seconds (0.5 to 5 minutes). -
Page 57: Setting Time And Date
Setting Time and Date January 10, 2006 2. Enter your ID and touch the Enter Passcode box. 3. Enter your passcode. Touch OK. When the Key Op access is activated, the icon is highlighted. Key Op access deactivates if the laser imager times out and returns to the Status screen or if you cancel the access level. - Page 58 Operation and Maintenance 3-28 2. Enter your ID and touch the Enter Passcode box. 3. Enter your passcode. Touch OK. The Time and Date Properties screen appears. 4. Use the left and right arrows to navigate to your desired time or date field.
-
Page 59: Audible Alarm (On/Off)
Audible Alarm (On/Off) January 10, 2006 An audible alarm alerts operators when an error message or notice appears on the local panel. Key Operators can disable or enable the audible alarm function. To enable or disable the audible alarm: 1. At the Main Menu screen, touch the System Functions button. The System Functions screen appears. -
Page 60: Selecting Bins
Operation and Maintenance Selecting Bins 3-30 3. Enter your ID and touch the Enter Passcode box. 4. Enter your passcode. Touch OK. 5. At the System Functions screen, touch the Audible Alarm button. This function is only available if the imager is configured with a sorter. Key Operators can select bins for each available modality. - Page 61 Operation and Maintenance 3. Enter your ID and touch the Enter Passcode box. 4. Enter your passcode. Touch OK. The Image Source Editor screen appears. Image Source Editor 5. Touch the up or down arrows to highlight Bin. 6. Touch the + or - to select your desired bin. 7.
-
Page 62: Changing Dmax
Operation and Maintenance Changing Dmax 3-32 Key Operators can change the Dmax value for each available modality. To change a Dmax value: NOTE: Modality settings may override the setting you enter. 1. At the Image Sources screen, use the up and down arrows to select a modality. - Page 63 Operation and Maintenance 4. Enter your passcode. Touch OK. The Image Source Editor screen appears. Image Source Editor 5. Touch the up and down arrows to highlight Dmax. 6. Touch the + or - to select your desired Dmax value. 7.
-
Page 64: Deleting Print Jobs
Operation and Maintenance Deleting Print Jobs 3-34 Key Operators can delete one or all print jobs in the print queues. To delete a print job or all jobs: 1. At the Job Management screen, use the up and down arrows to select Active, No Media or Undelivered print queue. - Page 65 Operation and Maintenance 5. Enter your ID and touch the Enter Passcode box. 6. Enter your passcode. Touch OK. The Delete this job or the Delete all jobs in the queue pop-up screen appears. 7. Touch Yes. January 10, 2006 5E6155 3-35...
-
Page 66: Scheduling The Automatic Energy Save Mode
Operation and Maintenance Scheduling the Automatic Energy Save Mode 3-36 To schedule the Automatic Energy Save Mode: 1. At the Main Menu screen, touch the System Function button. The System Function screen appears. Systems Functions 2. Touch the Energy Save Schedule button. The Energy Save Schedule screen appears. - Page 67 January 10, 2006 Energy Save Schedule 3. Touch the Enable / Disable button. The Key Op Login screen appears. 4. Enter your ID and touch the Enter Passcode box. 5. Enter your Passcode and touch OK. The Energy Save Schedule screen appears.
- Page 68 Operation and Maintenance Processor schedule control 3-38 Energy Save Schedule 6. Set the ON / OFF time by touching the Processor schedule control for the chosen ON / OFF time to set or clear. Use the time control at the right to adjust the times.
-
Page 69: Image Resizing Icons
Image Resizing Icons January 10, 2006 NOTE: When the Energy Save mode is activated, the imager shuts down the film processor heaters and 30 minutes later shuts down the processor drum motor. The Energy Save On screen is displayed on the local panel. If the imager is in the Energy Save mode, it automatically begins warm-up when a job is received. - Page 70 Operation and Maintenance 3-40 • Minify. The image file is reduced by the removal of pixel data. An image might be minified if the image size is larger than the media in the imager. For example, a computed radiography (CR) image is requested to print 35 x 43 cm at the imager with 8 x 10 in.
-
Page 71: Troubleshooting
January 10, 2006 Occasionally, you may have to correct minor problems. If more serious malfunctions occur, you must contact an Authorized Service Provider of Kodak products (see “Calling for Support” on page To determine the operator action required, monitor imager operation and note the imager status and error messages. - Page 72 The printer is completing prints in progress. Service mode The Service Override switch is enabled. Preventive Maintenance Call an Authorized Service Provider of indicator Kodak products to schedule Preventive Maintenance. Film Drawer Status Details Messages Opening... Please wait The film cartridge is currently opening.
-
Page 73: Local Panel Error Messages
If this action does not clear the error message, call an Authorized Service Provider of Kodak products. When you make a service call, be prepared with the error message and message number (see page 4-33). -
Page 74: Operator Actions
Delete job from the Undelivered Queue. 1. Restart the laser imager. 2. If the error persists, call an Authorized Service Provider of Kodak products. 1. Restart the laser imager. 2. If the error persists, call an Authorized Service Provider of Kodak products. - Page 75 5E6155 Troubleshooting Operator Action 1. Restart the laser imager. 2. If the error persists, call an Authorized Service Provider of Kodak products. 1. Restart the laser imager. 2. If the error persists, call an Authorized Service Provider of Kodak products.
- Page 76 5E6155 Operator Action 1. Restart the laser imager. 2. If the error persists, call an Authorized Service Provider of Kodak products. 1. Restart the laser imager. 2. If the error persists, call an Authorized Service Provider of Kodak products.
- Page 77 5E6155 Troubleshooting Operator Action 1. Restart the laser imager. 2. If the error persists, call an Authorized Service Provider of Kodak products. 1. Open the drawer. 2. Close the cartridge to prevent film from fogging. 3. Remove any film. 4. Close the drawer.
- Page 78 5E6155 Operator Action 1. Try a new film cartridge. 2. If the error persists, call an Authorized Service Provider of Kodak products. 1. Try a new film cartridge. 2. If the error persists, call an Authorized Service Provider of Kodak products.
- Page 79 Troubleshooting Operator Action 1. Try a new film cartridge. 2. If the error persists, call an Authorized Service Provider of Kodak products. 1. Try a new film cartridge. 2. If the error persists, disable AIQC for this film cartridge (see “Automatic...
- Page 80 5E6155 Operator Action 1. Restart the laser imager. 2. If the error persists, call an Authorized Service Provider of Kodak products. 1. Restart the laser imager. 2. If the error persists, call an Authorized Service Provider of Kodak products.
- Page 81 Troubleshooting Operator Action 1. Try a new film cartridge. 2. If the error persists, call an Authorized Service Provider of Kodak products. 1. Try a new film cartridge. 2. If the error persists, call an Authorized Service Provider of Kodak products.
- Page 82 2. Close the cartridge to prevent film from fogging. 3. Close the drawer. 4. If the error persists, call an Authorized Service Provider of Kodak products. 1. Try a new film cartridge. 2. If the error persists, call an Authorized Service Provider of Kodak products.
- Page 83 5E6155 Troubleshooting Operator Action 1. Restart the laser imager. 2. If the error persists, call an Authorized Service Provider of Kodak products. 1. Open the drawer. 2. Close the cartridge to prevent film from fogging. 3. Remove any film. 4. Close the drawer.
- Page 84 5E6155 Operator Action 1. Try a new film cartridge. 2. If the error persists, call an Authorized Service Provider of Kodak products. 1. Try a new film cartridge. 2. If the error persists, call an Authorized Service Provider of Kodak products.
- Page 85 5E6155 Troubleshooting Operator Action 1. Try a new film cartridge. 2. If the error persists, call an Authorized Service Provider of Kodak products. 1. Open the drawer. 2. Close the cartridge to prevent film from fogging. 3. Close the drawer.
- Page 86 5E6155 Operator Action 1. Restart the laser imager. 2. If the error persists, call an Authorized Service Provider of Kodak products. 1. Restart the laser imager. 2. If the error persists, call an Authorized Service Provider of Kodak products.
- Page 87 1. Open the hood. 2. Remove any film. 3. Close the hood. 1. Open the hood. 2. Remove any film. 3. Close the hood. 1. Restart the laser imager. 2. If the error persists, call an Authorized Service Provider of Kodak products. 4-17...
- Page 88 5E6155 Operator Action 1. Restart the laser imager. 2. If the error persists, call an Authorized Service Provider of Kodak products. 1. Restart the laser imager. 2. If the error persists, call an Authorized Service Provider of Kodak products.
- Page 89 5E6155 Troubleshooting Operator Action 1. Restart the laser imager. 2. If the error persists, call an Authorized Service Provider of Kodak products. 1. Restart the laser imager. 2. If the error persists, call an Authorized Service Provider of Kodak products.
- Page 90 5E6155 Operator Action 1. Restart the laser imager. 2. If the error persists, call an Authorized Service Provider of Kodak products. 1. Restart the laser imager. 2. If the error persists, call an Authorized Service Provider of Kodak products.
- Page 91 5E6155 Troubleshooting Operator Action 1. Restart the laser imager. 2. If the error persists, call an Authorized Service Provider of Kodak products. 1. Restart the laser imager. 2. If the error persists, call an Authorized Service Provider of Kodak products.
- Page 92 5E6155 Operator Action 1. Restart the laser imager. 2. If the error persists, call an Authorized Service Provider of Kodak products. 1. Restart the laser imager. 2. If the error persists, call an Authorized Service Provider of Kodak products.
- Page 93 5E6155 Troubleshooting Operator Action 1. Restart the laser imager. 2. If the error persists, call an Authorized Service Provider of Kodak products. 1. Restart the laser imager. 2. If the error persists, call an Authorized Service Provider of Kodak products.
- Page 94 5E6155 Operator Action 1. Restart the laser imager. 2. If the error persists, call an Authorized Service Provider of Kodak products. 1. Restart the laser imager. 2. If the error persists, call an Authorized Service Provider of Kodak products.
-
Page 95: Clearing Film Jams
Clearing Film Jams January 10, 2006 The numbers in the illustration identify key areas on the path from film pickup to exposure, through development and onto the film sorter. Jam Areas Film pickup from the cartridge. Vertical film path between the film pickup area and the film platen, and between the film platen and the processor drum. -
Page 96: Manually Closing The Film Cartridge Lid
Troubleshooting Manually Closing the Film Cartridge Lid Film Pickup Problems in Area 1U, 1M, or 1L 4-26 Film cartridges must be closed manually if the drawers are opened without the film cartridge closing automatically. NOTE: If the drawers are opened without the film cartridge closed, several sheets of film at the top of the cartridge will be exposed (fogged) and should be discarded. -
Page 97: Clearing Film Jams From Area 2
5. Close the drawer. 6. If you cannot resolve the problem, call an Authorized Service Provider of Kodak products. The vertical transport between the film pickup area and the film platen, and between the film platen and the processor drum is Area 2. If film jams in this area, an error message appears on the local panel. -
Page 98: Clearing Film Jams From Area 4
5. Close the front door. 6. If you cannot clear the jammed film, call an Authorized Service Provider of Kodak products. The film platen is Area 3. If film jams in this area, an error message appears on the local panel. -
Page 99: Clearing Film Jams From Area 6
5. Close the front door. 6. If you cannot clear the jammed film, call an Authorized Service Provider of Kodak products. The film processor drum is Area 4. If film jams in this area, an error message appears on the local panel. - Page 100 6. Close the drum cover and secure it with the two clamps. 7. Close the hood. 8. If you cannot clear the jammed film, call an Authorized Service Provider of Kodak products. NOTE: The processor has to warm up to operating temperature before the processor can print.
- Page 101 Clearing Film Jams from Area 5 January 10, 2006 The drive rollers just before the sorter are in Area 5. If film jams in this area, an error message appears on the local panel. Densitometer Clearing Film Jam 5 When the Film Jam in Area 5: error message appears: 1.
-
Page 102: Clearing Film Jams From Area 6
4. Grasp the film and pull upward at a 90° angle. 5. Close the hood. 6. If you cannot clear the jammed film, call an Authorized Service Provider of Kodak products. The sorter is Area 6. If film jams in this area, an error message appears on the local panel. -
Page 103: Calling For Support
If you cannot repair the machine and need help, you should call for support. Before you call, have the following information available: • Model number: 8900 • K-number: (see front of the laser imager above the Kodak logo) • Phone Support number: 1-800-328-2910 (U.S. only) 5E6155... -
Page 105: Specifications
Specifications Dimensions Electrical January 10, 2006 Height: 152 cm (60 in.) Width: 81 cm (32 in.) Depth: 86 cm (34 in.) Weight: 466 kg (1028 lb.) Voltage: 100 V ±10%, 50/60 Hz ±3 Hz 120 V ±10%, 50/60 Hz ±3 Hz 200 V ±10%, 50/60 Hz ±3 Hz 220 V ±10%, 50/60 Hz ±3 Hz 240 V ±10%, 50/60 Hz ±3 Hz... -
Page 106: Laser Specifications
Specifications Laser Specifications Operating Environment Storage Environment Environmental Effects Wavelength: 810 nm Power: 100 mW Radiation class: Type Diode Temperature: 15° to 35°C (59° to 95°F) Humidity: 20% to 75% RH, non condensing Airflow 0.5 cubic feet per minute of fresh outside air, per square foot of floor area, assuming a maximum occupancy of 10 persons per1000 square feet in the... -
Page 107: Film Sizes
Film Sizes Film Types Film Throughput Agency Compliance January 10, 2006 The 8900 Laser Imager processes the following film sizes: • 20 x 25 cm (8 x 10 in.) DryView Laser Imaging Film • 20 x 25 cm (8 x 10 in.) DryView Mammography Laser Imaging Film •... -
Page 109: Film Technical Information
General Description Spectral Sensitivity January 10, 2006 This section describes the characteristics of Kodak DryView Laser Imaging Film, not the operation of the 8900 laser imager. DryView Laser Imaging Film is a high-resolution, infrared-sensitive, photothermographic film designed specifically for the family of DryView Laser Imagers. DryView Laser Imaging Film is packaged in daylight load packages, and available in blue or clear, 7-mil polyester base. -
Page 110: Image Quality
Because it is a totally dry imaging process, there is no image quality variability due to “wet” chemistry. DryView Laser Imaging Film is system-matched for the Kodak patented Automatic Image Quality Control (AIQC) technology. This fully automated... -
Page 111: Environmental Impact
Environmental Impact Developer Product Regulations OSHA MSDS Required Hazardous Use permits Local Disposal* Regulations Hazardous Hazardous Note: There is no SUPERFUND liability with DryView Laser Imaging Film. * State and local laws vary. Consult appropriate regulations or authorities prior to disposal. Storing and Handling Undeveloped Film Handling Developed Film... -
Page 112: Archiving Developed Film
Laser Imaging Film can be left on a light box for more than 24 hours; in extreme cases in which light boxes are exceptionally hot (120°F/49°C), Kodak recommends removing them prior to 8 hours of continuous exposure. Take care when using spotlight viewing for more than 30 seconds because temperatures near the light source may exceed 180°F/82.2°C. -
Page 113: Dissipating Heat
However, the film does contain silver and polyester that may be recovered by using one of several recycling processes. Call your local Kodak sales representative or go to the Kodak website www.kodak.com/go/KES Refer to Publication J700 and see “End of Life Management' section. -
Page 115: Appendix A: Quality Control Procedures
The Kodak DryView 8900 Laser Imager has a built-in Automatic Image Quality Control (AIQC) system that automatically compensates for film lot variations, ensuring consistent print densities. The MQSA requires that the mammography facility establish a quality control (QC) process that verifies the effectiveness of the AIQC system. -
Page 116: Running A Qc Baseline Test
This test sets up a baseline set of film parameter values that shall be used as a standard for comparison in daily quality control tests. Kodak recommends the procedure described below as a means of complying with this regulation. - Page 117 January 10, 2006 determine the film parameter values as follows: a. Determine which step has a density closest to 2.20. Then determine which step has a density closest to but not less than 0.45. Designate the difference between these densities as Density Difference (DD). b.Determine which step has an average density closest to but not less than 1.20.
- Page 118 Quality Control Procedures Quality Control Chart 5E6155 January 10, 2006...
-
Page 119: Running A Daily Qc Test
The MQSA requires that a sensitometric test be run daily and that clinical images be made only when the control chart is within the control ranges. Kodak recommends the following laser imager test. Perform this test daily before clinical mammograms are performed, to ensure quality output. Plot the values obtained from the test on the chart for comparison with the film parameter values established in the baseline test. - Page 120 Quality Control Procedures c. Note the cause of the problem in the "Remarks" section of the chart. d.Repeat the step wedge test and graph the parameters on the chart. 5E6155 January 10, 2006...
-
Page 121: Appendix B: Warranty And Limitation Of Liability
Customer. • Performance or non-performance of any third party equipment or software. • Impact of any Kodak product upon a network or third party equipment or software. • Malicious software infections caused by others. Virus Policy: In accordance with the Health Group Digital Solutions Virus... -
Page 122: End User License Agreement (Eula
Quotation or Invoice, Eastman Kodak Company ("Kodak") grants to Customer a nonexclusive license to use one copy of the software on the equipment (the "Software"). Kodak represents that it has title to or has the right to license the Software. Customer agrees to use the Software only in... -
Page 123: Limited Warranty
Within thirty (30) days after any expiration or termination of this license, in whole or in part, the Customer agrees to deliver to Kodak all copies of the Software or media (whether in whole or in part) in the... -
Page 124: Limitation Of Remedies
The remedies set forth above are Kodak's only obligation under the warranty. IN NO EVENT WILL KODAK OR ITS SUPPLIERS OR DEALERS BE LIABLE TO YOU FOR ANY INCIDENTAL OR CONSEQUENTIAL DAMAGES, INCLUDING ANY LOST REVENUES OR PROFITS, DOWNTIME COSTS, COST... -
Page 125: End-User License Agreement For Microsoft Desktop Operating Systems
Software Product License January 10, 2006 Warranty and Limitation of Liability protection. Contractor / manufacturer is Eastman Kodak Company, 343 State Street, Rochester, New York, 14650. IMPORTANT-READ CAREFULLY: THIS END-USER LICENSE AGREEMENT ("EULA") IS A LEGAL AGREEMENT BETWEEN YOU (EITHER AN INDIVIDUAL OR A SINGLE ENTITY) AND THE MANUFACTURER ("MANUFACTURER") OF THE COMPUTER SYSTEM OR COMPUTER SYSTEM... - Page 126 Warranty and Limitation of Liability display and run one (1) copy of the SOFTWARE PRODUCT on the COMPUTER. – Storage/Network Use. The SOFTWARE PRODUCT may not be installed, accessed, displayed, run, shared or used concurrently on or from different computers, including a workstation, terminal or other digital electronic device ("Devices").
- Page 127 January 10, 2006 Warranty and Limitation of Liability including the printed materials accompanying the SOFTWARE. – Reservation of Rights. Manufacturer, MS and its suppliers (including Microsoft Corporation) reserve all rights not expressly granted to you in this EULA. 2. DESCRIPTION OF OTHER RIGHTS AND LIMITATIONS: –...
- Page 128 Warranty and Limitation of Liability Manufacturer, MS or Microsoft Corporation which updates or supplements the original SOFTWARE PRODUCT is governed by this EULA unless alternative terms are provided with such updates or supplements. – Limitations on Reverse Engineering, Decompilation and Disassembly.
- Page 129 January 10, 2006 Warranty and Limitation of Liability with any trademarks or service marks of Manufacturer, MS or its suppliers (including Microsoft Corporation). – Application Sharing. The SOFTWARE PRODUCT may contain Microsoft NetMeeting, a product that enables applications to be shared between two or more computers, even if an application is installed on only one of the computers.
- Page 130 Warranty and Limitation of Liability B-10 and treaties. This EULA grants you no rights to use such content. All rights not expressly granted under this EULA are reserved by MS and its suppliers (including Microsoft Corporation). 5. DUAL-MEDIA SOFTWARE PRODUCT. You may receive the SOFTWARE PRODUCT in more than one medium.
- Page 131 January 10, 2006 Warranty and Limitation of Liability or re-export the SOFTWARE PRODUCT (or portions thereof): (i) to any country subject to a U.S. embargo or trade restriction; (ii) to any person or entity who you know or have reason to know will utilize the SOFTWARE PRODUCT (or portions thereof) in the design, development or production of nuclear, chemical or biological weapons;...
-
Page 132: Warranty And Special Provisions For Austria, New Zealand Or Papua New Guinea - Express Limited Warranty
Warranty and Limitation of Liability Warranty and Special Provisions for Austria, New Zealand or Papua New Guinea - Express Limited Warranty B-12 CONSUMER RIGHTS. CONSUMERS MAY HAVE THE BENEFIT OF CERTAIN RIGHTS OR REMEDIES PURSUANT TO THE TRADE PRACTICES ACT AND SIMILAR STATE AND TERRITORY LAWS IN AUSTRALIA OR THE CONSUMER GUARANTEES ACT IN NEW ZEALAND, IN RESPECT OF WHICH CERTAIN LIABILITY MAY NOT BE EXCLUDED. -
Page 133: Warranty And Special Provisions For England Scotland, Wales And Ireland - Limited Warranty
Warranty and Special Provisions for England Scotland, Wales and Ireland - Limited Warranty January 10, 2006 Warranty and Limitation of Liability (OR RELATED COMPANY OF EITHER) TO ANY PERSON OR COMPANY ON ITS BEHALF IN RELATION TO THE PROFITABILITY OF OR ANY OTHER CONSEQUENCES OR BENEFITS TO BE OBTAINED FROM THE DELIVERY OR USE OF THE SOFTWARE AND ANY ACCOMPANYING MICROSOFT HARDWARE, SOFTWARE, MANUALS OR WRITTEN MATERIALS. - Page 134 Warranty and Limitation of Liability Manufacturer with a copy of your receipt. This Limited Warranty is void if failure of the SOFTWARE or hardware has resulted from accident, abuse, or misapplication. Any replacement SOFTWARE or hardware will be warranted for the remainder of the original warranty period or thirty (30) days, whichever is longer.
-
Page 135: Warranty And Special Provisions For Canada - Limited Warranty
Warranty and Special Provisions for Canada - Limited Warranty January 10, 2006 Warranty and Limitation of Liability LIMITED WARRANTY. Manufacturer warrants that (a) the SOFTWARE will perform substantially in accordance with the accompanying written materials for a period of ninety (90) days from the date of receipt, and (b) any Microsoft hardware accompanying the SOFTWARE will be free from defects in materials and workmanship under normal use and service for a period of one (1) year from the date of receipt. -
Page 136: Garantie Et Dispositions Particulières Pour Le Canada Garantie Limitée
Warranty and Limitation of Liability GARANTIE ET DISPOSITIONS PARTICULIÈRES POUR LE CANADA GARANTIE LIMITÉE B-16 AGREEMENT SHALL BE LIMITED TO THE AMOUNT ACTUALLY PAID BY YOU FOR THE SOFTWARE AND/OR MICROSOFT HARDWARE. BECAUSE SOME STATES/JURISDICTIONS DO NOT ALLOW THE EXCLUSION OR LIMITATION OF LIABILITY FOR CONSEQUENTIAL OR INCIDENTAL DAMAGES, THE ABOVE LIMITATION MAY NOT APPLY TO YOU. -
Page 137: Warranty And Special Provisions For The United States Of America And Any Other Country - Limited Warranty
Warranty and Special Provisions for the United States of America and any Other Country - Limited Warranty January 10, 2006 Warranty and Limitation of Liability écrite et tout matériel qui l'accompagnent. Cette garantie limitée vous accorde des droits spécifiques reconnus par la loi. ABSENCE DE RESPONSABILITÉ... - Page 138 Warranty and Limitation of Liability misapplication. Any replacement SOFTWARE or hardware will be warranted for the remainder of the original warranty period or thirty (30) days, whichever is longer. NO OTHER WARRANTIES. TO THE MAXIMUM EXTENT PERMITTED BY APPLICABLE LAW, MANUFACTURER AND ITS SUPPLIERS DISCLAIM ALL OTHER WARRANTIES, EITHER EXPRESS OR IMPLIED, INCLUDING, BUT NOT LIMITED TO IMPLIED WARRANTIES OF MERCHANTABILITY AND FITNESS FOR A PARTICULAR PURPOSE, WITH REGARD TO THE SOFTWARE,...
- Page 139 Warranty and Limitation of Liability expressly granted are reserved. If you acquired the SOFTWARE in the United States of America, this Software License Agreement and Warranty are governed by the laws of the State of Washington, U.S.A. If you acquired the SOFTWARE outside the United States of America, local law may apply.
-
Page 141: Key Operator
Glossary AIQC Cycle power DICOM Dmax Dmin dPatch Film model Key operator Modality January 10, 2006 Automatic Image Quality Control. Computed Radiography, the process of creating digital radiographic images. Computed Tomography, the process of creating digital tomographic images. Cycle power means to shut down and power up the laser imager. Digital Imaging and Communications in Medicine. - Page 142 Not available or not applicable Picture Archiving Communication System Link - Medical Image Manager. A family of store-and-forward software applications that is developed by Kodak. The metal surface on which the film rests as it is exposed. Mammography Quality Control Test Pattern.
- Page 144 EASTMAN KODAK COMPANY 343 State Street Rochester, N.Y. 14650 Kodak and DryView are trademarks of Eastman Kodak Company. © Eastman Kodak Company, 2006...