Table of Contents
Advertisement
Preface
Thank you for purchasing the DocuPrint C4350. This guide is written with the new user in mind
and provides information about how to set up and operate the printer as well as precautions for
use. Before using the printer, be sure to read this guide for good performance and effective use.
Please keep this guide for future reference. The illustrations shown in this guide are those of the
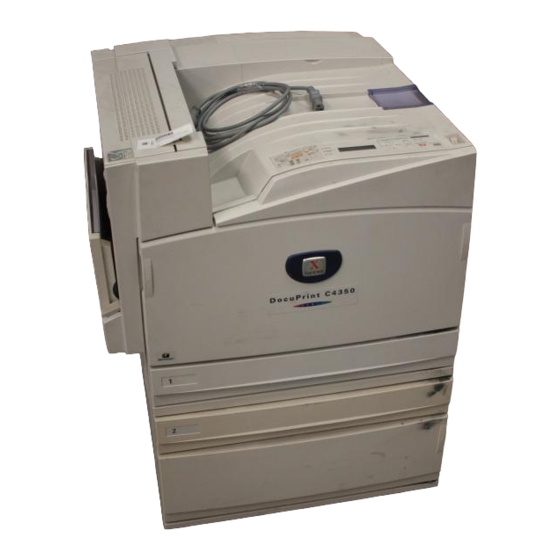
printer that has a 3 tray module (1650 Sheet Feeder).
In this manual, safety instructions are preceded by the symbol
Always read and follow the instructions before performing the required procedures.
This equipment is certified as a Class 1 laser product, which does not emit hazardous laser radiation.
Follow the operations described in the User Guide. Do not operate the machine in any way other than
described in the User Guide. Unauthorized operation can cause faults or accidents.
As a member of the International Energy Star Program, Fuji Xerox confirms this product satis-
fies the requirements for International Energy Star Program standards.
Fuji Xerox shares the global concern about environmental conservation and has integrated that concern
in its business activities-from research and development to disposal. We have implemented a number
of programs to lessen the burden on the environment. For example, we have totally eliminated
ozonedepleting chlorofluorocarbons from our manufacturing facilities. We are committed to leadership
in the conservation of resources by reusing and recycling post-consumer waste material such as paper,
cartridges, and parts from our customer's copiers and printers. Along with our efforts to make environ-
mental values a part of the Fuji Xerox culture, DocuPrint C4350 adopts recycled components that sat-
isfy our strict quality standards.
Reception interference
When installed at a certain location, the machine may cause interference with radio and television
reception. If you notice flickering or distorted images or noises on your audio-visual units, your machine
may be causing radio interference. Switch it off, and if the interference disappears, the machine is the
cause of radio interference. Perform the following procedure until the interference is corrected.
Move the machine and the TV and/or radio away from each other.
l
Reposition or reorientate the machine and TV and/or radio.
l
Unplug the machine, TV and/or radio, and replug them into outlets that operate on different circuits.
l
Reorientate the TV and/or radio antennas and cables until the interference stops. For an outdoor
l
antenna, ask your local electrician for support.
Use coaxial cable antennas.
l
.
i
Advertisement
Chapters
Table of Contents
Troubleshooting

Related Manuals for Fuji Xerox DocuPrint C4350


Summary of Contents for Fuji Xerox DocuPrint C4350
- Page 1 Preface Thank you for purchasing the DocuPrint C4350. This guide is written with the new user in mind and provides information about how to set up and operate the printer as well as precautions for use. Before using the printer, be sure to read this guide for good performance and effective use.
- Page 2 DocuPrint C4350 Features The DocuPrint C4350 has the following features:...
- Page 3 * For information about the setting items, refer to the print driver's online help. For how to use the On-line Help and the contents, refer to "4.2.2 Using the Online Help" (P.50).
- Page 4 ◆ Preface ◆ DocuPrint C4350 Features ◆ ◆ Types of Manuals ◆ Using This Guide ◆ Safety Notes ◆ The Objectives of the International Energy Star Program ◆ About License ◆ Illegal Copies and Printouts Setting up the Printer Environment...
- Page 5 Canceling or Checking the Status of Print Jobs Canceling Print Jobs from the Computer Canceling Print Jobs from the Printer Checking the Status of Print Jobs Ejecting the Remaining Print Data Forcibly Loading Configuration of Options and Paper Settings for Trays Printing Flow of Printing (Windows) Setting of Printing Features...
- Page 6 Compensating for the Differences in Characteristics between Device (Monitor, Scanner, Etc.) Printing after Registering Frequently Used Settings (Favorites) Registering Settings in [Favorites] Printing Using the Registered Settings Printing PDF Files Directly (ContentsBridge) Printing PDF Files Using the ContentsBridge Utility Printing PDF Files without Using the ContentsBridge Utility Sending a Document to the Printer by E-Mail (E-mail Printing) Setting up the Environment for E-mail Printing Sending E-mails...
-
Page 7: Troubleshooting
Replacing Drum Cartridges [A1], [A2], [A3], and [A4] Replacing the Waste Toner Container [B]. Replacing the Staple Cartridge Replacing the Staple Cartridge for Saddle Stitch Disposing Chips from Punch Dust Box Printing Report/List Types of Reports/Lists Printing Report/List Checking Total Number of Printed Pages Checking Total Number of Printed Pages by Meter Checking Total Number of Printed Pages by [Printer Meter Report] Using Power Saver Mode... - Page 8 Troubleshooting When Working in a TCP/IP Environment For Windows 95/Windows 98/Windows Me For Windows NT 4.0/Windows 20000/Windows XP/Windows Server 2003 Troubleshooting When Using CentreWare Internet Services Troubleshooting When Using E-mail Services Setting Common Menu Outline of Common Menu About Menu Structure About Common Menu Description of Common Menu Print Language Setting...
- Page 9 ◆...
-
Page 10: Types Of Manuals
Types of Manuals We provide the following guides for optimum usage of the machine. Manuals Supplied with this Printer and Their Contents The following manuals come with this printer. Setup Guide This guide explains the procedure for installing the printer. User Guide This guide explains how to set up and operate the printer and troubleshooting. -
Page 11: Using This Guide
Using This Guide Prerequisite This guide assumes that you have a basic knowledge of the operating environ- ment of your computer, network environments, and how to operate the com- puter. For more information about the environment of your computer, basic knowledge of network environments, and how to operate the computer, refer to the manuals supplied with the computer, OS (Operating System), and network system. - Page 12 Chapter 7 Setting Control Panel This chapter explains the items that can be set from the control panel of this printer and how to set them. Appendices These appendix includes main specifications of this printer and Q&A. Notations (1)In this guide, "computer" refers to a personal computer or workstation. (2)The following icons are used in this guide depending on the type of information: Indicates important information which you should read.
-
Page 13: Safety Notes
Safety Notes For your own safety, please read this page carefully before using the machine. Graphic symbols used throughout this guide Used for items that if not followed strictly, can lead to severe or fatal injuries. Used for items that if not followed strictly, can cause injuries to user or damages to printer. - Page 14 The machine has ventilation holes on the rear panel, and rear end and left side of the top panel. Ensure that the machine is installed with a minimum clearance of 100mm from the rear vent to the wall. A poor ventilation can cause excessive inter- nal heat and fire.
- Page 15 When moving the machine, do not tilt it more than 10 degrees. If tilted excessively, the machine may fall over and cause injuries. Front Left Front Left Rear Rgiht Rgiht Rear When the machine is installed, be sure to lock the caster stoppers. An unlocked machine may fall over or slide and cause injuries.
- Page 16 For Power & Earth Connection The power specifications are listed below. The specifications that apply to your machine depend on your machine configuration. Connect the power plug only to a properly rated power outlet. Otherwise, it can cause fire or electric shocks. If in doubt, contact our Customer Support Center.
- Page 17 To prevent fire or electric shock, follow the instructions below based on your printer configuration. If in doubt, contact our Customer Support Center. - If your printer is a 220-240 V model, there is no need to attach a separate earth line since the earth connection is incorporated in the power line.
- Page 18 The machine has a circuit breaker. In the event of a current leakage, the breaker will automatically cut off the power circuit to prevent any leakages or fire from occur- ring. The breaker is normally On ("|"). Once a month, check the breaker for correct operation.
- Page 19 For Machine Operation Do not place any liquid container such as a vase or coffee cup on the machine. Spilt water can cause a fire or electric shock Do not place any metal parts such as staples or clips on the machine. If metal and flammable parts get into the machine, they can short-circuit internal components, and cause fire or electric shock.
- Page 20 Do not use conductive paper, e.g. folding paper, carbonic paper and coated paper. When paper jam occurs, they can cause a short circuit and fire. Never touch areas labeled as "High Voltage." You can get an electric shock. Never touch a labeled area found on or near the heat roller. You can get burnt. If a sheet of paper is wrapped around the heat roller, do not try to remove it by yourself to avoid injuries or burns.
- Page 21 For Consumables Never throw a toner cartridge into an open flame. It can cause an explosion and you can get burnt. Never throw toner, a waste toner container, or a toner container into an open flame. It can cause an explosion and you can get burnt. Never use a vacuum cleaner when you clean spilled toner.
- Page 22 For Finisher When removing jammed staples, take care not to injure your fingers. Never touch the moving parts of the finisher during it is operated. It will cause you to get an injury. Never touch the safety switch. The safety switch activates to stop the machine operation when the front doors are opened or the finisher is disconnected from the main body by being moved to the right direction.
- Page 23 ■ Labels indicating Warning and Caution Warning and caution labels are attached inside the printer to ensure safe use of this printer. Read and follow the instructions carefully for your safety. *This label is located behind the waste toner container cover. xxiii...
-
Page 24: The Objectives Of The International Energy Star Program
The Objectives of the International Energy Star Program To protect the global environment and conserve energy sources, the International Energy Star Program encourages the following product features. Fuji Xerox confirms DocuPrint C4350 satisfies the requirements for this program. Sleep Mode feature... -
Page 25: About License
About License OpenSSL Copyright (c)1998-2003 The OpenSSL Project. All rights reserved. Redistribution and use in source and binary forms, with or without modification, are permitted provided that the following conditions are met: 1. Redistributions of source code must retain the above copyright notice, this list of conditions and the following disclaimer. - Page 26 SSLeay Copyright (c)1995-1998 Eric Young (eay@cryptsoft.com). All rights reserved. This package is an SSL implementation written by Eric Young (eay@crypt- soft.com). The implementation was written so as to conform with Netscapes SSL. This library is free for commercial and non-commercial use as long as the follow- ing conditions are aheared to.
-
Page 27: Jpeg Code
AGES (INCLUDING, BUT NOT LIMITED TO, PROCUREMENT OF SUBSTITUTE GOODS OR SERVICES; LOSS OF USE, DATA OR PROFITS; OR BUSINESS INTERRUPTION) HOWEVER CAUSED AND ON ANY THE- ORY OF LIABILITY, WHETHER IN CONTRACT, STRICT LIABILITY, OR TORT (INCLUDING, NEGLIGENCE OR OTHERWISE) ARISING IN ANY WAY OUT OF THE USE OF THIS SOFTWARE, EVEN IF ADVISED OF THE POSSIBILITY OF SUCH DAMAGE. -
Page 28: Illegal Copies And Printouts
Illegal Copies and Printouts Copying or printing certain documents may be illegal in your country. Penalties of fines or imprisonment may be imposed on those found guilty. The following are examples of items that may be illegal to copy or print in your country. Currency ●... -
Page 29: Table Of Contents
Setting up the Printer Environment Printer Environment ................2 Printer Environment Setting Flow ............8 Setting the IP Address ............... 9 1.3.1 Setting Flow ..............10 1.3.2 Setting Addresses............. 11 Setting the Port ................15 1.4.1 Enabling the Port .............. 15 1.4.2 Enabling the SNMP Agent .......... -
Page 30: Printer Environment
Printer Environment This section describes the environments where this printer can be used. When connected to the computer directly, this printer can be used as a local printer. When connected to a network, this printer can be used as a network printer. Since this printer is compatible with multiple protocols, it can be shared among the printers installed in different network environments. - Page 31 1.1 Printer Environment ® Window network (SMB) "SMB (Server Message Block)" is a protocol used to share a file and printer ® under Windows 95/Windows 98/Windows Me/Windows NT 4.0/Windows 2000/ Windows XP/Windows Server 2003. SMB allows you to send print data to the printer on the same network (Ethernet interface) without passing through the server and print it.
- Page 32 When printing from the Windows 95/Windows 98/Windows Me computer in the TCP/IP environment, use TCP/IP Direct Print Utility. "TCP/IP Direct Print Utility" is Fuji Xerox software used to send print data from the Windows 95/Windows 98/Windows Me computer to the printer on the same network (Ethernet interface) directly without passing through the server and print it.
- Page 33 1.1 Printer Environment TCP/IP (UNIX) Since this printer supports the TCP/IP protocol, you can print from the UNIX computer. To do this, you need to assign the IP address to this printer and the UNIX computer. For information about how to print from a UNIX workstation, refer to the manual stored on the "Driver CD Kit"...
- Page 34 1.1 Printer Environment ® AppleTalk Since this printer supports the AppleTalk protocol, you can print from the Macin- ® tosh using EtherTalk ® For how to use EtherTalk , refer to the manual stored on the "PostScript Driver Library" CD-ROM.
- Page 35 1.1 Printer Environment Internet Printing (IPP) Since this machine supports IPP (Internet Printing Protocol), you can send print data from the Windows Me/Windows 2000/Windows XP/Windows Server 2003 computer to a remote printer over the Internet or Intranet and print it. In addition, since Windows 2000/Windows XP/Windows Server 2003 supports the client software (IPP port monitor) used to print via the IPP printer, you can specify an IPP-compliant printer from the Add Printer Wizard.
-
Page 36: Printer Environment Setting Flow
Printer Environment Setting Flow This section describes the printer environment setting flow. Confirm the settings necessary for setting up the printer environment with reference to the chart below. For more information, refer to the manual stored on the "Driver CD Kit" and "PostScript Driver Library"... -
Page 37: Setting The Ip Address
Setting the IP Address This section describes how to set the IP address. You can set the IP address using one of the following two methods: Setting the IP address from the control panel. ● Using the "IP Address Setting Tool" contained on the "Driver CD Kit" CD-ROM supplied ●... -
Page 38: Setting Flow
1.3 Setting the IP Address 1.3.1 Setting Flow If you are not certain whether a DHCP server exists, follow the procedure dis- cussed below to check whether it exists. If the DHCP server exists, the IP address is automatically set and so you need not enter the IP address. If the DHCP server does not exist, set the IP address with reference to "1.3.2 Setting Addresses"... -
Page 39: Setting Addresses
1.3 Setting the IP Address Printing the Settings List Procedure Print the "System Settings List" with reference to "5.6 Printing Report/ List (P.152)". In the "System Settings List", check the addresses of [TCP/IP: IP Address], [TCP/IP: Subnet Mask], [TCP/IP: Gateway Address] and [WINS: Primary WINS Server Address], [WINS: Secondary WINS Server Address] under [Communication Settings]. - Page 40 1.3 Setting the IP Address Setting the IP Address...
- Page 41 1.3 Setting the IP Address Setting the Subnet Mask/Gateway Address...
- Page 42 1.3 Setting the IP Address...
-
Page 43: Setting The Port
Setting the Port After setting the IP address or checking the setting, enable the port and set the transport protocol as required. This section describes the procedure for setting the port status to [Enable], the procedure for setting the SNMP agent status (Default: Enable) to [Enable], and the procedure for enabling the SMP port and transport protocol. -
Page 44: Enabling The Snmp Agent
1.4 Setting the Port 1.4.2 Enabling the SNMP Agent Enable the SNMP agent and select a transport protocol from among [IPX], [UPD], and [IPX, UPD]. - Page 45 1.4 Setting the Port...
-
Page 46: Enabling The Smp Port And Protocol
1.4 Setting the Port 1.4.3 Enabling the SMP Port and Protocol This section describes the procedure for enabling the SMB port and selecting the transport protocol. - Page 47 1.4 Setting the Port...
-
Page 48: About Allocation Of Memories
About Allocation of Memories This section describes allocation of memories. Memory allocation for this printer is shown in the table below. Memory type Standard Print page buffer HPGL auto layout memory PS memory Receive buffer capacity : Supported : Not supported when an internal hard disk drive (option) is installed. When an optional internal hard disk drive is installed, you can select [Hard Disk] for the LPD, SMB, or IPP receive buffer (spool) settings. - Page 49 1.5 About Allocation of Memories HPGL Auto Layout Memory Specify the capacity of the memory to be used for the (HP-GL/2) auto layout. PS Memory Specify the capacity of the memory to be used for PostScript. Receive Buffer Capacities "Receive buffer" is the area where the data received from the computer is stored temporarily.
- Page 50 1.5 About Allocation of Memories In this mode, the print data output by the application is sent to this printer and printed directly. While this printer is processing a print request from a com- puter, it rejects print requests from other computers.
- Page 51 Installing the Print Driver Overview ..................24 2.1.1 Supported Operating Systems and Required System Environment..............24 Print Driver Installation ..............25 2.2.1 When Printing via the Printer on the Network (TCP/IP Environment (LPR/LPD)) ........26 How to Get the Latest Print Driver ........... 27 Uninstallation ...................
-
Page 52: Overview
* 4: Supports Mac OS 7.5 or later, 8.x, 9.x, Mac OS X 10.2.x/10.3.x. * 5: For Windows 98/ME, USB Print UTility is required (the utility software is supplied by Fuji Xerox). Refer to the manual stored on the "Driver CD Kit" CD-ROM. -
Page 53: Print Driver Installation
Print Driver Installation The printer drive installation method varies depending on the environment you use. Install the print driver with reference to the relevant section. ■When printing on the TCP/IP network using ipr 2.2.1 When Printing on the Network (TCP/IP Environment (LPR/LPD)) (P.26) Install the print driver with reference to the manual stored on the "Driver CD Kit"... -
Page 54: When Printing Via The Printer On The Network (Tcp/Ip Environment (Lpr/Lpd))
This section describes the procedure for installing the print driver to print directly from the computer via the printer on the TCP/IP network. If your OS is Windows 95/Windows 98/Windows Me, Fuji Xerox's TCP/IP Direct Print Utility is ● installed together with the print driver. -
Page 55: How To Get The Latest Print Driver
Using the driver install tool "CentreWare EasyOperator" allows you to download the latest print ● driver from Fuji Xerox home page when the print driver you use now is older than it. For details on how to update your print driver, refer to the manual stored on the "Driver CD Kit" CD-ROM sup-... -
Page 56: Uninstallation
Uninstallation Uninstallation of Print Driver The print driver for Windows can be uninstalled using the print driver uninstall tool stored on the "Driver CD Kit" CD-ROM supplied with this printer. For more information, refer to the manual stored on the "Driver CD Kit" CD-ROM supplied with this printer. - Page 57 Basic Operations Main Components and Their Functions ........... 30 Switching on/off the Printer .............. 36 3.2.1 Switching on the Printer............ 36 3.2.2 Switching off the Printer............ 37 3.2.3 Circuit Breaker ..............38 Canceling or Checking the Status of Print Jobs....... 39 3.3.1 Canceling Print Jobs from the Computer......
-
Page 58: Main Components And Their Functions
Main Components and Their Functions Main Unit Front View Standard + 3 tray module (option) Standard + high capacity feeder (option) Standard + 1 tray module (option) The illustrations shown in this guide are those of the printer that has a 3 tray module (1650 Sheet Feeder). - Page 59 3.1 Main Components and Their Functions Rear View Internal View Never touch a labeled area found on or near the heat roller. You can get burnt. If a sheet of paper is wrapped around the heat roller, do not try to remove it by yourself to avoid injuries or burns. Switch off the machine immediately, and contact our Cus- tomer Support Center.
- Page 60 3.1 Main Components and Their Functions Professional Finisher C Name Description Front cover (G) Open this cover when clearing a paper jam, adding staples, removing a stable jam, or removing punched hole chips. Output tray Printed sheets of paper are ejected here. Exit cover Open this cover to clear a paper jam.
-
Page 61: Control Panel
3.1 Main Components and Their Functions Control Panel This section describes the control panel. For the messages displayed on the LCD, refer to "3.1 LCD Indications" (P.34). Name Description Indicator Check the position of the cover or tray indicated by the error message. <Toner Replace- This indicator goes on when the toner runs low. -
Page 62: Lcd Indications
3.1 Main Components and Their Functions Name Description <Power Saver> but- This button illuminates in green when the printer is saving power. If this button is pressed when the printer is saving power, the printer stops sav- ing power. If this button is pressed when the printer is not saving power, the printer starts saving power. -
Page 63: Menu Mode Screen
3.1 Main Components and Their Functions Menu Mode Screen This screen is used to set menu options. To display the menu mode screen, press the <Menu> button. The network/port setting screen is displayed as follows: For more information about the menu screen, refer to "7 Setting Common Menu" (P.255). -
Page 64: Switching On/Off The Printer
Switching on/off the Printer When using this printer, turn it on. The printer will be ready for printing about 45 seconds later. When you finished all print jobs for the day or will not use the printer for a long period of time, be sure to turn off the printer. -
Page 65: Switching Off The Printer
3.2 Switching on/off the Printer 3.2.2 Switching off the Printer Turn off the printer following procedure below. When the printer is turned off, the print data remaining in the printer and the information spooled ● in the memory are erased. Procedure View the LCD on the control panel to make sure that no print job is being pro-... -
Page 66: Circuit Breaker
3.2 Switching on/off the Printer 3.2.3 Circuit Breaker The machine has a circuit breaker. In the event of a current leakage, the breaker will automatically cut off the power circuit to prevent any leakages or fire from occurring. The breaker is normally On ("|"). Once a month, check the breaker for correct operation. -
Page 67: Canceling Or Checking The Status Of Print Jobs
Canceling or Checking the Status of Print Jobs To cancel print jobs, first cancel the print instruction from the computer. If the print instruction cannot be cancelled from the computer, cancel it from the printer. You can check the status of the print jobs sent to the printer from the computer. 3.3.1 Canceling Print Jobs from the Computer This section describes the procedure for canceling the print instruction from the... -
Page 68: Canceling Print Jobs From The Printer
3.3 Canceling or Checking the Status of Print Jobs 3.3.2 Canceling Print Jobs from the Printer Canceling the Job in Process To cancel the print job being processed on the printer, press the <Cancel Job> button on the control panel. Note that printing of the current page will be com- pleted. -
Page 69: Checking The Status Of Print Jobs
3.3 Canceling or Checking the Status of Print Jobs Press the <Online> button. Press the <Online> button [Ready to print] is displayed. Now you are finished with the procedure. 3.3.3 Checking the Status of Print Jobs Checking the Status on Windows The procedure for checking the status of print jobs on Windows is described below. -
Page 70: Ejecting The Remaining Print Data Forcibly
Ejecting the Remaining Print Data Forcibly This section describes how to execute all the print jobs received by this printer. Ejecting the print data from the control panel allows you to interrupt reception of print data and empty the receive buffer. You can also delete all the print jobs received by this printer. -
Page 71: Loading Configuration Of Options And Paper Settings For Trays
Loading Configuration of Options and Paper Settings for Trays If you are using this printer as a network printer, you can load the printer configuration and the paper type and size specified for the tray on the control panel into the print driver. If you are using this printer as a local printer, this feature is not available. - Page 73 Printing Flow of Printing (Windows) .............. 46 Setting of Printing Features ............. 47 4.2.1 Setting Printing Features ..........47 4.2.2 Using the Online Help............48 Printing on Special Paper..............49 4.3.1 Printing on Special Paper Using Tray 5 (Bypass Tray)..50 4.3.2 Printing on Special Paper Using Trays 1 to 4 ....
-
Page 74: Flow Of Printing (Windows)
Flow of Printing (Win- dows) This section describes the basic flow of printing in a Windows environment. (The flow may differ depending on the computer or system configuration used.) Start up the application used on the computer For the startup procedure, refer to the manual that comes with the application. If necessary Check settings of menu options Before sending print data from the computer, perform the following checks:... -
Page 75: Setting Of Printing Features
Setting of Printing Fea- tures 4.2.1 Setting Printing Features You can set most printing features on the tabs in the properties dialog box of the print driver which is displayed when printing from the application, or the tabs in the properties dialog box of the printer icon which is installed in your printer. For information about the setting items of the print driver and how to set them, refer to the Online Help for PCL6 print driver. -
Page 76: Using The Online Help
4.2 Setting of Printing Features 4.2.2 Using the Online Help Using the Online Help, you can view the description of the items displayed in the properties dialog box of the print driver and how to set printing properties. The procedure for displaying the Online Help is discussed below. Procedure Click [Start], select [Printers and Faxes], and then display the proper- ties dialog box of the printer to be used. -
Page 77: Printing On Special Paper
Printing on Special Paper This printer can print on the following special paper: Labels, Heavyweight paper 2, Heavyweight paper 2 (Side 2), Coated paper 2, and Coated paper 2 (Side 2) can be used via tray 5 (bypass tray). Bond paper Labels ●... -
Page 78: Printing On Special Paper Using Tray 5 (Bypass Tray)
4.3 Printing on Special Paper 4.3.1 Printing on Special Paper Using Tray 5 (Bypass Tray) The method of displaying the Properties dialog box for this printer differs depending on the applica- tion. Refer to the guide for the application used. For how to use tray 5 (bypass tray), refer to "5.4 Loading Paper"... -
Page 79: Printing On Special Paper Using Trays 1 To 4
4.3 Printing on Special Paper Click [OK] to proceed to printing. 4.3.2 Printing on Special Paper Using Trays 1 to 4 When printing with paper loaded in trays 1 to 4, you need to specify the paper type on the control panel. Specify the paper type with reference to (2) "Selecting the Paper Type"... -
Page 80: Printing On Postcards/Envelopes
Printing on Postcards/ Envelopes This section describes the procedure for printing on postcards/envelopes. For how to use tray 5 (bypass tray), refer to "5.4 Loading Paper" (P.115). 4.4.1 Loading Postcards/Envelopes Load postcards/envelopes in tray 5 (bypass tray). Procedure This section describes how to load postcards/envelopes in tray 5 (bypass tray). -
Page 81: Configuring Settings For Printing
4.4 Printing on Postcards/Envelopes 4.4.2 Configuring Settings for Printing To configure the settings for printing, use the [Paper/Output] tab and the [Paper] tab. Here, we use WordPad for Windows XP as an example. The procedure is the same for other operating systems. The method of displaying the Properties dialog box for this printer differs depending on the applica- tion. - Page 82 4.4 Printing on Postcards/Envelopes For postcards, select [##Postcard (100x148mm)##]] from [Paper Size]. For envelope, select [##Envelope(148x200mm)##] from [Paper Size]. Click [OK] to proceed to printing.
-
Page 83: Printing On A Registered Form (Overlay Printing)
Printing on a Registered Form (Overlay Printing) You can print a document over the form created in advance. This feature is called "overlay printing". With this feature, you can print all pages with the created form overlaid. To use this feature, you need to create/register form data file. Form (registered in advance.) Data sent from application (sent later) - Page 84 4.5 Printing on a Registered Form (Overlay Printing) Check the [Create / Register Forms] checkbox. Enter the form name (max. 8 characters) in [File Name]. To register the previously created form again, click the form name in [Watermarks], click [Edit] to make appropriate changes, and then click [OK}.
-
Page 85: Printing Using A Form
4.5 Printing on a Registered Form (Overlay Printing) 4.5.2 Printing Using a Form Procedure Using the application, create a document to be laid over the form. Select [Print] from the [File] menu. Check [Select Printer] and then click [Preferences]. Click the [Watermarks/Forms] tab. Check the [Image Overlay] checkbox. -
Page 86: Printing On Non-Standard Size/Long-Size Paper
Printing on Non-Standard Size/Long-size Paper This section describes how to print on non-standard size paper such as long-size paper. This printer supports the following paper sizes: For trays 1-4 For tray 5 (bypass tray) Short edge Short edge Paper (vertical): (vertical): feed 100 to 305.0 mm... - Page 87 4.6 Printing on Non-Standard Size/Long-size Paper Procedure Load long-size paper in tray 5 (bypass tray) with the print side facing down and the trailing edge curled as shown on the right. Curl the trailing edge of the long-size paper as far as ●...
-
Page 88: Setting Non-Standard Paper Sizes
4.6 Printing on Non-Standard Size/Long-size Paper 4.6.2 Setting Non-standard Paper Sizes Register non-standard sizes in the print driver. When loading non-standard size paper in trays 1-4 for printing, you also need to make settings on the control panel. Non-standard size paper cannot be loaded in the optional tray 3 (large capacity) and optional tray 4 (large capacity). - Page 89 4.6 Printing on Non-Standard Size/Long-size Paper...
- Page 90 4.6 Printing on Non-Standard Size/Long-size Paper Configuring the Print Driver Settings To register non-standard paper sizes, use the [Custom Paper Size] dialog box. Registering non-standard paper sizes as custom paper sizes allows you to select them from [Paper Size] on the [Paper/Output] tab. You can register up to 20 paper sizes and assign names to them.
- Page 91 4.6 Printing on Non-Standard Size/Long-size Paper Click [Custom Paper Size]. The [Custom Paper Size] dialog box appears. Select a desired custom definition from the [Details] list box. In [Settings for], specify the lengths of short and long edges. You can either enter the values using the keys on the keyboard, or [ ] and [ ] on the dialog box. The short edge cannot be longer than the long edge even if it is within the allowable range.
-
Page 92: Printing On Non-Standard Size Paper
4.6 Printing on Non-Standard Size/Long-size Paper 4.6.3 Printing on Non-standard Size Paper This section describes how to print on non-standard size paper. The procedure is the same for other operating systems. The method of displaying the Properties dialog box for this printer differs depending on the applica- tion. -
Page 93: Setting The Truetype Font Printing
Setting the TrueType Font Printing This section describes how to edit the TrueType font substitution table used to specify True- Type font substitution for each font and how to substitute a TrueType font for another True- Type font. 4.7.1 Editing the TrueType Font Substitution Table The TrueType font substitution table allows you to specify TrueType font substi- tution for each font. -
Page 94: Setting The Truetype Font Printing
4.7 Setting the TrueType Font Printing Select the font to be changed from the [TrueType Fonts] column. From the [Select Printer Font], select the printer font to be used. If [Soft fonts] is selected, a TrueType font will be downloaded to the printer dur- ing printing. - Page 95 4.7 Setting the TrueType Font Printing Procedure Select [Print] from the [File] menu. Check [Select Printer] and then click [Preferences]. Click the [Detailed Settings] tab. Click [Specify Font]. Select the appropriate radio button. Click [OK] to proceed to printing.
-
Page 96: Printing Confidential Documents/Printing After Checking The Printout (Secure/Sample Print)
Printing Confidential Documents/ Printing after Checking the Printout (Secure/Sample Print) The secure print (printing confidential documents) and sample print (checking a sample print and then printing the remaining copies) features are available when an internal hard disk drive is installed in this printer. The internal hard disk drive has a risk of failure. -
Page 97: Making Secure Print And Sample Print
4.8 Printing Confidential Documents/Printing after Checking the Printout (Secure/Sample Print) 4.8.1 Making Secure Print and Sample Print This section describes how to make secure print or sample print. First, configure the secure/sample print job on the computer. Next, execute a print command on the printer to print out print data. - Page 98 4.8 Printing Confidential Documents/Printing after Checking the Printout (Secure/Sample Print) Enter the user ID in the [User ID] text box. You can enter up to eight characters in this text box. To assign a password, enter it in the [Password] text box. You can enter up to four characters in this text box.
- Page 99 4.8 Printing Confidential Documents/Printing after Checking the Printout (Secure/Sample Print) Operation on the control panel The following procedure is for outputting the print data stored in this printer using the secure/sample print feature. To next page To next page...
- Page 100 4.8 Printing Confidential Documents/Printing after Checking the Printout (Secure/Sample Print) From previous page From previous page (Secure print) (Sample print) As the user ID, the user name (up to 8 characters) specified in [Secure Print/Sample Print User ● Name] on the [Configuration] tab of the PCL6 print driver is displayed. As the password, use the password entered in the [Password] text box in the [Secure Print] dialog ●...
-
Page 101: Printing At The Specified Time (Delayed Printing)
Printing at the Specified Time (Delayed Printing) When an internal hard disk drive (optional) is installed in this printer, you can use the delayed print feature. With this feature, you can register a document in advance and print it automatically at the specified time. The internal hard disk drive has a risk of failure. - Page 102 4.9 Printing at the Specified Time (Delayed Printing) Select [Delayed Print] from [Job Type]. The [Delayed Print] dialog box appears. Enter the time to start printing in [Hour] and [Minutes]. Enter the time in 24-hour form. Select [Enter Document Name] or [Auto Retrieve] from [Retrieve Docu- ment Name].
- Page 103 4.9 Printing at the Specified Time (Delayed Printing) Operation on the Control Panel To cancel delayed printing or perform printing in defiance of the specified time, operate the control panel as follows: The document name (up to 12 bytes) entered in [Document Name] in the [Delayed Print] dialog box displayed from the [General] tab.
-
Page 104: Setting Print Modes
4.10 Setting Print Modes You can make detailed settings for color printing. To make detailed settings, use the [Image Options] tab. The followings are the print modes that can be set on the [Image Options] tab. About [Output Color] Select [Color (Auto)] or [Black] from this box. Option Description Color (Auto) - Page 105 4.10 Setting Print Modes Option Description Standard Suitable for printing documents containing texts, graphs, and photos. Photo Can reproduce photos and gradations more beautifully. This image quality is suitable for printing images represented by sRGB. Presentation Can print documents with colors adjusted to vivid colors. This image quality is suitable for the documents for presenta- tion use.
- Page 106 4.10 Setting Print Modes When printing you can specify the resolution to be reported to the application. Select [Auto], [600 dpi], [300 dpi], or [200 dpi] from [Resolution] in the [Detailed Settings] dialog box on the [Image Options] tab according to the type of prints you want to make. Although this printer supports resolu- tion of 600 dpi only, selecting [300 dpi] or [200 dpi] reports resolution of 300 dpi or 200 dpi to the application that cannot print normally at 600 dpi.
- Page 107 4.10 Setting Print Modes Select a mode from [Image Adjustment Mode]. If you have selected [Recommended] from [Image Adjustment Mode], select the image type from [Image Types]. If you have selected [ICM Adjustment (System)], select a color conversion method from [Intent]. [ICM Adjustment (System)] appears only when you are running Windows 98/Windows Me/Windows XP/Windows 2003.
-
Page 108: Printing After Adjusting The Image Quality
4.11 Printing after Adjusting the Image Quality You can print after making detailed settings for the image quality. To make these settings, display the Graphic Properties screen. This screen has three tabs which allow you to make the following settings: Tab name Description Image Settings... - Page 109 4.11 Printing after Adjusting the Image Quality Procedure Select [Print] from the [File] menu. Check [Select Printer] and then click [Preferences]. Click the [Image Options] tab, and then click [Image Settings]. The [Graphics Properties] dialog box having the [Image Settings] tab will open. Click the [Apply to All Elements] or [Apply to Selected Element] radio button.
-
Page 110: 4.11.2 Adjusting The Color Balance
4.11 Printing after Adjusting the Image Quality 4.11.2 Adjusting the Color Balance You can print after adjusting the densities of cyan, magenta, yellow, and black toners. You can adjust the density of each color toner at three levels (low, middle, and high) where you can finely adjust the density in seven steps (-3 to + 3). -
Page 111: Compensating For The Differences In Characteristics Between Device (Monitor, Scanner, Etc.)
4.11 Printing after Adjusting the Image Quality Adjust the density. Using [ ] and [ ] under the Low, Mid, and High graphs, you can adjust the density at three levels (low, middle, and high) where you can finely adjust the density in seven steps (-3 to + 3). Click [OK]. - Page 112 4.11 Printing after Adjusting the Image Quality When the [ICC Profile] dialog box is opened in Windows 98/Me/2000/XP/Server 2003, the default directory is as follows: x:\[Windows system directory] \color? "x" indicates the name of the drive containing the system. To make adjustments, use the [Profile Settings] tab. Here, we use WordPad for Windows XP as an example.
- Page 113 4.11 Printing after Adjusting the Image Quality Procedure Select [Print] from the [File] menu. Check [Select Printer] and then click [Preferences]. Click the [Image Options] tab, and then click [Profile Settings]. The [Graphics Properties] dialog box having the [Profile Settings] tab will open. Click [Color Temperature / Gamma Correction] or [ICC Profile], and then select the compensation method.
-
Page 114: Printing After Registering Frequently Used Settings (Favorites)
4.12 Printing after Registering Fre- quently Used Settings (Favorites) You can register frequently used settings in [Favorites] and select them for printing. 4.12.1 Registering Settings in [Favorites] The following is an example of printing an A4-size document with multiple pages on sheets of A4-size paper in the 2-up page layout mode. -
Page 115: 4.12.2 Printing Using The Registered Settings
4.12 Printing after Registering Frequently Used Settings (Favorites) Click [OK] in the [Save Favorites] dialog box. To modify or delete the settings registered in [Favorites], click [Edit] shown on the right side of the [Favorites] box. For more details, refer to the On-line Help for the print driver. Click [OK]. -
Page 116: Printing Pdf Files Directly (Contentsbridge)
4.13 Printing PDF Files Directly (ContentsBridge) As this printer is provided with ContentsBridge, you can send PDF files directly to the printer without using the print driver. Since the print data is sent to the printer directly, you can print data more easily and faster than when using the print driver. -
Page 117: Printing Pdf Files Using The Contentsbridge Utility
4.13 Printing PDF Files Directly (ContentsBridge) 4.13.1 Printing PDF Files Using the Contents- Bridge Utility Drag & drop Speedy ! Speedy ! PDF file ContentsBridge Easy ! Easy ! Operating Environment of ContentsBridge Utility Supported operating systems ● Windows 98, Windows Me, Windows 2000, Windows XP, Windows Server 2003 Installing the ContentsBridge Utility Copy [ContentsBridge.exe] from the "Driver CD Kit"... - Page 118 4.13 Printing PDF Files Directly (ContentsBridge) Printing PDF Files Procedure Double-click the [ContentsBridge] icon. The [ContentsBridge] dialog box appears. Select this printer from [Printer]. Enter the name of the path to the PDF file in [File to Print], or click [Browse] to select the file you want to print.
- Page 119 4.13 Printing PDF Files Directly (ContentsBridge) Click [Close] in the [ContentsBridge] dialog box. Printing PDF Files in a simple procedure Specifying this printer as a default printer and creating a [ContentsBridge] short- cut icon on the desktop allows you to print PDF files in a simple procedure. Procedure Drag and drop the PDF file you want to print to the [ContentsBridge] shortcut icon.
-
Page 120: Contentsbridge Utility
4.13 Printing PDF Files Directly (ContentsBridge) 4.13.2 Printing PDF Files without Using the Con- tentsBridge Utility You can send a PDF file directly to the printer and print the PDF file with the ipr command without using the ContentsBridge utility. In this case, the PDF file is printed based on the settings made for the following items: Print Mode Password... -
Page 121: Sending A Document To The Printer By E-Mail (E-Mail Printing)
4.14 Sending a Document to the Printer by E-Mail (E-mail Printing) E-mails can be sent from the computer to this printer when the printer is connected to the network and configured for TCP/IP communication and mail reception. You can print the e-mail message as well as the attached TIFF or PDF document with this printer. - Page 122 4.14 Sending a Document to the Printer by E-Mail (E-mail Printing) Set the following items on the Properties dialog box to match the mail environment. After making settings, be sure to click [Apply New Settings] and reboot the printer. *Default l Necessity of setting depending on Item⁄...
-
Page 123: 4.14.2 Sending E-Mails
4.14 Sending a Document to the Printer by E-Mail (E-mail Printing) 4.14.2 Sending E-mails Attached files that can be sent Files that can be sent as attached documents are as follows: PDF file ● Tiff file ● This section describes how to send e-mails from the computer to the printer using Outlook Express. -
Page 124: Precautions For Sending Documents By E-Mail
4.14 Sending a Document to the Printer by E-Mail (E-mail Printing) 4.14.3 Precautions for Sending Documents by E-mail Security precaution The e-mail is sent through the Internet connected to computers all over the world. So, you need to pay much attention to security to prevent the e-mail from being intercepted or altered by a third party. - Page 125 Maintenance Configuring the Printer from the Computer (CentreWare Internet Services) ............98 5.1.1 Outline of CentreWare Internet Services ......98 5.1.2 The CentreWare Internet Services Screen ....... 99 5.1.3 Browser Settings............. 100 5.1.4 Proxy Server and Port Numbers........101 5.1.5 Checking the Printer Settings .........
-
Page 126: Configuring The Printer From The Computer (Centreware Internet Services)
Configuring the Printer from the Com- puter (CentreWare Internet Services) 5.1.1 Outline of CentreWare Internet Services CentreWare Internet Services is a service that enables you to use a web browser to display the printer/job status or change the settings of this printer when it has been configured for use in TCP/IP environment. -
Page 127: The Centreware Internet Services Screen
5.1 Configuring the Printer from the Computer (CentreWare Internet Services) Browsers Netscape 7.0 for Windows and later ● Internet Explorer 6.0 Service Pack1 for Windows and later ● Netscape 7.0 for Macintosh and later ● Internet Explorer 5.2 for Macintosh and later ●... -
Page 128: For Internet Explorer
5.1 Configuring the Printer from the Computer (CentreWare Internet Services) Lower left panal Links to our home page, the Copyright screen, and online help are displayed. Contents of the bottom area are identical to all pages. 5.1.3 Browser Settings Before using this service, check the following settings in your browser. For Netscape Communicator Procedure Select [Preferences] from the [Edit] menu. -
Page 129: Proxy Server And Port Numbers
5.1 Configuring the Printer from the Computer (CentreWare Internet Services) In the [Settings] dialog box, select [Every visit to the page] or [Every time you start Internet Explorer] in the [Check for newer versions of stored pages] pane. Click [OK] to exit the dialog box. 5.1.4 Proxy Server and Port Numbers This describes proxy server settings and port numbers when using this service. -
Page 130: Checking The Printer Settings
5.1 Configuring the Printer from the Computer (CentreWare Internet Services) 5.1.5 Checking the Printer Settings If the Internet Services are not in use, enable the services using the following procedure. If the IP address is invalid, set the IP address after enabling Internet Services. Set the IP address fol- lowing messages on the LCD. -
Page 131: Items That Can Be Set For Centreware Internet Services
5.1 Configuring the Printer from the Computer (CentreWare Internet Services) 5.1.6 Items That Can Be Set for CentreWare Internet Services After enabling CentreWare Internet Services, you can set the following items relating to the services. Items that can be set in [Internet Services Setting] on the [Properties] screen: Auto Refresh Interval: (Default: 120 sec) - Page 132 5.1 Configuring the Printer from the Computer (CentreWare Internet Services) When specifying a port number, add ":" after the address, followed by "80" (default port number). The CentreWare Internet Service screen appears.
- Page 133 5.1 Configuring the Printer from the Computer (CentreWare Internet Services) Using On-line Help For information about items that can be set on each screen, click [Help] to see On-line Help. Click here. Jobs On the [Jobs] screen, the status of each protocol or print jobs instructed on the printer control panel is displayed.
-
Page 134: Mail Notice Service
Mail Notice Service If this printer is connected to the network in the environment which enables mail sending/ receiving, you can configure this printer so that end of the print job instructed from the com- puter can be notified by an e-mail, or error status in this printer and the history that this machine rejected the print/mail receive request can be notified to the specified e-mail address. - Page 135 5.2 Mail Notice Service ■Machine e-mail address setting In the Properties screen, set the machine e-mail address using [Machine Details - Machine E-mail Address]. ■Send protocol (SMTP server address) setting In the Properties screen, set the SMTP server address using [Protocol Settings - TCP/IP].
- Page 136 5.2 Mail Notice Service Set [Enable] of [Mail Notice Service] to ON. Click [Apply New Settings]. If a screen prompting input of user name and password, enter required items, and then click [OK]. If a message prompting restart of the machine, restart it.
- Page 137 5.2 Mail Notice Service After booting (if you restarted the machine), select the [Mail Notice Ser- vice] from the left frame, and then make settings as needed.##Screen capture to be replaced## Scroll the frame and click [Apply New Settings]. If a screen prompting input of user name and password, enter required items, and then click [OK]. If a message prompting restart of the machine, restart it.
- Page 138 5.2 Mail Notice Service Click [Printing Preferences] in the [General] tab. On the [Detailed Setteings] tab, set [E-mail Job Confirmation] to ON, and then enter the notifying address in [E-mail Address].
-
Page 139: Http Communications Via Encryption (Http-Ssl)
HTTP Communications via Encryption (HTTP-SSL) Setting the SSL function to ON enables secure HTTP communications between the network and a computer on that network. HTTP uses the SOAP, internet ser- vice, or IPP port. To encrypt communications, SSL/TLS protocol is used and a certificate is required. - Page 140 5.3 HTTP Communications via Encryption (HTTP-SSL) Click [General Security]. Create the certificate. 1) Click the [Generate Self-Signed Certificate] button. 2) Make settings for [Size of Public Key]. 3) Make settings for [Issuer]. 4) Click the [Generate Certificate] button. A screen appears to prompt input of the user name and pass- word.
- Page 141 5.3 HTTP Communications via Encryption (HTTP-SSL) Select the [Enable] check box for [HTTPS]. Display items contained in the folder. Make settings for [HTTPS Port Number]. Apply the settings to the machine. 1) Click the [Apply New Settings] button. 2) The right frame of the Web browser changes to prompt reboot of the machine. 3) Click [Reboot].
- Page 142 On the screen displayed, enter "(CD-ROM drive name):¥PCL\Win2000_XP", and then click [OK]. Select the DocuPrint C4350 driver, and then click [OK]. Select [Yes] if the machine is used as the default printer or [No] if not, and then click [Next].
-
Page 143: Loading Paper
To obtain the most out of this printer, it is recommended to use the paper intro- duced herein. If you want to use paper not recommended by Fuji Xerox, contact our Customer Support Center. When changing the paper type in a tray, change the tray setting to the corresponding one on the ●... -
Page 144: Standard Paper
"Please wait" is also sometimes displayed and printing is discontinued for 30 seconds or more when one sheet of paper A5 in size or smaller has been printed. ■Standard Paper The following table shows the standard paper recommended by Fuji Xerox. Paper Paper... - Page 145 A-zone (high temperature and humidity) 28ºC, 85% B-zone (normal office) 22ºC, 55% C-zone (low temperature and humidity) 10ºC, 15% ■Semi Standard Paper The following table shows the standard paper recommended by Fuji Xerox. Paper Paper Paper Size Image Quality Usage Notes...
-
Page 146: Usable Paper
5.4 Loading Paper Paper Paper Paper Size Image Quality Usage Notes Name Weight Type Gold Flag Plain Plain Paper D Small dots appear when used ship in the A- and C-zones. Gold Flag Plain Plain Paper D Small dots appear when used ship in the A- and C-zones. - Page 147 5.4 Loading Paper Paper Paper Size Paper Type Image Quality Usage Notes Name Weight P70 V703 Plain Plain Paper D Small dots appear in solid areas. To prevent this, use Premium paper. Xcite(Red) Plain Plain Paper D Small dots appear in solid areas when used in the A- and C-zones.
- Page 148 5.4 Loading Paper Paper Paper Size Paper Type Image Quality Usage Notes Name Weight Pro- Heavyweight 1 Heavyweight 1 Small dots or white areas Explore may appear. To prevent this, contact our Cus- tomer Support Center for adjustment. 3R95809 Solid areas may come out slightly lighter.
-
Page 149: Storing And Handling Paper
5.4 Loading Paper ■Storing and Handling Paper Please Keep the Following Points in Mind When Storing Paper Store paper inside a cabinet or other dry place. Paper that has absorbed mois- ● ture can cause paper jams and image quality defects. After opening a package of paper, wrap up the remaining paper to store it. - Page 150 5.4 Loading Paper Procedure Pull out the tray towards you until it stops When pulling out a paper tray, do it slowly. If pulled out with too much force, the tray can hit and injure your knees. Load and align the edge of the paper against the left edge of the tray with the M A X side to be printed on facing up.
- Page 151 5.4 Loading Paper Paper type settings procedure (1) Check if the paper loaded in the tray requires setting. (2) Set the paper type and size, as needed. (1) Check if the paper loaded in a tray requires setting. Find which paper is loaded in the tray from the lists of recommended paper type in "Paper Type"...
- Page 152 5.4 Loading Paper (2) Set the paper type. Use the control panel for paper type settings of Trays 1 to 4. When printing on special paper using Tray 5 (bypass tray), refer to "4.3.1 Printing on Special Paper Using Tray 5 (Bypass Tray)" (P.50). When setting on the control panel is complete, get the machine configuration information from the printer using the print driver.
-
Page 153: Changing The Size Of Paper In Trays 1 To 4
5.4 Loading Paper 5.4.3 Changing the Size of Paper in Trays 1 to 4 The following describes how to change the paper size on Trays 1 to 4. The paper type for Paper Trays 1 to 4 is configured. The default paper type setting is "Plain." When ●... - Page 154 5.4 Loading Paper While holding the grip, move the right paper guide lever to the right side of the tray. Load and align the edge of the paper against the front left edge of the tray with the side to be printed on facing up. Do not load mixed paper types into the tray.
-
Page 155: Loading Paper Into Tray 5 (Bypass)
5.4 Loading Paper 5.4.4 Loading Paper into Tray 5 (Bypass) When printing on postcards, envelops, or non-standard size paper that cannot be loaded in Trays 1 to 4, use Tray 5 (bypass tray). The following describes how to load paper into Tray 5 (bypass tray). Detailed print instructions are designated using the [Paper/Output] tab in the print driver. - Page 156 5.4 Loading Paper Check the position of the paper guides at the front side of Tray 5 (bypass). Normally, set the paper guide to the Normal position. If the paper guide is in the 12" (305mm) or 12.6" (320mm) position, return it to the Normal position. If using paper for prints whose width exceeds that of A3 (297mm), such as 12 x 18 inches or 12.6 x 17.7 (SRA3) inches, move the paper guide.
- Page 157 5.4 Loading Paper Moving the Position of the Paper Guide If using paper for prints whose width exceeds that of A3 (297mm), such as 12 x 18 inches or 12.6 x 17.7 (SRA3) inches, move the paper guide. to the 12" (305 mm) or 12.6"...
-
Page 158: Setting For Using Rough Surface Plain Paper
5.4 Loading Paper 5.4.5 Setting for Using Rough Surface Plain Paper Rough surface paper (plain) is the paper of which roughness of the surface is somewhat outstanding when observed through a light source. Change the [Paper Image Quality] setting to [D] or [G] on the control panel and then set the paper type. - Page 159 5.4 Loading Paper...
-
Page 160: Setting For Using Special Heavyweight Paper
5.4 Loading Paper 5.4.6 Setting for Using Special Heavyweight Paper When special heavyweight paper is used such as the medicine bag or name- card, change the Paper Image Quality setting on the control panel. For informa- tion about steps (1) through (7), refer to “5.4.5 Setting for Using Rough Surface Plain Paper”... -
Page 161: Automatic Tray Selection
5.4 Loading Paper 5.4.7 Automatic Tray Selection If you set paper source on the [Paper/Output] tab to [Paper Source] in the PCL6 print driver's properties screen when making prints, the machine automatically selects the corresponding paper tray according to the size and orientation of the document to print. -
Page 162: Replacing Consumables
Replacing Consumables 5.5.1 Consumables The following describes types and handling of consumables. The machine is pro- vided with the following consumables. The use of consumables not recommended by Xerox may impair quality and performance. Use only consumables recommended by Xerox for the machine. Type of consumable Type of consumable Product code... -
Page 163: Replacing Toner Cartridges
5.5 Replacing Consumables 5.5.2 Replacing Toner Cartridges This machine is equipped with cartridges containing four colors of toner; black (K), cyan (C), magenta (M), and yellow (Y). Each cartridge contains toner of respective color (image forming powder) which gradually consumed at every printing. - Page 164 5.5 Replacing Consumables Procedure Check that the printer is not printing, and then open the front cover. Turn the toner cartridge of the color indicated in the message anticlockwise to the unlocked position. "K" is for black, "C" is for cyan, "M" is for magenta, and "Y"...
-
Page 165: Replacing Drum Cartridges [A1], [A2], [A3], And [A4]
5.5 Replacing Consumables Insert the toner cartridge as far as pos- sible with the arrow ( ) on the car- tridge facing upwards. urn the toner cartridge clockwise to the locked position. Close the front cover. The message [Ready to print] appears on the LCD of the control panel. - Page 166 5.5 Replacing Consumables The number of pages that can be printed varies depending on documents. ● It is possible not to stop printing even when the life is reached. In this case, the message remains ● [Ready to print Replace Drum: xx]. For information about setting, refer to ”Drum Life End” (P.277) of "7.2.2 The System Administrator Menu".
- Page 167 5.5 Replacing Consumables Lift up the stopper on the left side of the front of the machine while pressing the bottom of the stopper upwards. Pull down the handle. The drum cartridge lock is released and the four drum cartridges rise up. Grip the handle of the drum cartridge (A1, A2, A3, or A4) indicated in the message and gently pull out the car-...
- Page 168 5.5 Replacing Consumables Do not place the new drum cartridge in an upright ● position. Return used toner cartridges to our Customer Sup- ● port Center for disposal. Place the new drum cartridge (with pro- tective cover) on the handle, and insert the end of the drum cartridge into the machine.
- Page 169 5.5 Replacing Consumables Pull down the stopper to lock the han- dle in place. Close the front cover. The [Ready to print] message appears on the LCD of the control panel.
-
Page 170: Replacing The Waste Toner Container [B]
5.5 Replacing Consumables 5.5.4 Replacing the Waste Toner Container [B]. Toner remaining on the drum after printing is gathered in the waste toner con- tainer. When it is almost the time to replace the waste toner container, the mes- sage [Ready to print Replace Bottle B] appears. Even after the message appears, you can print about 900 pages normally. - Page 171 5.5 Replacing Consumables Procedure Prepare a new waste toner container. Remove the new container, orange vinyl cap, and clean- ing rod from the box. Vinyl cap Cleaning rod Waste toner container Check that the printer is not printing, and then open the front cover. Open the black cover (B) at the front of the machine by pulling the left and right orange tabs downward.
- Page 172 5.5 Replacing Consumables Cover the top of the waste toner con- tainer with the supplied orange vinyl cap to prevent toner from spilling out. Hold the used waste toner container firmly with both hands and lift it into the empty box. The <L>...
- Page 173 5.5 Replacing Consumables Store the used cleaning rod with the used waste toner container. Hold the center section of the new waste toner container and push the container in as far as possible while making sure that the center section is properly aligned.
-
Page 174: Replacing The Staple Cartridge
5.5 Replacing Consumables 5.5.5 Replacing the Staple Cartridge When the Professional Finisher (optional) is installed and it is time to replace the staple cartridge (R1), a message appears on the LCD of the control panel. When this message appears, replace the staple cartridge with a new one. The use of staple cartridges not recommended by Xerox may impair quality and performance. - Page 175 5.5 Replacing Consumables Hold the right and left levers of the empty staple case ((1)) and remove the case from the cartridge as shown in the figure on the right. ((2)). Prepare a new staple case. Insert the case from its tip into the staple car- tridge ((1)), and then push the rear of the case until it seats((2)).
- Page 176 5.5 Replacing Consumables 5.5.6 Replacing the Staple Cartridge for Saddle Stitch When the Professional Finisher (optional) is installed and it is time to replace the staple cartridge for saddle stitch (R2, R3), a message appears on the LCD of the control panel.
- Page 177 5.5 Replacing Consumables Install a new staple cartridge for saddle stitch by holding pawls on both sides in position, and press it down lightly until you hear it click into place. Return the unit to its original position. Close the front cover of the finisher. A message will be displayed and the machine will not operate if the finisher's front cover is even slightly open.
- Page 178 5.5 Replacing Consumables 5.5.7 Disposing Chips from Punch Dust Box When the Professional Finisher (optional) is installed and the punch dust box is full of chips, a message appears on the LCD of the control panel. Dispose the chips according to the message. When the punch dust box is pulled out, make sure to dispose all chips without remaining any.
- Page 179 5.5 Replacing Consumables Push the empty punch dust box until it comes to a stop. Close the front cover of the finisher. A message will be displayed and the machine will not operate if the finisher's front cover is even slightly open.
-
Page 180: Printing Report/List
Printing Report/List This section describes the types of reports/lists and how to print them. 5.6.1 Types of Reports/Lists This machine has a feature that prints out the following reports and lists in addi- tion to printing data from the computer. Types of reports and lists that can be printed out vary according to options equipped to the machine. - Page 181 5.6 Printing Report/List For information about [PCL Settings List], [PCL Stored Form List], [HP-GL/2 Settings List], [HP- ● GL/2 Logical Printers/Stored Jobs List], and [HP-GL/2 Pallet List], refer to the manual contained on the proviced CD-ROM. ■Print example...
-
Page 182: System Settings
5.6 Printing Report/List System Settings List The following describes the system settings list. Some items may not be displayed depending on the settings of this printer. ■About the system settings list printer or network information are printed. Detailed items and print result are as follows. -
Page 183: Communication Settings
5.6 Printing Report/List Communication Settings Whether each port is enabled or disabled is printed. When enabled, the following items and values are printed. Ethernet settings Connection type and MAC address. TCP/IP How to obtain the IP address, IP address, subnet mask, gateway address, whether to limit receiving of printing by IP address, and status information. -
Page 184: Error History Report
5.6 Printing Report/List UPnP Discovery (port status and port number). Mail Notice Service Port status. E-mail settings - For POP3 receiving protocol Main receiving port status, receiving protocol, POP3 server (server name/IP address, port number, login name, and receive interval), POP receiving password encryption, whether to print header and contents (mail), and whether to receive only from specified domains. - Page 185 5.6 Printing Report/List Error message Cause and Action 016-711 (Out of PCL6 Cause: PCL6 print data cannot be processed because of Memory) the necessary memory is insufficient. Action: If the <Print Mode> is <Super Fine>, change the setting to <High Quality> and retry. If the problem is still not corrected, retry after changing the setting to <Standard>.
- Page 186 5.6 Printing Report/List Error message Cause and Action 016-726 Cause: When the print mode is specified to <Auto>, print language cannot be selected automatically. The possible causes are as follows: PDF file is directly sent to the printer using LPR without installation of built-in expansion hard disc.
- Page 187 5.6 Printing Report/List Error message Cause and Action 016-705 Cause: Secure print document cannot be registered, as extension hard disc is not installed. Action: The extension hard disc is required for using the secure print function. “4.8 Printing Confidential Documents/Printing after Checking the Printout (Secure/Sample Print)”(P.68) 116-701 Cause: 2 sided print cannot be done, as the memory is...
- Page 188 5.6 Printing Report/List Error message Cause and Action 116-718 Cause: The specified PCL form is not registered yet. Action: Use an already registered form or newly register the form. The form registration status can be checked using <PCL Forms List>. “5.6 Printing Report/List”(P.152) 116-737 Cause: User definition data cannot be registered, as PCL...
- Page 189 5.6 Printing Report/List Error message Cause and Action 116-748 Cause: No drawing data exists in the HP-GL or HP-GL/2 (optional) print data. Action: Check the print data. 116-780 Cause: A problem exists to the attached document received by the printer. Action: Check the attached document.
-
Page 190: Font List
5.6 Printing Report/List Meter Report (Print Jobs) You can check the total number of pages printed and the total number of sheets used in this machine for each computer (job owner). The number of pages printed is counted by color and black/white print. <Printer Meter Report> shows the numbers that are counted from data initialization. - Page 191 5.6 Printing Report/List TIFF Logical Printers List A list of logical printers which are created in TIFF print mode is printed. ■Contents of the List Settings on No. 1 to 20 logical printers registered are printed on the TIFF logical printers list.
-
Page 192: Postscript Font List
5.6 Printing Report/List PostScript Font List This paragraph describes the PostScript fonts list. ■What is the PostScript Fonts List? When the PostScript Software Kit is installed, fonts that can be used by Post- Script are printed on this list. ■Contents of the List The PostScript Fonts List shows the font types and sample characters contained in PostScript ROM. - Page 193 5.6 Printing Report/List Stored Document List A list of documents stored in the printer with the Secure and Sample Print fea- tures is printed on the Stored Documents List. ■Contents of the List This list contains the following items. Mailbox Size Used and available spaces of the confidential mailbox are printed.
-
Page 194: Printing Report/List
5.6 Printing Report/List 5.6.2 Printing Report/List Use the control panel to print reports/lists. Here, we describe how to print the <Fonts List> as an example. Steps are the same when printing other reports/ lists. -
Page 195: Checking Total Number Of Printed
Checking Total Number of Printed Pages This section describes how to check the total number of printed pages. There are two ways of counting the total number of printed pages, and how to check differs individually. One way is to checking the total number of printed pages for each meter which is classified by color mode such as color print or black/white print. -
Page 196: Checking Total Number Of Printed Pages By [Printer Meter Report]
5.7 Checking Total Number of Printed Pages 5.7.2 Checking Total Number of Printed Pages by [Printer Meter Report] You can check the total number of pages printed and total number of sheets used in this printer for each computer (job owner) on the printer meter report. The number of pages printed is counted by color and black/white print. - Page 197 5.7 Checking Total Number of Printed Pages How to print the Printer Meter Report...
- Page 198 5.7 Checking Total Number of Printed Pages Initializing the Printer Meter Data...
-
Page 199: Using Power Saver Mode
Using Power Saver Mode This printer has two power saver features, low power mode and sleep mode, for suppress- ing power consumption during standby. By default, the machine moves to the low power mode when no print data is received for 15 min and then the sleep mode when no data is received for additional 15 min (30 min after reception of the last data). - Page 200 5.8 Using Power Saver Mode...
- Page 201 5.8 Using Power Saver Mode...
-
Page 202: Exiting The Power Saver Mode
5.8 Using Power Saver Mode 5.8.2 Exiting the Power Saver Mode The power saver mode is automatically cancelled upon data reception from a computer. The mode can also be cancelled manually by pressing the <Power Saver> button on the control panel. -
Page 203: Adjusting Gradation
Adjusting Gradation 5.9.1 Gradation Adjustment When the color gradation of the print image is out, you can easily adjust it. Through this gradation adjustment, the image quality of this machine can be con- sistently maintained. To adjust the gradation, print the gradation adjustment chart and compare it with "Color sample for gradation adjustment"... - Page 204 5.9 Adjusting Gradation Printing Chart Gradation adjustment is divided into two types, resolution preferred and grada- tion preferred. To adjust the gradation of the high resolution-conscious part like texts, select the resolution preferred. To adjust the smoothness of gradation for graphics and photo images, select gradation preferred.
- Page 205 5.9 Adjusting Gradation To print the gradation adjustment chart for Resolution Preferred, select <Text> in step (6) of the flow- chart. How to get the setting value Get the value in [Lighter/Darker] by comparing the printed gradation adjustment chart and "Color sample for gradation adjustment" included with the printer. Find the density that is close to density of the color sample from 7 offset patches and their intermediates of the gradation adjustment chart.
- Page 206 5.9 Adjusting Gradation Cyan Magenta Fold Cyan Cyan Magenta Yellow Black Process Gray Cyan Margin Margin Margin Margin Margin Margin Margin Margin Margin Margin...
- Page 207 5.9 Adjusting Gradation Slide the chart vertically with the “ “ mark using as the starting point and read difference from the color sample on the scale. Pay attention to the negative (-) and positive (+) directions. Cyan Cyan Difference For the example on the left, density of the gradation adjustment chart close to the color sample is at the second position in the negative...
- Page 208 5.9 Adjusting Gradation Write the difference in the <Difference> box. For the remaining two densities of the same color, read the difference in the same way. Repeat steps 1 to 6 for the remaining colors of C, M, Y, and K to read the difference.
- Page 209 5.9 Adjusting Gradation Obtain an adjustment value based on the expression in Computation Table, and write it down in <Adjustment Value>. The value entered at the previous adjustment is displayed in <Current Value>. How to enter the value Enter the density value written in the <Adjustment Value> box on <Computation Table>...
- Page 210 5.9 Adjusting Gradation Click [Properties]. The [Properties] tab will be displayed. Click [Gradation Adjustment] in the area to the left. The following screen will be displayed in the area to the right . Select the value from the density menu of the appropriate color. Also, select values from other two density menus of the same color.
- Page 211 5.9 Adjusting Gradation After entering density values of all colors, click <Apply New Settings>. ■Entering the value on the control panel Steps for entering the density values are as follows. Here, we describe setting for middle density (M) of gradation preferred for cyan as an example.
- Page 212 5.9 Adjusting Gradation To check the adjustment result, refer to Printing Chart (P.184) and print the cor- responding chart. Check that Low, Middle, and High density dot marks on the chart of C, M, Y, or K, are close to those of the color sample. If you are not satisfied with the result, do the adjustment again.
-
Page 213: Cleaning The Printer
5.10 Cleaning the Printer Cleaning the exterior of printer Before you start to clean the machine, be sure to switch off and unplug the machine. Turn the ● machine off when cleaning to avoid the risk of electric shock. Do not use benzene, paint thinner, or other volatile liquids or spray insect repellent on the machine ●... - Page 214 5.10 Cleaning the Printer Hold the center section of the waste toner container and pull the container out until it comes to a stop. To prevent the waste toner container from tilting and spilling toner, place the container in another location away from the machine.
- Page 215 Troubleshooting Type of Problem................188 6.1.1 Course of Action for Troubleshooting ......188 6.1.2 Unusual Conditions............189 Clearing Paper Jams ..............192 6.2.1 Removing Jammed Paper in Trays 1 to 4 ...... 193 6.2.2 Removing Jammed Paper in Large-capacity Tray..194 6.2.3 Removing Jammed Paper in Tray 5 (Bypass Tray) ..
-
Page 216: Type Of Problem
Type of Problem 6.1.1 Course of Action for Troubleshooting The course of action for troubleshooting is as follows. Follow the steps below. A problem Check “6.1.2 Unusual Conditions”(P.189) Is the print quality bad? If the print quality is poor “6.4 Poor Print Quality”(P.223) Is a message displayed on the control panel display? If a message is displayed “6.5 List of Messages”(P.227) -
Page 217: Unusual Conditions
6.1 Type of Problem 6.1.2 Unusual Conditions If you think some trouble is occurring on the machine, check the machine status again. If the problem still persists, proceed to”6.4 Poor Print Quality”(P.223) and ”6.5 List of Messages”(P.227) to take the appropriate action. Never open or remove printer covers that are secured with screws ●... - Page 218 6.1 Type of Problem Symptom Cause Action Cannot print. Is the <Standby> indicator off? This printer is in an off-line state or in the menu setting mode. Take the action depending on the indications below. [Offline] ● Press the <Off-line> button to exit the off-line state.
- Page 219 6.1 Type of Problem Symptom Cause Action The <Standby> lamp Is the interface cable not plugged Turn the power switch off, and check does not blink or light that the interface cable is connected. up despite your printing Is the interface that is to be used Check the port status of the interface.
-
Page 220: Clearing Paper Jams
Clearing Paper Jams When a paper jam occurs, printing stops with a beep sound. The error lamp on the control panel comes on and an error message appears on the display. Check the paper jam position with the indicator on the left side of the control panel, and remove the jammed paper carefully so as not to tear it. -
Page 221: Removing Jammed Paper In Trays 1 To 4
6.2 Clearing Paper Jams 6.2.1 Removing Jammed Paper in Trays 1 to 4 If a paper jam occurs in any of paper trays 1 to 4, check the tray that is indicated on the left side of the control panel, and remove the jammed paper according to the steps below. -
Page 222: Removing Jammed Paper In Large-Capacity Tray
6.2 Clearing Paper Jams 6.2.2 Removing Jammed Paper in Large- capacity Tray If a paper jam occurs in a large-capacity tray, check the tray that is indicated on the display, and remove the jammed paper according to the steps below. Removing the Jammed Paper in tray 3 (large capacity) Procedure Pull out the tray with the paper jam that... - Page 223 6.2 Clearing Paper Jams Removing Jammed Paper in Tray 4 (Large Capacity) Procedure Pull out tray 4 (large-capacity). Remove the jammed paper. If the paper is torn, check whether any pieces of paper are left inside the printer. If paper jams in the paper feed portion, open the inner cover and remove the paper.
-
Page 224: Removing Jammed Paper In Tray 5 (Bypass Tray)
6.2 Clearing Paper Jams 6.2.3 Removing Jammed Paper in Tray 5 (Bypass Tray) If a paper jam occurs in paper tray 5 (bypass tray), remove the jammed paper according to the steps below. Procedure Check the back (behind the paper sup- ply section) of paper tray 5 (bypass tray), and remove the jammed paper if any. -
Page 225: Removing Jammed Paper Inside Cover L1
6.2 Clearing Paper Jams 6.2.4 Removing Jammed Paper Inside Cover When a paper jam occurs inside cover L1 on the left side of tray module, remove the jammed paper according to the steps below. A paper jam message for cover L1 appears on the display for the standard +1 tray model, standard + 3 tray model and standard + large capacity cabinet model. -
Page 226: Removing Jammed Paper Inside Cover L2
6.2 Clearing Paper Jams 6.2.5 Removing Jammed Paper Inside Cover When a paper jam occurs inside cover L2 on the left side of tray 1, remove the jammed paper according to the steps below. Procedure Slowly open cover L1 while pulling the release lever. -
Page 227: Removing Jammed Paper Inside Cover L3
6.2 Clearing Paper Jams 6.2.6 Removing Jammed Paper Inside Cover When a paper jam occurs inside cover L3 with the 2-side report function, remove the jammed paper according to the steps below. Procedure Open the bypass tray and slowly open cover L3. -
Page 228: Removing Jammed Paper Inside Cover L4
6.2 Clearing Paper Jams 6.2.7 Removing Jammed Paper Inside Cover When a paper jam occurs inside cover L4, remove the jammed paper according to the steps below. In case of a long-size paper jam, remove the long-size paper according to the procedure for long-size paper (P.202) to prevent damage to the paper or printer and to avoid injury. - Page 229 6.2 Clearing Paper Jams Remove the jammed paper. Never touch a labeled area found on or near the fuser. You can get burnt. If a sheet of paper is wrapped around the heat roller, do not try to remove it by yourself to avoid injuries or burns.
- Page 230 6.2 Clearing Paper Jams For long-size paper Procedure While pushing up the release lever (1), slowly open cover L4 (2). If the leading edge of the paper is invis- ible or cannot be held with hands when cover L4 is opened, pull it out straight in the direction of the arrow.
- Page 231 6.2 Clearing Paper Jams If the jammed paper is at the fuser unit (fuser cartridge), pull out the leading edge of the paper by pulling it with both hands in the direction of the arrows. Never touch a labeled area found on or near the fuser.
- Page 232 6.2 Clearing Paper Jams Pull the paper drawn out in step 5 with both hands in the direction of the arrow. Never touch a labeled area found on or near the fuser. You can get burnt. If a sheet of paper is wrapped around the heat roller, do not try to remove it by yourself to avoid injuries or burns.
-
Page 233: Paper Jams In The Finisher
6.2 Clearing Paper Jams Push down the lever. Slowly close cover L4 by pushing its center portion. 6.2.8 Paper Jams in the Finisher The following describes how to clear paper jams that occur inside the profes- sional finisher when the professional finisher (optional) is installed. Paper jam at the center output tray............ - Page 234 6.2 Clearing Paper Jams Paper jam at the center output tray Procedure If any paper exists at the center tray exit, remove it by slowly pulling it right- ward. Open the top cover on the professional finisher interface and then close it. Paper jam at the finisher interface Procedure Open the top cover (cover F) on the...
- Page 235 6.2 Clearing Paper Jams Remove the jammed paper if any. Turn wheel [1] clockwise and remove the paper by pulling it out slowly. If the jammed paper is hidden from view, keep turning wheel [1] to feed the paper for removal. Close the top cover (cover F) on the professional finisher interface.
- Page 236 6.2 Clearing Paper Jams Open the finisher front cover. Move lever [2a] rightward. Remove the jammed paper. Return lever [2a] to its original position. Close the finisher front cover. A message will be displayed and the machine will not operate if the finisher's front cover is even slightly open.
- Page 237 6.2 Clearing Paper Jams Paper jam inside the finisher (at [2a]) (removal using wheel [2c]) Procedure If the edge of the paper comes out from the output tray exit, remove the paper by pulling it out slowly. Open the finisher front cover. Move lever [2a] rightward.
- Page 238 6.2 Clearing Paper Jams Remove the paper by pulling it out slowly. Return lever [2a] to its original position. Close the finisher front cover. A message will be displayed and the machine will not operate if the finisher's front cover is even slightly open.
- Page 239 6.2 Clearing Paper Jams Close the finisher front cover. A message will be displayed and the machine will not operate if the finisher's front cover is even slightly open. Paper jam inside the finisher (at [2b]) (removal using wheel [2c]) Procedure Open the finisher front cover.
- Page 240 6.2 Clearing Paper Jams Remove the paper by pulling it out slowly. Return lever [2b] to its original position. Close the finisher front cover. A message will be displayed and the machine will not operate if the finisher's front cover is even slightly open.
- Page 241 6.2 Clearing Paper Jams Remove the jammed paper. Return lever [3] to its original position. Close the finisher front cover. A message will be displayed and the machine will not operate if the finisher's front cover is even slightly open. Paper jam inside the finisher (at [5]) Procedure Open the finisher exit cover [5] upward.
- Page 242 6.2 Clearing Paper Jams Paper jam inside the finisher (at [4a]) Procedure Open the finisher front cover. Pull out the unit [4]. Turn wheel [4a] counterclockwise to remove all jammed paper. Return unit [4] to its original position. Close the finisher front cover. A message will be displayed and the machine will not operate if the finisher's front cover is even slightly open.
- Page 243 6.2 Clearing Paper Jams Paper jam inside the finisher (at [4b]) Open the finisher front cover. Move lever [4b] leftward. Remove the jammed paper if any. Pull out unit [4].
- Page 244 6.2 Clearing Paper Jams Remove all jammed paper from the upper left exit of the unit and from within the unit. Return unit [4] to its original position. Return lever [4b] to its original position. Close the finisher front cover. A message will be displayed and the machine will not operate if the finisher's front cover is even slightly open.
- Page 245 6.2 Clearing Paper Jams Remove the paper. Close the finisher front cover. A message will be displayed and the machine will not operate if the finisher's front cover is even slightly open.
-
Page 246: Stapler Faults
Stapler Faults This section describes stapling troubles. Follow the procedures on the following pages when prints are not stapled or when staples are bent. Contact our Customer Support Center if the problem persists after you have tried the following solutions. Stapling is available when the professional finisher (optional) and internal hard disk (optional) are installed. - Page 247 6.3 Stapler Faults Staple jam in staple cartridge Procedure Make sure that the machine has stopped, and then open the front cover on the professional finisher. Hold the staple cartridge holder by its lever [R1], and draw out the staple car- tridge holder to the right (towards you).
- Page 248 6.3 Stapler Faults Push up the illustrated metal portion of the staple cartridge. Remove the jammed staples (1), and return the metal portion pushed up in step 5 to its original position (2). When removing jammed staples, take care not to injure your fingers. Hold the orange lever and push the sta- ple holder until you hear it click into place.
- Page 249 6.3 Stapler Faults Staple jam in staple cartridge for saddle stitch If a staple jams in the staple cartridge for saddle stitch, take the action as described in the procedure below. Procedure Make sure that the machine has stopped, and then open the front cover on the professional finisher.
- Page 250 6.3 Stapler Faults Remove the jammed staples as illus- trated. When removing jammed staples, take care not to injure your fingers. Return the taken-out staple cartridge while holding its pawls on its left and right sides, and lightly push it down until you hear it click into place.
-
Page 251: Poor Print Quality
Poor Print Quality If the print quality is bad, select the closest symptom from the following and take appropriate actions. If the problem still persists, contact our Customer Support Center. Symptom Cause Action Print is too light The paper is damp. Replace with new paper. - Page 252 6.4 Poor Print Quality Symptom Cause Action Equally spaced bars The drum cartridge is dirty. Print a few sheets of paper. are printed. The drum cartridge has deteriorated Replace with a new drum cartridge. or is damaged. “5.5.3 Replacing Drum Cartridges [A1], [A2], [A3], and [A4]”(P.137) White dots appear in Unsuitable paper is being used.
- Page 253 6.4 Poor Print Quality Symptom Cause Action Nothing is printed. Multiple sheets are fed at a time. Fan sheets well before loading them again. “5.4 Loading Paper”(P.115) The drum cartridge has deteriorated Replace with a new drum cartridge. or is damaged. “5.5.3 Replacing Drum Cartridges [A1], [A2], [A3], and [A4]”(P.137) White areas or colored...
- Page 254 6.4 Poor Print Quality Symptom Cause Action Vertical blanks appear. The drum cartridge has deteriorated Replace with a new drum cartridge. or is damaged. “5.5.3 Replacing Drum Cartridges [A1], [A2], [A3], and [A4]”(P.137) The laser scanner may be dirty. Clean the laser scanner. “5.10 Cleaning the Printer”(P.185) No toner remains in the toner car- Replace with a new toner cartridge.
-
Page 255: List Of Messages
List of Messages This section describes messages and error codes that appear on the display of this printer. 6.5.1 List of Messages (Alphabetical Order) There are two types of messages: printer status messages and error messages. For error messages, "Cause" and "Action" are described. If an error message appears, the printing of data remaining in the printer and information spooled in the memory will not be guaranteed. - Page 256 6.5 List of Messages Message Cause/action RemovePaper fromTop Tray Cause: A paper jam has occurred inside the finisher. of G *These messages are displayed alternately. ↓↑ Action: Open the finisher front cover, open [2a], and turn [2c] to Open G. Open 2a.Turn 2c to remove the jammed paper.
- Page 257 6.5 List of Messages Message Cause/action Open5 right of GClear Cause: A paper jam has occurred near the finisher tray. jam.Close5 Action: Open ejecting port cover (5) on the right side of the finisher, and remove the jammed paper. “6.2.8 Paper Jams in the Finisher”(P.205) Open G.
- Page 258 6.5 List of Messages Message Cause/action Open G Open 4b toLeft Pull Cause: A paper jam has occurred inside the finisher. out4 *These messages are displayed alternately. ↓↑ Action: Open the finisher front cover (G), open [4b] leftward, pull out Remove All PaperInside 4 unit [4], and wholly remove the paper jammed inside [4].
- Page 259 6.5 List of Messages Message Cause/action OpenG.Pull outR4Empty Cause: The punch dust box (R4) of the finisher is about to be filled Punch Cont with punch dust. Action: Open the finisher front cover (G) and empty the punch dust box. “5.5.7 Disposing Chips from Punch Dust Box”(P.150) Open G.Reload R4Punch Cause: The punch dust box of the finisher is not correctly set.
- Page 260 6.5 List of Messages Message Cause/action Option not installed Cause: To use the secure/sample print function, the corresponding optional installation is necessary. Action: The internal hard disk (optional) must be installed to use the secure/sample print function. Please wait... Status: The system status of this printer is being diagnosed/initial- ●...
- Page 261 6.5 List of Messages Message Cause/action All data Status: The print data that remains in this printer is being ejected. Ejecting...Tray* Print data cannot be received from the computer. Empty Center Output Tray Cause: The center output tray is filled with paper. Action: Unload paper from the center output tray.
- Page 262 6.5 List of Messages Message Cause/action Replace Toner Cartridge: K Cause: Almost no toner remains in the black toner cartridge. Action: Replace with a new black toner cartridge. “5.5.2 Replacing Toner Cartridges”(P.135) Replace C, M, Y Toner Car- Cause: Almost no toner remains in any of toner cartridges (C, M and tridges Action Replace the emptied toner cartridge with a new one.
- Page 263 6.5 List of Messages Message Cause/action Load Tray * Cause: Paper tray * is out of paper of size and orientation xxxx and xxxx xxxx paper type XXXX. Action: Load paper of size and orientation xxxx and paper type XXXX in tray *.
- Page 264 6.5 List of Messages Message Cause/action Replace Drum Cartridge A* Cause: It is time to replace drum cartridge A*. Action: Replace with new drum cartridge A*. “5.5.3 Replacing Drum Cartridges [A1], [A2], [A3], and [A4]”(P.137) Ejecting... Status: Print data is being output. xxxxTray * Print data can be received from the computer.
- Page 265 6.5 List of Messages Message Cause/action Ready to print Cause: Failure occurs in this printer. (***-***) Action: Switch the printer off and on again after the display on the control panel turns itself off. If this message appears again, check error code [***-***] on the display. And take an appro- priate action.
- Page 266 6.5 List of Messages Message Cause/action Ready to print Add Toner: K Cause: Toner in the black toner cartridge is about to run out. Action: Prepare a new black toner cartridge. “5.5.2 Replacing Toner Cartridges”(P.135) Print processing and receiving print data from the computer are possible. Ready to print Add Toner: M Cause: Toner in the magenta toner cartridge is about to run out.
- Page 267 6.5 List of Messages Message Cause/action Ready to print Replace B Cause: The waste toner bottle needs to be replaced soon. Action: Prepare a new waste toner bottle. “5.5.4 Replacing the Waste Toner Container [B].2(P.142) Print processing and receiving print data from the computer are possible. Ready to print Order Toner:C Cause: Cyan toner cartridge needs to be replaced soon.
- Page 268 6.5 List of Messages Message Cause/action Reload Bypass Tray Cause: Tray 5 (bypass tray) is loaded with paper incorrectly or with color transparencies with white frame. Color transparencies with white frame cannot be used in this printer. Action: Load paper correctly in tray 5 (bypass tray), or use frameless transparencies (V516).
-
Page 269: List Of Error Codes
6.5 List of Messages 6.5.2 List of Error Codes If a print job is not completed successfully due to an error or some failure that has occurred in this printer, the following message with error code (***-***) is dis- played. Check the error code according to the table below, and take the specified action. - Page 270 6.5 List of Messages Error code Cause/action [Cause] Failure occurs in tray 4. [Action] Switch the printer off and on. If the problem still persists, contact our Customer Support Center. Trays other than tray 4 can be used. [Cause] Failure occurs in tray 5 (bypass). [Action] Switch the printer off and on.
- Page 271 6.5 List of Messages Error code Cause/action [Cause] The paper size loaded in the bypass tray is different from that specified on the print driver. [Action] Start printing after specifying the correct paper size on the print driver. [Cause] Failure occurs in the finisher. [Action] Switch the printer off and on.
- Page 272 6.5 List of Messages Error code Cause/action [Cause] POP3 server name is not set correctly in [POP before SMTP] That is performed when mail is set. [Action] Check if the POP3 server is set up correctly with CentreWare Internet Services. Also, check the settings for the DNS server. “4.14.1 Setting up the Environment for E-mail Printing”(P.93) [Cause] Login to the POP3 server failed in [POP3 before SMTP] that is performed when mail is sent.
- Page 273 6.5 List of Messages Error code Cause/action [Cause] Secure Print document cannot be registered because no internal hard disk (optional) is installed. [Action] To use the Secure Print feature, you need to install the internal hard disk (optional). “4.8 Printing Confidential Documents/Printing after Checking the Printout (Secure/Sample Print)”(P.68) [Cause] The number of Secure/Sample Print users exceeds the upper limit.
- Page 274 6.5 List of Messages Error code Cause/action [Cause] An error occurred during the print processing. It may be caused by either of the following: (1) When [Paper Priority] of [Printer Settings] in the Common Menu is set to [Not Selected] for all paper types, your print instruction specified Auto Tray Switch.
- Page 275 6.5 List of Messages Error code Cause/action [Cause] PDF file cannot be printed by using Contents Bridge because of insufficient memory. [Action] When using the Contents Bridge Utility, change the [Print Mode] settings in the [Contents Bridge] dialog box as follows: If [High Quality] is selected, change it to [Standard].
- Page 276 6.5 List of Messages Error code Cause/action [Cause] An error occurred during PostScript processing. [Action] Take one of the following actions: Set [Print Mode] to [High Quality]. ● Increase the print page buffer capacity. ● Increase the memory used by PS. ●...
- Page 277 6.5 List of Messages Error code Cause/action [Cause] The ASMTP server does not support DSN. [Action] Send the mail without DSN setting. [Cause] The IP address of this printer is not set correctly. [Action] Check the DHCP environment, or set a fixed IP address for this printer.
- Page 278 6.5 List of Messages Error code Cause/action [Cause] The STMP name for answer mail sending cannot be resolved. [Action] Check correctness of the SMTP server setting from CentreWare Internet Services. [Cause] The POP3 server name for when using the POP3 protocol cannot be resolved.
-
Page 279: Troubleshooting When Working In A Tcp/Ip Environment
Troubleshooting When Work- ing in a TCP/IP Environment This section describes the causes and verifications of troubles that may occur in a TCP/IP environment, as well as the actions to be taken for their solutions. For information about problems in other environments, refer to the manual contained on the Software Pack CD- ROM included with this printer. -
Page 280: For Windows Nt 4.0/Windows 20000/Windows Xp/ Windows Server 2003
6.6 Troubleshooting When Working in a TCP/IP Environment Cause Verification Action Print requests from multi- [Unable to print (Network Error)] None. (Printing will restart ple host hest computers is displayed. automatically). are sent to this printer at the same time. Printing files cannot be [Unable to print (Spool Error)] is After deleting unneces-... -
Page 281: Troubleshooting When Using Centreware Internet Services
Troubleshooting When Using CentreWare Internet Services Symptom Action Cannot connect to Is the printer working properly? CentreWare Internet Ser- Check if the power supply of this printer is switched on. vices. Are CentreWare Internet Services activated? Print out the "System Settings List" to check. Is the correct Internet address entered? Check the Internet address again. -
Page 282: Troubleshooting When Using E-Mail Services
Troubleshooting When Using E-mail Services This section describes troubleshooting for E-Mail Notice Service and the E-mail Print fea- ture. Symptom Action Unable to use the E-mail Is the printer's e-mail address set? Print feature. Verify the setting with CentreWare Internet Services. Is [Receive E-mail] set to on? Verify the setting with CentreWare Internet services. - Page 283 Setting Common Menu Outline of Common Menu .............. 256 7.1.1 About Menu Structure ............. 256 7.1.2 About Common Menu............. 256 Description of Common Menu ............258 7.2.1 Print Language Setting ........... 258 7.2.2 The System Administrator Menu ........261 7.2.3 Language................
-
Page 284: Outline Of Common Menu
Outline of Common Menu 7.1.1 About Menu Structure The Menu consists of Common Menu and Mode Menus. Mode Menu Common Menu ESCP Extended settings Press the HP-GL <Menu> button Extended settings Extended settings Extended settings PostScript Extended settings 7.1.2 About Common Menu The Common Menu is the screen to configure common settings for the entire print mode. - Page 285 7.1 Outline of Common Menu The Common Menu has the following menu items. Common Menu Description Print Language The menu for setting ESC/P, HP-GL/2, and PCL emulation mode, and for config- uring the settings related to functions to directly print PDF files and to print Post- Script files.
-
Page 286: Description Of Common Menu
Description of Common Menu This section describes the items which you can set by [Print Language], [Admin Menu], and[Language] of the Common Menu. For information about the operation to check the meter, refer to "5.7 Checking Total Number of Printed Pages" ●... - Page 287 7.2 Description of Common Menu Enables you to configure settings to directly send PDF files to the printer for printing without using a print driver. The settings are enabled when the ContentsBridge utility is not used for printing of PDF files. "4.13 Printing PDF Directly - ContentsBridge"...
-
Page 288: Output Size
Description of Common Menu Password If a password is set for the PDF file, set the password beforehand. Printing is enabled only when the password set for the PDF file to be printed and the password set here match. Up to 32 alphanumeric characters can be set. Collated Set whether to collate the printed sheets by copy (1, 2, 3...1, 2, 3...) when printing more than one copy. -
Page 289: The System Administrator Menu
7.2 Description of Common Menu Output Color Set whether to print in color or black and white. [Color (Auto)] (default) Automatically detects if the document is color or black and white by each page. When any color is used, the page is printed in color and, when the page is monochrome, it is printed in black and white. [Black] Prints in black and white. - Page 290 Description of Common Menu ■PJL (LOOK 2) (P.301) You can use the PJL command with this printer, which does not depend on any print language. ThePJL command controls the print job, and is necessary when you use the print driver. Setting the status of the PJL command sent from the computer to enabled or disabled.
- Page 291 7.2 Description of Common Menu Set when using LPD. ■Port Startup Set the status of the LPD port to [Enable] or [Disable] when switching on the power. The default is [Enable], which allows the use of the LPD port. To activate the LPD port, need to set the IP address. When the port is set to [Enable], and if there is insufficient memory, the status of the port may automatically be reset to [Disable].
- Page 292 Description of Common Menu NetWare Set when using NetWare. ■Port Startup Set the status of the NetWare port to enabled or disabled when the power is switched on. The default is [Disable]. Set to [Enable] when you use NetWare. When activating the port, the status of the port may be set to [Disable] due to insufficient memory. Set the unused port status to [Disable] or change the memory allocation capacity at [Allocate Memory], in case of insufficient memory.
- Page 293 7.2 Description of Common Menu Set when using SMB. ■Port Startup Set the status of the SMB port to enabled or disabled when the power is switched on. The default is [Enable], to use SMB. If memory becomes insufficient when the port is set to [Enable], the status of the port may be automatically set to [Disable].
- Page 294 Description of Common Menu Set when using IPP. ■Port Startup Set the status of IPP port to enabled or disabled when the power is switched on. The default is [Dis- able]. Set to [Enable] when you use IPP. To activate the IPP port, need to set the IP address. If memory becomes insufficient when the port is set to [Enable], the status of the port may be automatically set to [Disable].
- Page 295 7.2 Description of Common Menu ■TBCP Filter Set the TBCP filter to enabled or disabled, while data from the PostScript is processed. The default is [Disable]. EtherTalk Set when using EtherTalk. ■Port Startup Set the status of EtherTalk port to enabled or disabled when the power is switched on. The default is [Disable].
- Page 296 Description of Common Menu ■PJL (Note 1) (P.289) You can use the PJL command with this machine, which does not depend on any print language. The PJL command controls the print job, and is necessary when you use the print driver. Set the status of the PJL command sent from the computer to enabled or disabled.
- Page 297 7.2 Description of Common Menu Port9100 Set when using Port9100. ■Port Startup Set the status of the Port9100 port to enabled or disabled when the power is switched on. The default is [Disable]. Set [Enable] when you use Port9100. To activate the port9100 port, need to set the IP address. If memory becomes insufficient when the port is set to [Enable], the status of the port may be automatically set to [Disable].
- Page 298 Description of Common Menu SOAP Set the SOAP port. ■Port Startup Set the status of the SOAP port to enabled or disabled when the power is switched on. The default is [Disable]. Set [Enable] when you use SOAP. If memory becomes insufficient when the port is set to [Enable], the status of the port may be automatically set to [Disable].
- Page 299 7.2 Description of Common Menu SNMP Set when using SNMP. You need to set the SNMP server to use an application, which controls print- ers remotely. Information from the printers is under control by the SNMP server, and the application collects information on the printers from the SNMP server.
-
Page 300: Internet Services
Description of Common Menu A wrong IP address may cause trouble to the entire network. ● By the settings on the subnet mask, the former setting value is displayed, even when the <Menu> button is ● pressed after setting the value, in case a wrong value is entered (for example, when "0" has been set in the middle of the bits). - Page 301 7.2 Description of Common Menu Ethernet Set the communication speed and the type of the connector for the Ethernet interface. The optional values are as follows: [Auto] (default) The machine is switched to 100M full duplex, 100M half duplex, 10M full duplex, or 10M half duplex automatically.
- Page 302 Description of Common Menu SNTP Settings Set the system clock of this machine by Simple Network Time Protocol (SNTP). ■NTP Synchronize Set whether to set the clock of this printer in synchronization with the NTP server. The default is [Off]. ■Connect Interval Set the NTP server connection interval in the range of 1 to 500 hour, incremented by one hour.
-
Page 303: Power Saver Mode
7.2 Description of Common Menu System Settings The menu for configuring the settings for functions such as alert tone and the power saver mode. Alert Tone Set whether to activate the alert when there is something wrong with this machine. The default is[Off]. - Page 304 Description of Common Menu Power Saver Mode Set whether to automatically save power consumption by the machine after a given period. The default is [Enable]. If power saver mode is [Disable], you cannot set sleep mode to [Disable]. "5.8 Using Power Saving Function" (P.179) Power Save Timer (Note 1) (P.289) Set the duration of time to switch the printer to the power saver mode in the range of 15 to 240 min- utes incremented by 1 minute.
- Page 305 7.2 Description of Common Menu Banner Sheet ■Banner Output Set whether to output the banner sheet. For output, select the output form. You can select any output form on the top of the document, output on the end of the document, or output on each of them. The default is "Off."...
- Page 306 Description of Common Menu [Continue Print] The printing job will be continued, even if the drum cartridge is empty. The drum cartridge comes to the end of life after about 30,000 pages are printed. This may affect the printer's performance such as image printing quality. It is recommended to replace the drum cartridge. Millimeter/Inch Switching Set the unit of display to mm or inch.
- Page 307 7.2 Description of Common Menu ■îLogin Setup Set whether to make local or network access. The optional values are as follows: [Off] (default) No authentication [Local Access] Authentication by local access [Network Access] Authentication by network Access. This optional value is available when the Hard Disk Drive (optional) is installed.
-
Page 308: Printer Settings
Description of Common Menu Printer Settings The menu for setting the auto tray switch and the paper tray. For details about automatic tray selection, refer to "5.4.7 Automatic Tray Selection" (P.133). Substitute Tray Set whether to print using substitute paper when the tray selected by the auto paper switch runs out of paper. - Page 309 7.2 Description of Common Menu Paper Type Set the paper type to be loaded in the paper tray. The default is [Plain] for all paper trays. The name set in [Paper Name] is displayed as [Custom 1] to [Custom 5]. ■Trays 1 to 4 Select from [Plain], [Recycled], [Bond], [Side 2 Paper], [Heavyweight 1], [Heavyweight 1(A)], [Heavyweight 1(B)], [Heavyweight 1(C)], [Heavyweight 1(S)], [Transparency], [Coated 1], [Light-...
- Page 310 Description of Common Menu Paper Size Set the paper size to load into the paper tray. For information about suitable paper sizes, refer to "A Main Specifications" (P.300). ■Trays 1 to 4 [Auto] (default) Select when loading paper of standard size. [Non-Std] Select [Non-Std] when printing with non-standard paper size, and specify its long edge and short edge.
- Page 311 7.2 Description of Common Menu ■[Heavyweight 1], [Heavyweight 1 S2] A: (default) Suitable for [Heavyweight 1] (99 to 169 g/m Suitable for water-resistant paper. C: Suitable for white films. Special setting suitable for water-resistant sheet. ■[Heavyweight 2], [Heavyweight 2 S2] A: (default) Suitable for [Heavyweight 2] (170 to 220 g/m Suitable for calling card paper (made by A-one).
- Page 312 Description of Common Menu Default Paper Size Set the initial paper size to either A4 or 8.5 x 11" (Letter). The default is [A4]. Paper Size Setting Set a paper size for the automatic detection of a standard-size document and paper. You can select a size from AB Series (8 x 13"), AB Series, AB Series (8-kai/ 16-kai), AB Series (8 x 13"/8 x 14"), and Inch Series.
- Page 313 7.2 Description of Common Menu Allocate Memory [Note 1] (P.289) The menu for changing the capacities of interface memory and form memory. After changing the memory allocation capacity, all stored data in each memory may be erased due ● to re-setting of the memory. Memory exceeding total capacity cannot be allocated.
-
Page 314: Image Quality
Description of Common Menu Set the SMB-only receive buffer capacity in the range of 64 to 1024 KB, incremented by 32 KB. The default is [256K]. [Hard Disk] Spool processing is done. The receiving buffer for the spool process uses the Hard Disk Drive. This item is available when the Hard Disk Drive (optional) is installed. - Page 315 7.2 Description of Common Menu Gradation Chart ■ Load A4-size paper on Tray 5 (Bypass) and press the <Eject/Set> button to print the gradation-prior- ity gradation chart. Enter Value ■ Calcuate setting values from density differences between the printed gradation chart and the color sample for gradation adjustment supplied with this printer.
- Page 316 Description of Common Menu Init/Del Data You can initialize the printer settings stored in the NV memory, the internal Hard Disk Drive, and report data, and delete data such as registered forms in the printer. Each value is set to default by the initialization. For information about the default, refer to "7.4 List of Common Menu"...
- Page 317 7.2 Description of Common Menu Form If there are no registered forms, [Not registered] is displayed. ■Dele ESC/P Forms Delete ESC/P forms for emulation. ■Del PCL Forms Delete all PCL forms for emulation. The PCL forms are not deleted individually but at the same time. Font Delete PCL fonts for emulation.
-
Page 318: Language
If [English] is set, use the print driver and Fuji Xerox software of the English version. Download the English print driver Contents Bridge Utility from the web site of Fuji Xerox by referring to "2.3 Obtaining the Latest Print Driver" (P.28). -
Page 319: Common Menu Basic Operations
Common Menu Basic Operations This section describes basic operations of the Common Menu. 7.3.1 Basic Operations To display menu screens or set the printer while changing the hierarchical level on each menu, use the following buttons: To display the menu setting screen Press the <Menu>... -
Page 320: Changing Common Menu Settings
Common Menu Basic Operations 7.3.2 Changing Common Menu Settings This section describes how to set the Common Menu by exemplifying the case of setting the SMB port to "Enable." (Printer power on) (1) <Press the <Menu> button. (Menu display) (2) Press the < >... -
Page 321: List Of Common Menu
List of Common Menu Following is the configuration of the Common Menu. ■Remarks Press the < > The < > or < > button switches menus and functions in < > < > < > the same level. Press the < >... - Page 322 List of Common Menu From the previous page To the next page...
- Page 323 7.4 List of Common Menu From the previous page To the next page...
- Page 324 List of Common Menu From the previous page To the next page...
- Page 325 7.4 List of Common Menu From the previous page To the next page...
- Page 326 List of Common Menu From the previous page...
- Page 327 Appendix Main Specifications.................300 Product Specifications.............300 Output Sizes Supported by Finisher .......307 Printable Area ..............308 Internal Fonts ..............309 Parallel Interface .............313 Optional Product List ..............315 Precautions/Limitations ..............316 Precautions/Limitations on Main Unit ......316 SMB ................317 TCP/IP (lpd) ..............319 Upgrading the Software Version of the Printer .......322 Service Life if Consumables and Periodic Replacement Parts ..323 Paper Sizes and Memory Capacity ..........324 Glossary ..................326...
-
Page 328: Main Specifications
Main Specifications Product Specifications Main unit Item Specification Type Desktop Printing System Laser Xerography (Microtandem) Fusing System Heat roller (Oil-less) ° Warmup Time 45 s or less (at power on at the room temperature of 20 Continuous printing [Paper feed from Tray 1] speed - Plain, Lightweight 1 Sided: Color... - Page 329 A Main Specifications Item Specification Continuous Printing - [Heavyweight 1]: Speed 1 Sided: Color, Black (Continued) 22 sheets/minute (A4 16 sheets/minute (A4 13 sheets/minute (B4), 11 sheets/minute (A3) 2 Sided: Color, Black 18 sheets/minute (A4 10 sheets/minute (A4 9 sheets/minute (B4), 8 sheets/minute (A3) [Paper feed from Tray 5 (Bypass)] - Plain, Lightweight...
- Page 330 A Main Specifications Item Specification Continuous Printing - [Heavyweight 1]: Speed 1 Sided: Color, Black (Continued) 16 sheets/minute (A4 13 sheets/minute(A4 13 sheets/minute (B4), 11 sheets/minute (A3) 9 sheets/minute (432.1 to 483.0 mm) 5 sheets/minute (Long-size: 483.1 to 900.0 mm) 4sheets/minute (Long-size: 900.0 to 1200.0 mm) 2 Sided: Color, Black 16 sheets/minute (A4...
- Page 331 Paper Feed Capacity Standard model: Tray 1 (560 sheets), Tray 5 (Bypass) (100 sheets) Fuji Xerox P Paper Standard + 1 tray module: Tray 1 and 2 (560 sheets each), Tray 5 (Bypass) (100 sheets) Standard + 3 tray module:...
- Page 332 A Main Specifications Item Specification Emulation ESC/P (VP-1000), HP-GL (7586B, DJ750CPlus), HP-GL/2 (DJ750C Plus), PCL (CLJ5500) ® ® Supported OS Microsoft Windows ® ® Microsoft Windows ® ® Microsoft Windows Millenium Edition ® ® Microsoft Windows 2000 ® ® Microsoft Windows NT ®...
-
Page 333: Professional Finisher
Maximum: 11 x 17", Minimum: 8.5 x 11", 64 to 90 g/m Tray Capacity Output tray A4: 500 sheets Finisher tray A4: Fuji Xerox P Paper 1,500 sheets, B4 or larger paper: 1,500 sheets, Mixed stack*: 300 sheets *: If large paper is stacked on small paper... - Page 334 A Main Specifications Item Specification Punching Number of holes: 2 or 4 Fuji Xerox P Paper For punching-supported output sizes, refer to "A.2 Output Sizes Supported by Finisher" (P.307). Suddle Stitch/Folding Maximum number of sheet: Saddle stitch (with stapling): 15 sheets (90 g/m...
-
Page 335: Output Sizes Supported By Finisher
A Main Specifications Output Sizes Supported by Finisher The finisher can handle paper of the types listed in the table. If Direction is Vertical, paper can be punched or stapled on the long edge. ● If Direction is Horizontal, paper can be punched or stapled on the short edge. ●... -
Page 336: Printable Area
A Main Specifications Printable Area Standard printing area The standard printable area is the size after a 4.1 mm margin is deducted each from the top, bottom, right, and left of paper. (For SRA3 (320 mm wide), 8.5 mm is deducted from the right and left.) The actual printing area may differ depending on the printer (plotter) control language. -
Page 337: Internal Fonts
A Main Specifications Internal Fonts This printer has the following internal fonts. ® For PostScript fonts, refer to "PostScript Setting Guide." Stroke Fonts (for PCL5, HP-GL, and HP-GL/2 only) European stroke fonts ● Outline Fonts The relationship between the internal outline fonts and the Page Description Language or emulation mode is as follows. - Page 338 A Main Specifications Font HPGL Category Font PCL5 PCL6 ESC/P Type HPGL2 European MultiType CG Times European MultiType CG Times Italic European MultiType CG Times Bold European MultiType CG Times Bold Italic European MultiType Univers Medium European MultiType Univers Medium Italic European MultiType Univers Bold...
- Page 339 A Main Specifications Font HPGL Category Font PCL5 PCL6 ESC/P Type HPGL2 European MultiType Marigold European MultiType Arial European MultiType Arial Italic European MultiType Arial Bold European MultiType Arial Bold Italic European MultiType Times New European MultiType Times New Italic European MultiType Times New Bold...
- Page 340 A Main Specifications Font HPGL Category Font PCL5 PCL6 ESC/P Type HPGL2 European MultiType Helvetica Narrow Bold Oblique European MultiType New Century Schoolbook Roman European MultiType New Century Schoolbook Italic European MultiType New Century Schoolbook Bold European MultiType New Century Schoolbook Bold Italic European MultiType...
-
Page 341: Parallel Interface
A Main Specifications Parallel Interface This section describes the parallel interface (Centronics interface conforming to the IEEE1284 standards) installed in this printer. Connector Shape The printer has an IEEE1284-B type connector. The connector shape is as follows: Pin Arrangement When both directions are OFF, the signal pin arrangement is as follows: Pin No. - Page 342 A Main Specifications Descriptions of Signals Both directions OFF nStrobe (Pin No.1) ● Synchronizing signal to read Data 1 to 8. LOW active pulse is necessary. Data1 to 8 (Pin No.2 to 9) ● 8-bit parallel data input. Data 1 is the least significant bit (LSB) and Data 8 is the most significant one (MSB).
-
Page 343: Optional Product List
The products and product codes are as of January 2006. ● The products and products codes are subject to change. ● For the latest information, contact Fuji Xerox Printer Support Desk or our dealers. ●... -
Page 344: Precautions/Limitations
Precautions/Limitations Precautions/Limitations on Main Unit This section gives notes and limitations that you should follow when using this printer. About the optional Hard Disk Drive When the Hard Disk Drive is installed, a power failure during use may destroy ● data on the Hard Disk Drive. -
Page 345: Smb
C Precautions/Limitations The precautions/limitations of using SMB are as follows: Configuring the machine Take great care when setting the IP address. The IP address is managed ● throughout the system. Consult your network administrator before defining any address. Depending on the network environment used, it may be necessary to set the ●... -
Page 346: Switching Off The Power
C Precautions/Limitations Switching off the power Note the following points when switching off the power of this printer: When [SMB Spool] is set to [Memory] All print data spooled to the printer memory, including data in the process of printing, will be deleted. When the power is turned on again, the print data will not be found. -
Page 347: Tcp/Ip (Lpd)
C Precautions/Limitations If you have changed the IP address or name of your computer If the IP address or name of your computer has been changed, this machine can- not process an inquiry or cancellation normally. Turn the power OFF and ON when there is no print data in the receiving buffer of this machine. - Page 348 C Precautions/Limitations Configuring the computer Take great care when setting the IP address. The IP address is managed ● throughout the system. Consult your network administrator before defining any address. Consult the Network Information Service (NIS) administrator when setting the ●...
- Page 349 C Precautions/Limitations When [LPD Spool] is set to [Off] If the machine has accepted a print request from a computer, it cannot accept any print request from an other computer. If you have changed the IP address or name of your computer If the IP address or name of your computer has been changed, this machine can- not process an inquiry or cancellation normally.
-
Page 350: Upgrading The Software Version Of The Printer
Upgrading the Software Ver- sion of the Printer Fuji Xerox provides a tool to upgrade the software installed in the printer (hereinafter, called the printer software). This tool is called a firmware utility. This firmware utility is available from the web site of Fuji Xerox. -
Page 351: Service Life If Consumables And Periodic Replacement Parts
The number of print pages may differ according to contents of original documents, paper sizes, ● paper type, environment and frequency of switching on/off the Printer. An engineer from Fuji Xerox will replace the periodic replacement parts. ● Maintenance performance parts We stock expendable accessories and the maintenance performance parts (parts that are necessary for printer maintenance) for machines for 7 years after. -
Page 352: F Paper Sizes And Memory Capacity
Paper Sizes and Memory Capacity Necessary memory capacity may differ according to the print mode setting of the printer driver and paper sizes. Necessary memory capacity may differ according to the operating environment. Refer to the memory capacity on the list below for printing command. Necessary memory capacity may differ according to printer drivers. -
Page 353: Postscript Printer Driver
F Paper Sizes and Memory Capacity PostScript Printer Driver Memory capacity Memory capacity 1 sided (Unit: MB) 2 sided (Unit: MB) Printing Output Size Available output Available output mode Hight Speed A5 Non-standard Long-size (305 X 1200) Å| High image quality Non-standard Long-size (305 X 1200) -
Page 354: Glossary
Glossary [10BASE-T] Twist pair cable, 10 Mbps, base band in IEEE802.3 standard. [100BASE-TX] One of FastEthernet interfaces, an advanced version of 10BASE-T. The communication speed is 100 Mbps, which is much faster than 10 Mbps by 10BASE-T. [A3] 420 x 297 mm paper [A4] 297 x 210 mm paper. - Page 355 G Glossary "double-click" indicates an action, quickly clicking the left mouse button twice. [CMYK] A way of expressing colors in processes like color printing. It is divided into four colors: Cyan (C), Magenta (M), Yellow (Y), and Black (K), which are leveled for printing.
-
Page 356: Full Color
G Glossary [Font] The character style. Font indicates a set of characters with a unified design. [Full color] The maximum number of colors (about 1,677 million colors) that can be displayed on a computer. [G..S.M.] The weight of a sheet of paper with an area of 1 m2. [Gradation] Refers to the smoothness between colors. -
Page 357: Local Printer
G Glossary [Installation] To incorporate software or hardware into the computer or peripherals to make it available. To incorporate software such as a printer driver into the computer system, or a network extension card into the printer. In this guide, "installation" indicates primarily to incorporate software into the computer. -
Page 358: Network Printer
G Glossary [Login] An action that enables access to the computer system resources such as hard disk drives or print- ers on the network. Also, to exit the login is called "logout". [Mode menu] The menu for setting fixed conditions for processing each of the emulation modes of ESC/P and HP-GL/2 emulation mode. -
Page 359: Printer Driver
G Glossary [Plug and play] The function for Windows 95/Windows 98/Wndows Me/Windows 2000/Windows XP, that sets operating environment automatically and enables it to be used instantly, when peripherals are installed to the computer. [Port] The connector part where the computer exchanges information among peripherals. [Port9100] A network communication method sending data on Windows 2000/Windows XP. - Page 360 G Glossary [Receiving buffer] Buffer is the location to store data sent from the client temporarily. By increasing the memory capacity of the receive buffer, the client can be freed faster. [Resolution] Expresses the fineness of an image. Usually, it is expressed by the number of dots per inch (dpi) so that the larger the value, the higher the resolution (details can be reproduced in more detail).
- Page 361 G Glossary [WINS] Stands for Windows Internet Name Services, which is a name solution service to obtain the IP address from the computer name in a TCP/IP environment. [WWW] Stands for World Wide Web. The system providing websites on the Internet.
- Page 362 Q&A Here are frequently asked questions and their answers to help you use the computer with no problem. Want to know the printer settings. You can check the current printer settings with the function setting list. For details about the function setting list, refer to "5.6 Printing Report/List" (P.152). What print functions are available? The PCL6 printer driver for this printer has the all-in-one, 2-sided, enlarged con- tinuous print, booklet creation, and other print functions.
-
Page 363: H Q&A
H Q&A Want to Print on Special Paper. You can use heavyweight paper, transparencies, lightweight paper, and other special paper for printing. For the printing method, refer to "4.3 Printing on Special Paper" (P.51). Want to print data with the image quality of the original document. You can set printing and image quality in detail according to the document type (photo, character, presentation, and web). -
Page 364: Printing Is Slow
H Q&A Want to check whether a print job was output. Using the Document Monitor from the CD-ROM, you can check the processing status of a print job on your computer. In addition, the CentreWare Internet Ser- vices allows you to delete a print job from your computer. For details about the CentreWare Internet Services, refer to "5.1 Configuring the Printer from the ●... - Page 365 H Q&A...
- Page 366 ......................................................................................................................................................................................................................................................................................................................................................................................................
- Page 367 .............., ..........................................................................................................................................................................................................................................................................................................................................................................................................................
- Page 368 ....................................................................................................................................................................................................................................................................................................................................................................................
- Page 369 ......................................................................................................................................................................................................................................................................................................................................................................................................