Table of Contents
Advertisement
Available languages
Available languages
BVSTDCMV13,
MODELOS
BVSTDCMVX20 &
MODELS
BVSTDCMVX23
Manual de Instrucciones
CAFETERA
LEA TODAS LAS INSTRUCCIONES ANTES DE USAR ESTE APARATO
Instruction Manual
COFFEEMAKER
PLEASE READ ALL INSTRUCTIONS BEFORE USING THIS APPLIANCE
Manual de Instruções
CAFETEIRA
LEIA TODAS AS INSTRUÇÕES ANTES DE USAR ESTE APARELHO
Advertisement
Table of Contents

Related Manuals for Oster BVSTDCMV13


Summary of Contents for Oster BVSTDCMV13
- Page 1 BVSTDCMV13, MODELOS BVSTDCMVX20 & MODELS BVSTDCMVX23 Manual de Instrucciones CAFETERA LEA TODAS LAS INSTRUCCIONES ANTES DE USAR ESTE APARATO Instruction Manual COFFEEMAKER PLEASE READ ALL INSTRUCTIONS BEFORE USING THIS APPLIANCE Manual de Instruções CAFETEIRA LEIA TODAS AS INSTRUÇÕES ANTES DE USAR ESTE APARELHO...
-
Page 2: Precauciones Importantes
5. NO opere ningún artefacto con un cable o enchufe dañados, después de que el artefacto haya fallado o si se cae al suelo o se daña de cualquier otra manera. Regrese el artefacto al Centro de Servicio Oster Autorizado más cercano para ®... -
Page 3: Instrucciones Especiales Para El Cable
CON SE RV E E S TA S INS TRU CC ION ES CUIDADO Y USO DE LA JARRA Siga las siguientes instrucciones para reducir o eliminar el riesgo de romper la jarra: a. Esta jarra está diseñada para ser utilizada con su cafetera Oster , por lo tanto ®... - Page 4 Botón de los minutos e. Indicador de encendido/apagado 6. Plato calefactor f. Indicador PM 7. Filtro permanente g. Indicador de la programación h. Pantalla del reloj 8. Interruptor de encendido/apagado i. Interruptor de encendido/apagado (Modelo BVSTDCMV13) Esp añ ol-3...
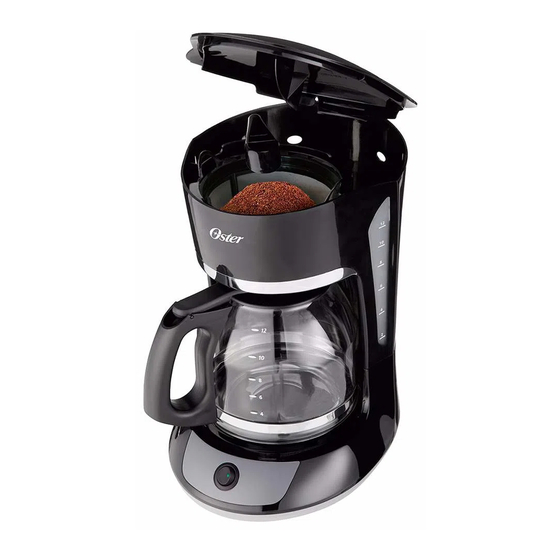
- Page 5 C ON O C I EN DO S U A RTE FA C TO Su nueva cafetera Oster tiene las siguientes características: ® 1. Capacidad para 12 tazas 2. Almacenamiento del cable – Le permite almacenar la longitud extra del cable que no utilice para mantener limpio su mostrador o mesa 3.
- Page 6 PRE PA RA CI óN PA RA EL U SO P O R P RI ME RA VEz AJUSTANDO LA LONgITUD DEL CABLE ELÉCTRICO Usted puede ajustar la longitud del cable eléctrico de manera que tenga la longitud exacta que usted desea. Para aumentar la longitud del cable eléctrico:Tome el cable eléctrico (no el enchufe) y hálelo suavemente sacándolo de la ranura, después hálelo alejándolo de la cafetera.
- Page 7 U S A N DO S U A RTE FA C TO PREPARANDO SU CAFE Limpieza de la cafetera antes de utilizarla por primera vez: Siga los pasos indicados en la sección “Añadiendo Agua y Café Molido” y en “Preparando Café Ahora”, pero sin agregar café. Seleccionando y midiendo el café...
-
Page 8: Preparando Café Ahora
No prepare café con la canasta de preparación abierta. PREPARANDO CAFÉ AhORA Para el modelo con interruptor (Modelo BVSTDCMV13 únicamente): Presione el interruptor de manera que la luz se encienda. Consulte la figura 6. Esta luz indica que la cafetera está encendida y que el ciclo de preparación está... - Page 9 PREPARANDO CAFE MAS TARDE Para los modelos programables (Modelo BVSTDCMVX20 y BVSTDCMVX23 únicamente): Usted debe programar el tiempo en el que le gustaría que la cafetera inicie a preparar su café. 1. Mientras que la cafetera está apagada, presione y detenga el botón para programar la preparación de café...
-
Page 10: Cuidado Y Limpieza
C U I D A DO Y LI MPIEzA Usted debe limpiar su cafetera cuando note cualquiera de las siguientes condiciones: Salida excesiva de vapor o los tiempos de preparación aumentan considerablemente. Esto es causado por la acumulación de residuos minerales que se encuentran en el agua. -
Page 11: Problemas Y Soluciones
En el caso poco probable de que su artefacto nuevo no funcione satisfactoriamente, sírvase revisar la siguiente lista de posibles problemas e intente seguir los pasos recomendados ANTES de llamar a un Centro de Servicio Autorizado de Oster ® PROBLEMAS POTENCIALES... -
Page 12: Important Safeguards
5. DO NOT operate any appliance with a damaged cord or plug or operate it after the appliance malfunctions, or has been damaged in any manner. Return this appliance only to the nearest Oster Authorized Service Center for examination, ®... -
Page 13: Special Cord Set Instructions
DECANTER USE AND CARE Follow the instruction below to reduce or eliminate the chance of breaking the decanter: a. This decanter is designed for use with your Oster coffeemaker and therefore ® must never be used on a range top or in any oven, INCLUDING A MICROWAVE OVEN. -
Page 14: Description Of The Appliance
Hour Button 5. Power Cord d. Minute Button e. Power Indicator 6. Warming Plate f. PM Indicator 7. Permanent Filter g. Delay Brew Indicator h. Clock Display 8. ON/OFF Switch i. Brew Now/Off Button (Model BVSTDCMV13 only) En g lish-3... - Page 15 LE ARN I N G A B O U T YOUR A PPLIA NC E Your new Oster coffeemaker has the following features: ® 1. 12-Cup brewing capacity 2. Cord storage – Allows you to store extra cord length for a tidy countertop 3.
-
Page 16: Prepar I N G F O R First Tim E Us E
PREPAR I N G F O R FIRST TIM E US E ADJUSTINg ThE POWER CORD LENgTh You can customize the length of the power cord so that it is the exact length you desire. To increase the length of the power cord: Grasp the power cord (not the power plug) and gently lift it out of the slot, then feed it into the coffeemaker. -
Page 17: Using Your Appliance
U SI N G YOU R AP PLIA NC E BREWINg COFFEE Cleaning the Coffeemaker Before First Use Follow the steps below under “Adding Water and Ground Coffee” and “Brewing Coffee Now”, but do not add coffee grounds. Selecting and Measuring ground Coffee For best results, use coffee ground for use with automatic drip coffeemakers. -
Page 18: Brewing Coffee Now
Do not brew coffee while the brew basket lid is open. BREWINg COFFEE NOW For Switch Model (Model BVSTDCMV13 only): Push the switch so the light illuminates. See Figure 6. This light indicates that the coffeemaker is on and the brew cycle will begin. -
Page 19: Brewing Coffee Later
BREWINg COFFEE LATER For Programmable Model (Models BVSTDCMVX20 & BVSTDCMVX20 only): You must set the time for when you would like the coffeemaker to begin brewing your coffee. 1. While the coffeemaker is off, press and hold the SET DELAY button. See Figure 8. 2. -
Page 20: Care And Cleaning
C A R E A ND CLEA NING Your Coffeemaker must be cleaned when you begin to notice excessive steaming or the brewing time increases considerably. This condition is caused by a build-up of lime and mineral deposits from your water. If the pumping action stops before all the water has been pumped out of the machine, the appliance requires cleaning. - Page 21 En gl is h-10...
-
Page 22: Precauções Importantes
5. NÃO opere nenhum aparelho com fio ou plugue danificados, caso o aparelho estiver falhando, ou quando apresentar qualquer tipo de avaria ou se tiver caído no chão. Leve-o a uma Assistência Técnica Credenciada Oster para que seja ® revisado ou reparado. - Page 23 CUIDADO E USO DA JARRA Siga as seguintes instruções para reduzir ou eliminar o risco de quebrar a jarra: a. Esta jarra foi desenvolvida para ser utilizada com a sua cafeteira Oster ® portanto nunca deve ser usada sobre as a boca de um fogão, um forno ou em um forno micro-ondas.
-
Page 24: Descrição Do Aparelho
Botão de minutos e. Indicador para ligar/desligar 6. Chapa de aquecimento f. Indicador PM 7. Filtro permanente g. Indicador da programação h. Tela do relógio 8. Interruptor para ligar/desligar (somente i. Interruptor para ligar/desligar para no modelo BVSTDCMV13) P or tug uês-3... - Page 25 CON HE CEN DO 0 SE U A PA RELH O Sua nova cafeteira Oster tem as seguintes características: ® 1. Capacidade de preparo 36 xícaras 2. Para guardar o fio – Permite que você guarde o excedente de fio que não estiver utilizando, para não ficar solto na mesa, ou no balcão.
-
Page 26: Ajustando O Relógio
AN TES D E US AR PE LA P RI MEI RA VE z AJUSTANDO O COMPRIMENTO DO FIO ELÉTRICO Você pode ajustar o comprimento do fio, de modo que ele tenha o comprimento exato que você deseja. Para aumentar o comprimento do fio: Pegue o fio (não o plugue, puxe-o do sulco, delicadamente, para afastá-lo (tirá-lo para fora)da cafeteira. - Page 27 UTI L I z AN DO O S EU A PA R ELH O PREPARANDO SU CAFE Limpeza da cafeteira antes do primeiro uso Siga os passos indicados na seção “Colocando água e pó de café” e em “Preparando o café instantaneamente”, porém, sem adicionar o pó de café e faça a cafeteira funcionar como se já...
- Page 28 Não prepare café com a tampa do recipiente para colocação do porta-filtro aberta. PREPARO IMEDIATO DE CAFÉ Para o modelo com interruptor (somente para o modelos BVSTDCMV13) Pressione o interruptor para acender a luz. Veja figura 6. Esta luz indica que a cafeteira está ligada e que o ciclo de preparo vai começar.
- Page 29 REPARANDO O CAFÉ MAIS TARDE Para o Modelo Programável (somente para os modelos BVSTDCMVX20 e BVSTDCMVX23) Você pode programar o tempo para começar a preparar o café, na hora desejada. 1. Enquanto a cafeteira estiver desligada, pressione e segure o botão para programar o preparo de café “PROGRAMAR”.
-
Page 30: Limpeza E Manutenção
LI M P E z A E MA NU TENÇ ÃO A cafeteira deve ser limpa, se você notar os seguintes detalhes: Saída excessiva de vapor, ou os tempos aumentaram, consideravelmente. Este problema ocorre quando se acumulam resíduos minerais provenientes da água. Se o procedimento de bombear água, parar antes de esvaziar toda a água que fora colocada para coar o café, sua cafeteira precisa de limpeza. -
Page 31: Problemas E Soluções
® uso sem problemas. No evento improvável de sua nova aparelho não operar satisfatoriamente, por favor veja os seguintes problemas potenciais e tente os passos recomendados ANTES DE chamar um Centro de Serviço Autorizado Oster ® POSSíVEIS PROBLEMAS PROVÁVEIS CAUSAS A luz de “Ligada”... - Page 32 The following information is intended for Mexico only. A informação a seguir é somente para o México. CAFETERA OSTER ® MODELOS: BVSTDCMV13, BVSTDCMV13-013, BVSTDCMVX20, BVSTDCMVX20-013, BVSTDCMVX23, BVSTDCMVX23-013 LEA EL INSTRUCTIVO ANTES DE USAR EL APARATO LA SIGUIENTE INFORMACIÓN ES PARA MÉXICO: IMPORTADOR: SUNBEAM MExICANA, S.A.