Table of Contents
Advertisement
Available languages
Available languages
Quick Links
5
4
3
2
1
MODEL
BVSTDC3401
MODELO
Instruction Manual
5 CUP COFFEE MAKER
PLEASE READ ALL INSTRUCTIONS BEFORE USING
Manual de Instrucciones
CAFETERA PARA 5 TAZAS
LEA TODAS LAS INSTRUCCIONES ANTES DE USAR
Manual de Instruções
CAFETEIRA COM CAPACIDADE PARA 15 XÍCARAS
LEIA TODAS AS INSTRUÇÕES ANTES DE USAR ESTE APARELHO
Advertisement
Table of Contents

Related Manuals for Oster BVSTDC3401013


Summary of Contents for Oster BVSTDC3401013
- Page 1 MODEL BVSTDC3401 MODELO Instruction Manual 5 CUP COFFEE MAKER PLEASE READ ALL INSTRUCTIONS BEFORE USING Manual de Instrucciones CAFETERA PARA 5 TAZAS LEA TODAS LAS INSTRUCCIONES ANTES DE USAR Manual de Instruções CAFETEIRA COM CAPACIDADE PARA 15 XÍCARAS LEIA TODAS AS INSTRUÇÕES ANTES DE USAR ESTE APARELHO...
-
Page 2: Important Safeguards
DO NOT operate any appliance with a damaged cord or plug or operate it after the appliance malfunctions, or has been damaged in any manner. Return this appliance only to the nearest Oster Authorized Service Center for examination, repair or adjustment. -
Page 3: Special Cord Set Instructions
Follow the instruction below to reduce or eliminate the chance of breaking the decanter: a. This decanter is designed for use with your Oster® coffeemaker and therefore must never be used on a range top or in any oven, INCLUDING A MICROWAVE OVEN. -
Page 4: Description Of The Appliance
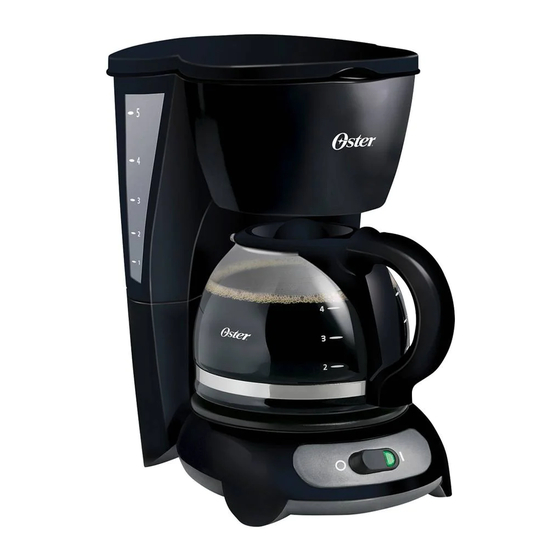
DESCRIPTION OF THE APPLIANCE 1. ON/OFF Switch 2. Removable Filter Insert 3. Brew Basket 4. Water Reservoir 5. Power Cord 6. Warming Plate 7. Decanter 8. Water Level Indicator 9. Permanent Filter En g lish-3... -
Page 5: Setting Up Your Coffeemaker
SETTING UP YOUR COFFEEMAKER Congratulations on the purchase of your new OSTER coffeemaker! Please read these ® instructions carefully before using your new coffeemaker. Proper use, care and mainte- nance will ensure trouble-free operation and the long life of this appliance. Save these instructions for cleaning and, if necessary, replacement parts information. -
Page 6: Brewing Coffee
BREWING COFFEE Cleaning the coffeemaker before first use Follow the steps below under “Adding Water and Ground Coffee” and “Brewing Coffee Now”, but do not add coffee grounds. Selecting and Measuring Ground Coffee For best results, use coffee ground for use with automatic drip coffeemakers. The amounts shown below are suggested amounts. -
Page 7: Brewing Coffee Now
4) Be certain that the filter is centered in the middle of the removable filter basket insert. Close the brew basket. Do not exceed 5 cup line indicated on the water tank see through window. 5) Fill the water reservoir with the desired amount of tap water. 6) Close the brew basket lid. - Page 8 CLEANING INSTRUCTIONS Turn off the appliance, unplug from the outlet and wait for it to cool before cleaning. Your Coffeemaker must be cleaned when you begin to notice excessive steaming or the brewing time increases considerably. This condition is caused by a build-up of lime and mineral deposits from your water.
- Page 9 CLEANING YOUR COFFEE MAKER DAILY Always unplug the coffee maker and allow it to cool before cleaning. Remove the filter basket, carafe and carafe lid and wash them in a solution of warm water and mild liquid detergent. Never use cleaning powders, metal fibers or other abrasive material. Glass carafe, lid and brew basket may be washed in the upper dish rack of the dishwasher.
-
Page 10: Troubleshooting
TROUBLESHOOTING Potential Problems Probable Cause “On” light does not illuminate • Unplugged. • Power outage. Coffee is not brewing • Unplugged. • Power outage. • The water reservoir is empty; check water window . • The filter basket is not properly inserted. -
Page 11: Precauciones Importantes
NO opere ningún artefacto con un cable o enchufe dañados, después de que el artefacto haya fallado o si se cae al suelo o se daña de cualquier otra manera. Regrese el artefacto al Centro de Servicio Oster Autorizado más cercano para examinarlo, repararlo ®... - Page 12 CUIDADO Y USO DE LA JARRA Siga las siguientes instrucciones para reducir o eliminar el riesgo de romper la jarra: a. Esta jarra está diseñada para ser utilizada con su cafetera Oster , por lo tanto nunca ® debe ser usada sobre las hornillas de una estufa, horno ni TAMPOCO EN UN HORNO MICROONDAS.
- Page 13 DESCRIPCION DEL ARTEFACTO 1. Interruptor de Encendido/Apagado 2. Inserto del Filtro Removible 3. Canasta de Preparación 4. Tanque de Agua 5. Cable Eléctrico 6. Plato Calefactor 7. Jarra 8. Indicador de Nivel del Agua 9. Filtro Permanente Esp añ ol-3...
-
Page 14: Preparando Su Cafetera
PREPARANDO SU CAFETERA ¡Felicidades! Usted ha seleccionado una cafetera Oster®. Por favor lea estas instrucciones cuidadosamente antes de utilizar su nueva cafetera. El uso, cuidado y mantenimiento adecuado asegurarán una operación sin problemas y una larga vida a su artefacto. Guarde estas instrucciones para obtener información sobre cómo limpiarla y si es necesario sobre cómo obtener partes de repuesto. - Page 15 PREPARANDO SU CAFE Limpieza de la cafetera antes de utilizarla por primera vez: Siga los pasos indicados en la sección “Añadiendo Agua y Café Molido” y en “Prepa-rando Café Ahora”, pero sin agregar café. Seleccionando y Midiendo el Café Molido: Para mejores resultados, utilice el tipo de café...
- Page 16 4) Asegúrese de que el filtro esté en el centro del inserto del filtro removible de la canasta y después cierre la canasta de preparación. Al colocar el agua en el tanque de agua, no se exceda de la marca de 5 tazas indicada en la ventana.
- Page 17 LIMPIANDO SU CAFETERA APAGUE la cafetera, desenchúfela del tomacorriente y espere a que se enfríe antes de limpiarla. Usted debe limpiar su cafetera cuando note cualquiera de las siguientes condiciones: Salida excesiva de vapor o los tiempos de preparación aumentan considerablemente. Esto es causado por la acumulación de residuos minerales que se encuentran en el agua.
- Page 18 LIMPIEZA DIARIA DE SU CAFETERA Siempre desenchufe la cafetera y permita que se enfríe antes de limpiarla. Saque la canasta del filtro, la jarra y la tapa de la jarra y lávelos en una solución de agua caliente y detergente líquido suave. Nunca utilice polvos limpiadores, fibras metálicas o cualquier otro material abrasivo.
-
Page 19: Problemas Y Soluciones
PROBLEMAS Y SOLUCIONES Problemas Potenciales Causas Probables La luz de encendido ON no se ilumina • Está desconectada. • Interrupción de la energía eléctrica. No prepara café • Esta desconectada. • Interrupción de la energía eléctrica. • No hay agua en el tanque, revise la ventana de visibilidad. -
Page 20: Precauções Importantes
7. NÃO opere nenhum aparelho com fios danificados, quando o aparelho esteja falhando, quando tiver danos de qualquer natureza, ou se cair no chão. Procure a assistência técnica Oster mais próxima para consertá-lo ou ajustar a parte ®... - Page 21 Siga as seguintes instruções para reduzir ou eliminar o risco de quebrar a jarra: a. Esta jarra foi designada para ser utilizada com a sua cafeteira Oster®, portanto nunca deve ser usada sobre as grelhas de um forno TAMPOUCO EM UM FORNO DE MICROONDAS.
- Page 22 DESCRIÇÃO DA CAFETEIRA 1. Interruptor Liga/Desliga 2. Recipiente do filtro removível 3. Base para o filtro 4. Compartimento para água 5. Fio elétrico 6. Chapa de aquecimento 7. Jarra 8. Indicador do nível de água 9. Filtro permanente P or tug uês-3...
- Page 23 PREPARANDO SUA CAFETEIRA PARA SER USADA Parabéns, por ter escolhido uma cafeteira Oster®! Por favor, leia as instruções, cuidadosamente, antes de utilizar sua nova cafeteira. O uso correto e a manutenção adequados garantem um funcionamento sem problemas e uma longa vida à sua cafeteira.
- Page 24 PREPARANDO SEU CAFÉ Limpeza da cafeteira antes do primeiro uso: Siga os passos indicados na seção “Colocando água e pó de café” e em “Preparando o café instantaneamente”, porém, sem adicionar o pó de café e faça a cafeteira funcionar como se já...
- Page 25 4) Assegure-se que o filtro esteja bem no centro do porta-filtro. Em seguida, feche a tampa do recipiente designado para a colocação do porta-filtro. Ao colocar água no compartimento para água. Tome cuidado para ñao exceder a marca indicada de 5 xícaras grandes (15 xícaras de café). 5) Coloque água potável no compartimento para água da sua cafeteira, na quantidade desejada.
- Page 26 LIMPANDO SUA CAFETEIRA A cafeteira deve ser limpa, se você notar os seguintes detalhes: Saída excessiva de vapor, ou os tempos aumentaram, consideravelmente. Este problema ocorre quando se acumulam resíduos minerais provenientes da água. Se o procedimento de bombear água, parar antes de esvaziar toda a água que fora colocada para coar o café, sua cafeteira precisa de limpeza.
-
Page 27: Problemas E Soluções
PROBLEMAS E SOLUÇÕES Possíveis Problemas Prováveis Causas A luz de “Ligada” – ON - não acende • Está desligada da tomada de força. • Falta de energia elétrica. O café não filtra • Está desligada da tomada de força. • Falta de energia elétrica. •... - Page 28 CAFETERA PARA 5 TAZAS OSTER ® MODELOS: BVSTDC3401, BVSTDC3401-013 LEA EL INSTRUCTIVO ANTES DE USAR EL APARATO LA SIGUIENTE INFORMACIÓN ES PARA MÉXICO: IMPORTADOR: SUNBEAM MEXICANA, S.A. DE C.V. AV. JUÁREZ No. 40-201, EX–HACIENDA DE SANTA MÓNICA, TLALNEPANTLA, ESTADO DE MÉXICO, C.P.