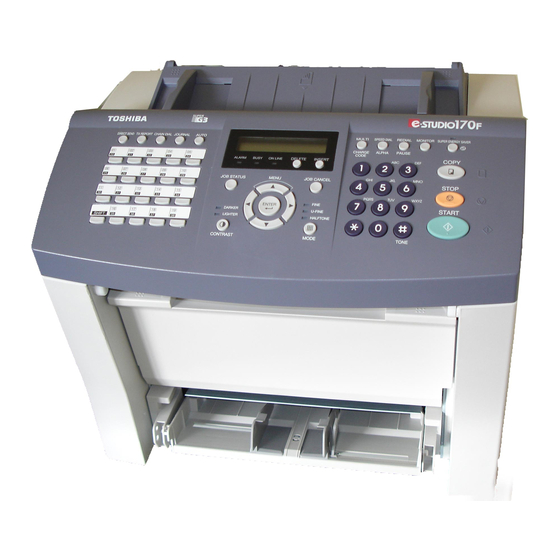
Toshiba E-studio170F Quick Start Manual
Plain paper facsimile
Hide thumbs
Also See for E-studio170F:
- Operation manual (244 pages) ,
- Owner's manual (242 pages) ,
- Service manual (492 pages)
Table of Contents
Advertisement
Quick Links
Advertisement
Table of Contents

Related Manuals for Toshiba E-studio170F


Summary of Contents for Toshiba E-studio170F
-
Page 1: Quick Start Guide
READ THIS BOOK First PLAIN PAPER FACSIMILE Quick Start Guide... - Page 2 TAR Program, to encourage the widespread and voluntary use of energy-efficient technologies that enhance the workplace, improve product performance, prevent pollution, and reduce your energy costs. As an NERGY TAR Partner, Toshiba has determined that this facsimile model meets the NERGY TAR guidelines for energy efficiency.
-
Page 3: Table Of Contents
3. ABOUT THE CD-ROM........................14 3. SETUP FLOW ............................15 1. SELECT A DESIRABLE LOCATION ....................16 2. FACSIMILE MACHINE INSTALLATION...................18 • Connecting Your TOSHIBA Facsimile ...................18 • Recording Paper Exit Tray......................19 • Document Support.........................20 • Document Exit Tray ........................21 • Recording Paper Tray........................22 •... -
Page 5: Notice To Users
Should such problems occur, the user should NOT contact the Telecom Faults Service.” TOSHIBA (AUSTRALIA) PTY LIMITED Level 5, Building 3 Central Park 666 Great South Rd... -
Page 6: Preface
PREFACE Thank you for purchasing the Toshiba PLAIN PAPER FACSIMILE e-STUDIO170F. This QUICK START GUIDE provides the setup flow for installation of the e-STUDIO170F and contents of this product, reference manuals and CD-ROMs. Before using the PLAIN PAPER FACSIMILE, thoroughly read and understand this guide. -
Page 7: Disclaimer Notice
2 All warranties, conditions and other terms implied by law are, to the fullest extent permitted by law, excluded and no such implied warranties are given or apply in relation to the Products. 3 TOSHIBA TEC CORPORATION shall not be liable for any loss, cost, expense, claim or damage whatsoever caused by any of the following: (a) use or handling of the Product otherwise than in accordance with the manuals, including but not limited to Operator’s Manual, User‘s Guide, and/or incorrect or careless handling or use of the Product;... -
Page 9: Software License Agreement
1. SOFTWARE LICENSE AGREEMENT 1. SOFTWARE LICENSE AGREEMENT...................8 2. TRADEMARKS AND COPYRIGHT ..................10... -
Page 10: Software License Agreement
1. SOFTWARE LICENSE AGREEMENT Wordcraft International Limited Unimessage Pro Software License Agreement CONDITIONS OF PURCHASE Software is licensed subject to the limitations on permitted use. No refund will be given after the purchaser has installed the software. This Licence shall continue for as long as the Product is in use. Failure to comply with the terms and conditions detailed below will result in termination of the licence. -
Page 11: Limited Warranty
LIMITED WARRANTY Wordcraft International Limited make no representations or warranties, express or implied, of any kind with respect to the contents of this package and specifically disclaim any express or implied warranty of merchantability or fitness for any particular purpose. Wordcraft International Limited’s liability shall be limited to replacing any faulty product with alternative product or a cash refund up to but not exceeding the value of the monies paid for the product when originally purchased. -
Page 12: Trademarks And Copyright
© 2005 TOSHIBA TEC CORPORATION All Rights Reserved Under the copyright laws, this manual cannot be reproduced in any form without prior written permission of TOSHIBA TEC CORPORATION. No patent liability is assumed, however, with respect to the use of the information contained herein. -
Page 13: Introduction
2. INTRODUCTION 1. ITEMS INCLUDED WITH THE PRODUCT................12 2. ABOUT THE MANUALS ......................13 3. ABOUT THE CD-ROM......................14... -
Page 14: Items Included With The Product
4. Document Exit Tray ......1 10. Quick Reference Guide....1 5. Recording Paper Tray ..... 1 11. Quick Start Guide ......1 (with Bypass Tray) 12. User Documentation CD-ROM..1 6. Toner Cartridge ....... 1 13. TOSHIBA Viewer CD-ROM....1 2.INTRODUCTION... -
Page 15: About The Manuals
CD-ROMs. - QUICK REFERENCE GUIDE The QUICK REFERENCE GUIDE explains the main functions to readily use the e-STUDIO170F which has been set up. For more details about the functions to operate the e-STUDIO170F, please see the OPERATOR’S MANUAL. -
Page 16: About The Cd-Rom
Includes the Setup.exe to install the TOSHIBA Viewer, printer driver and TWAIN driver. For more details about the installation procedure of the TOSHIBA viewer, please see “Installing the TOSHIBA Viewer” in chapter 2 “INSTALLATION” in the OPERATOR’S MANUAL FOR TOSHIBA Viewer. -
Page 17: Setup Flow
3. SETUP FLOW 1. SELECT A DESIRABLE LOCATION ...................16 2. FACSIMILE MACHINE INSTALLATION................18 • Connecting Your TOSHIBA Facsimile....................18 • Recording Paper Exit Tray ........................19 • Document Support ..........................20 • Document Exit Tray...........................21 • Recording Paper Tray ........................22 • Bypass Tray ............................23 3. -
Page 18: Select A Desirable Location
- Be sure to fix the power cable securely so that no one trips over it. Be sure to hold the e-STUDIO170F by 2 places with both hands as shown in the illustration on the right. 3.SETUP FLOW... - Page 19 408 mm ( 16.06 inches ) Height: 433.5 mm ( 17.07 inches )
-
Page 20: Facsimile Machine Installation
2. FACSIMILE MACHINE INSTALLATION Connecting Your TOSHIBA Facsimile Make sure that the Power Switch is turned OFF. Plug in the power cord as in the figure below. Connect the telephone line cord (modular cord) to the “LINE” connector. Connect the external telephone set (if desired) to the “TEL” connector. -
Page 21: Recording Paper Exit Tray
Recording Paper Exit Tray Recording Paper Exit Tray Installation - Fit the tabs of the Recording Paper Exit Tray onto the posts on the back side of the unit. Do not place heavy objects on the Recording Paper Exit Tray or apply strong force. -
Page 22: Document Support
2.FACSIMILE MACHINE INSTALLATION (Cont.) Document Support Document Support Installation - Fit the tabs of the Document Support into the slots on the top side of the unit. Do not place heavy objects on the Document Support or apply strong force. It may be necessary to gently bow the base of the support toward you as you place the support into position. -
Page 23: Document Exit Tray
Document Exit Tray Open the Front Cover - Hold the Front Cover by the grips on both sides of its upper part and pull it down to open it. Do not pull the Front Cover too strongly when opening it. Document Exit Tray Installation - Fit the tabs of the Document Exit Tray into the slots on the front side of the unit. -
Page 24: Recording Paper Tray
2.FACSIMILE MACHINE INSTALLATION (Cont.) Recording Paper Tray Recording Paper Tray Installation - Place the hooks of the Recording Paper Tray into the guides on the front side of the unit and press into position. Do not place heavy objects on the Recording Paper Tray or apply strong force. -
Page 25: Bypass Tray
Bypass Tray Bypass Tray Installation - Place the Bypass Tray on the Recording Paper Tray. Do not place heavy objects on the Bypass Tray or apply strong force. -
Page 26: Initial Printing Supplies Installation
About Recording Paper: - Use only recommended paper brands to optimize your facsimile performance. Contact your authorized TOSHIBA dealer for more information. - Remove the recording paper when storing or relocating your facsimile. - Avoid using damaged, folded or misaligned recording paper. Use of damaged paper could cause double feeding or paper jamming. - Page 27 Install the Recording Paper - Place the recording paper stack into the tray. Do not exceed the upper stack limit line as this may cause paper mis-feeds. Do not add paper on top of the paper already in the machine. Adjust the Paper Guides - Adjust the Paper Guides to fit the size of the Recording Paper.
-
Page 28: Return To The Standby Mode
3.INITIAL PRINTING SUPPLIES INSTALLATION (Cont.) Select the Paper Size - Select the paper size of the Recording Paper Tray. To select letter size, press: To select A4 size, press: To select legal size, press: Return to the Standby Mode STOP - Press to return to the Standby Mode. -
Page 29: Recording Paper Installation (Bypass Tray)
Recording Paper Installation (Bypass Tray) Open the Paper Guides - Open the Paper Guides. Insert the Recording Paper - Insert a one sheet of paper on the Bypass Tray. Do not insert more than one sheet of paper on the Bypass Tray. -
Page 30: Drum Unit And Toner Cartridge Installation
3.INITIAL PRINTING SUPPLIES INSTALLATION (Cont.) Drum Unit and Toner Cartridge Installation IMPORTANT: When you use a toner cartridge of our recommendation, the facsimile machine can detect whether or not the cartridge is inserted in the machine and alert the user when the amount of toner is low or needs replacing. - Page 31 Attach the Toner Cartridge to the Drum Unit - Match the colored parts in the lower area of the Drum Unit with the same colored parts in the lower area of the Toner Cartridge. Install the Process Unit Install the Process Unit along the Guide in the machine. Pressing in the Process Unit forcibly could damage the machine.
- Page 32 3.SETUP FLOW...
- Page 33 Printed in Malaysia DP-1700F OME040104A0...
- Page 34 PLAIN PAPER FACSIMILE Quick Start Guide 2-17-2, HIGASHIGOTANDA, SHINAGAWA-KU, TOKYO, 141-8664, JAPAN 6LA98513101 R04102071001-TTEC 2005 TOSHIBA TEC CORPORATION All rights reserved Ver01 2005-03...