Table of Contents
Advertisement
Advertisement
Table of Contents

Related Manuals for Toshiba e-STUDIO 191F


Summary of Contents for Toshiba e-STUDIO 191F
-
Page 2: Operating Instruction
ENGLISH Operating Instruction The following Operating Instruction manuals are included with this machine. Please refer to the appropriate manual and keep all manuals for future reference. If you lose the manual, contact the authorized TOSHIBA dealer. Accessories Operating Instructions (For Basic Operations) This manual contains essential information for setting up the machine and performing basic operations. -
Page 3: How To Read This Manual
Enter the Telephone Number using the Number Pad (up to 36 digits) ENTER NAME or the Email Address using the QWERTY Keyboard (up to 60 characters), then press Ex: 335 or admin@toshiba ENTER NAME admin@toshiba Enter the Station Name using the QWERTY Keyboard (up to 15... -
Page 4: Table Of Contents
ENGLISH Table of Contents Operating Instruction ......................How to Read This Manual ......................... Table of Contents ......................Safety Information......................Precaution ........................Security Suggestions for Key Operators ................13 Main Unit and Accessories....................14 External View ........................15 Control Panel........................16 Unpacking ........................ -
Page 5: Safety Information
TOSHIBA dealer for a generate heat and eventually cause fire if replacement. Using a damaged cord can left unattended over an extended period of cause fire or electric shocks. -
Page 6: Operating Safeguards
Never dispose of toner or a toner you notice any unusual condition, contact cartridge into an open flame.Toner your authorized TOSHIBA dealer. remaining in the cartridge can cause an The power cord is plugged firmly into explosion, burns, and/or injuries. For the receptacle. - Page 7 Disconnect the volatile, flammable, or combustible power cord from the machine immediately, materials such as curtains that may catch and contact your authorized TOSHIBA fire. dealer. Do not place the machine in a hot, humid, Keep the room ventilated when using the dusty or poorly ventilated environment.
- Page 8 Safety Information Others The machine has a built-in circuit for protection against lightning-induced surge current. If lightning strikes in your neighborhood, maintain ample distance from the machine and do not touch the machine until the lightning has stopped. If you notice flickering or distorted images or noises on your audio-visual units, your machine may be causing radio interference.
-
Page 9: Precaution
Store the Toner Cartridge and paper in cool areas with low humidity. • TOSHIBA recommends using high quality 16 - 24 lb paper, using an inferior paper may cause excessive paper curl, requiring you to empty out the Output Tray more often to avoid paper jams. - Page 10 Key Operator ID Code. For Key Operator: When setting up this machine, please consult with your authorized TOSHIBA dealer, and decide on the Key Operator ID Code together, then record it and keep it in a safe place for future reference.
- Page 11 Precaution Laser Safety LASER SAFETY This machine employs a laser. Only qualified service personnel should attempt to service this device due to possible eye injury. Caution USE OF CONTROLS, ADJUSTMENTS OR PERFORMANCE PROCEDURES OTHER THAN THOSE SPECIFIED HEREIN MAY RESULT IN HAZARDOUS RADIATION EXPOSURE. Caution Label Manufacturer’s Name and Address...
- Page 12 (b) any special, incidental, consequential or indirect loss or damage, costs, expenses, financial loss or claims for consequential compensation; whatsoever and howsoever caused which arise out of or in connection with the Product or the use or handling of the Product even if TOSHIBA TEC CORPORATION is advised of the possibility of such damages.
-
Page 13: Security Suggestions For Key Operators
ID Card. Data on SD cards are your responsibility. To delete Do not give the device information by phone or Email. data on SD cards, contact your local TOSHIBA Authorized Dealer. 2. Always connect through a Firewall when installing your device on a network that is connected to the 8. -
Page 14: Main Unit And Accessories
ENGLISH Main Unit and Accessories Unpack the carton and check that you have all the illustrated accessories. Telephone Line Cable Operating Instructions Operating Instructions Machine Power Cord Recording Paper Tray Toner Cartridge CD-ROM... -
Page 15: External View
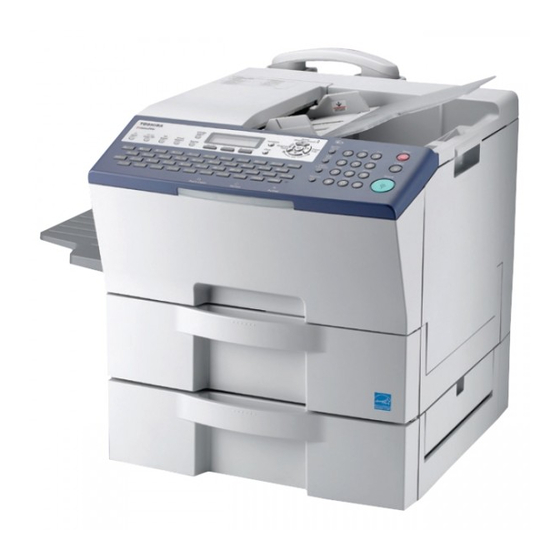
External View Insert the Directory Sheet Holder. (see Note 1) Control Panel ADF (Automatic Document Feeder) Recording Paper Tray Sub Document Tray Toner Cartridge Right Cover Jam Cover Paper Tray (Tray-1) 2nd Paper Tray (Tray-2) (optional) NOTE 1. For more details, refer to the Printing the Directory Sheet in the Operating Instructions (For Advanced Operations) of pro- vided booklet. -
Page 16: Control Panel
ENGLISH Control Panel 5 6 7 9 10 11 13 14 Icon Contents Icon Contents Print Key Scan/file Key Used for Printer function. Used for optional Network Scanner Function. Email Key Email Report Key Used to select the EMAIL mode. Used to send the transmission result notification by Email. - Page 17 Control Panel Icon Contents Icon Contents Cursor Keys • Adjust the Monitor and Ringer volume. • Move the cursor while entering numbers and characters. • Search the station name for Quick Name Search and Directory Search Dialing. • Confirm the entered station for multi-station communication. •...
- Page 18 Control Panel Icon Contents Icon Contents Status LED (RED) Print Data LED (GREEN) Lights/Flashes when trouble Flashes: occurs. When receiving printing data. Lights: Lights: The machine detected a trouble While printing. status, • No paper in the selected tray or toner has run out.
-
Page 19: Unpacking
Unpacking Installing Your Machine To set up your machine, follow the instructions on the page provided for each section. ATTENTION • Do not plug the main unit's AC Power Cord until instructed to do so. Important 1. Unpack the carton and visually check the condition of the machine and make sure no missing accessories or any shipping damage before installation. -
Page 20: Remove All Shipping Tapes And All Packing Materials
Unpacking Remove All Shipping Tapes and All Packing Materials Remove all shipping tapes and all packing Install the Recording Paper Tray. materials. Pull out the tray until it stops. Remove the screw, and fix the screw on the tray as illustrated below. Insert the tray into the machine until it stops. -
Page 21: Load Paper
Unpacking Load Paper Pull out the tray until it stops. Load the paper under the claw on the left as illustrated below. For Tray-1/Tray2 Load Paper : Printing Side Down Paper Weight : 16 - 24 lb. Paper Capacity : 550 Sheets (20 lb.) Default Paper Size : Letter Push down the bottom plate of the tray until it stops. - Page 22 Unpacking When changing the paper size, refer to Make sure that the paper is set properly and it Changing the Paper Size in the Operating does not exceed the Max. Level Indicator. Instructions (For Advanced Operations) on the provided CD-ROM. Insert the tray into the machine until it stops.
-
Page 23: Install The Toner Cartridge
• Shake the Toner cartridge, as toner may accumulate on one side during transportation. • For optimum copy quality, use the recommended TOSHIBA Toner Cartridge. Store Toner Cartridge in a cool dark place. Do not remove the protective cover unless you are ready to use it. - Page 24 Unpacking Insert the Toner Cartridge until it stops, and then push it down. ATTENTION • The Right Cover will not close if the Toner Cartridge is not pushed down adequately. Close the Right Cover.
-
Page 25: Installing Your Machine
Installing Your Machine Optional 2nd Telephone Line Jack Optional Telephone Handset Jack (Optional G3 Communication Port Kit or External Telephone Jack (GD-1310) is required.) Connect the Telephone Line Cable from the Optional Handset Kit into the HANDSET jack on the back of the machine. You can connect an additional standard single line telephone to the machine. -
Page 26: Setting The Dialing Method (Tone Or Pulse)
Setting the Dialing Method ENGLISH (Tone or Pulse) Number Pad Your machine can operate with either of two dialing methods (Tone or Pulse), depending on the type of telephone line you are connected to. If you need to change the dialing method to Tone or Pulse, follow the procedure below. -
Page 27: Adjusting The Volume
ENGLISH Adjusting the Volume Cursor Keys You can adjust the monitor, and ringer volume on your machine. The built-in speaker enables you to hear the dial tone, dialing signals, and busy tone. The ringer sounds when your machine receives a call. Monitor Key Stop Key Setting the Monitor Volume... -
Page 28: Setting The Ringer Volume
Adjusting the Volume Setting the Ringer Volume MMM-dd-yyyy 15:00 Standby RINGER VOLUME repeatedly to lower the volume. RINGER VOLUME repeatedly to raise the volume. (((( )))) NOTE 1. You can also adjust the volume of the key touch tone and the volume of the buzzer in the Fax Parameter No.10 (KEY / BUZZER VOLUME). -
Page 29: User Parameters (For Facsimile)
ENGLISH User Parameters (For Facsimile) Function Key Set Key Number Pad Your facsimile machine has several basic settings (User Parameters) to help you keep records of the documents you send or receive. For example, the built-in clock keeps the current date and time, and your LOGO and ID Number help to identify you when sending, or receiving documents. - Page 30 1234 Enter your LOGO (up to 25 characters and numbers) by using the LOGO QWERTY Keyboard. TOSHIBA Ex: TOSHIBA If you make a mistake, use to move the cursor one space beyond the incorrect character, press then re-enter the new character.
-
Page 31: Setting Your Machine
ENGLISH Setting Your Machine Programming Auto Dialer Your machine has 2 types of Auto Dialers. Function Key Set Key Number Pad The default dialer can be selected by changing the setting of Fax Parameter No. 119 (QWERTY KEYBOARD). When the setting is set to: "1: One-Touch"... -
Page 32: Placing Documents (Facsimile/Internet Fax)
Placing Documents (Facsimile/Internet Fax) How to Place Documents Face Up Documents can be set up to the Upper Limit Indicator. Max. 100 pages (A4 / Letter size Documents, 20 lbs paper) Upper Limit Indicator (A) Upper Limit Guide (B) ADF Tray Document Guides Adjust the Document Guides to the Document width. -
Page 33: Sending Documents
ENGLISH Sending Documents Manual Number Dialing Documents can be transmitted by dialing the Telephone Number manually. Number Pad Start Key ENTER STATION(S) THEN PRESS START 00% Set document(s) face up. Enter the Telephone Number using the Number Pad (up to 36 digits). TEL. -
Page 34: Quick Name Search Dialing
Set document(s) face up. Enter the first letter of the name you wish to search repeatedly until it TOSHI is shown on the LCD display. 4567 Ex: TOSHIBA TOSHIBA 7890 Press to store document(s) into the memory. * STORE * NO.001... -
Page 35: What Is Internet Fax
ENGLISH What is Internet Fax? It is a feature whereby scanned documents are transmitted to Internet Fax or to computers as Email. Internet Fax communicates via an Intranet or the Internet without using the telephone line. This machine can be connected to 10Base-T/100Base-TX Ethernet LAN (local area network). A regular Fax machine goes off-hook, dials, and the phone network completes a circuit over phone lines to the receiving fax. -
Page 36: Using The Internet Fax Feature
What is Internet Fax? Using the Internet Fax Feature To use the Internet Fax feature, a network cable must be connected to the machine, and the network environment must be properly configured in Function Parameters. For setup instructions, refer to the Operating Instructions (For Advanced Operations) on the provided CD- ROM. - Page 37 1. To function as an SMTP Mail Server, your machine's Email Address must include its unique Host Name within your com- pany domain. This unique Host Name must be registered within your network's DNS (Domain Name System) Server. Ex: Internet_Fax@fax01.toshiba.com 2. Automatically refers to immediate SMTP transfer or immediate POP3 retrieval. Manually refers to manual retrieval of mail when configured as a POP3 Client.
-
Page 38: Replacing Consumables
ENGLISH Replacing Consumables Adding Paper (Paper Trays: Tray-1 and Tray-2) ATTENTION • When "ADD PAPER" message appears on the display, either Tray-1 or Tray-2 has run out of paper or is not closed firmly. Replenish the paper in the tray(s) or ensure that the tray(s) are closed. Pull out the tray until it stops. - Page 39 Replacing Consumables Make sure that the paper is set properly and it does not exceed the Max. Level Indicator. Insert the tray into the machine until it stops. NOTE 1. When the optional Tray-2 is installed and the same size of paper is loaded in both trays, the paper will be supplied from Paper Tray-1 first.
-
Page 40: Replacing The Toner Cartridge
Order the Toner Cartridge using the Toner Cartridge Order Form. Replace the Toner Cartridge before the Toner runs out. TONER IS RUNNING LOW When ordering the Toner Cartridge, print the Order Form using the following procedures, and fax it to your authorized TOSHIBA dealer. FUNCTION (1-9) ENTER NO. OR... - Page 41 • Shake the cartridge well, as toner may accumulate on one side during transportation. • For optimum copy quality, use the recommended TOSHIBA Toner Cartridge. Store Toner Cartridge in a cool dark place. Do not remove the protective cover unless you are ready to use it.
- Page 42 Replacing Consumables Align the top of the Toner Cartridge with the Close the Right Cover. line under the arrow as illustrated below, and insert the Toner Cartridge into the machine. The below message appears on the LCD when the Right Cover is closed. NEW TONER REPLACED? 1:YES 2:NO Insert the Toner Cartridge until it stops, and...
- Page 43 Replacing Consumables FUNCTION (1-9) ENTER NO. OR MAINTENANCE (3-6) ENTER NO. OR TONER REPLACEMENT? 1:YES 2:NO...
-
Page 44: Problem Solving
Problem Solving If You Have Any of These Problems Mode Symptom Cause / Action Page During Installation The display is The backup capacitor is completely discharged. blinking After setting the clock, the blinking will stop. During Document doesn’t 1. Check that your document is free of staples and paper Transmission feed/multiple feed clips, and that it is not greasy or torn. - Page 45 Problem Solving Mode Symptom Cause / Action Page Transmission Copy Vertical lines on the Check own copy quality. If copy is OK, your machine has no Quality transmitted problem, report to the receiving party that they have a document problem. If copy is NG, clean the Document Scanning Area. (Refer to the Operating Instructions (For Advanced Operations) on the provided CD-ROM.) Transmitted...
-
Page 46: User(U)/Jam(J) Error Codes
Wait for a few seconds and plug the power cord of the machine in the wall outlet again. If the E Code reappears, contact your local TOSHIBA Authorized Dealer. -
Page 47: Removing A Misfed Paper (Paper Feed/Paper Transport)
Open the Right Cover. Close the Right Cover. Remove the misfed paper. NOTE 1. When clearing a misfed paper that is difficult, or impossible to see, disconnect the power cord from the machine and contact your local TOSHIBA Authorized Dealer. - Page 48 Open the Jam Cover. (Tray-2 optional) Close the Jam Cover. Remove the misfed paper. NOTE 1. When clearing a misfed paper that is difficult, or impossible to see, disconnect the power cord from the machine and contact your local TOSHIBA Authorized Dealer.
-
Page 49: Removing A Misfed Paper (Inside The Machine)
Problem Solving Removing a Misfed Paper (Inside the Machine) ATTENTION • Do not scratch or touch the surface of the OPC Drum with bare hands. The OPC Drum is sensitive to light. To prevent optical exposure problems, do not expose the OPC Drum to direct sunlight or bright light. - Page 50 • The Right Cover will not close if the Toner Cartridge is not pushed down adequately. NOTE 1. When clearing a misfed paper that is difficult, or impossible to see, disconnect the power cord from the machine and contact your local TOSHIBA Authorized Dealer.
-
Page 51: Removing A Misfed Paper (Adf)
Remove misfed document. Remove misfed document in the Sub Document Tray as illustrated below. NOTE 1. When clearing a misfed document that is difficult, or impossible to see, disconnect the power cord from the machine and contact your local TOSHIBA Authorized Dealer. -
Page 52: Information Code
Check with the other party. NOTE 1. After identifying the problem and taking the recommended action, if the Information Codes keep occurring or if Information Codes that are not listed in the above table appear, please contact your local TOSHIBA Authorized Dealer. - Page 53 1. After identifying the problem and taking the recommended action, if the Information Codes keep occurring or if Information Codes that are not listed in the above table appear, please contact your local TOSHIBA Authorized Dealer. Continued on the next page...
- Page 54 NOTE 1. After identifying the problem and taking the recommended action, if the Information Codes keep occurring or if Information Codes that are not listed in the above table appear, please contact your local TOSHIBA Authorized Dealer.
- Page 55 NOTE 1. After identifying the problem and taking the recommended action, if the Information Codes keep occurring or if Information Codes that are not listed in the above table appear, please contact your local TOSHIBA Authorized Dealer.
-
Page 56: Fcc Notice
Electronic Imaging Division 2 Musick, Irvine, CA 92618-1631 Note: For Technical Support, please contact your Authorized TOSHIBA dealer. This equipment complies with Part 68 of the FCC rules and the requirements adopted by the ACTA. On the rear panel of this equipment is a label that contains, among other information, a product identifier in the format US:AAAEQ##TXXXX. - Page 57 In order to program this information into your facsimile machine, you should refer to page 28 in this Operating Instructions to complete the steps. Example of Header Format (DATE and TIME, LOGO, ID Number setting) MMM-dd-yyyy 09:00 TOSHIBA 201 348 7000 P.01/05 1) Date and Time...
-
Page 58: Notice To Users In Canada
FCC Notice Notice to Users in Canada NOTICE Before installing this equipment, users should ensure that it is permissible to be connected to the facilities of the local telecommunications company. The equipment must also be installed using an acceptable method of connection. - Page 59 à une interface téléphonique. La terminaison d’une interface peut consister en une combinaison quelconque de dispositifs, à la seule condition que la somme d’indices d’équivalence de la sonnerie de tous les dispositifs n’excède pas 5. TOSHIBA OF CANADA LIMITED Office Product Group 191 McNABB STREET...
- Page 60 memo...
-
Page 61: Important Information
IMPORTANT INFORMATION When requesting information, supplies or service, always refer to the model and serial number of your machine. The model and serial number plate (Main Name Plate) is located on the rear of the machine. For your convenience, space is provided below to record information you may need in the future for ref- erence or troubleshooting. - Page 62 Operating Instructions (For Basic Operations) The following trademarks and registered trademarks are used throughout this manual: Adobe, Acrobat Reader & Adobe logo are either registered trademarks or trademarks of Adobe Systems Incorporated. All other trademarks identified herein are the property of their respective owners. ®...