Table of Contents
Advertisement
Quick Links
Advertisement
Table of Contents

Related Manuals for Toshiba e-studio50f


Summary of Contents for Toshiba e-studio50f
- Page 2 Service Telephone Number – Model and Serial Number Copyright 2002 TOSHIBA TEC CORPORATION All rights reserved © Unauthorized copying and distribution is a violation of law. Printed in Philippines. The contents of this Operator's Manual are subject to change without notice.
-
Page 3: Table Of Contents
Table of Contents Getting to Know Your Machine DISCLAIMER NOTICE ....................Safety Information......................Function Key........................10 External View ........................11 Control Panel ........................12 Installing Your Machine Main Unit and Accessories.................... 14 Installing the Accessories ..................... 15 Installing the Drum Unit/Toner Cartridge Assembly ........... 16 Loading the Recording Paper .................. - Page 4 Table of Contents Basic Operations Sending Documents....................... 43 General Description ..................Memory Transmission..................Direct Transmission ..................Voice Mode Transmission................Transmission Reservation ................Redialling ....................... Receiving Documents....................59 Reception Modes ................... Telephone Mode .................... Fax / Tel Auto Switching Mode ..............Fax Mode .......................
- Page 5 Table of Contents Advanced Features Fax Forward ........................82 Setting Fax Forward ..................82 Network Features Sub-Addressing......................83 General Description..................83 Setting the Sub-Address into a One-Touch/ABBR. Dialling Numbers ... 84 Sending a Fax with Sub-Address ..............85 Printout Journals and Lists Journals and Lists......................
-
Page 6: Getting To Know Your Machine
Product even if TOSHIBA TEC CORPORATION is advised of the possibility of such damages. TOSHIBA TEC CORPORATION shall not be liable for any loss, cost, expense, claim or damage caused by any inability to use (including, but not limited to failure, malfunction, hang-up, virus infection or other... -
Page 7: Safety Information
Safety Information denotes a potential hazard that could result in serious injury or death. WARNING • TO PREVENT FIRE OR SHOCK, DO NOT EXPOSE THIS PRODUCT TO RAIN OR ANY TYPE OF MOISTURE. • TO MINIMIZE THE POSSIBILITY OF SHOCK OR DAMAGE TO THE MACHINE, IT MUST BE PROPERLY GROUNDED. - Page 8 Safety Information denotes hazards that could result in minor injury or damage to the machine. CAUTION • TO REDUCE THE RISK OF SHOCK OR FIRE, USE ONLY NO. 26 AWG OR LARGER TELEPHONE LINE CABLE. • DISCONNECT ALL POWER TO THE MACHINE BEFORE COVER(S) ARE REMOVED. REPLACE THE COVER(S) BEFORE THE UNIT IS RE-ENERGIZED.
- Page 9 Safety Information denotes hazards that could result in minor injury or damage to the machine. CAUTION Do not install the machine near heating or an air conditioning unit. Avoid exposure to direct sunlight. Install the machine on a flat surface, leave at least 4 inches (10 cm) of space between the machine and other objects.
-
Page 10: Function Key
Function Key Any function can be started by first pressing and then enter the function number, or by FUNCTION pressing scroll keys repeatedly until the desired function appears on the display. Deferred Communication 1 = XMT Polling 1 = Polling Print List 1 = Journal (Print/View) 2 = Speed Dial List... -
Page 11: External View
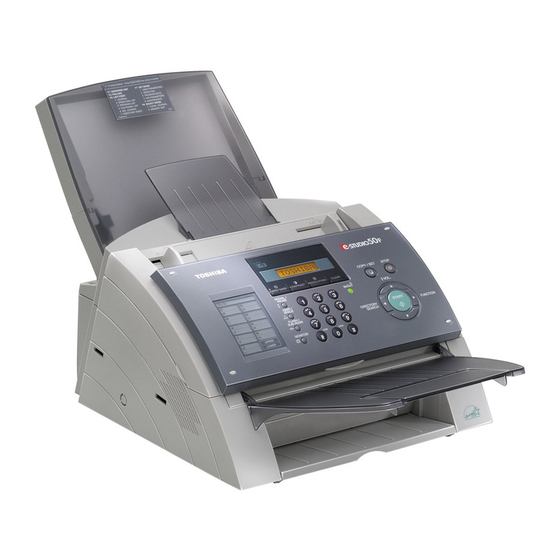
External View Document Sub Tray Paper Tray Cover Paper Tray Control Panel Document Return Tray Handset (Available as an option, see page 114) Recording Paper Tray 1 For some countries, the handset may not be available because of the country’s regulation or NOTE specification. -
Page 12: Control Panel
Control Panel - Used to switch the machine into energy saving mode. (See page 36) - Used to set Normal, Lighter or Darker. (See page 40) - Used to set Standard, Fine, Super-Fine or Halftone. (See page 40) - Use this button when resetting all the previously set functions. One-Touch Keys (01-16) - Used to enter a pause when recording or dialing a telephone - Used for One-Touch Dialing. - Page 13 Control Panel LCD Display - Press this button when you want to stop Indicates date and time, or the current status can telecommunication, registration operation, be confirmed by one of the following colors. or audible tone. Green : Machine is activated for communication, printing data or scanning a document.
-
Page 14: Installing Your Machine
Installing Your Machine Main Unit and Accessories Unpack the carton and check that you have all the accessories illustrated. Starter Toner Cartridge Drum Unit Machine Paper Tray Paper Tray Cover Document Sub Tray Document Return Tray Telephone Line Cable Power Cord Operator's Manual CD-ROM Handset Cradle Stopper... -
Page 15: Installing The Accessories
Installing the Accessories 8 1/2 Final Installed View Paper Tray Paper Tray Cover Hook the projections into the holes on the machine. Document Sub Tray Handset Cradle Hook the projections into the Stopper holes on the machine. Handset [Available as an Option] Document Return Tray Handset Cord Hook the projections into the... -
Page 16: Installing The Drum Unit/Toner Cartridge Assembly
Installing the Drum Unit/Toner Cartridge Assembly Unpack the Toner Cartridge and rock it back and forth as shown for 5 or 6 times to even the toner inside. Remove the protective seal. Note: Pull on the seal slowly and straight out. - Page 17 Installing the Drum Unit/Toner Cartridge Assembly Open the ADF Door and Printer Cover. Align the projections on both sides of the Drum Unit/Toner Cartridge Assembly with the grooves in the machine as shown and insert the Drum Unit/Toner Cartridge Assembly into the machine.
-
Page 18: Loading The Recording Paper
Loading the Recording Paper Paper Specifications In general, most bond papers will produce excellent results. Most photocopy papers will also work very well. There are many "name" and "generic" brands of paper available. We recommend that you test various papers until you obtain the results you are looking for. For detailed recommended paper specifications. (See page 113) How to Load the Recording Paper Remove the Paper Tray Cover. - Page 19 memo...
-
Page 20: Connecting The Telephone Line Cable And Power Cord
Connecting the Telephone Line Cable and Power Cord Power Cord Plug one end of the power cord into an ordinary AC outlet and the other end into the receptacle on the rear of the machine. Warning: This apparatus must be properly grounded. Do not modify the AC outlet. Telephone Line Cable Plug one end of the telephone line cable into the telephone jack supplied by the telephone company and the other end into the LINE jack on the Rear of the machine. - Page 21 Connecting the Telephone Line Cable and Power Cord External Telephone (Optional) You can connect an additional standard single line telephone to the machine.
-
Page 22: Setting The Dialling Method (Tone Or Pulse)
Setting the Dialling Method (Tone or Pulse) Your machine can operate with either of two dialling methods (Tone or Pulse), depending on the type of telephone line you are connected to. If you need to change the dialling method to Tone or Pulse, follow the procedure below. -
Page 23: Adjusting The Volume
Adjusting the Volume You can adjust the monitor and ringer volume on your machine. The built-in speaker enables you to hear the dial tone, dialling signals, and busy tone. The ringer sounds when your machine receives a call. Setting the Monitor Volume ENTER TEL NO. -
Page 24: User Parameters
User Parameters General Description Your facsimile machine has several basic settings (User Parameters) to help you keep records of the documents you send or receive. For example, the built-in clock keeps the current date and time, and your LOGO and ID Number help to identify you when you send or receive documents. Setting the Date and Time At standby the display will show the date and time. -
Page 25: Setting Your Name
(1-8) USER PARAMETERS? SETTING NAME? NAME:❚ Enter your NAME (max. 25 characters and digits) by using NAME:TOSHIBA❚ the Keypad. (See page 28) T O S H I B A If you make a mistake, use to move the cursor one space beyond the incorrect character, press CLEAR then re-enter the new character. -
Page 26: Setting Your Character Id
User Parameters Setting Your Character ID If the remote machine has a Character ID capabilities, when you are sending or receiving, your Character ID will appear on the remote machine's display and the remote machine's Character ID will appear on your display. -
Page 27: Setting Your Id Number (Fax Telephone Number)
User Parameters Setting Your ID Number (Fax Telephone Number) If the remote machine does not have a Character ID but it has an ID Number, when sending or receiving, your ID Number will appear on the remote machine's display and their ID Number will appear on your display. -
Page 28: Entering Characters
Entering Characters The Keypad also serves as character and symbol input key when recording LOGO, Character ID and station name. Select the desired characters according to the following table Keys Character Table Number of times key is pressed Ö È É... -
Page 29: Programming Your Machine
Programming Your Machine One-Touch/Abbreviated Dialling Numbers Entering One-Touch/Abbreviated Dialling Numbers One-Touch and Abbreviated Dialling are two fast ways of dialling full telephone numbers. To use these dialling methods, you must first store the telephone number using the following procedure. To enter a One-Touch key, follow the steps below SET MODE (1-8) 1:ONE-TCH 2:ABBR... - Page 30 One-Touch/Abbreviated Dialling Numbers Entering One-Touch/Abbreviated Dialling Numbers To set an Abbreviated Dialling Number, follow the steps below SET MODE (1-8) 1:ONE-TCH 2:ABBR ABBR. NO.=❚ [22]ENTER TEL.# (01 to 82) Enter the telephone number [22]9-555 2345❚ (up to 36 digits including pauses and spaces). 9 PAUSE 5 5 5 SPACE 2 3 4 5 [22]ENTER NAME Enter the station name using character keys...
-
Page 31: Editing One-Touch/Abbreviated Dialling Numbers
One-Touch/Abbreviated Dialling Numbers Editing One-Touch/Abbreviated Dialling Numbers If you have to change or erase any of the One-Touch/Abbreviated dialling numbers, follow the steps below. To change the settings of a One-Touch/ABBR dialling number SET MODE (1-8) 1:ONE-TCH 2:ABBR Press for One-Touch Dialling Number. Press for ABBR. - Page 32 One-Touch/Abbreviated Dialling Numbers Editing One-Touch/Abbreviated Dialling Numbers To erase the settings of a One-Touch/ABBR Dialling number SET MODE (1-8) 1:ONE-TCH 2:ABBR Press for One-Touch Dialling Number. Press for ABBR. Dialling Number. PRESS ONE-TOUCH Enter the station you wish to erase. <01>9-555 1234 <01>ENTER TEL.# PRESS ONE-TOUCH...
-
Page 33: Printing Out A Directory Sheet
* PRINTING * Your machine prints out the directory sheet. ******************* -DIRECTORY SHEET- ****************** DATE 10-DEC-2003 ***** TIME 15:00 ***** 201 555 1234 SALES DEPT ACCOUNTING dotted line TOSHIBA ********************************************* -HEAD OFFICE - ****** - 201 555 1212- ******* Directory Sheet Cover... -
Page 34: Customizing Your Machine
Customizing Your Machine General Description Your facsimile machine has a variety of adjustable Fax Parameters. These parameters, listed in the Parameter Table, are preset for you and do not need to be changed. If you do want to make a change, read the table carefully. -
Page 35: Fax Parameter Table
Customizing Your Machine Fax Parameter Table Setting Parameter Setting Comments Number CONTRAST Normal Setting the home position for the CONTRAST. Lighter Darker RESOLUTION Standard Setting the home position for the RESOLUTION. Fine S-Fine Halftone STAMP Setting the home position of the STAMP key. To select the stamp function when document is stored in memory, see Fax Parameter No. - Page 36 Customizing Your Machine Fax Parameter Table Setting Parameter Setting Comments Number OGM LENGTH 1 sec. Setting for the OGM length of your TAM from 1 to 60 (TAM I/F) seconds. The machine will not start to detect SILENCE until the time setting has lapsed. 60 sec.
- Page 37 Customizing Your Machine Fax Parameter Table Setting Parameter Setting Comments Number ENERGY SAVER To reduce the power consumption in standby, select either MODE Energy-Saver or Sleep mode and specify the Delay Time (1 Energy- to 120 minutes) for the machine to enter into the selected Saver mode.
- Page 38 Customizing Your Machine Fax Parameter Table Setting Parameter Setting Comments Number PC-FAX RCV MODE Print Selecting how the machine will execute the received Fax document(s). Upload & Print : Print the received document(s). Print Upload & Print : Print the received document(s) and Upload upload it’s file.
-
Page 39: Basic Operations
Basic Operations Loading Documents Documents You Can Send In general, your machine will send any document printed on A4 size paper. Document Size Document Thickness Maximum Size Minimum Size Single sheet: 257 mm 0.06 mm, 45 g/m (See Note) 148 mm 0.15 mm, 112 g/m 128 mm Multiple sheets:... -
Page 40: How To Load Documents
Loading Documents How to Load Documents 1. Be sure the document(s) is free of staples, paper clips and is not torn, greasy or covered by foreign objects. 2. Place the document(s) FACE DOWN on the Automatic Document Feeder (ADF) until the leading edge placed into the machine stops. -
Page 41: Basic Transmission Settings
Basic Transmission Settings General Description You can temporarily change the transmission settings either before or after you place the document on the ADF. These settings are as follows • Contrast • Resolution • Communication Journal After your document(s) have been sent, your machine will automatically return to the preset settings. Contrast Your machine is preset to Normal contrast. -
Page 42: Communication Journal (Comm. Journal)
Basic Transmission Settings Communication Journal (COMM. JOURNAL) A Communication Journal lets you verify if the transmission was successful. You can select the condition to print out the Communication Journal as follows. When COMM. JOURNAL = OFF a Communication Journal will not print. When COMM. -
Page 43: Sending Documents
Sending Documents General Description You can choose either Memory or Direct Transmission. Use Memory Transmission if: • You want to send the document(s) to multiple stations. • You have to retrieve the document immediately. • You want to take advantage of Dual Operation design. Use Direct Transmission if: •... -
Page 44: Memory Transmission
Sending Documents Memory Transmission Your machine quickly stores the document(s) into the machine's memory. Then, starts to dial the telephone number. If the transmission fails, your machine will re-transmit the remaining unsuccessful page(s) automatically. Store document(s) Transmit Receive in memory Destination A Destination B 1 If memory overflow occurs while storing document(s), the remaining document(s) on the ADF... - Page 45 Sending Documents Memory Transmission Manual Number Dialling To dial the telephone number manually, follow the steps below. DOCUMENT SET Set document(s) face down. Enter a telephone number from the keypad. 5551234❚ (Up to 36 digits) You can also designate more that one destination. 5 5 5 1 2 3 4 * STORE * The document(s) begin to store into memory.
- Page 46 Sending Documents Memory Transmission One-Touch Dialling One-Touch Dialling allows you to dial a full telephone number by pressing a single key. To set up the One- Touch keys, see page 29. DOCUMENT SET Set document(s) face down. Press a One-Touch key (01 - 16). <01>...
- Page 47 Sending Documents Memory Transmission Directory Search Dialling Directory Search dialling allows you to dial a full telephone number by searching the station name entered in One-Touch keys or Abbreviated dialling numbers. DOCUMENT SET Set document(s) face down. ENTER LETTER(S) Enter the full station name or part of a station name by using the Keypad.
- Page 48 Sending Documents Memory Transmission Multi-Station Transmission (Broadcasting) If you have to send the same document(s) to multiple stations, you can save time in feeding the document(s) by using memory transmission. That is, you can store the document(s) into memory and then send it to the station(s) automatically.
-
Page 49: Direct Transmission
Sending Documents Direct Transmission If your machine's memory is full or you wish to send the document(s) immediately, use Direct Transmission. Manual Number Dialling (Direct Transmission) To dial the telephone number manually, follow the steps below. DOCUMENT SET Set document(s) face down. MEMORY XMT? DOCUMENT SET Enter a telephone number from the keypad. - Page 50 Sending Documents Direct Transmission One-Touch Dialling (Direct Transmission) One-Touch Dialling allows you to dial a full telephone number by pressing a single key. To set up the One- Touch keys, see page 29. DOCUMENT SET Set document(s) face down. MEMORY XMT? DOCUMENT SET Press a One-Touch key (01 - 16).
- Page 51 Sending Documents Direct Transmission Abbreviated Dialling (Direct Transmission) Abbreviated dialling is a speedy way to dial a frequently dialed telephone number by preprogramming the telephone number into the built-in auto-dialer with a 2-digit abbreviated code. To program an abbreviated dialling number, see page 30. DOCUMENT SET Set document(s) face down.
- Page 52 Sending Documents Direct Transmission Directory Search Dialling (Direct Transmission) Directory Search dialling allows you to dial a full telephone number by searching the station name entered in One-Touch keys or Abbreviated dialling numbers. DOCUMENT SET Set document(s) face down. MEMORY XMT? DOCUMENT SET ENTER LETTER(S) Enter the full station name or part of a station name by...
-
Page 53: Voice Mode Transmission
Sending Documents Voice Mode Transmission If you wish to send the document after talking with other party, use Voice Mode Transmission. Your machine requires an optional fax handset or an external telephone. Off-Hook Dialling For Off-Hook Dialling, follow the steps below. DOCUMENT SET Set document(s) face down. - Page 54 Sending Documents Voice Mode Transmission On-Hook Dialling For On-Hook Dialling, follow the steps below. DOCUMENT SET Set document(s) face down. ENTER TEL NO. You will hear dial tone through the monitor speaker. Dial the telephone number from the keypad. 5551234❚ 5 5 5 1 2 3 4 When you hear a beep, NOTE...
-
Page 55: Transmission Reservation
Sending Documents Transmission Reservation You can do the following while sending a document(s) from memory or receiving a document(s). • Reserve the next transmission into memory. (Up to 5 different files) • Reserve a priority transmission. Memory Transmission Reservation (Multi-Tasking) If your machine is on-line busy transmitting from memory, receiving or printing received documents, you can reserve a transmission by the following procedure. - Page 56 Sending Documents Transmission Reservation Direct Transmission Reservation (Priority Transmission Reservation) If you are in a rush to send an urgent document, however there are many files in the memory, use Direct Transmission Reservation to send the urgent document. The urgent document will be sent immediately after the current communication is finished.
-
Page 57: Redialling
Sending Documents Redialling Automatic Redialling If a busy line is detected, the machine will redial the number up to 3 times WAITING TO DIAL at 3 minutes interval. During that time, a message will appear as shown to the right. Manual Redialling You can also redial the last dialed number manually by pressing key. - Page 58 Sending Documents Redialling To redial the last dialed number through ADF DOCUMENT SET Set document(s) face down. MEMORY XMT? DOCUMENT SET 5551234 Your machine starts to dial the last dialed number. NOTE 1 While the unit is displaying "WAITING TO DIAL", you can press to start redialling REDIAL immediately.
-
Page 59: Receiving Documents
Receiving Documents Reception Modes You can select one of the four modes as shown below. Conditions Suggested Reception Mode Settings You normally receive Fax Parameter No. 17 set to 1: Tel Telephone Mode only voice calls. You can answer the incoming call via an External Telephone (Optional). -
Page 60: Telephone Mode
Receiving Documents Telephone Mode When your machine is set to this mode, your machine will not receive documents automatically. If you receive a fax call, follow the procedure below to receive documents manually. Setting the Telephone Mode Change Fax Parameter No. 17 (RECEIVE MODE) to 1: Tel. -
Page 61: Fax / Tel Auto Switching Mode
Receiving Documents Fax / Tel Auto Switching Mode When your machine is set to this mode, your machine will switch to document reception or voice communication automatically. Setting the Fax / Tel Auto Switching Mode Change Fax Parameter No. 17 (RECEIVE MODE) to 3: Fax / Tel SW. -
Page 62: Fax Mode
Receiving Documents Fax Mode When your machine is set to this mode, it will immediately begin to receive documents automatically when a call is received. Setting the Fax Mode Change Fax Parameter No. 17 (RECEIVE MODE) to 2: Fax. (See page 35) Operation of Fax Mode Your machine will begin receiving automatically when a fax call is received. -
Page 63: Tam (Telephone Answering Machine) Interface Mode
Receiving Documents TAM (Telephone Answering Machine) Interface Mode Your machine is equipped with a unique feature called TAM Interface which enables it to automatically switch a single telephone line either to Fax or TAM. You can connect most TAMs in the market to your machine and use your existing telephone line very efficiently. - Page 64 Receiving Documents TAM (Telephone Answering Machine) Interface Mode Setting the TAM Interface Mode Change Fax Parameter No. 17 (RECEIVE MODE) to 4: TAM I/F. (See page 35) Operation of TAM Interface Mode If it is a Fax call, When your TAM and Fax receives an incoming call, the TAM always answers the call first and then the TAM plays the OGM (Outgoing Message) recorded in your TAM to the calling station.
-
Page 65: Print Reduction
Receiving Documents Print Reduction This machine can use Letter, Legal or A4 size plain paper for recording. Sometimes, oversized documents sent to you by the other parties cannot be printed within a single page. When this occurs, the document will be divided into separate pages. -
Page 66: Receiving Oversize Documents
Receiving Documents Receiving Oversize Documents If the received document is extremely long (over 39% longer than the recording paper), the document will be divided into separate pages. When printing on separate pages, the bottom 10 mm (0.4 in) of the first page will be overlapped on top of the next page. -
Page 67: Substitute Memory Reception
Print Collation Mode The printing mechanism of the e-STUDIO50F is a Reverse Order Stacking construction. The e-STUDIO50F has a Print Collation Mode that stacks received documents in the correct order. When the Print Collation Mode is enabled, all received documents are stored into memory first, then printed out in Correct Order Stacking. -
Page 68: Making Copies
Making Copies Your machine has a copy function which can make single or multiple copies. DOCUMENT SET Set document(s) face down. NO. OF COPY=1 Enter the number of copies. NO. OF COPY=10 * STORE * The machine stores the document, then prints the copies. 1 The copy will be reduced automatically depending on the length of the original document. -
Page 69: Advanced Features
Advanced Features Timer Controlled Communications General Description You can send document(s) to one or multiple stations at any preset time within the next 24 hours. Up to 5 built-in timers can be set for deferred communication. Deferred Transmission DOCUMENT SET Set document(s) face down. -
Page 70: Polling
Polling General Description Polling means calling other station(s) to retrieve document(s). The other station must know in advance that you will call and must have document(s) set on the ADF or stored in the memory. You may need to set a polling password, shared by the other station, to ensure security. -
Page 71: To Poll Documents From Another Station
Polling To Poll Documents from Another Station The following procedure lets you poll document(s) from one or multiple stations. Be sure to set the polling password before polling. (See page 70) PASSWORD=1234 Enter a 4-digit polling password. (See Note 2) PASSWORD=1111 1 1 1 1 ENTER STN(S) -
Page 72: Program Keys
Program Keys General Description Your fax machine has special Program Keys. These keys are useful if you frequently need to send or poll the same group of stations. You can use these keys to store a One-Touch group key, a sequence of stations to be polled, a deferred transmission sequence or an additional One-Touch key. -
Page 73: Setting For Deferred Transmission
Program Keys Setting for Deferred Transmission To set a Program Key for deferred transmission PROGRAM DIAL? PRESS P-KEY [P1]ENTER NAME Enter the Key Name (up to 15 characters) by using the Character keys. (See page 28) PRESS FUNCTION Ex: PROG. A and press START TIME ❚... -
Page 74: Setting For Polling
Program Keys Setting for Polling To set a Program Key for polling PROGRAM DIAL? PRESS P-KEY [P1]ENTER NAME Enter the Key Name (up to 15 characters) by using the Character keys. (See page 28) PRESS FUNCTION Ex: PROG. A and press PASSWORD=1234 Enter a 4-digit polling password. -
Page 75: Setting For One-Touch Key
Program Keys Setting for One-Touch Key To set a Program Key for One-Touch Key ONE-TOUCH DIAL? PRESS P-KEY [P1]ENTER NAME Enter the station name (up to 15 characters) by using the Character keys. (See page 28) [P1]ENTER TEL.# Ex: PROG. A and press Enter a telephone number (up to 36 digits including pauses and spaces). -
Page 76: Changing Or Erasing The Program Key Settings
Program Keys Changing or Erasing the Program Key Settings To change the settings in a Program Key, follow the procedure on setting a Program Key on pages 72 to 75. • Start time or station(s) for deferred transmission • Station(s) for polling •... -
Page 77: Access Code
Access Code General Description The Access Code prevents an unauthorized user from operating the machine. Once a 4-digit Access Code is registered, no one can operate the machine without entering the correct access code. Automatic Receiving, however, is always available. After you complete any operation, such as mode setting or transmission, and the display returns to standby, you have to re-enter the access code in order to use the machine again. -
Page 78: Operating Your Machine With The Access Code (Restrict All Operations)
Access Code Operating Your Machine with the Access Code (Restrict All Operations) Enter the Access Code. ACCESS CODE=❚ 1 2 3 4 ACCESS CODE=**** 10-DEC 15:00 00% Now you can operate the machine normally. Operating Your Machine with the Access Code (Restrict Access of Fax Parameters Only) The machine can restrict the operation of setting and printing the Fax Parameters only. -
Page 79: Distinctive Ring Detector (Drd)
Distinctive Ring Detector (DRD) General Description Your machine has a special feature in conjunction with an optional service provided by many local telephone companies. It can distinguish up to 2 telephone numbers with a corresponding ring pattern identifying each number. "DRD" lets you provide multiple phone numbers, one for your fax, business or personal use with only one single phone line. -
Page 80: Pin Code Access
PIN Code Access General Description If your PBX requires a PIN (Personal Identification Number) code to get an outside line, your machine can be set to prompt the user to enter a PIN code before any dialling. Selecting the Access Method (Prefix or Suffix) SET MODE (1-8) NO.=❚... -
Page 81: Dialling With A Pin Code
PIN Code Access Dialling with a PIN Code DOCUMENT SET Set document(s) face down. Dial by any combination of the following methods: • One-Touch Dialling • Abbreviated Dialling • Manual Number Dialling, press after each station is entered (up to 7 stations) •... -
Page 82: Fax Forward
Fax Forward Setting Fax Forward This feature allows all incoming faxes to be forwarded to the station registered in the one-touch or abbreviated dialling number. Once the faxes are received in the memory, the machine will forward the received document(s) to the telephone number registered in the one-touch or abbreviated dialling number. This function is convenient when you would like to receive faxes in another place (i. -
Page 83: Network Features
This password is used only when reserving documents from a remote facsimile or the local hub and not used during document retrieval. To send a document to a Bulletin Board Box from the e-STUDIO50F, do this by setting the Bulletin Board Box number of a remote party to the Sub-Address. -
Page 84: Setting The Sub-Address Into A One-Touch/Abbr. Dialling Numbers
Sub-Addressing Setting the Sub-Address into a One-Touch/ABBR. Dialling Numbers SET MODE (1-8) 1:ONE-TCH 2:ABBR Press to select “One-Touch” Press to select “ABBR. NO.”. PRESS ONE-TOUCH Press a One-Touch key (01 - 16). <01>ENTER TEL.# <01>551234s2762❚ Enter the telephone number, press then enter the FLASH Sub-Address (up to 20 digits). -
Page 85: Sending A Fax With Sub-Address
Sub-Addressing Sending a Fax with Sub-Address to separate the Telephone number and the Sub-Address. FLASH If you want to send a document to a Confidential Box or a Bulletin Board Box using Sub-Address Communications, set the box number of the remote party in the Sub-Address. To send a document to a Bulletin Board box within a remote device, the setting of a password is required. -
Page 86: Printout Journals And Lists
Printout Journals and Lists Journals and Lists General Description To help you maintain records of the documents you sent and received, as well as lists of the numbers you record, your facsimile machine is equipped to print the following journals and lists: Transaction Journal, Individual Transmission Journal, Communication Journal, One-Touch/Abbreviated/Directory Search No. -
Page 87: Individual Transmission Journal (Ind. Xmt Journal)
Journals and Lists Individual Transmission Journal (IND. XMT JOURNAL) An Individual Transmission Journal contains the information on the latest transmission. IND. JOURNAL? * PRINTING *... - Page 88 C8044B03C1000 ¤ 003/003 00:01:32 0353678980 10-DEC 08:57 C8044B03C1000 (13) -TOSHIBA ************************************ -HEAD OFFICE - ***** - 201 555 1212- ********* (15) (14) Sample Individual Transmission Journal (IND. XMT JOURNAL) ************** -IND. XMT JOURNAL- **************** DATE 10-DEC-2003 ***** TIME 15:00 *********...
- Page 89 Journals and Lists Individual Transmission Journal (IND. XMT JOURNAL) Explanation of Contents Printout date Printout time Journal number Communication result : "OK" indicates that the communication was successful. "BUSY" indicates that the communication has failed because of busy line. "STOP" indicates that STOP was pressed during communication. "M-OK"...
-
Page 90: Communication Journal (Comm. Journal)
STATION NAME/TEL NO. PAGES DURATION <01> SERVICE DEPT. 001/001 00:01:30 <02> SALES DEPT. 001/001 00:01:25 <03> ACCOUNTING DEPT. 000/001 00:01:45 ¤ BUSY 021 111 1234 000/001 00:00:00 - TOSHIBA - ************************************* - HEAD OFFICE - ****** - 201 555 1212 - *******... - Page 91 Journals and Lists Communication Journal (COMM. JOURNAL) Explanation of Contents Indication of communication mode Start time of communication End time of communication File number : 001 to 999 (When the communication is stored into memory, a file number is assigned for each communication.) Station number : Sequential number of the Stations.
-
Page 92: One-Touch/Abbreviated And Directory Search List
Journals and Lists One-Touch/Abbreviated and Directory Search List To print a One-Touch/Abbreviated Number and Directory Search List of the telephone numbers you have stored SPEED DIAL LIST? 1:ONE/ABBR 2:DIR To print a One-Touch/ABBR. Number List * PRINTING * To print a Directory Search List... - Page 93 222 666 2345 <03> ACCOUNTING DEPT 313 333 3456 NO. OF STATIONS = 03 (4) -TOSHIBA ************************************** -HEAD OFFICE - ***** - 201 555 1212- ********* Sample ABBR. Number List *************** -ABBR NO. LIST- ****************** DATE 10-DEC-2001 ***** TIME 15:00 ******* ABBR NO.
- Page 94 <01> 121 555 1234 SERVICE DEPT <02> 222 666 2345T NO. OF STATIONS = 06 -TOSHIBA ************************************ -HEAD OFFICE - ***** - 201 555 1212 - ********* Explanation of Contents (1) One-Touch number or Abbreviated number : <nn>= One-Touch number, [nn] = Abbreviated number...
-
Page 95: Program List
[P1] TIMER XMT 12:00 [001] [P2] TIMER POLL POLL 19:00 [002] -TOSHIBA ************************************ -HEAD OFFICE - ***** - 201 555 1212- ********* Explanation of Contents (1) Program key (2) Program name : Up to 15 characters (3) Type of communication : "XMT"... -
Page 96: Fax Parameter List
2:Lighter 3:Darker) RESOLUTION (HOME) (1:Standard 2:Fine 3:S-Fine 4:Halftone) 2 MEMORY SIZE (2MB) (6) -TOSHIBA ************************************ -HEAD OFFICE - ***** - 201 555 1212- ********* Explanation of Contents (1) Parameter number (2) Description : "(HOME)" means home position setting. (3) Selection (4) Current setting : "----"... -
Page 97: Toner Cartridge And Drum Unit Supply Order Forms
Journals and Lists Toner Cartridge and Drum Unit Supply Order Forms To print the Supply Order Forms MAINTENANCE(1-3) 1:TONER 2:DRUM To print a Toner Cartridge Order Form * PRINTING * To print a Drum Unit Order Form Sample Supply Order Forms *************************** >... -
Page 98: Power Failure Report
CREATED TIME START TIME PAGES DESTINATION(S) MEM. DEF. XMT 10-DEC 12:00 23:00 <03> -TOSHIBA ************************************ -HEAD OFFICE - ***** - 201 555 1212- ********* Explanation of Contents Power failure date and time Power return date and time File number Communication type Stored date/time : Date/time that these files were stored. -
Page 99: Problem Solving
Problem Solving Troubleshooting If You Have Any of These Problems Mode Symptom Cause / Action page During Standby The display is blinking The battery is completely discharged. This may happen at first installation. After setting the clock, the blinking will stop. During Transmission Document doesn't 1. - Page 100 Troubleshooting Mode Symptom Cause / Action page Communication No dial tone 1. Check the connection of the telephone line. 2. Check the telephone line. No auto answer 1. Check the connection of the telephone line. 2. Check the Reception mode setting. 3.
- Page 101 Troubleshooting Mode Symptom Cause / Action page TAM Interface Trouble Cannot utilize the This feature is not compatible. The fax machine is designed to in Unattended TAM I/F remote turn-on feature answer after 8 rings if the TAM does not answer. Mode (OUT Mode) of the telephone answering machine...
- Page 102 Troubleshooting Mode Symptom Cause / Action page TAM Interface Trouble Fax machine will not Increase the ring count for detection on the telephone In Unattended Fax start to receive with the answering machine. Mode (OUT Mode) telephone answering machine in the auto- answer mode.
-
Page 103: Information Codes
Troubleshooting Information Codes When something unusual occurs, the display may show one of the Information Codes listed below. These will help you to identify and correct the problem. Info. Meaning Action page Code Recording paper jammed when feeding from the Remove the jammed paper. - Page 104 Troubleshooting Information Codes Info. Meaning Action page Code • Unit received a confidential document or was 1. Print a File List and check the contents. requested to be polled of a confidential document 2. Wait until unit finishes printing. under any of following conditions. 1.
-
Page 105: Clearing A Recording Paper Jam
Troubleshooting Clearing a Recording Paper Jam If the recording paper becomes jammed in the machine, the display will show an Information Code 001 or 007. To clear the jam, Info. Code 001 (1) Remove the Paper Tray Cover. (2) Remove the jammed or wrinkled paper. To clear the jam, Info. -
Page 106: Clearing A Document Jam
Troubleshooting Clearing a Document Jam If a document becomes jammed in the machine, the display will show the Information Code 030 or 031. To clear the jam (1) Open the ADF Door. (2) Remove the jammed document. -
Page 107: Cleaning The Document Scanning Area
Troubleshooting Cleaning the Document Scanning Area If the receiving party reports that the received documents were black, or contained black lines, try making a copy on your unit to verify. If the copy is black or has black lines, the document Scanning Area is probably dirty and must be cleaned. -
Page 108: Cleaning The Printer Roller
Troubleshooting Cleaning the Printer Roller If you find toner on the back of the recording paper, the printer roller in the Fuser unit is probably dirty. To clean the rollers MAINTENANCE(1-3) * PRINTING * The machine will print out 3 Cleaning Charts. Then, return to standby. -
Page 109: Adjusting The Automatic Document Feeder (Adf)
Troubleshooting Adjusting the Automatic Document Feeder (ADF) If document misfeeding occurs frequently, we suggest you adjust the ADF. To adjust the ADF Slide the Pressure Adjusting Lever to the desired position depending on the condition. Position Condition To prevent no feed trouble Standard position To prevent multiple feed trouble... -
Page 110: Checking The Telephone Line
Troubleshooting Checking the Telephone Line If you do not hear a dial tone when the key is pressed or the incoming call does not ring on MONITOR your machine even if the Monitor and Ringer Volume is set properly, follow the procedure below to check the telephone line. -
Page 111: Appendix
Appendix Specifications Model Name DP-500F Compatibility ITU-T Group 3 Coding Scheme MH, MR, MMR (Conforms to ITU-T Recommendations) Modem Type ITU-T V.34, V.17, V.29, V.27 ter and V.21 Modem Speed 33600 - 2400 bps Document Size Max. : 257 x 2000 mm (with operator's assistance) Min. - Page 112 Specifications Image Memory Capacity 120 pages (Based on ITU-T Image No.1 chart using Standard Resolution) Power Supply 220-240 VAC, 50/60 Hz, Single Phase Power Consumption Standby (Sleep Mode : On) Less than 1.0 Wh Standby (Energy-Saver : On) Approx. 6.0 Wh Standby (Energy-Saver : Off) Approx.
-
Page 113: Recording Paper Specifications
Recording Paper Specifications In general, most photocopy papers will also work very well. There are many "name" and "generic" brands of paper available. We recommend that you test various papers until you obtain the results you are looking for. The following table summarizes the major specifications to consider when selecting white or colored paper. Basic Weight 60 to 90 g/m Cut Edge Conditions... -
Page 114: Options And Supplies
Options and Supplies Please contact your dealer for availability. A. Options: Order No. Picture Description GJ-1100 Handset Kit B. Supplies: Order No. Picture Description PS-PU500F Toner Cartridge PS-ZT500F Drum Unit... -
Page 115: Regulatory Information
The use of this NERGY compliant product will reduce energy consumption and ultimately benefit the environment. The default functions can be adjusted depending on your office requirements. Please ask your authorized TOSHIBA TEC dealer for more details. -
Page 116: Glossary
Glossary ABBR. No. The ability to store full phone numbers into the dialer and then utilizing a short series of (Abbreviated Number) keystrokes to speed dial that number in the future. Access Code A 4-digit programmable access code that prevents unauthorized operation of your Fax. The mechanism that delivers a stack of document pages to the scanner one page at a time. - Page 117 Glossary G3 Mode (Group 3) Refers to the standards and transmission capabilities of the current generation of facsimile machines. Group Dialling The ability to program many telephone numbers into a single station so that many locations can be dialed in sequence utilizing a single keystroke. Halftone A scanning technique to distinguish levels of gray from black and white.
- Page 118 Glossary PSTN Public Switched Telephone Network. Network of interconnected switching equipment and transmission facilities. Resolution Relates to the number of dots scanned or printed per certain square. The quality of the image increases as the number of dots per certain square increases. Sleep Mode The lowest power state that the machine enters after the specified time without actually turning off.
-
Page 119: Itu-T Image No. 1
ITU-T Image No. 1 All specifications are based on the ITU-T Image No. 1 (The sample shown below is not to scale). -
Page 120: Index
Index ..............ABBR Number List 92, 93 Key/Buzzer Volume ......Abbreviated Dialling Numbers ..........Access Code ..........ADF Capacity ........Loading Documents ......Automatic Document Feeder ............LOGO ........Automatic Reduction ........Memory Transmission Character ID............26 .......... Monitor Volume Communication Journal (COMM. - Page 122 DZSD002076-1...