SATO Cl4NX Operator's Manual
Laser printers
Hide thumbs
Also See for Cl4NX:
- Operator's manual (807 pages) ,
- Programming reference manual (756 pages) ,
- Service manual (160 pages)
Table of Contents
Advertisement
Quick Links
Advertisement
Table of Contents
Troubleshooting

Related Manuals for SATO Cl4NX


Summary of Contents for SATO Cl4NX
- Page 1 Operator Manual For printer model:...
- Page 2 Specifications and contents in this document are subject to change without notice. Trademarks SATO is a registered trademark of SATO Corporation and its subsidiaries in Japan, the U.S. and other countries. QR Code is a registered trademark of DENSO WAVE INCORPORATED.
-
Page 3: Table Of Contents
2.7.3 Region Setting with Optional RTC ................25 2.7.4 City Setting with Optional RTC ................26 2.7.5 Date Setting with Optional RTC................26 2.7.6 Time Setting with Optional RTC ................26 2.7.7 Print Method Setting ....................27 2.7.8 Ribbon Setting ......................27 CL4NX Operator Manual... - Page 4 4.3 Settings Menu Tree Structure ................59 4.4 Details of the Settings Menu Screen ............... 68 4.4.1 Printing Menu ......................68 4.4.2 Interface Menu......................85 4.4.3 Applications Menu ....................134 4.4.4 System Menu......................144 4.4.5 Tools Menu......................152 4.4.6 Information Menu....................162 CL4NX Operator Manual...
-
Page 5: Table Of Contents Cl4Nx Operator Manual
6.4.7 Wireless LAN Interface..................202 7 Appendix ................... 203 7.1 List of Initial Value ..................203 7.1.1 Printing Menu ......................203 7.1.2 Interface Menu....................... 205 7.1.3 Applications Menu ....................212 7.1.4 System Menu......................214 7.1.5 Tools Menu......................215 CL4NX Operator Manual... - Page 6 7.7.1 USB Interface ......................241 7.7.2 LAN Ethernet Interface ..................242 7.7.3 Bluetooth Interface ....................243 7.7.4 RS-232C Interface....................244 7.7.5 IEEE1284 Interface ....................246 7.7.6 External Signal Interface (EXT) ................248 7.7.7 Wireless LAN Interface..................252 CL4NX Operator Manual...
-
Page 7: Before You Start
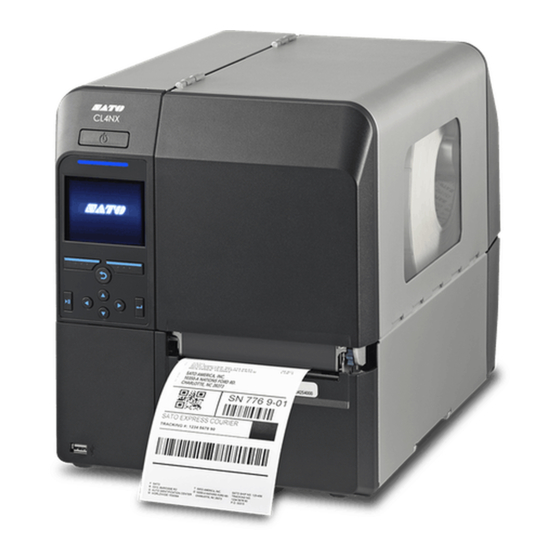
Features of the Product The SATO CL4NX printer is a high-performance labeling system with robust casing made of metal and equipped with versatile functions. The main features of the printer are as follows: • Simple and stylish design •... -
Page 8: Safety Precautions
• Do not use other than the specified printer and disconnect the power plug voltage. Doing so could cause a fire or from the outlet. Then contact your SATO electric shock. reseller or technical support center. If you operate the printer in this condition, it could cause a fire or electric shock. - Page 9 • Do not disassemble or modify the printer. to a ground. Not grounding the ground Doing so could cause a fire or electric wire could cause electric shock. shock. Contact your SATO reseller or technical support center to do internal inspections, adjustments, and repairs. Regarding the cutter Handling of the power cord •...
- Page 10 Pulling the cord could expose or break the core wires and cause a fire or electric shock. • The power cord set that comes with the printer is especially made for this printer. Do not use it with any other electrical devices. CL4NX Operator Manual...
-
Page 11: Precautions For Installation And Handling
Precautions for Installation and Handling Printer operation can be affected by the printer environment. Refer to the following instructions for installation and handling of CL4NX printer. Select a Safe Location Do not put the printer in a location subject to wa- ter or oil. -
Page 12: Regulatory Approval
• Remove the certificate label (serial number seal) affixed to this product Use of this product near microwave and/or other wireless LAN equipment, or where static electricity or radio interference is present, may shorten the communication distance, or even disable communication. CL4NX Operator Manual... - Page 13 In a domestic environment this product may cause radio interference, in which case the user may be required to take adequate measures. EN55022 Warnung Dies ist eine Klasse A Produkt. In einer häuslichen Umgebung verursacht dieses Produkt vielleicht Radioeinmischung in dem Fall, der vom Benutzer vielleicht verlangt wird, adäquate Maßnahmen zu ergreifen. CL4NX Operator Manual...
- Page 14 Before You Start (Pb) (Cd) (Cr6+) (PBB) (Hg) (PBDE) ABS PC SJ/T11363-2006 SJ/T11363- 2006 2006 2 28 SJ/T11364-2006 CL4NX Operator Manual...
-
Page 15: Parts Identification
1.1 Parts Identification of the Printer 1.1.1 Front View Top cover Color LCD Operator panel Media discharge outlet USB connector (Type A) Enable the storage of printer setting information with the USB memory. CL4NX Operator Manual... -
Page 16: Rear View
100 to 240 V, 50 to 60 Hz. Interface connector for external signals. Connect the optional applicator to this terminal. USB connector (Type B) To connect printer to the host computer using the USB interface. CL4NX Operator Manual... -
Page 17: Internal View
Head lock lever Print head (Consumables) Used to release the print head assembly. The part to print on the media. Do the maintenance regularly. Platen roller (Consumables) Front cover Media holder guide CL4NX Operator Manual... -
Page 18: Parts On The Operator Panel
Navigate the selection in the screen menu. The functions change depending on the screen. The functions of the buttons are indicated below the screen. (For example: when in offline mode, left soft button: ONLINE; right soft button: FEED) CL4NX Operator Manual... -
Page 19: Led Indicator
1 Parts Identification 1.2.2 LED Indicator LED Indicator Color Descriptions Blue Power on, online mode, offline mode (Light off) Power off Printer error (For example, when the ribbon runs out) Blue Sleep mode Flashes at intervals of two seconds. CL4NX Operator Manual... - Page 20 1 Parts Identification This page is intentionally left blank. CL4NX Operator Manual...
-
Page 21: Installing The Printer
• A location that is subject to vibration • A location with high temperature and humidity • A dusty location • A location exposed to direct sunlight • A location with a lot of noise • A location that the power fluctuation is large CL4NX Operator Manual... -
Page 22: Installation Space
Front View Standard model 83.5 82.5 150 mm 271 mm 150 mm (3.3”) (3.3”) (5.9”) (10.7”) (5.9”) 737 mm (29”) 2.2.2 Side View Printer front view 150 mm 457 mm 150 mm (5.9”) (18.0”) (5.9”) 757 mm (29.8”) CL4NX Operator Manual... -
Page 23: Checking The Bundled Accessories
2 Installing the Printer 2.3 Checking the Bundled Accessories After unpacking the printer, make sure that you have all the bundled accessories: If there is a missing item, contact your SATO reseller where you have purchased the printer. AC power cord* User documents (Quick guide, Warranty, etc.) -
Page 24: Connecting The Interface Cable
This may cause damage to the interface circuitry in the printer or computer and is not covered by warranty. 2.4.2 Interface Settings You can set the various interface settings of the printer through Interface in Settings menu. For details, refer to Interface in chapter 4 Operation and Configuration. CL4NX Operator Manual... -
Page 25: Connecting The Power Cord
AC 100 - 240 V, 50 - 60 Hz. If your local voltage is not in the stated range, contact your SATO reseller or technical support center. *The shape of the power plug varies depending on the region in which it was purchased. -
Page 26: Power On/Off The Printer
Make sure that the printer is in offline mode before you power off. If Online shows on the display, press the button to change to offline mode. Press the power button for more than two seconds to power off the printer. CL4NX Operator Manual... -
Page 27: Starting Up The Printer (Startup Guide)
2.7.3 Region Setting with Optional RTC Set the region (time zone). Select the region with the buttons, and then press the right soft button or the button to confirm. CL4NX Operator Manual... -
Page 28: City Setting With Optional Rtc
Select the value with the buttons, and move the selection with the buttons. When you have completed the time setting, press the right soft button or the button to confirm. Note Set the time in 24-hour format. CL4NX Operator Manual... -
Page 29: Print Method Setting
• I-Mark: Use the sensor of reflective type. *None shows only when you have installed the optional cutter unit. Select the type of media sensor with the buttons, and then press the right soft button or the button to confirm. CL4NX Operator Manual... -
Page 30: Media Setting
• Rewinder: Shows the video about how to rewind the liner in the printer. Press the button to stop the video and go back to the previous screen. After you complete the media setting, press the right soft button to go to the next screen. CL4NX Operator Manual... -
Page 31: Confirmation Screen
To go back to the startup guide setting, press the left soft button. Notes • You can enable or disable the startup guide in Startup Guide under Tools menu. • Even though you cancel the startup guide halfway, the printer saves the settings you have changed. CL4NX Operator Manual... - Page 32 2 Installing the Printer This page is intentionally left blank. CL4NX Operator Manual...
-
Page 33: Loading Ribbon And Media
If there is a mark on the media, the ink is coated on the outer side of the ribbon. The ink is coated on the inner side. (Face-in ribbon) The ink is coated on the outer side. (Face-out ribbon) CL4NX Operator Manual... -
Page 34: Loading Ribbon
Face-out ribbon Note You can also refer to the sticker pasted on the inner side of the top cover. Open the top cover . CAUTION • Open the top cover fully to prevent accidental drop of the cover. CL4NX Operator Manual... - Page 35 Turn the head lock lever clockwise to unlock the print head. Load the ribbon to the ribbon supply spindle . While taking note of the wind direction, insert the ribbon all the way in. CL4NX Operator Manual...
- Page 36 If the media is already loaded, press the print head down until the head lock lever is locked. If the media is not loaded, continue with Section 3.5 Loading Media. Close the top cover. CL4NX Operator Manual...
-
Page 37: Removing The Ribbon
Press the tab on the tip of the ribbon rewind spindle to pull out the ribbon rewind spindle. Pull to remove the ribbon from the ribbon rewind spindle. Push the ribbon rewind spindle all the way in. CL4NX Operator Manual... -
Page 38: Usable Media
I-mark or Gap correctly. Move the media sensor to the position where it can sense the I-mark or Gap of the media. The I-mark sensor is below the mark, and the Gap sensor is below the mark. CL4NX Operator Manual... -
Page 39: Loading Media
When loading the media, make sure that the print side faces up. Face-in media Face-out media Open the top cover. CAUTION • Open the top cover fully to prevent accidental drop of the cover. Turn the head lock lever clockwise to unlock the print head. CL4NX Operator Manual... - Page 40 Push the media holder guide lightly against the media roll. Pass the media below the media damper and the media sensor guide . Make sure that the end of the media comes out from the front of the printer. CL4NX Operator Manual...
-
Page 41: Loading Fan-Fold Media
Load the media from the bottom of the printer Note: If the media jam occurs frequently due to the media is loaded from the bottom of the printer, change to load the media from the rear of the printer. CL4NX Operator Manual... -
Page 42: Loading Media With Optional Cutter
Refer to the steps 1 to 6 of Section 3.5.1 Loading Media Roll to load the media. Press the tab at the front of the printer to open the dispenser unit . CL4NX Operator Manual... -
Page 43: Loading Media With Optional Dispenser And Liner Rewinder
The routing path of the media is as shown on the right figure. Label Liner Refer to the steps 1 to 7 of Section 3.5.1 Loading Media Roll to load the media. Press the tab at the front of the printer to open the dispenser unit . CL4NX Operator Manual... -
Page 44: Removing Liner From The Rewinder
Close the print head and the top cover. 3.5.6 Removing Liner from the Rewinder Pull the clip away from the printer and then pull to remove the liner . Put the clip back to its initial position. CL4NX Operator Manual... -
Page 45: Operation And Configuration
In offline mode, the print job will stop. You can cancel the print job, feed the media or show the settings mode. Cancel the print job. Feed the media. Change to Change to settings mode. online mode. CL4NX Operator Manual... -
Page 46: Status Icon
Network link is enabled and connected Not connected to NTP time server. Wi-Fi is authenticated but not connected Wi-Fi is not connected Wi-Fi is connected Signal Level: 1 Wi-Fi is connected Signal Level: 2 Wi-Fi is connected Signal Level: 3 CL4NX Operator Manual... - Page 47 USB memory is connected Writing data to the USB memory • Print Job Status Icon Description Waiting for the media removal Ribbon near-end is detected Command error is detected Receive buffer near full is detected Faulty print head is detected CL4NX Operator Manual...
- Page 48 Clean the print head or the platen roller Replace the print head Replace the platen roller Replace the cutter unit • Buzzer Status Icon Description Buzzer volume: Off Buzzer volume: Low Buzzer volume: Medium Buzzer volume: High CL4NX Operator Manual...
-
Page 49: Error Icon
Change to offline mode if allowed for the active error. Change to settings mode or guidance video. • Error Icon Icon Descriptions Label end or media end error is detected Ribbon end is detected CL4NX Operator Manual... - Page 50 Receive buffer over is detected BCC error is detected Cutter error is detected USB memory is not accessible or there is no free space in the USB memory Program error or writing to the memory failed Calendar error is detected CL4NX Operator Manual...
- Page 51 Wireless LAN setting error is detected Printer error is detected The temperature of the print head has exceeded the tolerance range. RFID module is defective. Bluetooth module is defective. Authentication with the server failed. Authentication with the server timed out. CL4NX Operator Manual...
-
Page 52: Guidance Video
If there are more video to choose from, press the arrow buttons to select the guidance video and press button. The guidance video shows. Do the procedures to resolve the error according to the guidance video. CL4NX Operator Manual... - Page 53 The printer changes to offline mode. Press the button. The printer changes to settings mode. Select Information with the buttons. Press the button. The item list shows. Select Help with the buttons. Press the button. The list of guidance video shows. CL4NX Operator Manual...
- Page 54 Indication panel shows again when one of the buttons is pressed. Stop the playback of the video and go back. Playback the video Playback or pause from the start. the video. Rewind the video. Forward the video. CL4NX Operator Manual...
-
Page 55: How To Cancel The Print Job
Cancel the print job according to the procedures as follows: Press the button to change the printer to offline mode. Press the left soft button. A message shows for confirming to cancel the print job. Press the right soft button. The print job will be cancelled. CL4NX Operator Manual... -
Page 56: Settings Mode
Change the printer to settings mode according to the procedures as follows: Press the button in online mode. The printer changes to offline mode. Press the button. The printer changes to settings mode. To stop the settings mode, press the button. CL4NX Operator Manual... -
Page 57: Item Selection
The item with a “>” indicated on the right side has more items in the next layer of submenu. Similarly, select the item with the button or button. Press the button to go back to the previous screen. There are more items in the next layer. Go back to the previous screen. CL4NX Operator Manual... -
Page 58: Alphanumeric Input
Select the number for input back to the item list. with the arrow buttons. The selected number will be Input the selected number highlighted in the selection into the text box. area. CL4NX Operator Manual... - Page 59 Do the function as shown on the screen above. Go back to the previous Change the value in the screen. selection box with the buttons. Select item with the buttons. The selected item will be highlighted in the selection area. CL4NX Operator Manual...
- Page 60 Cancel the IP address that Select the digit for input you input in the text box and go back to the item list. with the buttons. Select the digit for input with the buttons. CL4NX Operator Manual...
-
Page 61: Settings Menu Tree Structure
I-Mark Levels I-Mark Slice Level Head Check Head Check Mode Every Page Check Media Size Adjustments Offset Pitch Darkness Adjust Start Online Feed After Error Feed At Power On Max Feed Paper End Head Base Position Priority Setting CL4NX Operator Manual... - Page 62 WEP Conf. Authentication Key Index Key #1 - Key #4 Conf.. WPA Authentication EAP Conf. EAP Conf. EAP Mode Inner Method Username Password Anon. Outer ID Verify Server Cert. Private Key P/W PAC Auto Provisioning PAC P/W CL4NX Operator Manual...
- Page 63 User Security Authentication Protocol Authentication Pass- phrase Privacy Protocol Privacy Passphrase Traps Enable SNMP Version IP Version Destinations Destination 1 Destination 2 Destination 3 Community User Engine ID Security Authentication Protocol Authentication Passphrase Privacy Protocol Privacy Passphrase CL4NX Operator Manual...
- Page 64 CRC Mode Flow Control Ignore CR/LF Ignore CAN/DLE External I/O Enable Signals EXT 9PIN EXT Mode Inputs Start Print Reprint Outputs Paper End Ribbon End Machine Error Print Done Qty/Offline Ribbon Near End Dispenser EXT I/O Re-print CL4NX Operator Manual...
- Page 65 Chip Manufacturer Pre-Encoded Tag Assign Prefix MCS Prefix Digit Input Prefix Log RFID Data Data To Record Output Error Mode Pulse Length Counters Life time Count Success Count Failure Count Total User Count Success Count Failure Count Total CL4NX Operator Manual...
- Page 66 JIS Encoding Proportional € SZPL Label Shift Caret Delimiter Tilde Clock Format SIPL Font Settings Zero Slash € STCL Command Head Control Code 1st Byte Code 2nd Byte Code 3rd Byte Code SDPL Control Code Code Type CNTBY CL4NX Operator Manual...
- Page 67 Change Printhead Printhead Interval Printhead Count Change Cutter Change Cutter Cutter Life Cutter Count Change Platen Change Platen Platen Interval Platen Count Sound Error Sound Energy Saving Sleep Timeout LCD Brightness Show Total Count Password Password Enable CL4NX Operator Manual...
- Page 68 Darkness Adjust HEX-Dump Hex Dump Mode Buffer Dump Log Files Copy Remove Print Reset Select Data Data & Settings Settings Service Factory Certificates HTTPS Wi-Fi Root CA Wi-Fi Client Wi-Fi Private Key EAP-FAST PAC File Startup Guide CL4NX Operator Manual...
- Page 69 Build Version Name Date Print Module Boot Name Release Date Checksum Main Name Release Date Checksum Counters Head Life Head 1 Head 2 Head 3 Cutter IP Address LAN MAC Wi-Fi MAC Wi-Fi Region Wi-Fi Status Wi-Fi Versions CL4NX Operator Manual...
-
Page 70: Details Of The Settings Menu Screen
Print Mode menu. Darkness Range Set the range of the print darkness. Darkness Set the print darkness. Imaging Set the print reference position in the vertical and horizontal directions. Advanced Set the sensor operation and print motion. CL4NX Operator Manual... -
Page 71: Label Length
The setting range varies depending on the print resolution of the printer. • 203 dpi: 1 to 832 dots • 305 dpi: 1 to 1248 dots • 609 dpi: 1 to 2496 dots Note: Set the label size to a value that includes the liner. CL4NX Operator Manual... -
Page 72: Auto Measure
Show or do not show the warning icon when the ribbon is about to run out. The options are as follows: • Enabled: Show the warning icon. • Disabled: Do not show the warning icon. Note: The warning icon shows in the status bar on the upper part of the screen. CL4NX Operator Manual... -
Page 73: Sensor Type
Mode. Operate in cutter mode if you have installed the cutter unit. However, oper- ate in linerless mode when you have set Linerless in Print Mode. Operate in dispenser mode if you have installed the dispenser unit. CL4NX Operator Manual... -
Page 74: Print Mode
• After: After cut, backfeed the front part of the next media to the print head position. For dispenser mode, backfeed the front part of the next label after dispensing the label. • Before: Before printing, backfeed the front part of the media to the print head position. CL4NX Operator Manual... -
Page 75: Eject Cut
Specify the print darkness from ten steps. The setting range is 1 to 10. 1 is the lightest and 10 is the darkest. To further fine tune the print darkness, set the items in the Printing > Advanced > Adjustments > Darkness Adjust. CL4NX Operator Manual... - Page 76 Set the print position in the vertical direction. Set the offset value from the print reference position with '+' to move away from the feed direction, and with '-' to move toward the feed direction. The setting range is -792 to +792 dots. CL4NX Operator Manual...
- Page 77 Feeds the media automatically at power on. Max Feed Set the length to feed after printing. Set the media type for sensing paper end. Paper End Head Base Position Set the edge position for printing. Priority Setting Select the prioritized setting. CL4NX Operator Manual...
- Page 78 6. Set to offline mode. Press the right soft button to confirm that the media feeds correctly. Note: If the media does not feed correctly after the Auto-calibration, contact your SATO reseller or technical support center. CL4NX Operator Manual...
- Page 79 • Low (with only liner) ≤ 0.5 (V) • High (media attached with liner) - Low ≥ 1.0 (V) 13. If both “High” and “Low” level obey the standard value, press the right soft button to confirm the value. CL4NX Operator Manual...
- Page 80 Slice level to the slice level calculated in step 1. 4. Press the right soft button to confirm the value. Note: If you set the Slice Level to 0.0 (V), the printer sets the slice level automat- ically. CL4NX Operator Manual...
- Page 81 • Low (without I-mark) ≤ 0.5 (V) • High (with I-mark) - Low ≥ 1.0 (V) 12. If both “High” and “Low” level obey the standard value, press the right soft button to confirm the value. CL4NX Operator Manual...
- Page 82 • After Batch: The head check occurs before starting to print and when stopping to print. If backfeed is applicable, the head check occurs before starting to print, when stopping to print and during the backfeed. • Every Page: Do head check for each specified number of media. CL4NX Operator Manual...
- Page 83 Printing > Advanced > Adjustments Correct the offset position, print position and print darkness. The setting items are as follows: Offset Correct the offset position. Pitch Offset the print position in the vertical direction. Darkness Adjust Fine tune the print darkness. CL4NX Operator Manual...
- Page 84 Darkness Adjust Printing > Advanced > Adjustments > Darkness Adjust Fine tune the print darkness. The setting range is 0 to 99. 0 is the lightest and 99 is the darkest. Refer to Darkness in Printing > Darkness. CL4NX Operator Manual...
- Page 85 The setting range is as follows: The setting range varies depending on the print resolution of the printer. • 203 dpi: 0 to 2040 dots • 305 dpi: 0 to 3060 dots • 609 dpi: 0 to 6120 dots CL4NX Operator Manual...
-
Page 86: Paper End
For printer configuration, set whether to prioritize the setting through the printer or prioritize the setting through the command. The options are as follows: • Enabled: Prioritize the setting through the printer. • Disabled: Prioritize the setting through the command. CL4NX Operator Manual... -
Page 87: Interface Menu
To use LAN and wireless LAN for the interface between the host and the printer. The setting items are as follows: Settings Set IPv4, IPv6 or wireless LAN. Services Set the port for connection, NTP, LPD, FTP or SNMP. CL4NX Operator Manual... - Page 88 Set the wireless LAN. *Shows if you have installed the optional wire- less LAN. CAUTION: You cannot use LAN and wireless LAN at the same time. The wireless LAN function is available if you have installed the wireless LAN. CL4NX Operator Manual...
- Page 89 DNS server. CAUTION: After setting, press the right soft button (check mark) to enable the new setting. Press the left soft button (cross mark) to cancel the new setting and goes back to the previous setting. CL4NX Operator Manual...
- Page 90 The setting range is as follows: 000.000.000.001 to 255.255.255.255 Netmask Interface > Network > Settings > IPv4 > Netmask If you have selected Static in Mode menu, set the subnet mask address. The setting range is as follows: 128.000.000.000 to 255.255.255.255 CL4NX Operator Manual...
- Page 91 If you have selected Static in Mode menu, set the primary address of the DNS server. The setting range is as follows: 000.000.000.000 to 255.255.255.255 Note: You can register the DNS server up to three IP addresses. You can use comma to delimit different IP addresses. CL4NX Operator Manual...
- Page 92 • Auto: Generate the IP address and gateway automatically (stateless mode). • DHCP: Get the IP address and gateway from the DHCP server auto- matically (stateful mode). • Static: Set the IP address and gateway and subnet mask manually. CL4NX Operator Manual...
- Page 93 The setting range is 1 to 128. Gateway Interface > Network > Settings > IPv6 > Gateway If you have selected Static in Mode menu, set the default gateway address. The setting range is as follows: 0:0:0:0:0:0:0:0 to ffff:ffff:ffff:ffff:ffff:ffff:ffff:ffff CL4NX Operator Manual...
- Page 94 *Shows if you have selected WEP in Security menu. authentication WPA Conf. Set the WPA WPA+WPA2 or *Shows if you have selected WPA2 in Security menu. EAP Conf. Set the EAP authentication. *Shows if you have selected Dynamic WEP in Security menu. CL4NX Operator Manual...
- Page 95 2. When the Scanning… shows on the screen, press the WPS button on the access point of the wireless LAN device. 3. When the connection to the access point is established, Successfully configured shows on the screen. CL4NX Operator Manual...
- Page 96 If you want to register any Wi-Fi network, press the left soft button and type the name of the network. You can type a maximum of thirty-two characters including alphabet (upper case and lower case), number and symbol. CL4NX Operator Manual...
- Page 97 The options are as follows: • None • WEP • WPA+WPA2 • WPA2 • Dynamic WEP If you have selected Ad-hoc in Mode, only None and WEP is available in Security menu. CL4NX Operator Manual...
- Page 98 The setting range is 1 to 4. CAUTION: Depending on the product, the range of the key index can be 0 to 3. If you have set the printer to 1, then set the product to 0. CL4NX Operator Manual...
- Page 99 Personal (PSK) in WPA Authentication menu. WPA Authentication Interface > Network > Settings > Wi-Fi > WPA Conf. > WPA Authentication Set the WPA authentication method. The options are as follows: • Personal (PSK) • Enterprise (802.1x) • CCKM CL4NX Operator Manual...
- Page 100 Enable or disable PAC Auto Provisioning. sioning *Shows if you have selected FAST in EAP Mode menu. PAC P/W Set the PAC password. *Shows if you have selected FAST in EAP Mode menu and you have selected Disabled in PAC Auto Provisioning. CL4NX Operator Manual...
-
Page 101: Eap Mode
Interface > Network > Settings > Wi-Fi > EAP Conf. > Username Interface > Network > Settings > Wi-Fi > WPA Conf. > EAP Conf. > User- name Set the user name. You can type alphabetic, numeric and symbolic characters in the range of 0 to 63 characters. CL4NX Operator Manual... - Page 102 Key P/W Set the Private Key password. Shows if you have selected TLS in EAP Mode menu or in Inner Method menu. You can type alphabetic, numeric and symbolic characters in the range of 0 to 64 characters. CL4NX Operator Manual...
- Page 103 Set the PAC password. Shows if you have selected FAST in EAP Mode menu and you have selected Disabled in PAC Auto Provisioning. You can type alphabetic, numeric and symbolic characters in the range of 0 to 64 characters. CL4NX Operator Manual...
- Page 104 *Shows when you have selected Status5 in Flow Control menu. Port1 Interface > Network > Services > Ports > Port1 Set the port number. The setting range is 1 to 65535. You cannot set the same number as port 2 and port 3. CL4NX Operator Manual...
-
Page 105: Flow Control
Interface > Network > Services > Ports > BCC Enable or disable the functions for BCC. Shows if you have selected Status5 in Flow Control menu. The options are as follows: • Enabled: Enable the BCC check function. • Disabled: Disable the BCC check function. CL4NX Operator Manual... - Page 106 • Enabled: Enable the error. • Disabled: Disable the error. Time Server IP Interface > Network > Services > NTP > Time Server IP Set the IP address of the NTP server. The setting range is 0.0.0.0 to 255.255.255.255. CL4NX Operator Manual...
- Page 107 Set the Traps function. Agent Interface > Network > Services > SNMP > Agent Set the Agent function. The setting items are as follows: Enable Use the Agent function. Read-Only Set the Read-Only function. Read-Write Set the Read-Write function. CL4NX Operator Manual...
- Page 108 Interface > Network > Services > SNMP > Agent > Read-Only > Commu- nity Set the community name of Read-Only. You can type alphabetic, numeric and symbolic characters in the range of 0 to 32 characters. To disable, keep the field blank. Initial setting: public CL4NX Operator Manual...
- Page 109 Passphrase Set the authentication passphrase. Shows if you have selected Authentication or Privacy in User Security menu. You can type alphabetic, numeric and symbolic characters in the range of 0 to 32 characters. Initial setting: mypassword CL4NX Operator Manual...
- Page 110 Privacy in User Security menu. Privacy Protocol Set the authentication privacy protocol. *Shows if you have selected Privacy in User Security menu. Privacy Pass- Set the authentication privacy passphrase. phrase *Shows if you have selected Privacy in User Security menu. CL4NX Operator Manual...
- Page 111 Interface > Network > Services > SNMP > Agent > Read-Write > Authenti- cation Protocol Set the authentication protocol. Shows if you have selected Authentication or Privacy in User Security menu. The options are as follows: • MD5 • SHA CL4NX Operator Manual...
- Page 112 Interface > Network > Services > SNMP > Agent > Read-Write > Privacy Passphrase Set the authentication privacy passphrase. Shows if you have selected Privacy in User Security menu. You can type alphabetic, numeric and symbolic characters in the range of 8 to 32 characters. Initial setting: mypassword CL4NX Operator Manual...
- Page 113 Privacy in Security menu. Privacy Protocol Set the authentication privacy protocol. *Shows if you have selected Privacy in Secu- rity menu. Privacy Pass- Set the authentication privacy passphrase. phrase *Shows if you have selected Privacy in Secu- rity menu. CL4NX Operator Manual...
- Page 114 Set the version of IP. The options are as follows: • 4 • 6 Destinations Interface > Network > Services > SNMP > Traps > Destinations Set the number of Traps Destinations. The setting range is 1 to 3. CL4NX Operator Manual...
- Page 115 Set the community name of Traps. Shows if you have selected 1 or 2c in SNMP Version menu. You can type alphabetic, numeric and symbolic characters in the range of 1 to 32 characters. Initial setting: trapcom CL4NX Operator Manual...
- Page 116 Authentication Protocol Interface > Network > Services > SNMP > Traps > Authentication Protocol Set the authentication protocol. Shows if you have selected Authentication or Privacy in Security menu. The options are as follows: • MD5 • SHA CL4NX Operator Manual...
- Page 117 Interface > Network > Services > SNMP > Traps > Privacy Passphrase Set the authentication privacy passphrase. Shows if you have selected Privacy in Security menu. You can type alphabetic, numeric and symbolic characters in the range of 8 to 32 characters. Initial setting: mypassword CL4NX Operator Manual...
- Page 118 The setting items are as follows: Baudrate Set the communication speed. Parameters Set the data parameter. Flow Control Set the communication protocol. Set the BCC check function. *Shows if you have selected Status5 in Flow Control menu. CL4NX Operator Manual...
- Page 119 • 7-O-2 • 7-E-2 List of the Parameter Configuration Parameter Data length (bit) Parity Stop bit (bit) 8-N-1 NONE 8-O-1 8-E-1 EVEN 8-N-2 NONE 8-O-2 8-E-2 EVEN 7-N-1 NONE 7-O-1 7-E-1 EVEN 7-N-2 NONE 7-O-2 7-E-2 EVEN CL4NX Operator Manual...
- Page 120 Set the BCC check function. *Shows if you have selected Status5 in Flow Control menu. Flow Control Interface > USB > Flow Control Set the communication protocol. The options are as follows: • Status4 • Status5 • None CL4NX Operator Manual...
- Page 121 Set the CRC check function. Flow Control Set the communication protocol. Enable Interface > Bluetooth > Enable Enable or disable the functions for Bluetooth. The options are as follows: • Enabled: Enable the Bluetooth function. • Disabled: Disable the Bluetooth function. CL4NX Operator Manual...
-
Page 122: Pin Code
• Level 4 Interface > Bluetooth > ISI Set the communication parameter ISI. The setting range is 0, or 18 to 4096. Set to a value that is higher than the setting value of the communication parameter ISW. CL4NX Operator Manual... - Page 123 Set to a value that is lower than the setting value of the communication parameter PSI. CRC Mode Interface > Bluetooth > CRC Mode Enable or disable the functions for CRC. The options are as follows: • Enabled: Enable the CRC function. • Disabled: Disable the CRC function. CL4NX Operator Manual...
- Page 124 Ignore CAN/DLE Interface > Ignore CAN/DLE Ignore or do not ignore the CAN/DLE code of the received data. The options are as follows: • Enabled: Ignore the CAN/DLE code. • Disabled: Do not ignore the CAN/DLE code. CL4NX Operator Manual...
- Page 125 Set the output signal of the EXT 9PIN. EXT Mode Set the mode of the external signal. Inputs Set the input pin No. of Signal Print Start/Signal Reprint. Outputs Set the output pin No. of the signal. CL4NX Operator Manual...
- Page 126 • PIN5: Set the Signal Reprint to 5PIN. • PIN7: Set the Signal Reprint to 7PIN. Note: You cannot set the any inputs with same input pin No. If do, the settings will show in red and you cannot save the settings. CL4NX Operator Manual...
- Page 127 • PIN10: Set the selected signal to 10PIN. • OFF: Set the selected signal to off mode. Note: You cannot set the any outputs with same output pin No. If do, the settings will show in red and you cannot save the settings. CL4NX Operator Manual...
- Page 128 Data To Record Set the data to be recorded. Output Error Set the output signal for the RFID error. Mode Pulse Length Set the pulse length of output signal for the RFID error. Counters Set the RFID counter. CL4NX Operator Manual...
- Page 129 The setting range is 0 to 24 dBm. Tag Offset Interface > RFID > Tag Offset Set the value of tag offset. Contact the dealer when you want to set this value. The setting range is 0 to 240 mm. CL4NX Operator Manual...
- Page 130 Retries, the print stops. Retries Interface > RFID > Retries Set the number of reprint for the RFID error. The setting range is 0 to 9. If you set to 0, the RFID error screen shows and the print continues. CL4NX Operator Manual...
- Page 131 Set the three digit prefix data. Interface > RFID > MCS > MCS Enable or disable the Multi vendor Chip-based Serialization. • Enabled: Enable the Multi vendor Chip-based Serialization. • Disabled: Disable the Multi vendor Chip-based Serialization. CL4NX Operator Manual...
- Page 132 • 2bits: Set the number of digit of the prefix data to 2 digits. Fill in 0 for the lower 1 bit of the prefix data. • 3bits: Set the number of digit of the prefix data to 3 digits. CL4NX Operator Manual...
- Page 133 Set the output signal for the RFID error. The options are as follows: • Pulse: Output pulse as the output signal when RFID error occurs. • Level: Output level as the output signal when RFID error occurs. CL4NX Operator Manual...
- Page 134 Shows the total number of successful write done to the RFID tag. Count Failure Shows the total number of RFID error print. Count Total Shows the total number of printed RFID tag. This is the total number of Count Success and Count Failure. CL4NX Operator Manual...
- Page 135 Shows the total number of printed RFID tag after the RFID counter is cleared. This is the total number of Count Success and Count Failure. Note: You can reset the counter with the right soft button (CLEAR) when the counter is 1 or above. CL4NX Operator Manual...
-
Page 136: Applications Menu
SBPL Applications > SBPL To use SBPL as the printer command, set the items as follows: Show Error Enable or disable the command error indica- tion. Standard Code Set the protocol code. Font Settings Set the font. CL4NX Operator Manual... -
Page 137: Font Settings
Applications > SBPL > Font Settings > Zero Slash Set whether to print the number zero (0) with or without slash (/). The options are as follows: • Enabled: Print zero with slash. • Disabled: Print zero without slash. CL4NX Operator Manual... - Page 138 Applications > SBPL > Font Settings > Proportional Set whether to print each character with different width or with the same width. The options are as follows: • Enabled: Print each character with different width. • Disabled: Print all characters with the same width. CL4NX Operator Manual...
- Page 139 The setting range varies depending on the print resolution of the printer. • 203 dpi: -832 to 0 to 832 dots • 305 dpi: -1248 to 0 to 1248 dots • 609 dpi: -2496 to 0 to 2496 dots CL4NX Operator Manual...
- Page 140 The setting range is 0 to 255. Delimiter Applications > SZPL > Delimiter Set the delimiter (,) code. The setting range is 0 to 255. Tilde Applications > SZPL > Tilde Set the tilde (~) code. The setting range is 0 to 255. CL4NX Operator Manual...
- Page 141 Applications > SIPL > Font Settings > Zero Slash Set whether to print the number zero (0) with or without slash (/). The options are as follows: • Enabled: Print zero with slash. • Disabled: Print zero without slash. CL4NX Operator Manual...
-
Page 142: Control Code
Applications > STCL > Command Head > Control Code Set the control code. The options are as follows: • AUTO: Do the protocol detection automatically. • ESC|LF|NUL • 7B|7C|7D • CUSTOM: Change the first to third byte codes. CL4NX Operator Manual... - Page 143 You can change if you have selected CUSTOM in Control Code menu. The setting range is 0 to 255. SDPL Applications > SDPL To use SDPL as the printer command, set the items as follows: Control Code Set the control code. CL4NX Operator Manual...
- Page 144 The setting range is 00 to ff hex. Applications > SDPL > Control Code > STX Set the STX code. You can change if you have selected Custom in Code Type menu. The setting range is 00 to ff hex. CL4NX Operator Manual...
- Page 145 The setting range is 00 to ff hex. CNTBY Applications > SDPL > Control Code > CNTBY Set the CNTBY code. You can change if you have selected Custom in Code Type menu. The setting range is 00 to ff hex. CL4NX Operator Manual...
-
Page 146: System Menu
*You can set if you have installed the optional RTC kit. Time Zone Set the time zone. Messages System > Regional > Messages Set the display language of the LCD. Select the display language from the list. CL4NX Operator Manual... - Page 147 You can set if you have installed the optional RTC kit. Date System > Regional > Date Set the date. You can set if you have installed the optional RTC kit. The setting range is 2000-01-01 to 2035-12-31. *The date format is Year - Month - Date. CL4NX Operator Manual...
-
Page 148: Time Zone
Clean Printhead Enable or disable the notification function about the cleaning timing of the print head. Cleaning Interval Set the notification interval about the cleaning timing of the print head. Clean Counter Shows the current print distance. CL4NX Operator Manual... -
Page 149: Cleaning Interval
System > Notifications > Change Printhead > Change Printhead Enable or disable the notification function about the replacement timing of the print head. The options are as follows: • Enabled: Enable the notification function. • Disabled: Disable the notification function. CL4NX Operator Manual... -
Page 150: Change Cutter
Set the notification interval about the replacement timing of the cutter unit. Available to change if you have selected Enabled in Change Cutter menu. The printer shows the cutter count as the setting value. The setting range is 10 to 1000 Kcuts. CL4NX Operator Manual... - Page 151 The printer shows the fed distance as the setting value. The setting range is 10 to 100 km. Sound System > Sound Set the buzzer sound. The setting items are as follows: Error Sound Set the buzzer volume for notification of the error. CL4NX Operator Manual...
-
Page 152: Energy Saving
0 is the darkest and 9 is the brightest. Press the right soft button to complete the setting. Note: Because of the energy saving function, the display will decrease the bright- ness when you have not operated the printer for a period of time. CL4NX Operator Manual... - Page 153 Password screen before you go into the Settings menu. The options are as follows: • Enabled: Enable the password setting. • Disabled: Disable the password setting. Note: The default password is 0310. CL4NX Operator Manual...
-
Page 154: Tools Menu
USB memory. Reset Initialize the configuration of the printer. These are the setting items for service. Service Strictly for SATO authorized service personnel use. Factory These are the setting items for service. Strictly for SATO authorized service personnel use. - Page 155 When you increase the setting value, the stop position moves away from the feed direction (toward the end part of the media). Darkness Adjust Fine tune the print darkness of the test print. 0 is the lightest and 99 is the darkest. CL4NX Operator Manual...
- Page 156 When you increase the setting value, the stop position moves away from the feed direction (toward the end part of the media). Darkness Adjust Fine tune the print darkness of the test print. 0 is the lightest and 99 is the darkest. CL4NX Operator Manual...
- Page 157 When you increase the setting value, the stop position moves away from the feed direction (toward the end part of the media). Darkness Adjust Fine tune the print darkness of the test print. 0 is the lightest and 99 is the darkest. CL4NX Operator Manual...
-
Page 158: Hex Dump Mode
• The details of the file created inside the hexdump/ of the printer are as follows: • BT00xx.bin: The received data through Bluetooth. • LAN00xx.bin: The received data through LAN. • LPT00xx.bin: The received data through IEEE1284. • SCI00xx.bin: The received data through RS-232C. • USB00xx.bin: The received data through USB. CL4NX Operator Manual... -
Page 159: Log Files
2. Select the file to copy and press the button. A tick mark shows on the right side of the file name. 3. After you select the file, press the right soft button to copy the selected file to the USB memory. CL4NX Operator Manual... - Page 160 Select the items to initialize. The items are as follows: Data Initialize the data saved in the printer. Data & Settings Initialize the data and setting values of the printer. Settings Initialize the setting values of the printer. CL4NX Operator Manual...
- Page 161 Press the left soft button to cancel or press the right soft button to do the initialization. Refer to Section 7.1 List of Initial Value for the initial value of each set- ting items. Note: The data to initialize are the fonts and graphics registered in the printer. CL4NX Operator Manual...
- Page 162 The confirmation screen shows. Press the left soft button to cancel or press the right soft button to do the initialization. Refer to Section 7.1 List of Initial Value for the initial value of each set- ting items. CL4NX Operator Manual...
- Page 163 • Disabled: Disable the startup guide. If you have selected to Enabled in Startup Guide menu, the startup guide shows at the first time the display changes back to offline screen or the next time you power on the printer. CL4NX Operator Manual...
-
Page 164: Information Menu
LAN. Wi-Fi Status Shows the status of wireless LAN. *Shows only when you have installed the optional wireless LAN. Wi-Fi Versions Shows the versions of wireless LAN. *Shows only when you have installed the optional wireless LAN. CL4NX Operator Manual... - Page 165 Dispenser Shows the video for loading of media roll to the printer installed with dispenser. Dispenser with Shows the video for loading of media roll to the Rewinder printer installed with dispenser and liner rewinder. CL4NX Operator Manual...
- Page 166 Dispenser Shows the video for replacement of media roll to the printer installed with dispenser. Dispenser with Shows the video for replacement of media roll Rewinder to the printer installed with dispenser and liner rewinder. CL4NX Operator Manual...
-
Page 167: Boot Version
Shows the Disks. Warp!!-mode Checked box shows enabled while unchecked box shows disabled. Kernel Version Information > Kernel Version Shows the kernel version of this printer. Build Version Information > Build Version Shows the firmware version of this printer. CL4NX Operator Manual... -
Page 168: Print Module
Shows the Boot firmware release date. Checksum Shows the Boot firmware checksum. Main Information > Print Module > Main Name Shows the Main firmware name. Release Date Shows the Main firmware release date. Checksum Shows the Main firmware checksum. CL4NX Operator Manual... - Page 169 Shows the head counter information of this printer. Cutter Shows the current number of cuts. Caution: • Only SATO authorized service personnel is permitted do the counter clear. Head Information > Counters > Head Shows the head counter information of this printer.
-
Page 170: Lan Mac
Shows the region information of the wireless LAN. Shows only when you have installed the optional wireless LAN. Wi-Fi Status Information > Wi-Fi Status Shows the status of wireless LAN. Shows only when you have installed the optional wireless LAN. CL4NX Operator Manual... -
Page 171: Wi-Fi Versions
4 Operation and Configuration Wi-Fi Versions Information > Wi-Fi Versions Shows the version of wireless LAN. Shows only when you have installed the optional wireless LAN. CL4NX Operator Manual... - Page 172 4 Operation and Configuration CL4NX Operator Manual...
-
Page 173: Cleaning And Adjustment Of The Printer
• Use the cleaning pen, cotton swab or cotton cloth from a cleaning kit to clean. Do not clean with a hard object. Doing so could cause damage. • Remove the media and ribbon before cleaning. Note Purchase the cleaning kit or cleaning sheet from the SATO reseller and technical service center. CL4NX Operator Manual... -
Page 174: Maintenance Of Print Head And Platen Roller
For the details of the cleaning kit, refer to the manual attached to the cleaning kit. Make sure that the printer is in power off mode, then disconnect the power cord from the AC outlet. Open the top cover. CAUTION Open the top cover fully to prevent accidental drop of the cover. CL4NX Operator Manual... - Page 175 Clean the dirt on the print head , platen roller and ribbon roller using a cleaning pen or a cotton swab dabbed with the cleaning liquid. Tilt down the sensor guide lock and pull out the media sensor guide . CL4NX Operator Manual...
-
Page 176: Maintenance With The Cleaning Sheet
Turn the head lock lever clockwise to unlock the print head. CAUTION • The print head and its surroundings are hot after printing. Be careful not to get burned. • Touching the edge of the print head with bare hand could cause injury. CL4NX Operator Manual... - Page 177 After you pull out the cleaning sheet, do the steps 4 to 6 again two or three more times. When no more dirt appears on the cleaning sheet after you have pulled it out, you can stop to clean with the cleaning sheet. CL4NX Operator Manual...
- Page 178 5 Cleaning and Adjustment of the Printer Turn the head lock lever clockwise to unlock the print head. Use a cleaning pen to clean the dirt on the print head. CL4NX Operator Manual...
-
Page 179: Adjusting The Base Reference Point
Cutter Mode I-mark Label Gap Label position Print Print position and position cut position Dispenser Mode I-mark Label Gap Label Dispensing position Print Print position and position dispensing position CL4NX Operator Manual... -
Page 180: Adjusting The Print Position
305 dpi: -45 to +45 dot “-” value 609 dpi: -90 to +90 dot -3.75 mm (-0.15”) ~ +3.75 mm (+0.15”) Note The above base reference point (print position) will be the stop position when sensor type is set to Gap sensor. CL4NX Operator Manual... - Page 181 The setting range is as follows: 203 dpi: -30 to +30 dot 305 dpi: -45 to +45 dot 609 dpi: -90 to +90 dot Press the right soft button to save the setting value. CL4NX Operator Manual...
-
Page 182: The Adjustment Of Media Stop Position
• You can also adjust when the operation mode is specified to Tear-off or Dispenser. Adjust the stop position with the procedures as follows: When the printer is in online mode, press button on the operator panel to change to offline mode Press the button to show Settings menu. CL4NX Operator Manual... -
Page 183: Guideline To Adjust The Media Stop/Cut Position
Press the right soft button to save the setting value. 5.3.4 Guideline to Adjust the Media Stop/Cut Position Stop position of the label in dispenser mode. The regular position is to let the label stay about 1 mm (0.04") on the liner. Stop position CL4NX Operator Manual... -
Page 184: Perforated Line
1 mm Perforated line • Fan-fold media 25 mm Area not to be cut Do not cut on the perforated line or 4 mm 4 mm mm (0.16” 0.98”) area from the perforated line Perforated line towards you. CL4NX Operator Manual... -
Page 185: Adjusting The Print Quality
Press the button to show Settings menu. Press the buttons to select Printing and then press the button. Press the buttons to select Darkness and then press the button. The Darkness screen shows. CL4NX Operator Manual... -
Page 186: Adjustment Of The Print Speed
The adjustment procedures of print speed are as follows: When the printer is in online mode, press button to set the printer to offline mode. Press the button to show Settings menu. Press the buttons to select Printing and then press the button. CL4NX Operator Manual... - Page 187 5 Cleaning and Adjustment of the Printer Press the buttons to select Speed and then press the button. The Speed screen shows. Press the buttons to select the value. Press the right soft button or the button to save the value. CL4NX Operator Manual...
-
Page 188: Adjusting The Buzzer Volume
The options are as follows: • Off: Mute the sound. • Low: Low volume. • Medium: Medium volume. • High: High volume. Press the right soft button or the button to save the setting. CL4NX Operator Manual... -
Page 189: Adjusting The Head Pressure Balance
Thin paper/tag, etc. Make sure to do the pressure balance setting as explained below after step 3. Notes • The factory default setting is Left and Right • The thickness of the media includes the liner. CL4NX Operator Manual... -
Page 190: Pressure Balance Setting
Pressure balance gradation Left Left Left Right Right Right *This table shows an example when the head pressure is Left Note The factory default setting is Left and Right CL4NX Operator Manual... -
Page 191: Troubleshooting
Framing error RS-232C settings are incor- Adjust the interface settings rect. correctly. To clear error: The cable connection is incor- Check and connect the cable 1005 Press the rect. correctly. Offline, but- ton or adjust the settings. CL4NX Operator Manual... - Page 192 The received print data is Check the print data. larger than the configured button or 1010 media size. open/close the print head. The media is fed with longer Adjust the sensor level. distance due to the incorrect sensor level. CL4NX Operator Manual...
- Page 193 Command error Incorrect command or parame- Check the print data. ter in the print data. Caaa: position of error occur- To clear error: 1017 rence Press the Can- <bb>: error command name cel or button. cc: error code CL4NX Operator Manual...
- Page 194 The temperature of the printer Stop the operation of the has exceeded the tolerance printer to let the temperature value. decreases. To clear error: Stop the opera- 1022 tion of the printer and wait until the temperature decreases. CL4NX Operator Manual...
- Page 195 Adjust the media sensor level. button or open/ incorrect. close the print head. EAP authentication error EAP Authentication failure. Use the correct Wi-Fi settings. (EAP failure) To clear error: 1046 Change the Wi- Fi settings or press the Offline button. CL4NX Operator Manual...
- Page 196 (AP) and authentication server settings. 1047 To clear error: Press the Offline button. Bluetooth error Bluetooth module is defective. Contact technical support cen- ter for repair of the Bluetooth module. To clear error: 1050 Confirm the prompted mes- sage. CL4NX Operator Manual...
-
Page 197: When Led Lights On Red/Blue
Flashes in blue color. The printer is in the sleep mode. You can operate the printer. (At intervals of 2 seconds) Lights on in red color. An error has occurred. Clear the error according to the message. CL4NX Operator Manual... -
Page 198: Troubleshooting Table
• Disconnect the power cord from the AC outlet before you do the cleaning. Note Purchase the cleaning kit or cleaning sheet from the SATO reseller and technical service center. 6.3.1 No Power Supply/Nothing on the Display What to check... -
Page 199: Can Feed The Media But Cannot Print
If the media sensor is dirty, clean with the clean- ing kit. For the cleaning of the printer, refer to Section 5.2 Maintenance of Print Head and Platen Roller. Does the interface operate correctly? Check the interface according to the Interface Troubleshooting. CL4NX Operator Manual... -
Page 200: Bad Print Quality
5.2 Maintenance of Print Head and Platen Roller. Is the print head defective? Replace the print head and reset the counter. Is the platen roller damaged? Replace the platen roller. Is the main board defective? Replace the main board. CL4NX Operator Manual... -
Page 201: Incorrect Print Position
5.2 Maintenance of Print Head and Platen Roller. Is the data or signal sent from the computer Power on the device again. incorrect? Check the data sent from the computer and the communication conditions. Is the platen roller damaged? Replace the platen roller. CL4NX Operator Manual... -
Page 202: Interface Troubleshooting
Check that there is no obstacle such as the rack made of metal between the printer and the host. Check the configuration of the printer. Check the setting of Bluetooth interface through Settings > Interface > Bluetooth menu. Power on the printer and the computer again. Install the Bluetooth driver again. CL4NX Operator Manual... -
Page 203: Rs-232C Interface
Check that the power of the external device is on. Check the configuration of the printer. Check the setting of external signal (EXT) interface through Settings > Interface > External I/O menu. Power on the printer and the external device again. CL4NX Operator Manual... -
Page 204: Wireless Lan Interface
Check that there is no obstacle such as the rack made of metal between the printer and the host. Check the configuration of the printer. Check the setting of wireless LAN interface through Settings > Interface > Wi-Fi menu. Power on the printer again. CL4NX Operator Manual... -
Page 205: Appendix
Dispenser (When dispenser is installed) Backfeed Before (If Print Mode is set to Tear-Off or Linerless) After (If Print Mode is set to Dispenser or Cutter) None (If Print Mode is set to Continuous) Eject Cut Darkness Range CL4NX Operator Manual... - Page 206 ― ― Offset 0 dot Pitch 0 dot Darkness Adjust Start Online Enabled Feed After Error Disabled Feed At Power On Disabled Max Feed 0 mm Paper End Using I-mark Head Base Position Standard Priority Setting Disabled CL4NX Operator Manual...
-
Page 207: Interface Menu
Interface 0:0:0:0:0:0:0:0 Yes/ Yes/ Interface Interface Wi-Fi ― ― ― Wi-Fi Protected Setup ― ― ― Button (PBC) ― ― ― ― ― ― SSID SATO_PRINTER Yes/ Yes/ Interface Interface Hidden SSID Disabled Yes/ Yes/ Interface Interface CL4NX Operator Manual... - Page 208 Verify Server Cert. Enabled Yes/ Yes/ Interface Interface Private Key P/W ― Yes/ Yes/ Interface Interface PAC Auto Provisioning Disabled Yes/ Yes/ Interface Interface PAC P/W ― Yes/ Yes/ Interface Interface Services ― ― ― Ports ― ― ― CL4NX Operator Manual...
- Page 209 User Security None Authentication Protocol Authentication Passphrase mypassword Privacy Protocol Privacy Passphrase mypassword Read-Write ― ― ― Community private User rwuser User Security None Authentication Protocol Authentication Passphrase mypassword Privacy Protocol Privacy Passphrase mypassword Traps ― ― ― CL4NX Operator Manual...
- Page 210 Interface Interface Flow Control STATUS4 Yes/ Yes/ Interface Interface Disabled Yes/ Yes/ Interface Interface ― ― ― Flow Control Status4 Yes/ Yes/ Interface Interface Disabled Yes/ Yes/ Interface Interface Bluetooth ― Enable Enabled Yes/ Yes/ Interface Interface CL4NX Operator Manual...
- Page 211 Interface Interface Signals ― ― ― EXT 9PIN MODE1 Yes/ Yes/ Interface Interface EXT Mode TYPE4 Yes/ Yes/ Interface Interface Inputs ― ― ― Start Print PIN5 Yes/ Yes/ Interface Interface Reprint PIN7 Yes/ Yes/ Interface Interface CL4NX Operator Manual...
- Page 212 Reader Version XXXXXXXXXXXXXXXX View ― ― ― Memory Bank Retry Mode Retry Retries Mark bad tags Enabled ― ― ― Disabled Chip Manufacturer IMPINJ Pre-Encoded Tag Disabled Assign Prefix Auto MCS Prefix Digit 3 bits Input Prefix CL4NX Operator Manual...
- Page 213 Output Error Mode Level Pulse Length 100 ms Counters ― ― ― Life time ― ― ― Count Success 000000 Count Failure 000000 Count Total 000000 User ― ― ― Count Success 000000 Count Failure 000000 Count Total 000000 CL4NX Operator Manual...
- Page 214 Font setting ― ― ― Zero Slash Disabled € STCL ― ― ― Command Head ― ― ― Control Code AUTO 1st Byte Code 2nd Byte Code 3rd Byte Code Font setting ― ― ― Zero Slash Disabled CL4NX Operator Manual...
- Page 215 7 Appendix Factory Setting Items Initial Value User Reset Reset € Code Page DOS 850 SDPL ― ― ― Control Code ― ― ― Code Type Standard CNTBY CL4NX Operator Manual...
-
Page 216: System Menu
― Change Platen Disabled Platen Interval 100 km Sound ― ― ― Error sound Medium Energy Saving ― ― ― Sleep Timeout 60 min LCD Brightness Show total count Disabled Passwords ― ― ― Password Enable Disabled CL4NX Operator Manual... - Page 217 Label Length 203 dpi: 800 dots 305 dpi: 1200 dots 609 dpi: 2400 dots Pitch Offset Darkness Adjust HEX-Dump ― ― ― Hex Dump Mode Disabled Reset ― ― ― Certificates ― Yes/ Interface Startup Guide Enabled CL4NX Operator Manual...
-
Page 218: Media Sensor Positions And Media Stop Positions
Gap sensor I-mark sensor 6.3 mm ~ 59.6 mm 6.3 mm ~ 59.6 mm (0.2” ~ 2.3”) (0.2” ~ 2.3”) 13.3 mm ~ 66.6 mm 13.3 mm ~ 66.6 mm (0.5” ~ 2.6”) (0.5” ~ 2.6”) Frame CL4NX Operator Manual... -
Page 219: Replacing The Print Head
Turn the head lock lever clockwise to unlock the print head. CAUTION • The print head and its surrounding are hot after printing. Be careful not to get burned. • Touching the edge of the print head with bare hand could cause injury. CL4NX Operator Manual... - Page 220 . Remove the two connectors from the print head . Connect the two connectors to the new print head. Install the print head. Install so that the print head is locked with a click sound. CL4NX Operator Manual...
-
Page 221: Replacing The Platen Roller
Be careful not to get burned. • Touching the edge of the print head with bare hand could cause injury. Lift the lever to unlock the platen roller , then pull out the platen roller . CL4NX Operator Manual... - Page 222 on both ends of the platen roller are pointing upward. Push the platen roller in the direction so that the tabs are fix on the grooves . Turn the lever back to lock the platen roller. CL4NX Operator Manual...
-
Page 223: Optional Uhf Rfid Configuration
This chapter provides the procedures to configure the printer to encode your inlays. Examine the media to determine printer settings. Refer to the CL4NX UHF Inlay Configuration Guide for what measurements you should take and what they mean, as well as a list of inlays and their required configurations. - Page 224 Turn the head lock lever clockwise to unlock the print head. CAUTION • The print head and its surroundings are hot after printing. Be careful not to get burned. • Touching the edge of the print head with bare hand could cause injury. CL4NX Operator Manual...
- Page 225 When the Antenna Pitch is set to Standard in the Interface > RFID menu, adjust the physical position of the antenna according to the settings required for the specific media and inlay used. Refer to the “Antenna Position” of the UHF Inlay Placement & Configuration Table in the CL4NX UHF Inlay Configuration Guide.
-
Page 226: Printing Of Rfid Tag Errors
(0, 0) The dump is printed for the first sixteen Dotted line shows the range specified with bytes of data. media size command <A1>. *(0,0): The origin of the range specified by the media size command <A1> CL4NX Operator Manual... - Page 227 TAG NOT FOUND error in RFID write command 40 mm TAG NOT FOUND 50 mm 3031323334353637 3839414243444546 The dump is printed for the first sixteen bytes of data. CL4NX Operator Manual...
- Page 228 ERROR Countermeasure Check the media. DIFFER EPC ERROR Cause Detected inconsistent EPC during a series of processes. Countermeasure Check the media. RFID MODULE Cause Hardware error occurred. ERROR Countermeasure Contact your SATO reseller or technical support center. CL4NX Operator Manual...
-
Page 229: Rfid Error And Reset Timing
Error signal output with long pulse Read/Write error RFID tag error output Print completion (Type2) When reprint count reaches the specified number, RFID tag error and Machine error are output at the same time. Machine error output is always long pulse. CL4NX Operator Manual... - Page 230 100 - 500 ms Machine Error RFID write error End of error print Print Print End TYPE 1 (PREND) TYPE 2 TYPE 3 TYPE 4 Paper End/ Ribbon End RFID tag error 100 - 500 ms Machine Error CL4NX Operator Manual...
- Page 231 Paper End/ Ribbon End RFID tag error Machine Error RFID write error End of error print Print Print End TYPE 1 (PREND) TYPE 2 TYPE 3 TYPE 4 Paper End/ Ribbon End RFID tag error Machine Error CL4NX Operator Manual...
-
Page 232: Rfid Printing Tips
Avoid printing barcodes or characters directly on top Feed direction of an RFID chip. The uneven surface will negatively Recommended affect print quality. no-print zone Antenna Inlay 15 mm RFID tag/label 15 mm IC chip Print object I-mark CL4NX Operator Manual... -
Page 233: Printer Specifications
Dispenser/Linerless mode: 5 to 35 °C (41 to 95 °F) Storage Temperature -20 to 60 °C (-4 to 140 °F) Operating Humidity Continuous/Dispenser/Cutter/Tear-off mode: 30 to 80% RH (Non-condensing) Linerless mode: 30 to 75% RH (Non-condensing) Storage Humidity 30 to 90% RH (Non-condensing) CL4NX Operator Manual... - Page 234 Label End Sensor Detect with I-mark sensor or Gap sensor Ribbon End/ Fixed Ribbon Near End Dispenser Fixed *When linerless cutter unit or dispenser unit is installed. Cutter Fixed *When cutter unit or linerless cutter unit is installed. CL4NX Operator Manual...
-
Page 235: Ribbon And Media
7 Appendix 7.6.2 Ribbon and Media Ribbon (Use genuine ribbon made by SATO.) Size Length: maximum 600 m (1968.5 ft.) Width: 39.5 mm to 128 mm (1.55” to 5.04”) *The maximum length varies depending on the ribbon type. *Use the ribbon that is wider than the media. -
Page 236: Interface
7 Appendix Media (Use genuine media made by SATO.) Size Dispenser with Liner Rewinder Pitch 203/305/609 dpi: 27 to 397 mm (1.06” to 15.63”) RFID mode: 27 to 240 mm (1.06” to 9.45”) (With Liner) 203/305/609 dpi: 30 to 400 mm (1.18” to 15.75”) RFID mode: 30 to 240 mm (1.18”... -
Page 237: Built-In Functions
Cutter open check (When cutter unit is installed) Label detection at dispensing (When dispenser unit is installed) Adjustment Functions Print Darkness Print Position Media Stop Position Buzzer LCD Brightness 7.6.5 Printer Languages Printer Languages SBPL SZPL SDPL SIPL STCL CL4NX Operator Manual... -
Page 238: Fonts/Symbols/Barcodes
40 dots H x 40 dots W Compatible Kanji Fonts 16 dots H x 16 dots W (Mincho) 24 dots H x 24 dots W Simplified Chinese 16 dots H x 16 dots W Characters 24 dots H x 24 dots W CL4NX Operator Manual... - Page 239 24 dots H x 24 dots W Scalable Fonts Rasterized Font CG Times CG Triumvirate HGMLAG SATO 0 SATO Alpha Bold Condensed SATO Beta Bold Italic SATO Folio Bold SATO Futura Medium Condensed SATO Gamma SATO OCR-B SATO Sans SATO Serif...
- Page 240 GS1 DataBar Composite (CC-A/CC-B) GS1 DataBar Truncated Composite (CC-A/CC-B) GS1 DataBar Stacked Composite (CC-A/CC-B) GS1 DataBar Expanded Stacked Composite (CC-A/CC-B) GS1 DataBar Expanded Composite (CC-A/CC-B) GS1 DataBar Stacked Omnidirectional Composite (CC-A/CC-B) GS1 DataBar Limited Composite (CC-A/CC-B) GS1-128 Composite (CC-A/CC-B/CC-C) CL4NX Operator Manual...
-
Page 241: Options
Cadmium and cadmium compounds ..Max. 0.01% Polybrominated biphenyls (PBB) ... .Max. 0.1% Polybrominated diphenyl ethers (PBDE) ..Max. 0.1% Energy Saving International ENERGY STAR program Ver2.0 CL4NX Operator Manual... -
Page 242: Interface Specifications
This may cause damage to the interface circuitry in the printer or host and is not covered by warranty. Notes • Wireless LAN is an optional interface. • You cannot use Wireless LAN interface and the LAN interface at the same time. CL4NX Operator Manual... -
Page 243: Usb Interface
Power Supply BUS Power through cable Power Consumption +5 V at 80 mA Pin Assignments Pin No. Description VBus -Data +Data Cable Specifications Cable Connector USB Type B connector Cable Length 5 m (16.4 feet) or less CL4NX Operator Manual... -
Page 244: Lan Ethernet Interface
Gateway Address IPv4 IPv6 Cable Specifications Cable 10BASE-T/100BASE-TX Category 5 Cable Length 100 m (328 feet) or less Software Specifications Supported Protocol TCP/IP Network Layer IP, ICMP Session Layer Application Layer LPD, FTP, DHCP, HTTP, SNMP, SNTP CL4NX Operator Manual... -
Page 245: Bluetooth Interface
10 m (32.8 feet) Profile Serial Port Profile Security Level None, level 2, 2-1, 2-2, level 3, level 4 PIN Code 1 to 16 characters consist of ASCII code (20H, 21H, 23H to 7EH) Disconnect Timeout 60 seconds (LMP layer) CL4NX Operator Manual... -
Page 246: Rs-232C Interface
Ready/Busy, XON/XOFF, Status3, Status4, Status5 Connector Pin Specifications Pin No. Descriptions Data Carrier Detect Input Receive Data Output Transmit Data Output Data Terminal Ready Reference Signal Ground Input Data Set Ready Output Request To Send Input Clear To Send Not connected CL4NX Operator Manual... - Page 247 (2.95 MB). Send the data that is less than 2.95 MB while monitoring the status of the printer. • The parity error will be detected if this error occurs after the reception of ESC+A. CL4NX Operator Manual...
-
Page 248: Ieee1284 Interface
BUSY Output PAPER EMPTY/PAPER ERROR Output SELECT Output AUTO FEED Not in use LOGIC Ground Frame Ground +5 V STROBE RETURN 20-27 DATA 1 - DATA 8 RETURN ACK RETURN BUSY RETURN PAPER EMPTY RETURN Input INITIALIZE CL4NX Operator Manual... - Page 249 7 Appendix Connector Pin Specifications Output FAULT 33-35 Not in use Input SELECT INPUT Cable Specifications Cable Connector Amphenol 36 pin, male Cable Length 1.5 m (5 feet) or less CL4NX Operator Manual...
-
Page 250: External Signal Interface (Ext)
+24 V ± 10% Vcc +5 V Output Outputs a low signal when the dispense is completed. You can set the pin number for output through the Settings > Inter- face > External I/O > Signals > Outputs menu. CL4NX Operator Manual... - Page 251 TYPE 3 TYPE 4 Replace media Paper End Ribbon End Machine Error Head Open Head Close Ribbon End Print Print End TYPE 1 (PREND) TYPE 2 TYPE 3 TYPE 4 Paper End Replace ribbon Ribbon End Machine Error CL4NX Operator Manual...
- Page 252 Print End TYPE 1 (PREND) TYPE 2 TYPE 3 TYPE 4 Paper End Ribbon Near End Head Open Head Close Press ONLINE button Print TYPE 1 Print End (PREND) TYPE 2 TYPE 3 TYPE 4 Paper End Offline CL4NX Operator Manual...
- Page 253 TYPE 1 (PREND) TYPE 2 TYPE 3 TYPE 4 Wait for dispense completion 500ms + backfeed time Dispense Complete Printed 1 piece Print TYPE 1 Print End (PREND) TYPE 2 TYPE 3 TYPE 4 Wait for dispense completion CL4NX Operator Manual...
-
Page 254: Wireless Lan Interface
Any alphanumeric character (maximum 32) Authentication Open System Shared Key WPA/WPA2 Do RADIUS server authentication with using 802.1x (EAP-TLS, LEAP, EAP-TTLS, EAP-PEAP, EAP-FAST protocol) Encryption None WEP (64 bits/128 bits) AES (WPA-PSK/WPA2-PSK, WPA-802.1x/WPA2-802.1x authentication) Communication Mode Infrastructure Ad hoc CL4NX Operator Manual... - Page 255 7 Appendix Software Specifications Supported Protocol TCP/IP Network Layer IP, ICMP Session Layer Application Layer LPD, FTP, DHCP, HTTP, SNMP, SNTP CL4NX Operator Manual...
- Page 256 Extensive contact information of worldwide SATO operations can be found on the Internet at www.satoworldwide.com...