Table of Contents
Advertisement
COMPACT COMPONENT SYSTEM
KOMPACTES KOMPONENTENSYSTEM
SYSTEME DE COMPOSANTS COMPACT
KOMPACTO KOMPONENTEN-SYSTEEM
SISTEMA DE COMPONENTES COMPACT
IMPIANTO A COMPONENTI COMPATTO
CA-TD77R
Consists of RX-TD77R and XT-TD77R.
Besteht aus RX-TD77R und XT-TD77R.
Comprenant le RX-TD77R et le XT-TD77R.
Bestaat uit RX-TD77R en XT-TD77R.
Consta del RX-TD77R y el XT-TD77R.
Dotato di RX-TD77R e XT-TD77R.
RM-SETD5U REMOTE CONTROL
PLAY
MODE
REPEAT
TEST
TONE
1
CENTER
MODE
4
DELAY
7
10
FM MODE
MUTE
TAPE
DIRECTION
PTY SELECT
–
RX-TD77R
COMPACT COMPONENT SYSTEM EX-TD77R
STANDBY
STANDBY/ON
PHONES
DISPLAY
MODE
CANCEL
PRO
LOGIC
DAP
SLEEP
2
3
XT-TD77R
CENTER
LEVEL
DISC 3
5
6
REAR
LEVEL
DISC 2
8
9
EFFECT
LEVEL
DISC 1
+10
SURROUND
L —
BALANCE
— R
CONTROL
TAPE
RDS
DISPLAY
TV / VIDEO
CONTROL
PTY SEARCH
PTY SELECT
+
VOLUME
INSTRUCTIONS
BEDIENUNGSANLEITUNG
MANUEL D'INSTRUCTIONS
GEBRUIKSAANWIJZING
MANUAL DE INSTRUCCIONES
ISTRUZIONI
SEA
3D-PHONIC
S. A. BASS
FM/AM
EON
TA/NEWS
PTY
ON/OFF
/INFO
SEARCH
VOLUME
TV SOUND / VCR
MENU
SET
CANCEL
ENTER
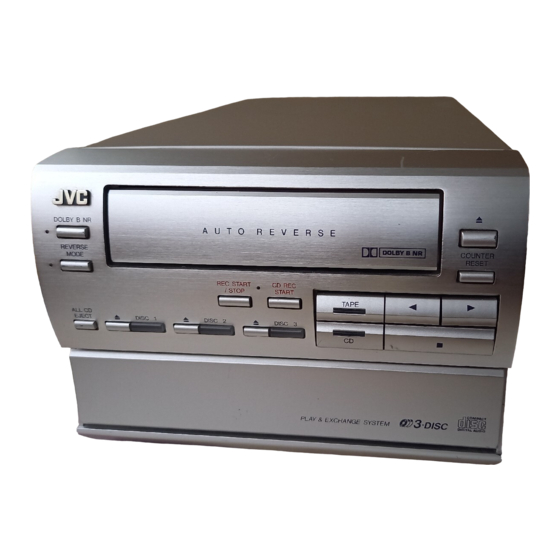
DOLBY B NR
REVERSE
MODE
REC START
CD REC
/STOP
START
ALL CD
DISC 1
DISC 2
DISC 3
EJECT
PLAY & EXCHANGE SYSTEM
COMPACT
DIGITAL AUDIO
DOLBY B NR
COUNTER
RESET
TAPE
CD
COMPACT
3
DISC
DIGITAL AUDIO
For Customer Use:
Enter below the Model No. and Serial
No. which are located either on the rear,
bottom or side of the cabinet. Retain this
information for future reference.
Model No.
Serial No.
E30580-2602A
[ EF, G ]
Advertisement
Table of Contents

Related Manuals for JVC CA-TD77R


Summary of Contents for JVC CA-TD77R
- Page 1 KOMPACTES KOMPONENTENSYSTEM SYSTEME DE COMPOSANTS COMPACT KOMPACTO KOMPONENTEN-SYSTEEM SISTEMA DE COMPONENTES COMPACT IMPIANTO A COMPONENTI COMPATTO CA-TD77R Consists of RX-TD77R and XT-TD77R. Besteht aus RX-TD77R und XT-TD77R. Comprenant le RX-TD77R et le XT-TD77R. Bestaat uit RX-TD77R en XT-TD77R. Consta del RX-TD77R y el XT-TD77R.
- Page 2 L or coloured red. IF IN DOUBT - CONSULT A COMPETENT ELECTRICIAN. Per l'Italia: "Si dichiara che il questo prodotto di marca JVC è conforme alle prescrizioni del Decreto Ministeriale n.548 del 28/08/95 pubblicato sulla Gazzetta Ufficiale della Repubblica Italiana n.301 del 28/12/ 95."...
- Page 3 Caution: Proper Ventilation To avoid risk of electric shock and fire, and to prevent damage, locate the apparatus as follows: 1 Front: No obstructions and open spacing. 2 Sides/ Top/ Back: No obstructions should be placed in the areas shown by the dimensions below.
-
Page 4: Laser Product
IMPORTANT FOR LASER PRODUCTS/ WICHTIGER HINWEIS FÜR LASER-PRODUKTE / IMPORTANT POUR LES PRODUITS LASER / BELANGRIJKE INFORMATIE VOOR LASERPRODUKTEN / IMPORTANTE PARA LOS PRODUCTOS LÁSER / IMPORTANTE PER I PRODOTTI LASER REPRODUCTION OF LABELS/ANBRINGUNGSORTE FÜR LASER-PRODUKTE/REPRODUCTION DES ETIQUETTES/ VERKLARING VAN DE LABELS/REPRODUCCIÓN DE ETIQUETAS/RIPRODUZIONE DELLE ETICHETTE 1 CLASSIFICATION LABEL, PLACED ON REAR ENCLOSURE 1 KLASSIFIKATIONSETIKETTE AN DER RÜCKSEITE... -
Page 5: Features
• With the One Touch Operation feature of JVC’s COMPU PLAY you can turn on the System and start the radio, the Cassette Deck, or the CD Player with a single touch. The three types of surround modes including JVC’s 3D PHONIC which allows you a nearly surround effect with only two front speakers. -
Page 6: Table Of Contents
Listening to a JVC VCR ... 49 Recording to a JVC VCR ... 49 Operating a JVC TV ... 49 Operating a VCR other than JVC’s VCR ... 49 Listening to a VCR ... 49 Recording of a VCR ... 49 Care And Maintenance ... -
Page 7: Getting Started
You need to point the Remote Control at the remote sensor on the System’s front panel. R6P(SUM-3)/AA(15F) Remote Sensor COMPACT COMPONENT SYSTEM EX-TD77R STANDBY 3D-PHONIC S. A. BASS STANDBY/ON PHONES FM/AM DISPLAY TA/NEWS MODE ON/OFF /INFO SEARCH VOLUME TV SOUND / VCR MENU CANCEL ENTER CA-TD77R... -
Page 8: Connecting The System Control Cord
CAUTION: Make all connections before plugging the Unit into an AC power outlet. Connecting the System Control Cord Connect the components exactly as illustrated below. White line Press the middle of When you plug in the the connector unit system connector, until it clicks into make sure that the the male connector. -
Page 9: Connecting The Fm Antenna
CAUTION: Make all connections before plugging the Unit into an AC power outlet. Connecting the FM Antenna CAUTION: To avoid noise, keep antennas away from metallic parts of the System, connecting cord and the AC power cord. Connecting the AM (MW/LW) Antenna ANTENNA (75 ) LOOP... -
Page 10: Connecting The Speakers
CAUTION: Make all connections before plugging the Unit into an AC power outlet. Connecting the Speakers Please refer to instructions for speakers as well when you connect speakers. For each speaker connect one end of the speaker wire to the speaker terminals on the back of the System and one end to the speaker. -
Page 11: Connecting A Vcr
Connecting a VCR Connect the VCR to the VCR terminal. RIGHT LEFT TV SOUND (PLAY) AUDIO OUT (REC) AUDIO IN Connecting a TV Connect a TV to the TV SOUND input terminals. AUDIO OUT RIGHT LEFT TV SOUND (PLAY) (REC) Connecting the MD Player You can use a digital fiber-optic cable to connect the MD Player for recording CDs. -
Page 12: Compu Play
COMPU PLAY COMPU PLAY is JVC’s feature that lets you control the most frequently used functions of the System with a single touch. One Touch Operation starts playing a CD, turns on the radio, plays a tape, etc. with a single press of the play button for that function. -
Page 13: Adjusting The Brightness Of The Display
To correct a mistake: Repeat the procedure from step 1 after pressing the ENTER key. CANCEL To correct a setting during the procedure, press the CANCEL key to go back to the previous setting item. Note: If you try to select DAILY or REC without first setting the clock, “CLOCK” and “ADJUST” are displayed alternately on the display, and you will be unable to set the timers. -
Page 14: Common Operations
Common Operations STANDBY indicator button PHONES RM-SETD77RU REMOTE CONTROL PLAY MODE REPEAT CANCEL button TEST TONE LOGIC SLEEP CENTER CENTER MODE LEVEL DISC 3 REAR DELAY LEVEL DISC 2 EFFECT LEVEL DISC 1 SURROUND FM MODE L — — R MUTE BALANCE CONTROL... -
Page 15: Adjusting The Volume
Adjusting the Volume Using the Unit To increase the volume, press the right side of the VOLUME button VOLUME left side of the VOLUME button Using the Remote Control To increase the volume, press the up side of the VOLUME button down side of the VOLUME button VOLUME Press the button in steps to adjust the volume level one step at a time, press the button continuously to... -
Page 16: S.e.a. Mode
S.E.A. Mode The System has some preset sound effects that give you control of the way your music sounds, so you can tailor it for your room and for the quality of the source. We can give you some idea of how each one affects the music, but the only way to really tell is to try them yourself. - Page 17 4. Adjust the level of the low (LOW), middle (MID), or high (HIGH) tones. Using the Unit 1. Select the “LOW”, “MID”, or “HIGH” tone ranges by adjusting the cursor keys left and right (4 The display changes with each press of the cursor keys as shown below. + Press the left (4 ) cursor key Ô...
-
Page 18: Using The Surround Processor
JVC’s 3D-PHONIC mode is the result of research on sound localiza- tion technology carried out at JVC for many years and makes it possible to reproduce the surround sound with only two front speakers. -
Page 19: Playing The Source Using The 3D-Phonic Modes
Playing the Source Using the 3D-PHONIC Modes When using JVC’s 3D-PHONIC modes, you need only two front speakers to reproduce the soundtracks of video software bearing the mark The 3D-PHONIC mode give you a very realistic surround effect when the sound is reproduced through the Dolby Surround decoder. -
Page 20: Playing The Source Using The Dap Modes
4. Select and play a sound source which was processed with Dolby Surround and is labeled with The effect level can be stored for each mode. You can select the 3D-PHONIC mode by pressing the 3D-PHONIC button on the Unit. Note: The 3D-PHONIC mode is not used with other surround modes. -
Page 21: Playing The Source Using Dolby Pro Logic Mode
Playing the Source Using Dolby Pro Logic Mode Preparing the Dolby Pro Logic Reproduction ——————— For connecting the diagram, See page 6 ‘‘For Dolby Pro Logic Reproduction’’. To use the Dolby Pro Logic mode, you need to prepare the various settings as follows: Center Speaker Mode Center Speaker mode contains the following four settings. - Page 22 Perform the steps below using the buttons on the Remote Control. SURROUND 1. Press the SURROUND CONTROL button. CONTROL 2. Press the PRO LOGIC button. LOGIC “PRO LOGIC” appears on the display and the SURROUND indicator lights up. CENTER 3. Select the desired Center Speaker mode. MODE Press the CENTER MODE button.
-
Page 23: Using The Dolby Pro Logic
Using the Dolby Pro Logic ————————————————— SURROUND CONTROL 1. Press the SURROUND CONTROL button. 2. Press the PRO LOGIC button to light the SURROUND indicator on LOGIC the display. “PRO LOGIC” appears on the display. 3. Start playback from the desired source. Enjoy the great sound of the Dolby surround processor. -
Page 24: Using The Tuner
Using the Tuner Number keys RM-SETD77RU REMOTE CONTROL PLAY MODE REPEAT CANCEL TEST TONE LOGIC SLEEP CENTER CENTER MODE LEVEL DISC 3 REAR DELAY LEVEL DISC 2 EFFECT LEVEL DISC 1 FM MODE SURROUND FM MODE MUTE L — BALANCE —... -
Page 25: Selecting A Radio Station
Selecting a radio station ————————————————— Manual Tuning Press the up and down cursor keys (¡ one step increments. “TUNED” appears on the display when a signal is found. Press the up cursor key (¡ Auto Tuning Keep the up or down cursor key (¡ until a signal is found. -
Page 26: Receiving Fm Stations With Rds
Receiving FM Stations with RDS RDS (Radio Data System) is a broadcasting service which a growing number of FM stations are now providing. It allows the FM stations to send additional signals along with their regular programme signals. For example, the stations send their station names and information about what type of programme they broadcast, such as sports or music, etc. -
Page 27: Changing The Display
Changing the Display ——————————————————— You can see RDS information on the display. DISPLAY To view RDS information on the display, press the DISPLAY MODE button. (When using the Remote MODE Control, press the RDS DISPLAY MODE button after pressing the RDS CONTROL button.) Each time you press the button, the display changes to show the following information: PS (Programme Service): Station names will be displayed. -
Page 28: Eon Function
3. Press the PTY SELECT – PTY SELECT PTY SELECT – button to choose a PTY. • The programme type display changes with each press of the PTY SELECT button as shown below. Ô TRAFFIC Ô NEWS Ô INFO Ô POP M Ô ROCK M Ô M.O.R. M Ô LIGHT M Ô... -
Page 29: Alarm Function
2. Preset stations are being searched for and while preparing to change the station, sound will be muted. 3. The station will be changed and the programme type being received will appear on the display. • When using the DISPLAY MODE button to change the display, use the appropriate setting for the type of display. -
Page 30: Using The Cd Player
Using the CD Player 3D-PHONIC S. A. BASS FM/AM VOLUME TV SOUND/VCR MENU CANCEL ENTER MENU CANCEL PLAY MODE REPEAT CANCEL RM-SETD77RU REMOTE CONTROL PLAY MODE REPEAT CANCEL TEST TONE LOGIC SLEEP CENTER CENTER MODE LEVEL DISC 3 DISC 3 Number keys REAR DELAY... -
Page 31: The Quickest Way To Start A Cd Is With The One Touch Operation
The System’s CD Player has an Automatic Changer with 3 disc trays. You can use Continuous, Random, Program or Repeat Play for the discs in DISC 1, DISC 2 and DISC 3. Repeat Play can repeat all the tracks on all the CD’s, the tracks on one of the CD’s or one track on one CD. There is also the Tray Lock function, which safely keeps discs in the trays. - Page 32 3. Push the disc tray for DISC 3 to the back. Push the disc tray gently to the back using the finger hold on the front right of the tray. The disc tray for DISC 2 will appear below the disc tray for DISC 3.
-
Page 33: To Play A Disc
To Play a Disc ——————————————————————— This function plays the disc in the Unit continuously, and lights the “CONTINUE” indicator. 1. Prepare the discs. DISC 1 DISC 3 2. Press the DISC (1-3) button on the Unit or the Remote Control you DISC 2 want to play. -
Page 34: To Select A Passage Within A Track
To Select a Passage Within a Track ———————————— Press the up or down cursor key continuously while a CD is playing. Pressing the up (¡ plays the CD backwards rapidly. Release the cursor key at the point at which you wish to resume normal playback. - Page 35 5. Press the cursor key to the up or down 1) to select the disc. (¡ The display changes to the Program Entry display and the disc number and track number sections blink for a few seconds. The menu display changes with each press of the cursor keys as shown below.
-
Page 36: To Check The Program
If you try to program a 33rd track, the System lets you know that the program is full by displaying the message “FULL” on the display. If you try to program a disc tray that is empty, or a track number that does not exist on a disc (for example, selecting track 14 on a disc that only has 12 tracks), the selected disc or track are skipped when the program is played. -
Page 37: Repeating A Track Or The Discs
5. Press the 3 or CD button. The tracks are played in random order. When all of the tracks have been played, the CD Player stops. Using the Remote Control 1. Press the PLAY MODE button to PLAY MODE select RANDOM. “RANDOM”... -
Page 38: Tray Lock Function
Using the Remote Control Press the REPEAT button. REPEAT The display changes with each press of the button, as shown below. = ALL = 1 CD = 1 = OFF = (back to the beginning) “REPEAT ALL” and “REPEAT 1” remain on the display even when you change the CD play mode. The three Repeat Modes above can be selected during Continuous Play, however, during Program Play and Random Play, you can only select REPEAT ALL or REPEAT 1. -
Page 39: Using The Cassette Deck (Listening To A Tape)
Using the Cassette Deck (Listening to a Tape) DOLBY B NR 3D-PHONIC S. A. BASS FM/AM VOLUME TV SOUND/VCR MENU CANCEL ENTER Cursor keys RM-SETD77RU REMOTE CONTROL PLAY MODE REPEAT CANCEL TEST TONE LOGIC SLEEP CENTER CENTER MODE LEVEL DISC 3 REAR DELAY LEVEL... -
Page 40: Regular Play
Regular Play If the power is already on, you can use this basic procedure: 1. Press the 0 button. “OPEN” appears on the display and the Tape Tray opens. 2. Insert a tape into the Tape Tray with the tape head at the back. 3. -
Page 41: Fast Forward And Rewind
Fast Forward and Rewind ————————————————— Press the ¡ When the Tape Direction indicator shows 3, the tape fast forwards when you press the ¡ and rewinds when you press the When the Tape Direction indicator shows 2, the tape rewinds when you press the ¡ fast forwards when you press the •... -
Page 42: Using The Cassette Deck (Recording)
Using the Cassette Deck (Recording) 3D-PHONIC S. A. BASS FM/AM VOLUME TV SOUND/VCR MENU CANCEL ENTER MENU CANCEL PTY SEARCH PTY SELECT – VOLUME REC PAUSE Recording onto a cassette from any of the sound sources is simple. Just place a tape in the Tape Tray, have the source ready, make one or two settings, and you’re ready to record. -
Page 43: Standard Recording
Standard Recording This is the basic method for recording any source. The System also has special ways for recording CD to tape which save you time and effort, as well as give you some special effects. However, when you need to add a selection to a tape you have made, or are combining selections from several sources on one tape, use the method described below;... -
Page 44: Cd Direct Recording
CD Direct Recording Everything on the CD goes onto the tape in the order it is on the CD, or according to the order you have set in a program. 1. Prepare CDs. (See page 27.) Check that the CD Player is not playing a CD. •... - Page 45 5. Press the cursor key up or down (¡ disc. The display changes with each press of the cursor keys as shown below. + Press the down ( 3 Ô 2 Ô 1 Press the up (¡ • If you press the DISC (1-3) buttons instead of pressing the up or down (¡ cursor keys, you can select the disc.
-
Page 46: Using The Timer
Using the Timer RM-SETD77RU REMOTE CONTROL PLAY MODE REPEAT CANCEL TEST TONE LOGIC SLEEP SLEEP CENTER CENTER MODE LEVEL DISC 3 REAR DELAY LEVEL DISC 2 EFFECT LEVEL DISC 1 FM MODE SURROUND L — BALANCE — R MUTE CONTROL TAPE TAPE TV / VIDEO... - Page 47 2. Press the SET button. The display changes to the On Time display. 3. Set the On Time. 1. Set the hour by pressing the 4 Pressing the pressing the 4 3, 4 either of these cursor keys adjusts the setting continuously until the key is released.
-
Page 48: Turning The Daily Timer On And Off
6. Press the SET button. Proceed to step 6 . To use a Cassette Deck as the source 1. Press the left or right cursor key (4 until “TAPE” blinks on the display. 2. Press the SET button. Proceed to step 6 . To Use the current source as the playback source: 1. -
Page 49: Setting The Once Rec (Recording) Timer
To Turn the DAILY Timer On Again MENU 1. Press the MENU button. “DAILY” appears on the display and the DAILY indicator in the “TIMER” section of the menu display blinks. 2. Press the SET button. 3. Press the ENTER button. The DAILY indicator in the TIMER section of the menu changes from a blinking display to a steady ENTER display. -
Page 50: Turning The Once Rec Timer On And Off
Before the Timer Starts Check that tape direction is correct. This is important especially when Reverse Mode is off. Set Reverse Mode on if you want to record on both sides of the tape. The VOLUME control is automatically set to 0 when ONCE REC Timer is recording. It is very easy, and can be very disappointing, to forget to put in a tape, or to accidentally leave a tape in Tape Tray you don’t want recorded over. -
Page 51: Setting The Sleep Timer
Setting the SLEEP Timer Use the Sleep Timer to turn the Unit off after a certain number of minutes when it is playing. By setting this timer, you can fall asleep to music and know your Unit will turn off by itself rather than play all night. You can only set the Sleep Timer when the Unit is on and a source is playing. -
Page 52: Using The Vcr
First make sure that the optional equipment is properly connected to the System. (See page 7.) The Remote Control supplied with System can control JVC VCRs. When operating a VCR, aim the Remote Control at the remote sensor on the VCR. -
Page 53: Listening To A Jvc Vcr
Operating a JVC TV ———————————————————— The Remote Control supplied with System can control JVC TVs. When operating a TV, aim the Remote Control at the remote sensor on the TV. You can use the buttons on the Remote Control to operate the following functions. -
Page 54: Care And Maintenance
Care And Maintenance Compact Discs Handle your compact discs, cassette tapes, and Cassette Deck carefully, and they will last a long time. • Remove the CD from the case by holding it at the edges while pressing the center hole lightly. •... -
Page 55: Troubleshooting
Troubleshooting • If you are having a problem with your System, check this list for a possible solution before calling for service. • If you cannot solve the problem from the hints given here, or the Unit has been physically damaged, call a qualified person, such as your dealer, for service. -
Page 56: Specifications
Specifications Amplifier/Tuner Section SPEAKERS A (IEC 268-3/DIN) (Main) 20 watts per channel, min. RMS, both channels driven, into 6 ohms at 1 kHz SPEAKERS B (Subwoofer) 30 watts per channel, min. RMS, both channels driven, into 3 ohms at 80 Hz, Input Sensitivity/Impedance (1 kHz) TV SOUND/VCR 400 mV/47 kohms Output Impedance (1 kHz) - Page 57 VICTOR COMPANY OF JAPAN, LIMITED EN, GE, FR, NL, SP, IT 0497TNYNATJEM...