Table of Contents
Advertisement
Quick Links
Advertisement
Table of Contents

Related Manuals for Night Owl HAWK-74250


Summary of Contents for Night Owl HAWK-74250
-
Page 3: Table Of Contents
User’s Manual TABLE OF CONTENTS FCC RADIATION NORM:..............................3 PACKAGE CONTENTS: ..............................4 SYSTEM REQUIREMENTS: ............................4 CHAPTER 1: LAYOUT..............................5 1.1 F ................................5 RONT ANEL 1.1.1 Front Panel Buttons ............................5 1.2 R ................................6 ANEL 1.2.1 Rear Panel Inputs/Outputs ........................... 6 CHAPTER 2: INITIAL SETUP ............................ - Page 4 User’s Manual 4.2 C ................................30 ONNECTION 4.3 R ............................... 30 ECORD EARCHING 4.4 R ............................30 ECORD LAYBACK 4.5 B ............................31 ACKUP ECORDED ILES 4.6 P ............................... 31 LAYBACK ONTROL 4.7 F ..............................31 IRMWARE PDATE APPENDIX I: HARD DRIVE CAPACITY........................33 APPENDIX III: FREQUENTLY ASKED QUESTIONS ....................
-
Page 5: Fcc Radiation Norm
User’s Manual FCC RADIATION NORM: This equipment has been tested and found to comply with limits for Class B digital device pursuant to Part 15 of Federal Communications Commission (FCC) rules. FCC Compliance Statement These limits are designed to provide reasonable protection against frequency interference in residential installation. -
Page 6: Package Contents
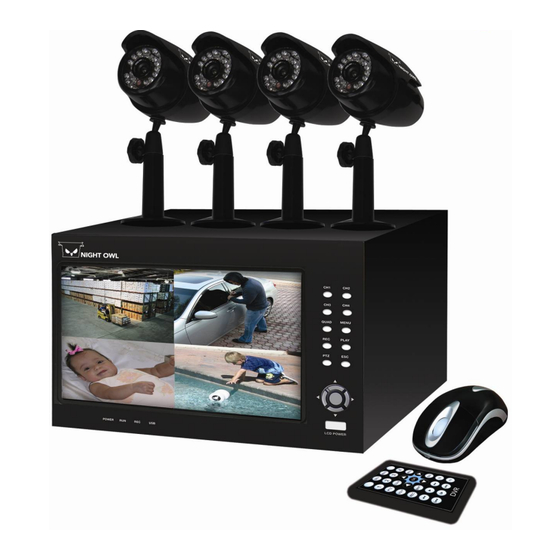
User’s Manual PACKAGE CONTENTS: Your new Security Camera and DVR Kit will ship with the following items. SYSTEM REQUIREMENTS: Please be sure the computer that you install the included software with complies with the following specifications: IBM PCs or 100% Compatibles ®... -
Page 7: Chapter 1: Layout
User’s Manual CHAPTER 1: LAYOUT 1.1 Front Panel 1.1.1 Front Panel Buttons 1. Channel Select Button 2. Quad / Single Channel Preview 4. Menu Button 5. PTZ (Pan Tilt Zoom) Control Button (not supported function with cameras in kit) 6. Playback Button 7. -
Page 8: Rear Panel
User’s Manual 1.2 Rear Panel 1.2.1 Rear Panel Inputs/Outputs VOUT: For external monitor support (BNC to RCA connector needed) V-1: Video Input 1 (Camera 1) V-2: Video Input 2 (Camera 2) V-3: Video Input 3 (Camera 3) V-4: Video Input 4 (Camera 4) PS2: Mouse Input 485T/R ( - , + ): PTZ (Pan Tilt Zoom) Control Serial Port Connection Port for PTZ Cameras 1.3 Remote Controller... -
Page 9: Chapter 2: Initial Setup
User’s Manual CHAPTER 2: INITIAL SETUP 2.1 Connecting the Power Supply 1. Plug the provided power supply into the back of the DVR labeled “DC12V” 2. Plug the other end of the power Adapter into any 110V outlet within your home or business. NOTE: Connecting your DVR and Cameras power source into a UPS or battery backup system will provide you recorded coverage after power failures. -
Page 10: Chapter 3: Dvr Menu Operations
User’s Manual CHAPTER 3: DVR MENU Operations 3.1 Menu Operation Instructions To access the menu, either scroll the mouse to the bottom left portion of the LCD and click Menu, or press Menu on the remote control or Press menu on the DVR front panel. 1. -
Page 11: Shortcut Menu
User’s Manual 3.2 Shortcut Menu The system will provide picture-in-picture, four picture (quad), volume adjust and choice of language in the shortcut menu showed in the bottom line of operation interface. Using the right and left keys to switch "bottom menu" to corresponding icon, the corresponding function can be realized by pressing the enter key or click left mouse. -
Page 12: Record Menu
User’s Manual NOTE: You can not format the HDD while recording. Please stop all channels from recording prior to formatting. 7. OK: Setup completed, Click the “OK” button, to save the changes to the system. 8. CANCEL: Click the ”CANCEL” button to discard all changes, nothing will be saved. 3.5 Record Menu Select “Record”... -
Page 13: Record Parameters
User’s Manual 3.5.1 Record Parameters – This will allow the user to change settings to individual cameras and recording quality. Use this section to apply a name to a channel or change the brightness, contrast or saturation of the cameras, as well as the recoding quality and frame rate. Enter “Record Parameters”, as shown below: 1. -
Page 14: Schedule Record
User’s Manual 3.5.2 Schedule Record Enter “Schedule”, will show the following interface 1. Channel: can select channel 1 through 4 for setup. 2. Setting Method: There are a total of seven rows (horizontal) for 7 days, and 24 columns (vertical) for the 24 hours in a day respectively. 0 = 12:00am, 6 = 6:00am, 12 = Noon, 18 = 6:00pm. -
Page 15: Manual Record
User’s Manual 3.5.3 Manual Record Entering “ManualRec”, will show the setup interface, or press “REC” button on the front panel of the DVR or remote control. 1. Channel: You may choose to record by channel options are channels 1 thru 4 2. -
Page 16: Playback Management
User’s Manual 3.6 Playback Management Choose “Playback” in the main menu to enter the video recording file search function or press the ‘Play’ button on the DVR or Remote Control (see below). 3.6.1 Search Files 1. Channel: User may search by channel. To select a channel, ensure the box has an ‘X’. ‘Blank’... - Page 17 User’s Manual N0. Denotes record number on the HDD. CH: Denotes the channel that has been recorded and available for playback Start Time: Denotes the date and start time of the recorded file MB-Sec: Denotes the size of the file – and the duration in seconds goto: Allows the user to move to the next page or a specific page number PLAY: Highlighting a file and clicking the “PLAY”...
-
Page 18: Playback Control
User’s Manual 3.6.2 Playback Control Menu Tool Bar: During playback, a menu bar will appear at the bottom of the image. If the menu is not visible, either right click on the mouse or press the menu button on the remote or DVR panel. -
Page 19: Motion Detection
User’s Manual 3.7 Motion Detection Choose the “Motion” option in the main menu, to enter the Motion Menu. In this Menu, there are options: “MotionPara” - used to set the motion area, channels, duration, motion level, alarm buzzers and timers. “Schedule”... -
Page 20: Motion Parameter
User’s Manual 3.7.1 - Motion Parameter Choose the second-level menu “MotionPara” to enter motion parameter setup menu. (See below) 1. Channel: Select the channel that you would like to setup for motion detection, 1 thru 4 2. SET: Click the “SET” button to access the selected channels motion detection area. To select a particular area on the image, hold down the left mouse button while dragging to highlight the desired area. - Page 21 User’s Manual 9. OK: Setup completed, Click the “OK” button, to save the changes to the system. 10. CANCEL: Click the ”CANCEL” button to cancel all changes, nothing will be saved. 3.7.2 - Motion Schedule Select "Schedule" on the Motion Menu to enter the below interface: 1.
-
Page 22: Ptz (Pan Tilt Zoom) Function
User’s Manual 3.8 PTZ (Pan Tilt Zoom) Function Select "PTZ" on the main menu, to enter the PTZ Setting interface: NOTE: This system does not come with Pan Tilt Zoom (PTZ) Cameras. You will need to purchase a PTZ camera(s) separately in order to use these functions. 1. -
Page 23: Ptz Control
User’s Manual 3.9 PTZ Control Select "PTZControl" on the main menu, then enter the PTZ control interface: 1. Channel: Please select the channel that you want to control In PTZ control interface, the optional modes of control are: Direction, Focus, Zoom, Iris, Automatic. -
Page 24: Log Management
User’s Manual 3.10 Log Management Select "Log" on the main menu to enter the Search Logs interface: 1. Type: Select the type of the log that you want to search for, Options are: a. Operation: will show the logs of accessing the DVR logs b. -
Page 25: System Settings
User’s Manual 3.11 System Settings Select "System " on the main menu to enter the systems settings interface: There are six (6) secondary menus within this interface they are: Configure, Password, Date&Time, Default, Reset and About. -
Page 26: System Settings - Configure
User’s Manual 3.11.1 System Settings – Configure Select "Configure” in the secondary menu. 1. Standard: It means the present display standard of the system. System Default is NTSC. Do not change this option. 2. Video Loss: When there is video loss on any channel the system will trigger the audio buzzer to alarm. -
Page 27: System Settings - Password Management
User’s Manual 3.11.2 System Settings – Password Management Select the secondary menu “Password” to enter the Modify Password menu. NOTE: Inputting a password: The password will consist of 6 numbers 0 thru 9. Just click on the appropriate box and the left click each number in sequential order to input a password. 1. -
Page 28: System Settings - Date And Time
User’s Manual 3.11.3 System Settings – Date and Time Select the secondary menu “Date&Time” to enter the setup menu. 1. Date: Change the system date. Format = Year-Month-Date 2. Time: Change the system time. Format = Hour:Minutes:Seconds – (Military Time) 3. -
Page 29: System Settings - Default Configuration
User’s Manual 3.11.4 System Settings – Default Configuration Select the secondary menu “Default” to enter the setup menu. 1. OK: reset to default configuration, Clicking the “OK” button, will reset the system back to it’s default state. 2. CANCEL: Click the ”CANCEL” button to cancel all changes, nothing will be changed. -
Page 30: System Settings - Reset
User’s Manual 3.11.5 System Settings – Reset Select the secondary menu “Reset” to enter the Reset menu. 1. OK: Clicking the “OK” button, will restart the system CANCEL: Click the ”CANCEL” return to the previous menu without resetting the system. -
Page 31: System Settings - About
User’s Manual 3.11.6 System Settings – About Select the secondary menu “About” to enter the About menu. NOTE: This will display the System Information such as, product version, HD version and SW version. CHAPTER 4: CLIENT SOFTWARE 4.1 Installation 1. Place the included software into your computer’s CD-ROM Drive. 2. -
Page 32: Connection
User’s Manual 4.2 Connection Link the DVR to the PC by the included USB cable. The system menu on the DVR will have “connecting to PC…” shown on screen. There will be a mark showing there is new USB device connection in the bottom right of the PC. To start using the Recorded File Operation, start the client software, enter “recording file”... -
Page 33: Backup Recorded Files
User’s Manual 4.5 Backup Recorded Files Select the file for backup in the searched file list. Click the “backup” button, a window for saving will appear. Then select the directory and file type, click ok button to save. There are two file type options, one is MJPEG format, the files saved in this format can only be played via client software. - Page 34 User’s Manual 1. If you are using a USB Flash Drive, skip to step 3. If you are connecting your DVR directly to your computer, select the hard drive that you would like to put the update file in with the “Choose Drive Num”...
-
Page 35: Appendix I: Hard Drive Capacity
User’s Manual APPENDIX I: HARD DRIVE CAPACITY SITUATION Resolution Quality Compression/Frame Highest 14KB High 11.5KB Simple CIF(352x240) 8.5KB Lowest Highest 19KB High 15KB Complex CIF(352x240) 11.5KB 10.5KB Lowest 8.5KB * 1 DAY = 24 Hours = 1,440 minutes = 86,400 seconds * 1GB = 1024MB = 1024000KB * Channel video quality(compression size)×... -
Page 36: Appendix Iii: Frequently Asked Questions
User’s Manual APPENDIX III: FREQUENTLY ASKED QUESTIONS 1 Question Why the DVR doesn’t start after connecting the power? Check if the power switch in the back channel is set to ON. 2 Question: Why does the DVR run slow when it starts? ... - Page 37 Night Owl is not responsible for any personal damage, loss or theft related to the Product or to its use for any harm, whether physical or mental related thereto. Any and all claims or statements, whether written or...
- Page 38 Prior to mailing, please contact our customer service department to obtain a return authorization number. The Purchaser must provide Night Owl with a copy of his/ her original, dated bill of sale, receipt or invoice, failing which Night Owl is not required to perform any of its obligations under this warranty. To claim on this warranty, proceed with the following steps.
- Page 39 User’s Manual...
- Page 40 User’s Manual...