
Related Manuals for Jensen JTA-450


Summary of Contents for Jensen JTA-450
- Page 1 JTA-450 3-SPEED STEREO TURNTABLE WITH MP3 ENCODING AND AM/FM STEREO RADIO INSTRUCTION MANUAL PLEASE READ THIS OPERATING MANUAL COMPLETELY BEFORE OPERATING THIS UNIT AND RETAIN IT FOR FUTURE REFERENCE.
-
Page 2: Important Safety Instructions
IMPORTANT SAFETY INSTRUCTIONS WARNING: TO REDUCE THE RISK OF FIRE OR ELECTRIC SHOCK, DO NOT EXPOSE THIS APPLIANCE TO RAIN OR MOISTURE. DANGEROUS HIGH VOLTAGES ARE PRESENT INSIDE THE ENCLOSURE. DO NOT OPEN THE CABINET REFER SERVICING TO QUALIFIED PERSONNEL ONLY. CAUTION: PLEASE READ AND OBSERVE ALL WARNINGS AND INSTRUCTIONS GIVEN IN THIS OWNER’S MANUAL AND THOSE MARKED ON THE UNIT, KEEP THESE... - Page 3 7. Do not block any of the ventilation openings. Install in accordance with the manufacturer’s instructions. 8. Do not install near any heat sources such as radiators, heat registers, stoves, or other apparatus (including amplifiers) that produce heat. 9. Do not defeat the safety purpose of the polarized or grounding – type plug. A polarized plug has two blades with one wider than the other.
-
Page 4: Fcc Notice
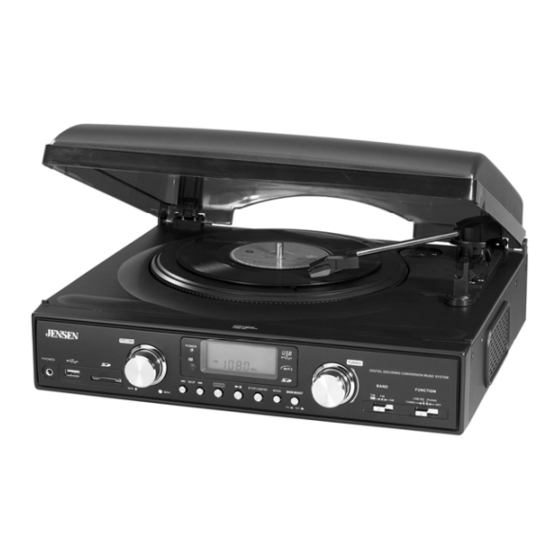
FCC NOTICE: This equipment has been tested and found to comply with the limits for a Class B digital device, pursuant to Part 15 of the FCC Rules. These limits are designed to provide reasonable protection against harmful interference in a residential installation. This equipment generates, uses and can radiate radio frequency energy and, if not installed and used in accordance with the instructions, may cause harmful interference to radio communications. - Page 5 MAIN UNIT 1. Turntable 2. 45 RPM Adaptor 3. Cue-lever (use this lever to lift the tone arm). 4. Tone Arm 5. Speed Selector 6. Tone Arm Holder 7. Speaker 8. Dust Cover 9. Display 10. Tuning Control 11. Band Selector 12.
-
Page 6: Important Notes
REMOTE CONTROL UNIT 1. PLAY/PAUSE BUTTON 2. RECORD BUTTON 3. STOP/CD/USB/SD BUTTON 4. SKIP- BUTTON 5. SKIP+ BUTTON 6. DISPLAY BUTTON 7. PROG BUTTON 8. MODE BUTTON 9. FOLDER UP BUTTON 10. FOLDER DOWN BUTTON 11. DELETE BUTTON Avoid installing the unit in locations described below: •... - Page 7 BATTERY CARE If the unit is not to be used for an extended period of time, remove the battery. An old or leaking battery can cause damage to the Remote Control. ii. Do not dispose of batteries in fire, batteries may explode or leak. BATTERY REPLACEMENT When the battery becomes weak, the operating distance of the Remote Control is greatly reduced and you will need to replace the...
- Page 8 AUTO-STOP Switch (27) located on the back of the unit to the “OFF” position. The turntable will now run to the end of the record, but will no longer stop automatically. To stop the turntable you will need to either set the Function Selector (12) to the OFF position or return the AUTO-STOP Switch (27) to the “ON”...
- Page 9 IMPORTANT: Moving or jarring the Turntable without securing the Tone Arm Clamp (6) could result in damage to the Tone Arm (3). You can convert you favorite records into MP3 files and store then on a USB Flash Drive or SD/MMC Memory Card via the USB port (22) or SD/MMC slot (20) located on the front panel.
-
Page 10: Usb / Card Operation
The following tasks can be accomplished by either using the controls on the REMOTE Control or those which have similar function markings on the JTA-450 main unit. This icon indicates that a task can only be performed using the controls on JTA-450. - Page 11 The track will be repeated and stop until the STOP Button (3) is pressed. To repeat a Folder, press the MODE button twice. "FOLDER" will light up. The selected Folder will be repeated and stop until the STOP Button is pressed. To repeat all the tracks, press the MODE Button 3 times and the Reapeat All Indicator "...
- Page 12 PROGRAMMED PLAY Programmed play can only be achieved in Stop mode. 1. In stop mode, briefly press the MODE button (14) on the unit. Program Channel No. ‘P1’ will briefly appear. ‘P’ will then disappear leaving the Program Indicator,‘PROG’ and ‘1’ flash in the Display to prompt for input. 2.
- Page 13 Original 38 Files 4. Repeat 1-3 above to delete more tracks as desired. For better playback sound, you can connect the JTA-450 to an external Audio Amplifier via the RCA LINE OUT JACKS located at the back panel. Please proceed as following: Connect the “L”...
-
Page 14: Using Headphones (Not Included)
Sound will then come out from the system’s built-in speakers and the external Amplifier’s speakers simultaneously. Set the VOLUME CONTROL (23) to “MIN” and adjust the sound level using the VOLUME CONTROL on the external Amplifier as desired. Turn the System and the external Amplifier off when you have finished listening. Unplug the connection cable. -
Page 15: Stylus Replacement
PLEASE REFER TO THE DIAGRAM BELOW TO REPLACE THE STYLUS. NO ADDITIONAL STYLUS IS SUPPLIED WITH THE SYSTEM. Clean your unit with a damp (never wet) cloth. Solvent or detergent should never be used. Avoid leaving your unit in direct sunlight or in hot, humid or dusty places. Keep your unit away from heating appliances and sources of electrical noise such as fluorescent lamps or motors. -
Page 16: Troubleshooting Guide
Should you experience difficulties in the use of this player please refer to the following chart or call 1-800-777-5331 for Customer Service. PROBLEM • The unit is disconnected from the AC outlet The unit will not play • The AC outlet has no power Poor AM or FM •...