Table of Contents
Advertisement
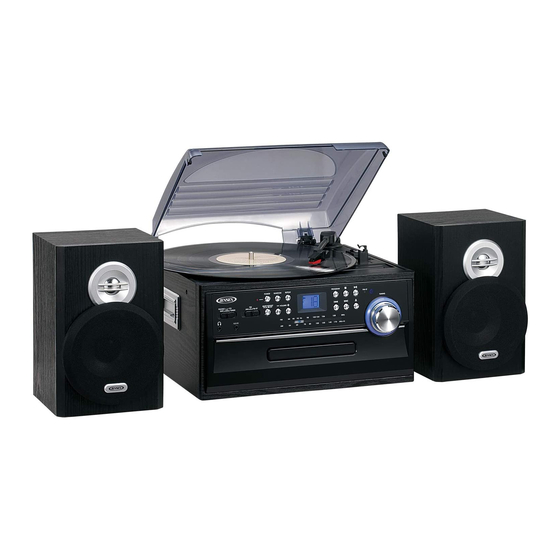
3-SPEED STEREO TURNTABLE WITH CD
AND CASSETTE MUSIC SYSTEM
USER MANUAL
JTA-475
PLEASE READ THIS USER MANUAL COMPLETELY BEFORE OPERATING THIS
UNIT AND RETAIN THIS BOOKLET FOR FUTURE REFERENCE.
DEAR JENSEN® CUSTOMER
Selecting fine audio equipment such as the unit you've just purchased is only the start of your
musical enjoyment. Now it's time to consider how you can maximize the fun and excitement
your equipment offers. This manufacturer and the Electronic Industries Association's
Consumer Electronics Group want you to get the most out of your equipment by playing it at a
safe level. One that lets the sound come through loud and clear without annoying blaring or
distortion and, most importantly, without affecting your sensitive hearing.
Sound can be deceiving. Over time your hearing "comfort level" adapts to higher volumes of
sound. So what sounds "normal" can actually be loud and harmful to your hearing. Guard
against this by setting your equipment at a safe level BEFORE your hearing adapts.
To establish a safe level:
Advertisement
Table of Contents

Related Manuals for Jensen JTA-475


Summary of Contents for Jensen JTA-475
- Page 1 PLEASE READ THIS USER MANUAL COMPLETELY BEFORE OPERATING THIS UNIT AND RETAIN THIS BOOKLET FOR FUTURE REFERENCE. DEAR JENSEN® CUSTOMER Selecting fine audio equipment such as the unit you've just purchased is only the start of your musical enjoyment. Now it's time to consider how you can maximize the fun and excitement your equipment offers.
- Page 2 Model Number: JTA-475 WARNING TO PREVENT FIRE OR SHOCK HAZARD, DO NOT USE THIS PLUG WITH AN EXTENSION CORD, RECEPTACLE OR OTHER OUTLET UNLESS THE BLADES CAN BE FULLY INSERTED TO PREVENT BLADE EXPOSURE.
-
Page 3: Important Safety Instructions
IMPORTANT SAFETY INSTRUCTIONS Read these instructions - All the safety and operating instructions should be read before the appliance is operated Keep these instructions - The safety and operating instructions should be kept for future reference. Heed all warnings - All warnings on the appliance and in the operating instructions should be adhered to. - Page 4 Outdoor Antenna Grounding - If an outside antenna is connected to the receiver, be sure the antenna system is grounded so as to provide some protection against voltage surges and built up static charges. Section 810 of the National Electrical Code, ANSI/ NFPA No.70-1984, provides information with respect to proper grounding of the mast and supporting structure, grounding of the lead-in wire to an antenna discharge unit, size of grounding conductors, location of antenna discharge unit, connection to grounding...
- Page 5 Note: This product complies with DHHS Rule 21 Subchapter J at date of manufacture. Follow the advice below for safe and appropriate operation. ON PROTECTION AGAINST LASER ENERGY EXPOSURE o As the laser beam used in this compact disc player is harmful to the eyes, do not attempt to disassemble the casing.
-
Page 6: Important Notes
Should any trouble occur, remove the power source and refer servicing to qualified personnel. PRECAUTION FORE USE • UNPACK ALL PARTS AND REMOVE PROTECTIVE MATERIAL. • DO NOT CONNECT THE UNIT TO THE MAINS BEFORE CHECKING THE MAINS VOLTAGE AND ALL OTHER CONNECTIONS HAVE BEEN MADE. •... -
Page 7: Getting Start
this device must accept any interference received, including interference that may cause undesired operation. NOTE : This equipment has been tested and found to comply with the limits for a Class B digital device, pursuant to Part 15 of the FCC Rules. These limits are designed to provide reasonable protection against harmful interference in a residential installation. -
Page 8: Connecting The Ac Power Cord
right speaker terminal 2. Connect the left speaker to the left speaker terminals with the red wire to L+ and the black wire to L -. 3. Connect the right speaker to the right speaker terminals with the red wire to R+ and the black wire to R -. - Page 9 TAPE FAST FORWARD / EJECT BUTTON CASSETTE DUST COVER 8.) 45 RPM RECORD ADAPTOR 9.) 33/45/78 RPM SPEED SELECTOR 10.) TONE ARM HOLDER 11.) FM WIRE ANTENNA 12.) RCA LINE OUT JACKS 13.) TURNTABLE AUTO STOP SWITCH 14.) SPEAKER WIRE TERMINAL 15.) AC POWER CORD...
- Page 10 1) PROGRAM BUTTON 2) REPEAT/RANDOM BUTTON 3) SKIP/SEARCH FORWARD SKIP/SEARCH BACKWARD 4) CD TRAY OPEN.CLOSE 5) PLAY/PAUSE BUTTON 6) STOP BUTTON 7) VOLUME + / - BUTTON (For CD, Tape, Phono and Tuner) BATTERY INSTALLATION 1.) Open the battery compartment cover. 2.) Insert two "AAA"...
-
Page 11: Listening To The Radio
1.) Press down the POWER button to turn the system "On", power LED indicator lights. 2.) Slide the FUNCTION selector to the TUNER (Radio) position. 3.) Slide the BAND selector to the desired band, AM, FM or FM STEREO. 4.) Tune to your desired station with the TUNING knob. If FM STEREO mode is selected and you tune to an FM Stereo station, the FM STEREO LED Indicator will light. -
Page 12: Programmed Cd Playback
Never place more than one CD in the CD tray. If two discs are loaded at the same time, the CD mechanism may jam and / or the discs themselves may be damaged. TO BEGIN CD PLAYBACK After you have loaded the CD in the player: 1.) Press the PLAY/PAUSE button to begin playback. - Page 13 1.) Press down the POWER button to turn the system "On". 2.) Slide the FUNCTION selector to the PHONO position. 3.) Raise the turntable dust cover. 4.) Release the tone arm clamp and remove the stylus protector. 5.) Place a record on the platter, over the center spindle (use the 45 RPM record adaptor when playing 45 RPM record).
-
Page 14: Cassette Tape Operation
REMARK: Some types of records may have an auto-stop area outside the preset limit, so the turntable may stop before the last track finishes. In this case, set the auto-stop switch to the “OFF” position. This allows the record to play to the end, but it will not stop automatically. -
Page 15: Bass Boost
To avoid damaging the tape, it is recommended to take the cassette tape out of the deck after listening. BASS BOOST Press down the “BASS BOOST” button on the main unit if you want to enhance the bass when listening to the system. Press the button again to turn off bass boost effect. LINE OUT CONNECTION You can connect this unit to your external Hi-Fi / AMPLIFIER system by connecting the LINE OUT socket to the auxiliary input socket of your Hi-Fi / AMPLIFIER system with... -
Page 16: Compact Disc Care
Furthermore, do not expose cassettes to direct sunlight, dust or oil, and do not touch the tape surfaces. COMPACT DISC CARE Handle the disc only by its edges. Never allow your fingers to come in contact with the shiny, unprinted side of the disc. Do not attach adhesive tape, stickers etc., to the disc label. -
Page 17: Specification
Symptom Possible Problem The unit does not AC cord is not plugged respond (no power). into a wall outlet Wall outlet is not functioning. AM band is too noisy. The reception at the set location is poor. Sound is distorted. Volume level is set too high. - Page 18 SPECTRA MERCHANDISING INTERNATIONAL, INC. warrants this unit to be free from defective materials or factory workmanship for a period of 90 days from the date of original customer purchase and provided the product is utilized within the U.S.A. This warranty is not assignable or transferable. Our obligation under this warranty is the repair or replacement of the defective unit or any part thereof, except batteries, when it is returned to the SPECTRA Service Department, accompanied by proof of the date of original consumer purchase, such as a duplicate copy of a sales receipt.