
Related Manuals for Jensen JTA-575


Summary of Contents for Jensen JTA-575
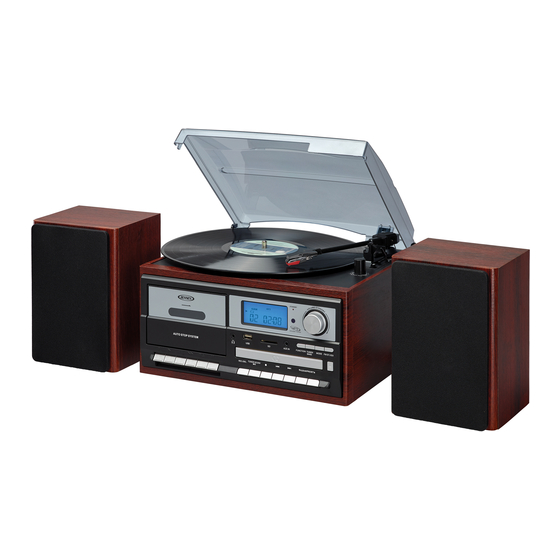
- Page 1 3-SPEED STEREO TURNTABLE MP3 CD SYSTEM WITH CASSETTE AND AM/FM STEREO RADIO MODEL: JTA-575 USER MANUAL PLEASE READ THIS USER MANUAL COMPLETELY BEFORE OPERATING THIS UNIT AND RETAIN THIS BOOKLET FOR FUTURE REFERENCE...
-
Page 2: Important Safety Instructions
WARNING TO PREVENT FIRE OF SHOCK HAZARD, DO NOT USE THIS PLUG WITH AN EXTENSION CORD, RECEPTACLE OR OTHER OUTLET UNLESS THE BLADES CAN BE FULLY INSERTED TO PREVENT BLADE EXPOSURE. TO PREVENT FIRE OR SHOCK HAZARD, DO NOT EXPOSE THIS APPLIANCE TO RAIN OR MOISTURE. The Caution Marking is located at the bottom enclosure of the apparatus. -
Page 3: Compliance With Fcc Regulations
Object and Liquid Entry - Never push objects of any kind into this product through openings as they may touch dangerous voltage points or short-out parts that could result in a fire or electric shock. Never spill liquid of any kind on the product. Damage Requiring Service - Unplug this product from the wall outlet and refer servicing to qualified service personnel under the following conditions: a) When the power-supply cord or plug is damaged,... -
Page 4: Protect Your Furniture
The serial number of this product is found on its bottom. You should note the serial number of this unit in the space provided as a permanent record of your purchase to aid in identification in the event of theft of loss. Model Number: JTA-575 Serial Number:... -
Page 5: Location Of Controls And Indicators
LOCATION OF CONTROLS AND INDICATORS MAIN UNIT 1) CASSETTE PLAYER 2) DUST COVER 3) EARPHONE JACK 4) TURNTABLE 5) USB SLOT 6) LCD DISPLAY 7) SD SLOT 8) AUX IN JACK 9) REMOTE CONTROL RECEIVER 10) STANDBY INDICATOR 11) FUNCTION BUTTON 12) TUNER / BAND BUTTON 13) VOLUME / STANDBY CONTROL 14) MODE BUTTON... -
Page 6: Remote Control
REMOTE CONTROL STANDBY BUTTON: Switches between standby mode and power on mode. PRESET/ALBUM ▼: Same function as “ALBUM / PRESET ▼” button on the unit. PRESET/ALBUM ▲: Same function as “ALBUM / PRESET ▲” button on the unit. BAND BUTTON: Same function as “BAND” button on the unit. MUTE BUTTON: Mutes audio playback. -
Page 7: Getting Started
Make sure that the power is turned off when connecting or disconnecting the speakers. Make sure that the speakers are connected to the correct jacks. POWER SOURCE MAIN UNIT The JTA-575 operates using an external AC-DC adaptor with output DC 15V 1.5A Plug the cord of the power adaptor into the DC IN JACK located on the back of the JTA-575. - Page 8 RADIO OPERATION AND RECORDING (ENCODING TO MP3) RADIO TUNING 1. Press the VOLUME/STANDBY CONTROL to turn the unit ON. 2. Tap the TUNER/BAND BUTTON to put the unit in radio mode (TUNER shows on the display). 3. Repeatedly press the TUNER/BAND BUTTON to select the AM or FM radio band. 4.
- Page 9 PHONO OPERATION AND RECORDING (ENCODING TO MP3) NOTES Remove the stylus protector. Release the TONE ARM LATCH to unlock the tone arm so it moves freely. Tap the FUNCTION button repeatedly to select PHONO mode (PHONO shows on the display). Set the record SPEED SELECTOR to the proper position depending on the record to be played.
-
Page 10: Usb/Sd Operation
Tap the FUNCTION button repeatedly to select AUX mode (AUX shows on the display). Insert a memory storage device (USB flash drive, SD or MMC card). Press the REC button; it takes 3-5 seconds to read memory device. “REC” will be flashing on the display, followed by “AUX REC”... - Page 11 This system is able to decode and playback MP3 and WMA files stored on the memory device (USB flash drive or SD/MMC memory card). This includes MP3 or WMA files stores in separate folders located on the memory device. PLAYING FROM THE USB PORT Tap the FUNCTION button repeatedly to select USB mode.
- Page 12 The system allows you to copy files from a USB to SD or SD to USB 1 file at a time, 1 folder at a time or all files at a time. I) COPY 1 TRACK Insert the USB flash drive or SD/MMC CARD, select “USB” OR “CARD” MODE depending on where the file is you want to copy from.
-
Page 13: Stop Button
CD/MP3 OPERATION AND RECORDING (ENCODING TO MP3) PLEASE READ THIS IMPORTANT INFORMATION: CD mechanisms used in devices like this are designed to fully read all commercial CDs. They will also read self-compiled cd-r/cd-rw discs but it may take up to 10 seconds for playback to start. If playback does not start, it is likely due to the quality of the CD-R/RW disc and/or the compatibility of the cd compilation software. - Page 14 COPYING A CD This unit allows you to copy tracks from a CD to either a USB flash drive or SD; 1 file at a time, 1 folder at a time or all files at one time. I) COPY 1 TRACK Tap the FUNCTION BUTTON to select CD mode.
-
Page 15: Care And Maintenance
LINE-OUT CONNECTION You can connect this unit to an external Hi-Fi / amplifier system by connecting the line-out RCA jacks to the auxiliary input jacks on your Hi-Fi / amplifier system with RCA cables (not included). USING HEADPHONES OR EARBUDS (NOT INCLUDED) Inserting the plug of your headphones or earbuds into the HEADPHONES JACK will enable you to listen to the CD, Radio or Cassette music in private. - Page 16 If the cassette feels tight while performing operation shown (see Fig.2), the tape may be jamming due to ridges formed in the winding of the tape (visible through the center window). These may be removed, in most cases, by fast winding of the cassette from one end to the other and back again. ...
-
Page 17: Troubleshooting Guide
TROUBLE SHOOTING GUIDE If you experience difficulties in the use of this clock radio, please check the following or call 1-800-777-5331 for Customer Service and support Symptom Possible Cause Solution Noise or sound - Station not tuned properly for AM or - Retune the AM or FM broadcast distorted on AM or station. - Page 18 90 DAY LIMITED WARRANTY AND SERVICE VALID IN THE U.S.A. ONLY SPECTRA MERCHANDISING INTERNATIONAL, INC. warrants this unit to be free from defective materials or factory workmanship for a period of 90 days from the date of original customer purchase and provided the product is utilized within the U.S.A. This warranty is not assignable or transferable.