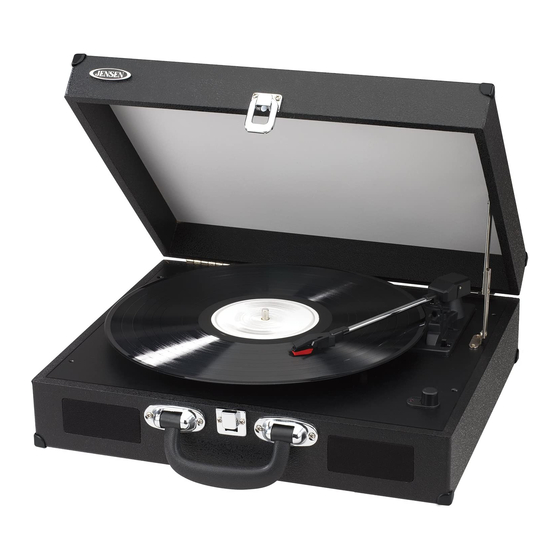
Summary of Contents for Jensen JTA-410
- Page 1 PORTABLE 3-SPEED TURNTABLE WITH BUILT-IN SPEAKERS USER MANUAL JTA-410 PLEASE READ THIS USER MANUAL COMPLETELY BEFORE OPERATING THIS UNIT AND RETAIN THIS BOOKLET FOR FUTURE REFERENCE.
-
Page 2: Important Safety Instructions
WARNING TO PREVENT FIRE OR SHOCK HAZARD, DO NOT USE THIS PLUG WITH AN EXTENSION CORD, RECEPTACLE OR OTHER OUTLET UNLESS THE BLADES CAN BE FULLY INSERTED TO PREVENT BLADE EXPOSURE. TO PREVENT FIRE OR SHOCK HAZARD, DO NOT EXPOSE THIS APPLIANCE TO RAIN OR MOISTURE. The Caution Marking is located at the back enclosure of the apparatus. - Page 3 damaged, liquid has been spilled or objects have fallen into the apparatus, the apparatus has been exposed to rain or moisture, does not operate normally, or has been dropped. 15. This appliance shall not be exposed to dripping or splashing water and that no object filled with liquids such as vases shall be placed on the apparatus.
-
Page 4: Compliance With Fcc Regulations
This model is equipped with non-skid rubber 'feet' to prevent the product from moving when you put the JTA-410 on your furniture. These 'feet' are made from non-migrating rubber material specially formulated to avoid leaving any marks or stains on your furniture. -
Page 5: Dear Jensen® Customer
The serial number of this product is found on its back cover. You should note the serial number of this unit in the space provided as a permanent record of your purchase to aid in identification in the event of theft of loss. Model Number: JTA-410 Serial Number: ____________________... -
Page 6: Accessories Included
10 AC SOCKET 11 BATTERY DOOR POWER SOURCE The JTA-410 operates using standard 120V~ 60Hz AC household power or 8 x “C” size (UM-2) batteries (Not included). A. BATTERY OPERATION For best performance and longer operating time, we recommend the use of alkaline batteries. - Page 7 Follow battery manufacturer’s directions ). B. AC POWER CONNECTION 1. Insert one end of power cord to the AC Socket (#10) at the back of the JTA-410. 2. Connect the power cord to AC power source. 3. When the unit is operated from AC power source, the internal battery source will automatically be disconnected.
-
Page 8: Aux In Operation
1. Use an audio cable (not included) with one 3.5 mm stereo plug on each end of the cable. 2. Plug one end into the AUX IN JACK (#8) on the JTA-410 and the other end of the cable into the Line-out Jack or Headphone Jack of your external audio device. It will automatically switch the unit to AUX mode. - Page 9 INSTALL THE USB DRIVE 1. Use the included USB cable to connect the turntable to your computer. 2. Your computer will detect the JTA-410 as a “USB PnP Audio Device” & start to install USB drivers for it automatically. 3. Waiting for the installation complete until your computer shows a pop up a message that it is installed properly and ready to use.
- Page 10 4. In the Sound Recording field, click the pull down menu to select “USB PnP Audio Device” as Default device of sound recording. 5. Click the Volume button under the Sound recording tab to open ”Recording Control“ interface; 6. Adjust the line in volume to a level without distortion. You can play a record on the turntable and use the Sound Recorder to record a short clip of music for testing.
- Page 11 1. Run the Audacity from the Windows start menu or double click the Audacity icon on your computer desktop. 2. The Audacity main screen appears. You will find the Record, Play, Pause, Stop, Skip to Start and Skip to End control buttons here. Use the File, Edit, View, Transport, Tracks, Generate, Effect and Analyze menus from your computer screen to Save, Export or Edit the music.
- Page 12 4. Adjust the input and output volume by sliding the Input and Output Volume bars. Output Volume Input Volume 5. Click the record button to start recording, left and right tracks will show on your computer screen. If you cannot see the sound waves appear on the Interface when recording, adjust the Input volume bar.
- Page 13 6. Use the Audacity control panel to record or listen the music you have recorded - Click button to start recording. - Click the button to skip to start; - Click the button to skip to end; - Click the button to play;...
-
Page 14: Care And Maintenance
Fig. 1 Fig.2 CARE AND MAINTENANCE 1. Avoid operating your unit under direct sunlight or in hot, humid or dusty places. 2. Keep your unit away from heating appliances and sources of electrical noise such as fluorescent lamps or motors. 3. -
Page 15: Troubleshooting Guide
TROUBLESHOOTING GUIDE SHOULD YOU EXPERIENCE DIFFICULTIES IN THE USE OF THIS PLAYER PLEASE REFER TO THE FOLLOWING CHART OR CALL 1-800-777-5331 FOR CUSTOMER SERVICE. PROBLEM POSSIBLE CAUSE SOLUTION AC power cord is not plugged into a Plug the AC power cord into a wall wall outlet or the connector is not outlet and plug the connector into the plugged into the power supply jack... - Page 16 90 DAY LIMITED WARRANTY AND SERVICE VALID IN THE U.S.A ONLY SPECTRA MERCHANDISING INTERNATIONAL, INC. warrants this unit to be free from defective materials or factory workmanship for a period of 90 days from the date of original customer purchase and provided the product is utilized within the U.S.A. This warranty is not assignable or transferable.


