Table of Contents
Advertisement
INSTALLATION/OPERATION &
AJ-44CE
AJ-44CEL
AJ-44CGP
AJ-44CS
AJ-44CSL
September 29, 2007
P/N 07610-001-76-22 (Revision H)
TECHNICAL MANUAL
FOR JACKSON MODELS:
AJ-66CE
AJ-66CEL
AJ-66CGP
AJ-66CS
AJ-66CSL
AJ-44 RACK CONVEYOR DISHMACHINE SERIES
AJ-80CE
AJ-80CEL
AJ-80CS
AJ-80CSL
Jackson MSC LLC.
P.O. Box 1060
Barbourville, KY. 40906
(606) 523-9795
Fax: (606) 523-9196
www.jacksonmsc.com
Advertisement
Table of Contents

Related Manuals for Jackson AJ-44


Summary of Contents for Jackson AJ-44
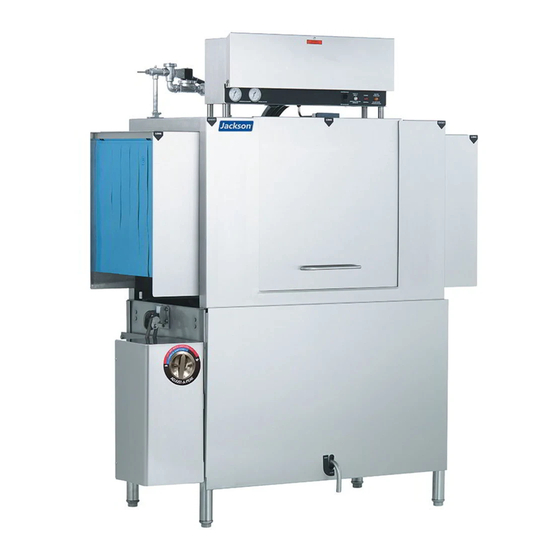
- Page 1 INSTALLATION/OPERATION & TECHNICAL MANUAL AJ-44CE AJ-44CEL AJ-44CGP AJ-44CS AJ-44CSL September 29, 2007 P/N 07610-001-76-22 (Revision H) AJ-44 RACK CONVEYOR DISHMACHINE SERIES FOR JACKSON MODELS: AJ-66CE AJ-66CEL AJ-66CGP AJ-66CS AJ-66CSL AJ-80CE AJ-80CEL AJ-80CS AJ-80CSL Jackson MSC LLC. P.O. Box 1060 Barbourville, KY. 40906...
-
Page 2: Manufacturers Warranty
The warranty registration card supplied with the machine must be returned to Jackson MSC within 30 days to validate the warranty. REPLACEMENT PARTS WARRANTY Jackson replacement parts are warranted for a period of 90 days from the date of installation or 180 days from the date of shipment from the factory, which ever occurs first. - Page 3 STOP! PARE! ARRET! CALL 1-888-800-5672 TO REGISTER THIS PRODUCT! FAILURE TO DO SO WILL VOID THE WARRANTY! LLAME AL 1-888-800-5672 PARA REGISTRAR ESTE PRODUCTO! AL NO HACERLO LA GARANTIA SERA ANULADA! S.V.P . APPELER 1-888-800-5672 POUR ENREGISTRER CE PRODUIT, LA GARANTIE SERA ANNULEE POUR TOUT PRODUIT NON- ENREGISTREE...
- Page 4 REVISION/ REVISION MADE PAGE DATE 05-14-2004 03-08-2005 01-13-2006 01-26-2006 03-21-2006 04-19-2007 35 & 36 05-03-2007 5 thru 22, 111 08-29-2007 APPLICABLE Added exhaust fan hook-up schematic. Updated installation instructions. Added 3 instruction sheets for 7096 limit switches. Added instruction sheet for curtain installation. Changed layout.
- Page 5 Installation Date: Service Rep. Name: Phone No.: AJ-44CSL Jackson MSC LLC. provides technical support for all of the dishmachines detailed in this manual. We strongly recommend that you refer to this manual before making a call to our technical support staff.
-
Page 6: Table Of Contents
SPECIFICATION INFORMATION Operating Characteristics Electrical Requirements D226 Steam Booster Parameters AJ-44 Electric - Left to Right AJ-44 Electric - Right to Left AJ-44 Gas - Left to Right AJ-44 Gas - Right to Left AJ-44 Steam - Left to Right... - Page 7 Prewash Arm/Upper Wash Arm Assembly Curtains/Tub Magnets Final Rinse Assembly Drive Assembly Door Assemblies Pawl Bar Miscellaneous Components AJ-44 & AJ-66 Pawl Bar Assemblies AJ-80 Pawl Bar Assemblies AJ-44 Rack Rail Assembly AJ-66 Rack Rail Assemblies AJ-80 Rack Rail Assemblies Miscellaneous Parts & Weldments...
- Page 8 ELECTRICAL SCHEMATICS AJ-44CE/CEL 200-230 Volt, 50/60 Hz, 1 Phase Primary Side 200-230 Volt, 50/60 Hz, 1 Phase Secondary Side 200-230 Volt, 50/60 Hz, 3 Phase Primary Side 200-230 Volt, 50/60 Hz, 3 Phase Secondary Side 380-460-600 Volt, 60 Hz, 3 Phase Primary Side 380-460-600 Volt, 60 Hz, 3 Phase Secondary Side 380-415 Volt, 50 Hz, 3 Phase Primary Side 380-415 Volt, 50 Hz, 3 Phase Secondary Side...
-
Page 9: Specification Information
SECTION 1: SPECIFICATION INFORMATION... -
Page 10: Operating Characteristics
WASH (MINIMUM) RINSE (MINIMUM) FLOW PRESSURE (PSI) FLOWRATE (GPM): AJ-44-66-80CE/CS/CGP AJ-44-66-80CEL/CSL MINIMUM CHLORINE (PPM) AJ-44-66-80CEL/CSL MODELS ONLY: OPERATING CHARACTERISTICS STEAM COIL TANK HEAT (CS/CSL MODELS ONLY): STEAM INLET PRESSURE (PSIG) STEAM CONNECTION NPT CONSUMPTION @ 15 PSIG (lbs/hr): AJ-44-66-80CS/CSL 6200... -
Page 11: Electrical Requirements
SECTION 1: SPECIFICATION INFORMATION AJ-44CE/CEL MODELS TYPICAL TOTAL ELECTRICAL VOLTS AMPS CIRCUIT 55 A 70 AMP 49 A 70 AMP 51 A 70 AMP 29 A 40 AMP 28 A 35 AMP 28 A 35 AMP 83 A 110 AMP 76 A 100 AMP 47 A... -
Page 12: D226 Steam Booster Parameters
MAXIMUM SHELLSIDE STEAM PRESSURE (PSI) * - Indicates typical design criteria but is subject to change without notice. For more information, contact you authorized Jackson service representative. STEAM RELIEF VALVE SET PRESSURE (PSI): WATER OUTLET SAFETY VALVE SET PRESSURE (PSI):... -
Page 13: Electric - Left To Right
SECTION 1: SPECIFICATION INFORMATION AJ-44 ELECTRIC - LEFT TO RIGHT AJ-44C Series Technical Manual 7610-001-76-22 Issued: 03-21-2006 Revised: 09-29-2007... -
Page 14: Electric - Right To Left
SECTION 1: SPECIFICATION INFORMATION AJ-44 ELECTRIC - RIGHT TO LEFT AJ-44C Series Technical Manual 7610-001-76-22 Issued: 03-21-2006 Revised: 09-29-2007... -
Page 15: Gas - Left To Right
SECTION 1: SPECIFICATION INFORMATION AJ-44 GAS - LEFT TO RIGHT AJ-44C Series Technical Manual 7610-001-76-22 Issued: 03-21-2006 Revised: 09-29-2007... -
Page 16: Gas - Right To Left
SECTION 1: SPECIFICATION INFORMATION AJ-44 GAS - RIGHT TO LEFT AJ-44C Series Technical Manual 7610-001-76-22 Issued: 03-21-2006 Revised: 09-29-2007... -
Page 17: Steam - Left To Right
SECTION 1: SPECIFICATION INFORMATION AJ-44 STEAM - LEFT TO RIGHT AJ-44C Series Technical Manual 7610-001-76-22 Issued: 03-21-2006 Revised: 09-29-2007... -
Page 18: Steam - Right To Left
SECTION 1: SPECIFICATION INFORMATION AJ-44 STEAM - RIGHT TO LEFT AJ-44C Series Technical Manual 7610-001-76-22 Issued: 03-21-2006 Revised: 09-29-2007... -
Page 19: Electric - Left To Right
SECTION 1: SPECIFICATION INFORMATION AJ-66 ELECTRIC - LEFT TO RIGHT AJ-44C Series Technical Manual 7610-001-76-22 Issued: 03-21-2006 Revised: 09-29-2007... -
Page 20: Electric - Right To Left
SECTION 1: SPECIFICATION INFORMATION AJ-66 ELECTRIC - RIGHT TO LEFT AJ-44C Series Technical Manual 7610-001-76-22 Issued: 03-21-2006 Revised: 09-29-2007... -
Page 21: Gas - Left To Right
SECTION 1: SPECIFICATION INFORMATION AJ-66 GAS - LEFT TO RIGHT AJ-44C Series Technical Manual 7610-001-76-22 Issued: 03-21-2006 Revised: 09-29-2007... -
Page 22: Gas - Right To Left
SECTION 1: SPECIFICATION INFORMATION AJ-66 GAS - RIGHT TO LEFT AJ-44C Series Technical Manual 7610-001-76-22 Issued: 03-21-2006 Revised: 09-29-2007... -
Page 23: Steam - Left To Right
SECTION 1: SPECIFICATION INFORMATION AJ-66 STEAM - LEFT TO RIGHT AJ-44C Series Technical Manual 7610-001-76-22 Issued: 03-21-2006 Revised: 09-29-2007... -
Page 24: Steam - Right To Left
SECTION 1: SPECIFICATION INFORMATION AJ-66 STEAM - RIGHT TO LEFT AJ-44C Series Technical Manual 7610-001-76-22 Issued: 03-21-2006 Revised: 09-29-2007... -
Page 25: Electric - Left To Right
SECTION 1: SPECIFICATION INFORMATION AJ-80 ELECTRIC - LEFT TO RIGHT AJ-44C Series Technical Manual 7610-001-76-22 Issued: 03-21-2006 Revised: 09-29-2007... -
Page 26: Electric - Right To Left
SECTION 1: SPECIFICATION INFORMATION AJ-80 ELECTRIC - RIGHT TO LEFT AJ-44C Series Technical Manual 7610-001-76-22 Issued: 03-21-2006 Revised: 09-29-2007... -
Page 27: Gas - Left To Right
SECTION 1: SPECIFICATION INFORMATION AJ-80 GAS - LEFT TO RIGHT AJ-44C Series Technical Manual 7610-001-76-22 Issued: 03-21-2006 Revised: 09-29-2007... -
Page 28: Gas - Right To Left
SECTION 1: SPECIFICATION INFORMATION AJ-80 GAS - RIGHT TO LEFT AJ-44C Series Technical Manual 7610-001-76-22 Issued: 03-21-2006 Revised: 09-29-2007... -
Page 29: Steam - Left To Right
SECTION 1: SPECIFICATION INFORMATION AJ-80 STEAM - LEFT TO RIGHT AJ-44C Series Technical Manual 7610-001-76-22 Issued: 03-21-2006 Revised: 09-29-2007... -
Page 30: Steam - Right To Left
SECTION 1: SPECIFICATION INFORMATION AJ-80 STEAM - RIGHT TO LEFT AJ-44C Series Technical Manual 7610-001-76-22 Issued: 03-21-2006 Revised: 09-29-2007... -
Page 31: Side Loader (Left To Right) Dimensions
14 1/2” * - 15” on 30” model ** - 30” on 30 “ model SIDE LOADER (LEFT TO RIGHT) DIMENSIONS MINIMUM 25” 5” DISHWASHER 12 1/2” 29” AJ-44C Series Technical Manual 7610-001-76-22 Issued: 03-21-2006 Revised: N/A 1/2” WALL OF SIDE LOADER 1/2”... -
Page 32: Side Loader (Right To Left) Dimensions
5” CENTER LINE DISHMACHINE AJ-44C Series Technical Manual 7610-001-76-22 Issued: 03-21-2006 Revised: N/A NOTE: ALL DIMENSIONS ARE TYPICAL. 25” DISHWASHER 12 1/2” CONVEYOR DISHMACHINE 14 1/2” * - 15” on 30” model 29” ** - 30” on 30 “ model 4 1/2”... -
Page 33: Side Loader (Installed) Dimensions
SECTION 1: SPECIFICATION INFORMATION 23” SIDE LOADER DIMENSIONS MODEL DIMENSIONS AJ-44 75” AJ-66 97” AJ-80 111” 30” SIDE LOADER DIMENSIONS MODEL DIMENSIONS AJ-44 82” AJ-66 104” AJ-80 118” NOTE: ALL DIMENSIONS ARE TYPICAL. 10” 4” 34” 23” or 30” SIDE LOADER (INSTALLED) DIMENSIONS (Left to Right installation shown for reference.) -
Page 34: D226 Steam Booster Dimensions
SECTION 1: SPECIFICATION INFORMATION 11” 14” NOTE: All dimensions are in inches and are for reference only. 16” D226 STEAM BOOSTER DIMENSIONS 43” 24” 16” 13” AJ-44C Series Technical Manual 7610-001-76-22 Issued: 03-21-2006 Revised: N/A 4” 11” 16” 6”... -
Page 35: D226 Steam Booster Plumbing Line Drawings
SECTION 1: SPECIFICATION INFORMATION D226 STEAM BOOSTER PLUMBING LINE DRAWINGS Steam Booster Piping - Single Tank Machine Steam Booster Piping - Double Tank Machine AJ-44C Series Technical Manual 7610-001-76-22 Issued: 03-21-2006 Revised: N/A... -
Page 36: Typical Electric And Gas Booster Dimensions
SECTION 1: SPECIFICATION INFORMATION TYPICAL ELECTRIC AND GAS BOOSTER DIMENSIONS Electric Booster Dimensions (Typical) 30 / " (775 mm) 30-1/2” 24” 24" (610 mm) / " NPT Coupling for Temperature/Pressure 18” Relief Valve Electical connection from side or below SIDE VIEW 20-3/4”... -
Page 37: Installation & Operation Instructions
SECTION 2: INSTALLATION & OPERATION INSTRUCTIONS... -
Page 38: Installation Instructions
However, rough handling by carriers or others may result in damage to the unit while in transit. If such a situ- ation occurs, do not return the unit to Jackson; instead, contact the carrier and ask them to send a representative to the site to inspect the damage to the unit and to complete an inspection report. - Page 39 SECTION 2: INSTALLATION/OPERATION INSTRUCTIONS It is also recommended that a shock absorber (not supplied) be installed in the incoming water line. This prevents line hammer (hydraulic shock), induced by the solenoid valve as it operates, from causing damage to the equipment. STEAM LINE CONNECTIONS: Some machines covered in this manual are designed to use low pressure steam as a source of heat for wash tank water.
- Page 40 CHEMICAL FEEDER EQUIPMENT: The AJ-44CEL/CSL, AJ-66CEL/CSL, and AJ-80CEL/CSL are designed to operate with a third party chemical injection system. Jackson does not endorse any particular chemical injection system. The system select- ed must be able to provide detergent and sanitizer in the required concentrations. The minimum chlorine concentration for prop- er sanitization is 50 PPM.
-
Page 41: Deliming Operations
SECTION 2: INSTALLATION/OPERATION INSTRUCTIONS DELIMING OPERATIONS: In order to maintain the dishmachine at its optimum performance level, it will be required to remove lime and corrosion deposits on a frequent basis. A deliming solution should be available from your detergent supplier. Read and follow all instructions on the label of the deliming solution. -
Page 42: Changing The Aj-44Ce/Cs Direction Of Travel
SECTION 2: INSTALLATION/OPERATION INSTRUCTIONS CHANGING THE AJ-44CE/CS DIRECTION OF TRAVEL The AJ-44 dishmachine has the ability to have its direction of travel changed from left to right, or from right to left. Direction of travel is determined by which end the rack of ware is put into the machine and which end the rack comes out. - Page 43 SECTION 2: INSTALLATION/OPERATION INSTRUCTIONS CHANGING THE AJ-44CE/CS DIRECTION OF TRAVEL (CONTINUED) 4. Remove the upper wash arm assembly bracket. This step may require that you have help as the bolts for securing the bracket to the top of the inner hood are the same bolts that hold the control box to the hood top.
- Page 44 SECTION 2: INSTALLATION/OPERATION INSTRUCTIONS CHANGING THE AJ-44CE/CS DIRECTION OF TRAVEL (CONTINUED) Removing the locknuts for the lower wash arm support bracket. 9. Remove the lower rinse arm support bracket, which is mounted directly opposite of the lower wash arm support bracket.
- Page 45 SECTION 2: INSTALLATION/OPERATION INSTRUCTIONS CHANGING THE AJ-44CE/CS DIRECTION OF TRAVEL (CONTINUED) and the strainer within in. The assembly should lift right out. (See next page for photograph detailing this step) 15. Remove the front and rear rinse pan locator brackets. Note: the brackets are mounted to the bolts that secure the tub weldment to the frame.
- Page 46 SECTION 2: INSTALLATION/OPERATION INSTRUCTIONS CHANGING THE AJ-44CE/CS DIRECTION OF TRAVEL (CONTINUED) Removing the hole cover weldment 22. Separate the rinse plumbing from the rest of the incoming plumbing by loosening the union. Ensure that the gasket on the bottom of the rinse injector stays with the assembly as you remove it.
- Page 47 Test the unit with an empty rack to ensure that it pulls the rack all of the way through the unit. If any problems arise you can contact your Jackson rep- resentative. 2. Replace the front dress panel once the unit is ready for service again.
-
Page 48: Curtain Installation Diagrams
SECTION 2: INSTALLATION/OPERATION INSTRUCTIONS CURTAIN INSTALLATION DIAGRAMS Please refer to the chart for placement of the curtains. AJ-44C Series Technical Manual 7610-001-76-22 Issued: 03-21-2006 Revised: N/A... -
Page 49: Side Loader Installation & Operation Instructions
This accessory assists in the delivery of a full dish rack from the break down (scrapping) table to the dishmachine. It will con- vert the direction of travel 90°. Since the Side Loader is shipped mounted on the conveyor dishwasher there is no additional installation required for this option. -
Page 50: D226 Steam Booster Installation & Operation Instructions
The D226 Booster is designed to take incoming water from a minimum temperature of 110°F to approximately 180°F for use in the final rinse of your Jackson dishmachine. In order to do this, water is supplied to the booster and is heated by tubes carry- ing 15-25 PSIG flow steam. - Page 51 SECTION 2: INSTALLATION/OPERATION INSTRUCTIONS D226 STEAM BOOSTER INSTALLATION & OPERATION INSTRUCTIONS (CONTINUED) ELECTRICAL: WARNING: Electrical and grounding connections must comply with applicable portions of the National Electrical Code ANSI / NFPA 70 (latest edition) and/or other electrical codes.Disconnect electrical power supply and place a tag or lock at the disconnect switch to indicate that you are working on the circuit.
-
Page 52: Gas Conveyor Hose Installation
SECTION 2: INSTALLATION/OPERATION INSTRUCTIONS Attach the hose fitting to this connection before making the Connection cut at the other end of the hose. Due to the fact that each customer may have different requirements for the orientation of the gas booster heater relative to the main dishmachine, the hose lengths that connect the two units must be customized during each installation. - Page 53 SECTION 2: INSTALLATION/OPERATION INSTRUCTIONS GAS CONVEYOR HOSE INSTALLATION (CONTINUED) AJ-44C Series Technical Manual 7610-001-76-22 Issued: 03-21-2006 Revised: N/A...
-
Page 54: Dishmachine Operating Instructions
SECTION 2: INSTALLATION/OPERATION INSTRUCTIONS PREPARATION: Before proceeding with the start-up of the unit, verify the following: 1. Close door(s) on dishmachine. 2. Close the drain valve(s). POWER UP (ELECTRICALLY-HEATED MODELS): To energize the unit, turn on the power at the service breaker. The volt- age should have been previously verified as being correct. - Page 55 SECTION 2: INSTALLATION/OPERATION INSTRUCTIONS DISHMACHINE OPERATION INSTRUCTIONS (CONTINUED) SHUTDOWN AND CLEANING (STEAM-HEATED MODELS): At the end of the workday, place the power switch in the OFF position, secure the flow of steam to the machine and open the door(s). Open the drain valves and allow the machine to drain completely.
-
Page 56: Changing Dual Sanitizatio Mode
This change can only be performed by an authorized Jackson service technician. If the machine does not have a dataplate like the one shown, the sanitization mode CAN NOT be changed. - Page 57 SECTION 2: INSTALLATION/OPERATION INSTRUCTIONS CHANGING DUAL SANITIZATION MODE (CONTINUED) THERMOSTAT ADJUSTMENT: Remove the front dress panel from the machine to expose the heater/thermostat box. Remove the cover from the heater/thermostat box. Locate the wash tank regulating thermostat (see diagram). Front Dress Panel Wash Thermostat The wash tank regulating thermostat will maintain the correct wash water temperature.
-
Page 58: Detergent Control
If the water cannot get hot enough, your results may not be satisfactory. This is why Jackson recommends that if you have installed the machine in an area with hard water, that you also install some type of water treatment equipment to help remove the dissolved solids from the water before it gets to the dishmachine. -
Page 59: Striker Plate Limit Switch Installation Instructions
SECTION 2: INSTALLATION/OPERATION INSTRUCTIONS STRIKER PLATE LIMIT SWITCH INSTALLATION INSTRUCTIONS Installation Instructions: 1. Wiring: The switch is wired common and nor- mally open because of the hinge design. By interrupting the line in series with the door switches, the dishmachine ceases to operate. Refer to the machine schematic for details on how to wire the switch. -
Page 60: Preventative Maintenance
SECTION 3: PREVENTATIVE MAINTENANCE... - Page 61 The dishmachines covered in this manual are designed to operate with a minimum of interaction with the operator. However, this does not mean that some items will not wear out in time. Jackson highly recommends that any maintenance and repairs not specifically discussed in this manual should be performed by QUALIFIED SERVICE PERSONNEL ONLY.
-
Page 62: D226 Maintenance
SECTION 3: PREVENTATIVE MAINTENANCE WARNING: Maintenance should only be performed by authorized service personnel in order to ensure safe and effective workmanship, while minimizing danger to operating personnel. The D226 Steam Booster is designed to operate at temperatures capable of causing burns to personnel. Always allow the unit to cool down to an acceptable temperature prior to performing any maintenance. -
Page 63: Lubrication Chart For Drive Gear
SECTION 3: PREVENTATIVE MAINTENANCE Note: The maintenance procedures detailed here are manufacturer’s instructions for the WINSMITH brand of gear reducer that is installed on the rack conveyors covered in this manual. Ambient Temperature -30 - 15°F Final Stage Worm Speed up to 2000 FPM ISO Viscosity Grade AGMA Lubricant No. -
Page 64: Drive Motor Gear Reducer Preventative Maintenance
SECTION 3: PREVENTATIVE MAINTENANCE DRIVE MOTOR GEAR REDUCER PREVENTATIVE MAINTENANCE Note: The maintenance procedures detailed here are manufacturer’s instructions for the WINSMITH brand of gear reducer that is installed on the rack conveyors covered in this manual. Lubrication & Maintenance: Factory filling - WINSMITH speed reducers are oil filled at the factory to the proper level for the standard mounting position that you will find it in on the unit. -
Page 65: Troubleshooting Section
SECTION 4: TROUBLESHOOTING SECTION... -
Page 66: Common Problems
WARNING: Inspection, testing and repair of electrical equipment should be performed only by qualified service per- sonnel. Certain procedures in this section require electrical tests or measurements while power is applied to the machine. Exercise extreme caution at all times. If test points are not easily accessible, disconnect power, attach test equipment and reapply power to test. - Page 67 Problem: Pawl bar does not move. 1. Failed or broken overload spring. Replace spring if necessary. 2. No power to the drive motor/failed drive motor. Verify power and wiring connections to the motor. If necessary, replace the motor. 3. Pawl bar not properly installed. Verify that the pawl bar is installed correctly. Problem: Racks go through the machine, but results are poor.
-
Page 68: D226 Common Problems
WARNING: Inspection, testing and repair of electrical equipment should be performed only by qualified service per- sonnel. Certain procedures in this section require electrical tests or measurements while power is applied to the machine. Exercise extreme caution at all times. If test points are not easily accessible, disconnect power, attach test equipment and reapply power to test.