Table of Contents
Advertisement
Advertisement
Table of Contents
Troubleshooting

Related Manuals for Electrolux EVE916BA


Summary of Contents for Electrolux EVE916BA
- Page 1 User manual Cooker EVE916BA EFE956BA EFE916BA...
-
Page 2: Table Of Contents
WE’RE THINKING OF YOU CONTENTS Thank you for purchasing an Electrolux appliance. General warnings You’ve chosen a product that brings with it decades Important safety instructions of professional experience and innovation. Ingenious and stylish, it has been designed with you in mind. EVE916BA components... -
Page 3: General Warnings
GENERAL WARNINGS Please read the user manual carefully and store in a handy CAUTIOn! place for later reference. Pass the user manual on to possible new owners of the appliance. read the following carefully to avoid an electric shock or fire. Read the following carefully to avoid damage or injury. It is important to use your appliance safely. -
Page 4: Important Safety Instructions
ImPORTANT SAFETY INSTRUCTIONS InDUCTIOn HOB mODEL WArnInG! Do not place heat resistant mats, wire mats or • OVEn aluminium foil under pots and pans. During use the appliance becomes hot. Care should be Do not allow pots to boil dry, as damage to both pan •... -
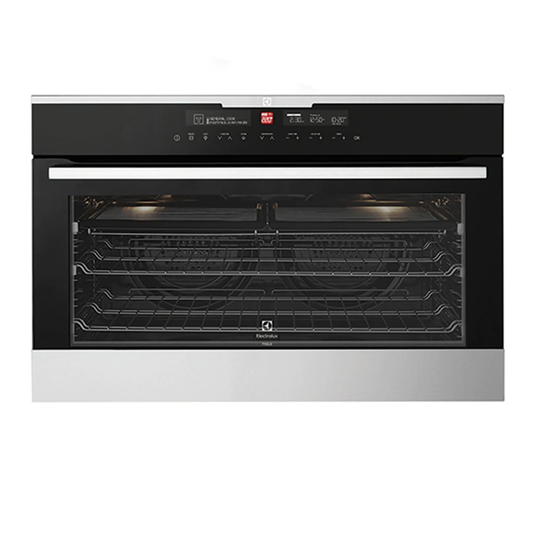
Page 5: Eve916Ba Components
EVE916BA COmPONENTS multi function electric oven and programmable controller ON/OFF Cook time control Cooking function display Light on/off Delay end control Temperature display Cooking function selector Set clock and timer control Cook time display Temperature control Instant confirm Delay end display Clock/timer display Control panel (see above) -
Page 6: Efe956Ba Components
EFE956BA COmPONENTS Induction hob, multi function electric oven and programmable controller ON/OFF Cook time control Cooking function display Light on/off Delay end control Temperature display Cooking function selector Set clock and timer control Cook time display Temperature control Instant confirm Delay end display Clock/timer display Induction hob (see page 22-30) Exhaust air outlet Storage compartment Control panel (see above) -
Page 7: Efe916Ba Components
EFE916BA COmPONENTS Gas hob, multi function electric oven and programmable controller ON/OFF Cook time control Cooking function display Light on/off Delay end control Temperature display Cooking function selector Set clock and timer control Cook time display Temperature control Instant confirm Delay end display Clock/timer display Wok burner control Semi rapid burner control Exhaust air outlet Semi rapid burner control... -
Page 8: Before Using The Appliance
BEFORE USING THE APPLIANCE preparing the appliance Installing the catalytic liners 1. Please remove all stickers, leaflets and boxes from the The oven will arrive with a catalytic fan baffle already fitted. door and from the floor of the oven before operation. Optional side panels are also supplied and may be fitted before installing the side racks. - Page 9 BEFORE USING THE APPLIANCE Installing the side racks positioning the dishes on the grill dish carrier 1. Insert the twin pegged side into the rear access holes provided, ensuring pegs are fully inserted. 2. Then locate the front peg into the front access hole and push in firmly. Fitting the shelves and grill dish carrier onto telescopic slides To fit a shelf or grill dish carrier to telescopic slides: 1.
- Page 10 BEFORE USING THE APPLIANCE - GAS HOB mODEL Installing the burners and trivets Installing the trivets 1. Position the 2 side trivets onto the hob first, ensuring the 2 corner location recesses are to the back of the hob. 2. Then position the middle trivet ensuring the trivet fingers are aligned with the side trivet fingers.
-
Page 11: Using The Oven
USING THE OVEN Turning the oven on Selecting a temperature • S witch on the oven by touching the ON/OFF The temperature is electronically controlled. symbol. The LCD control panel will come on and The temperature can be selected within the range of 30ºC inform you that you need to select a cooking function. to 250ºC and can be adjusted at any time. - Page 12 USING THE OVEN Cooking with the timer Setting the delay end time Your oven is equipped with a programmable controller that The delay end function can be used to switch the oven on can be used to turn the oven on and off automatically. The and off at a specific time during the day. ‘cook time’...
- Page 13 USING THE OVEN Timers Adjusting the clock The appliance has two timers which can be used one at a 1. Switch on the oven by touching ‘ON/OFF’ symbol. time. The count up timer can be used to measure a period 2. Select ‘SETTINGS’ from the function list and of time.
- Page 14 USING THE OVEN Safety cut-out features Activating the child-proof lock The oven automatically switches itself off if the When the child lock is engaged, the oven cannot be temperature is not adjusted or the appliance is left switched on. operating after a period of time. The oven switches itself 1.
- Page 15 OVEN COOKING FUNCTIONS Symbol Function Description Fan cook Heat comes from the element surrounding the fan. This fan circulates the hot air around the oven cavity so that you can put your food in different places in the oven and still cook them at the same time. You can use the ‘Fan Cooking’...
- Page 16 Fan grill ‘Fan Grill’ offers you the benefits of both fan assist bake and traditional grill functions. The grill element turns on and off to maintain set temperature while the fan circulates the heated oven air. Grill with the oven door closed. You can use ‘Fan Grill’...
-
Page 17: Oven Baking Guide
OVEN BAKING GUIDE Choosing the best oven settings The following table is intended as a guide and experience may show some variation in cooking times necessary to meet individual requirements. We recommend that you preheat your oven for 30 minutes. modes without Oven Fan Food Temperature Oven shelf position* Time in minutes •C Scones... -
Page 18: Oven Cooking Guide
OVEN COOKING GUIDE roasting meat Grilling Guide 1. Place the meat in the oven and set the temperature WArnInG! between 180°C and 200°C. (It is recommended to wrap your meats in an oven roasting bag or foil to NOTE: Always clean the grill/oven dish after every use. prevent fats and oils from splattering, making it easier Excessive fat build-up may cause a fire. -
Page 19: Dealing With Cooking Problems
DEALING WITH COOKING PROBLEmS problem Causes remedies Uneven cooking: Incorrect shelf position. Select shelf that puts food in the centre of the oven. Oven tray too large. Experiment with other trays or dishes. Trays not centralised. Centre trays. Air flow in oven uneven. Rotate food during cooking. -
Page 20: Oven Cooking Tips
OVEN COOKING TIPS • F or best baking results preheat oven for 30 minutes. • S elect the correct shelf location for food being cooked. • O ne of the grill trays can be used in the oven as a baking dish. • M ake sure dishes will fit into the oven before you switch it on. • K eep edges of baking dishes at least 40mm from the side of the oven. This allows free circulation of heat and ensures even cooking. • D o not open the oven door more than necessary. -
Page 21: Oven Troubleshooting
OVEN TROUBLESHOOTING If there is a problem with the appliance, please: • C heck the points listed below before calling for service. It may be possible to avoid a call by fixing the problem yourself – and so continue cooking. problem possible cause remedy Oven or grill not working Time of day is not set Set time of day Power is not turned on... -
Page 22: Using The Induction Hob
USING THE INDUCTION HOB Use the sensor fields to operate the appliance. The displays, indicators and sounds tell which functions operate. Sensor field Function Activates and deactivates the hob. Locks and unlocks the control panel. Activates and deactivates the STOP + GO function. Activates the Chef function. Heat setting display Indicates the selected heat setting. Timer indicators of cooking Indicates which of the cooking zones you have set the timer for. - Page 23 USING THE INDUCTION HOB Sensor field Function Indicates which cooking zone. Indicates that the cookware is incorrect, the diameter of the bottom of the cookware is too small or there is no cookware on the cooking zone. Activates and deactivates the Bridge function. Activates and deactivates the Power function.
- Page 24 USING THE INDUCTION HOB Activation and deactivation Bridge function Touch for 1 second to activate or deactivate the The Bridge function connects two cooking zones together appliance. and then operates them as one. You can use this function for cookware larger than 260 mm. Automatic switch off First set the heat setting for one of the cooking zones.
- Page 25 USING THE INDUCTION HOB power management • T o change the Count Down Timer: select the cooking zone with the sensor and touch Power management divides the power between the front and rear zones for each of the 3 modules. See • T o deactivate the Count Down Time select the illustration below: cooking zone with the sensor and touch until...
- Page 26 USING THE INDUCTION HOB • F irst deactivate the hob. • T hen hold down for 3 seconds. The displays will The Count Up timer come on and then go out. Then hold down for 3 Use the Count Up timer to monitor how long a cooking seconds.
- Page 27 USING THE INDUCTION HOB Energy saving Helpful hints and tips How to save energy INDUCTION COOKING • I f possible, always put the lids on the cookware. Induction cooking uses a strong electromagnetic • P ut cookware on a cooking zone before you field to induce energy into the metal of the cookware. start it. This energy makes the cookware become hot. • U se the residual heat to keep the food warm or Cookware for induction cooking to melt it.
- Page 28 USING THE INDUCTION HOB Cooking guide The data in the table is for guidance only Heat setting Use to: Time Hints nominal power consumption Keep warm. as required Place lid on cookware. Hollandaise sauce, melt: butter, 5-25 min mix from time to time. 3-8% chocolate, gelatine.
-
Page 29: Induction Hob Troubleshooting
INDUCTION HOB TROUBLESHOOTING If there is a problem with the appliance, please: • C heck the points listed below before calling for service. It may be possible to avoid a call by fixing the problem yourself – and so continue cooking. problem possible cause remedy You cannot activate the appliance Activate the appliance again and set the or operate it. - Page 30 INDUCTION HOB TROUBLESHOOTING problem possible cause remedy The electrical connection is incorrect. Speak to a qualified electrician to check comes on. The supply voltage is out of range. the installation. There is an error in the appliance Deactivate the appliance. Remove the comes on.
-
Page 31: Using The Gas Hob
USING THE GAS HOB 17.0mJ/h Intense heat wok LH medium heat burner control. 9.0mJ/h medium heat burners. Used for very fast burners. Used for simmering heating with woks and large middle medium heat burner with mid-sized cookware. cookware. control. 5.1mJ/h Low heat burner. RH medium heat burner control. -
Page 32: Gas Hob Troubleshooting
GAS HOB TROUBLESHOOTING If there is a problem with the appliance, please: • C heck the points listed below before calling for service. It may be possible to avoid a call by fixing the problem yourself – and so continue cooking. problem possible cause remedy Burner will not light even though Knob not held down long enough in ‘High’... -
Page 33: Cleaning Your Appliance
• W hen the ceramic glass is cool, apply a suitable • A suitable cleaner can be purchased from Electrolux cleaner (supplied with the appliance). Customer Care Centres. • I t is important to follow the cleaner manufacturer’s instructions. Remove any cleaning residue from the Oven door surface as staining of the cooktop may occur. -
Page 34: Cleaning Oven Accessories
CLEANING OVEN ACCESSORIES removing the shelves and grill dishes removing the catalytic liners • S lide the shelves and grill dish carrier towards you until • G rasp the outside edge of the liner and push upwards they reach the front stop. to release the hooks from the slots. • T ilt them up at the front to clear the side supports, taking care not to spill the contents. • L ift them clear. • W ash the shelves and grill dish in hot soapy water. -
Page 35: Cleaning The Oven Door
CLEANING THE OVEN DOOR positioning the door for dismantling removing the glass panes The door needs to be positioned at an angle to aid in the • R emove the inner glass and middle glass from disassembly of the panes. the door. • O pen the door fully to gain access to the hinges. • C lean the glass using detergent and warm water. Wipe clean and dry thoroughly. • Push down the hinge locking tab on both hinges. - Page 36 Changing the light globes • T here are 2 light globes located in the top of the oven cavity towards the front. • T o get access to the globes, firstly drop the element down as explained on page 34. • To remove, turn oven light glass anti-clockwise. • A special high temperature resistant globe should be used. This can be purchased from the Customer Care Centre. Light glass can be removed - turn anti-clockwise...
-
Page 37: Catalytic Liners
CATALYTIC LINERS Operation The catalytic liners are coated with a specially formulated enamel coating, over a base of regular enamel. This enamel coating has a rough surface which is also porous. During normal cooking, fats and other food spatter is partially absorbed into the surface and then oxidised away. -
Page 38: Installation Of The Appliance
In addition, a slot-in type installation is catered for allowing a continuous cabinetry kick panel to be used. model EVE916BA is designed to be built into cabinetry either below a benchtop or into a vertical cabinet. WArnInG! • T he cooker must be installed and serviced only by an... - Page 39 INSTALLATION OF THE EVE916BA Cabinet construction for built-in installation Cut-out dimensions For the best integration within a kitchen, install this Type of fit A (width) B (height) B (height) appliance in a cupboard that gives a flush fit with Flush fit (mm) 580 min. the surrounding cupboard fronts. A recess of Proud fit (mm) 560 min.
- Page 40 INSTALLATION OF THE EFE956BA & EFE916BA Cabinet construction for freestanding installation 900mm 600mm 600mm minimum minimum Wall hook vertical clearance from combustible surfaces Chain 600mm 15mm height of 755mm trivet from hob 900mm Anti-tilt Bracket Gas Hob 910mm (adjustable 910-930mm) Induction Hob 906mm (adjustable 906-926mm) 895mm The freestanding type installation uses the appliance as To ensure cooker stability, the anti-tilt brackets must be...
- Page 41 INSTALLATION OF THE EFE956BA & EFE916BA Cabinet construction for slot in installation 900mm 600mm minimum 600mm minimum vertical clearance from combustible surfaces Anti-tilt 600mm brackets 755mm 900mm Gas Hob 765mm Induction Hob 761mm This surface to be level with the top edge of the kick board 895mm To convert the freestanding appliance to a slot in installation the kick panel provided on the appliance...
- Page 42 INSTALLATION OF THE EFE956BA & EFE916BA Slot in Installation To remove the appliance kick panel • R emove all loose parts i.e. burner crowns & caps, trivets, and oven shelves. • C arefully lay down the appliance onto one side onto foam packaging and remove the screws as shown from each corner bracket. Remove 4 screws on each corner bracket Installation sequence for freestanding or slot-in installation • C heck that the required services are correctly positioned (see electrical &...
- Page 43 Hard wiring detail Supply cord size required 1. Remove terminal cover plate from rear panel EVE916BA, EFE916BA - 4mm of appliance. EFE956BA - 10mm 2. Fit wires through hole in cover plate and make Data plate gives information about rating connections to terminals.
-
Page 44: Electrical And Gas Connection Locations
ELECTRICAL & GAS CONNECTION LOCATIONS Checking piping size models EFE916BA, EFE956BA To work out a suitable pipe size for connection use the Gas connection point to regulator information in this table: models: EFE916BA model natural gas Universal LpG EFE916BA 66.1 mJ/h 57.5 mJ/h Electrical cable entry point Information about the length of run, number of elbows, models: EFE916BA,... - Page 45 LPG CONVERSION model EFE916BA Once these checks have been completed, if the regulator still fails to perform in a satisfactory manner This appliance is supplied set up for Natural Gas usage. it should be replaced. A conversion kit is included with the product for Universal 9.
-
Page 46: Testing The Operation Of The Gas Cooker
Checking gas supply NOTE: When flame is unsatisfactory, then refer to the 1. Check the manometer zero point is correct. Electrolux Technical Publications and correct the fault, 2. Connect the manometer to the cooker pressure test if possible. point. This is located on the regulator. -
Page 47: Warranty
Australia or New Zealand. the Appliances come with a guarantee by Electrolux that cannot be 3. During the Warranty Period Electrolux or its ASC will, at no extra charge excluded under the ACL. You are entitled to a replacement or refund... - Page 48 Do you remember the last time you opened a gift that made you say “Oh! How did you know? That’s exactly what I wanted!” That’s the kind of feeling that the designers at Electrolux seek to evoke in everyone who chooses or uses one of our products. We devote time, knowledge, and a great deal of thought to anticipating and creating the kind of appliances that our customers really need and want.