
Related Manuals for Trane MCD/MWD-512


Summary of Contents for Trane MCD/MWD-512
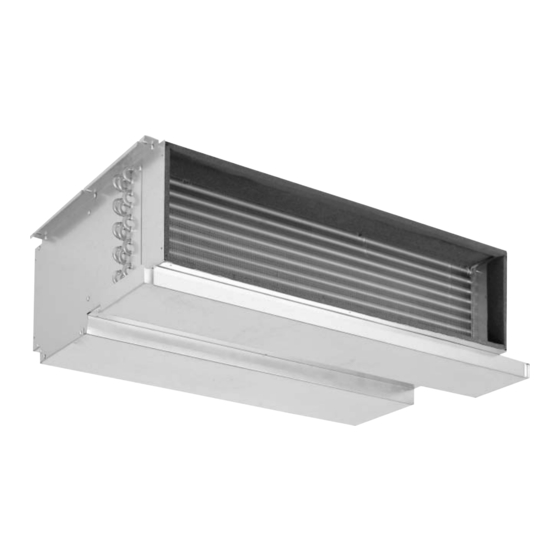
- Page 1 Installation Operation Maintenance MCD/MWD 512-518-524-530-536-048-060 Ductable ceiling-suspended unit SS-SVX07B-E4...
-
Page 2: General Information
If this condition is not respected, the constructor warranty could be cancelled. Do not release refrigerant into the atmosphere. © 2008 Trane SS-SVX07B-E4... - Page 3 Contents General information Installation t l i Operation f i l Maintenance SS-SVX07B-E4...
-
Page 4: Before Starting
Installation Before starting Table 1 - Recommended sections of electric wires (power link) Creation of refrigerant lines Unit size Section Maximum fuse size To create the refrigerant lines you 2.5 mm² 16 aM will need refrigeration quality 518 - 524 2.5 mm²... -
Page 5: General Data
Installation General data Table 2 - Cooling only R407C (1/2) Performances TTK 512 RB TTK 518 RB TTK 524 RB TTK 530 SB TTK 530 SC Indoor unit MCD 512 CB MCD 518 CB MCD 524 CB MCD 530 CB MCD 530 CB Cooling Capacity (1) (kW) - Page 6 Installation Table 2 - Cooling only R407C (2/2) Performances TTK 536 SB TTK 536 SC TTK 048 SC TTK 060 SC Indoor unit MCD 536 CB MCD 536 CB MCD 048 CB MCD 060 CB Cooling Capacity (1) (kW) 9.42 9.42 13.14 14.90...
- Page 7 Installation Table 3 - Cooling only R22 (1/2) Performances TTK 512 RB TTK 518 RB TTK 524 KB TTK 530 KB Indoor unit MCD 512 DB MCD 518 DB MCD 524 DB MCD 530 DB Cooling Capacity (1) (kW) 3.30 5.00 6.40 8.30...
- Page 8 Installation Table 3 - Cooling only R22 (2/2) Performances TTK 536 KB TTK 048 KC TTK 060 KC Indoor unit MCD 536 DB MCD 048 DB MCD 060 DB Cooling Capacity (1) (kW) 9.90 13.50 15.80 Power Input (kW) 4.20 5.10 5.90 Main Power supply...
- Page 9 Installation Table 4 - Heat pump R407C (1/2) Performances TWK 512 RB TWK 518 RB TWK 524 RB TWK 530 SB TWK 530 SC Indoor unit MWD 512 CB MWD 518 CB MWD 524 CB MWD 530 CB MWD 530 CB Cooling Capacity (1) (kW) 2.97...
- Page 10 Installation Table 4 - Heat pump R407C (2/2) TWK 536 SB TWK 536 SC TWK 048 SC TWK 060 SC Performances Indoor unit MWD 536 CB MWD 536 CB MWD 048 CB MWD 060 CB Cooling Capacity (1) (kW) 9.05 9.05 11.00 12.40...
- Page 11 Installation Table 5 - Heat pump R22 (1/2) Performances TWK 512 RB TWK 518 RB TWK 524 KB TWK 530 KB Indoor unit MWD 512 DB MWD 518 DB MWD 524 DB MWD 530 DB Cooling Capacity (1) (kW) 3.30 5.00 6.40 8.30...
- Page 12 Installation Table 5 - Heat pump R22 (2/2) Performances TWK 536 KB TWK 048 KC TWK 060 KC Indoor unit MWD 536 DB MWD 048 DB MWD 060 DB Cooling Capacity (1) (kW) 9.90 13.50 15.80 Cooling mode power input (kW) 5.10 5.90...
- Page 13 Installation Dimensions Figure 2 - Unit dimensions Table 6 - Unit dimensions (inch/mm) MCD/MWD 512 23 (578) 12 (305) 38.5 (980) 31.6 ( 803) 6.7 (170) 3.3 (87) 8.3 (210) 4.3 (110) MCD/MWD 518 23 (578) 12 (305) 38.5 ( 980) 31.6 ( 803) 6.7 (170) 3.3 (87)
-
Page 14: Power And Control Wiring
Installation Power and control wiring Table 7 - Control interconnection Outdoor unit Number of wires x section area (mm²) Including ground wire TTK 512 3 x 2.5 TTK 518 2 x 1.5 TTK 524 2 x 1.5 TTK 530 2 x 1.5 TTK 536 2 x 1.5 TTK 048... - Page 15 Installation Choice of installation Preparing the ceiling and installing the unit position Drill holes in the ceiling to fix the To ensure correct installation, the threaded rods according to the following points must be dimensions given the Dimensions considered. section. The angle brackets can also - The ceiling must be strong enough be used to space the drill holes.
-
Page 16: Refrigerant Connections
Installation Refrigerant connections CAUTION! Passage of the tube and cable An insufficiently lubricated bundle It is possible to remove the electrical compressor may break down. Before drilling into the wall cabinet to facilitate access to the - make sure there are no pipes or refrigerant connection. - Page 17 Installation Screw/flare connections Unscrew the Flare nuts which are Brazed connections placed on the beginnings of the These lines will be created on the CAUTION! indoor unit lines. Put the Flare nut installation site. They will be When cutting, deburring and onto the tube.
-
Page 18: Electrical Connections
Installation Condensate connections Electrical connections The unit must be perfectly level in All the wiring and earthing both directions. Connect the indoor arrangements must comply with unit's condensate tray to a local legislation. condensate drainage line. The unit is equipped with a 20 mm diameter WARNING! smooth tube connection. - Page 19 Installation Connecting the ducts Filtering Units can be equipped with Filtering the air is necessary to rectangular discharge and/or intake ensure the unit's correct operation. from the bottom or intake from the The unit is supplied with a filter. back ducts. Installing the wired WARNING! controller...
-
Page 20: Additional Refrigerant Charge
Operation Creating a vacuum Additional refrigerant R22 Refrigerant While the unit is operating, charge For this operation, use a pump charge the unit with gas through the service capable of creating a vacuum of Once the system has been vacuum Schraeder valve located at the 1 mm Hg (1.3mbar) or less. -
Page 21: Fan Speed
Operation Fan speed Check the fan turns freely. Wired controller operation 10. Make sure the intake and Refer to the selection data to select Figure 12 - Wired controller discharge ducts are not blocked. the static pressure according to the 11. - Page 22 Operation Wireless controller Auto (optional) Clock The unit can be put into 5 different To set the clock: operation modes (FAN, COOL, DRY, HEAT and - Press the clock setting button To use the wireless controller, point AUTO). The cycling will be: (Figure 13, 18).
-
Page 23: Periodic Maintenance
Maintenance WARNING! Handling the filter Disconnect the unit's power supply 1. To remove the filter, slightly push before servicing the unit. When the 4 clips down. servicing the units, make sure that 2. Remove the filter. the air passages through the coils 3. - Page 24 Maintenance Table 14 - Troubleshooting Symptoms Possible causes Checks Corrective action 1. Loose electrical connections. 1. Tighten the connections if necessary. A. Compressor or fan is not operating. 2. Check the fuses and wiring. 2. Replace the fuses if necessary. 1.
- Page 25 Maintenance Symptoms Possible causes Checks Corrective action A. Control switch no longer responds to the 1. Check operation and connections of 1. Replace the control switch if it is defective. ambient temperature. the control switch. B. Loss of refrigerant fluid. 1.
- Page 26 Trouble-shooting (electric heating only) Table 15 - Trouble-shooting (electric heating only) No heating. A. Incorrect control switch setting. 1. Check the thermostat's set points and 1. Change the settings. operation. B. Defective control switch. 1. Check operation and the signal to the 1.
- Page 27 Notes SS-SVX07B-E4...
-
Page 28: Safety Recommendations
SS-SVX07A-E4_0606 Stocking Location Europe Trane has a policy of continuous product and product data improvement and reserves the right to change design and specifications without notice. Only qualified technicians should perform the installation and servicing of equipment referred to in this publication..