Xerox Phaser 5335 User Manual
Xerox phaser 5335 laser printer user guide
Hide thumbs
Also See for Phaser 5335:
- Printing manual (110 pages) ,
- Installation manual (17 pages) ,
- Specifications (2 pages)
Table of Contents
Advertisement
Quick Links
Download this manual
See also:
Installation Manual
Advertisement
Table of Contents

Related Manuals for Xerox Phaser 5335


Summary of Contents for Xerox Phaser 5335
- Page 1 Version 1.0, December 2007 Phaser 5335 User Guide...
- Page 2 XEROX®, Phaser, and all Xerox product names and product numbers mentioned in this publication are the trademarks of XEROX CORPORATION. Other company brands and product names may be trademarks or registered trademarks of the respective companies and are also acknowledged.
-
Page 3: Table Of Contents
Contents Contents......................iii Before Using the Machine................vii Printer Environment Settings..............1 Supported Operating Environments ................ 1 Connecting a Cable ....................4 Setting the Network Environment ................6 Setting the IP Address .....................6 Enabling Ports ....................... 10 Configuring the Printer Using CentreWare Internet Services ........ 12 Overview of CentreWare Internet Services ............12 Using CentreWare Internet Services ..............15 Using the Online Help ....................15... - Page 4 Printing Using the Sample Print Feature ...............52 Paper......................57 About Paper......................57 Supported Paper ....................57 Unsupported Paper ....................60 Storing and Handling Paper ..................61 Loading Paper ....................... 62 Loading Paper in Tray 1 (Bypass Tray) ..............62 Loading Paper in Trays 2 - 5 ................. 64 Paper Sizes / Paper Types in the Trays ..............
- Page 5 Checking the Printer Status via E-mail ..............150 Setting the StatusMessenger Feature ..............151 Checking the Printer Status via E-mail ..............152 Security Features ....................153 SSL Data Encryption for HTTP Communication ..........153 Controlling Data Reception by IP Address ............158 Checking the Meter Reading ................160 Checking the Meter Reading (Meter) ..............160 Checking the Meter Reading by Computer (Meter Report) .........161 Authentication and Auditron Administration Features .........
- Page 6 Contents...
-
Page 7: Before Using The Machine
Xerox US Welcome Center:1-800-821-2797 Xerox Canada Welcome Center:1-800-939-3769 (1-800-93-XEROX) Serial Number When you call the Xerox Welcome Center, you will need the serial number which is located on the rear cover. For your convenience, record the serial number in the space below. - Page 8 Paper feed direction • Paper is synonymous with media, and is used interchangeably. • Machine is synonymous with Xerox Phaser 5335, and is used interchangeably. • Computer refers to a personal computer or workstation. • System Administrator refers to a person who is responsible for maintaining the machine, such as setting up the machine, installing the print drivers, and managing software.
-
Page 9: Related Information Sources
Related Information Sources The following additional sources of information are available for the machine. • Phaser 5335 User Guide • Phaser 5335 Printing Guide • Please note that diagrams used in this User Guide apply to a fully configured machine and Note therefore may not exactly represent the configuration being used. -
Page 10: Safety Notes
Read these safety notes carefully before using this product to make sure you operate the equipment safely. Your Xerox product and recommended supplies have been designed and tested to meet strict safety requirements. These include safety agency approval, and compliance to established environmental standards. Please read the following instructions carefully before operating the product and refer to them as needed to ensure the continued safe operation of your product. - Page 11 Plug the power cable directly into a correctly grounded electrical outlet. If you are not sure whether or not an outlet is correctly grounded, consult an electrician. Do not use an adapter to connect any Xerox equipment to an electrical outlet that lacks a ground connection terminal.
-
Page 12: Laser Safety Information
Class 1 laser product. It does not emit hazardous light, as the beam is totally enclosed during all phases of customer operation and maintenance. Operational Safety Information To ensure the continued safe operation of your Xerox equipment, follow these safety guidelines at all times. Do These: •... -
Page 13: Maintenance Information
• Never override or “cheat” any of the electrical or mechanical interlock devices. • Never operate the equipment if you notice unusual noises or odors. Disconnect the power cord from the electrical outlet and contact your local Xerox Service Representative or Service Provider immediately. -
Page 14: Consumables Information
Operation of this equipment in a residential area is likely to cause harmful interference in which case the user will be required to correct the interference at his own expense. Changes or modifications to this equipment not specifically approved by the Xerox Corporation may void the user's authority to operate this equipment. -
Page 15: Regulatory Information
Bulgaria Romania Hungary In the event of a problem you should contact your local Xerox representative in the first instance. This product has been tested to and is compliant with TBR21, a technical specification for terminal equipment for use on analogue-switched telephone networks in the European Economic Area. -
Page 16: Environmental Compliance
Xerox ENERGY STAR equipment is preset at the factory. Your machine will be delivered with the timer for switching to Power Save Mode from the last copy/print out, set at 5 minutes. -
Page 17: Product Recycling And Disposal
For more information about Xerox environmental programs, visit http://www.xerox.com/environment. If you are managing the disposal of your Xerox product, please note that the product contains lamp(s) with mercury, and may contain lead, Perchlorate and other materials whose disposal may be regulated due to environmental considerations. -
Page 18: Illegal Copies
Illegal Copies Copying certain documents may be illegal in your country. Penalties of fine or imprisonment may be imposed on those found guilty of making such reproductions. • Currency notes • Bank notes and cheques • Bank and government bonds and securities •... -
Page 19: Printer Environment Settings
Printer Environment Settings When you are finished installing your printer using the ‘Setup Guide’, go on to set up its operating environment. Supported Operating Environments The printer can be used both as a local and a network printer. When used as a local printer, the printer is connected directly to a computer. - Page 20 When the network expansion card (optional) is installed, the printer can be set up also in the following environments: • NetWare ® : Used when sharing and managing the printer using a NetWare server. (default: [Enable]) ® • SMB : Used when printing using a Windows network.
- Page 21 *3: On Mac OS 10.3.9 or later, printing can be performed using the printer driver for Macintosh. The printer driver for Macintosh is available on the Software CD-ROM or can be downloaded from the Xerox web site. When using the printer driver for Macintosh, additional memory of 256 MB or above is recommended.
-
Page 22: Connecting A Cable
Connecting a Cable Connect the printer to your computer using an interface cable appropriate for your connection method. An interface cable is not included with the printer. You must purchase it separately. Parallel Connection Switch the printer off. Plug the parallel cable into the interface connector on the printer. Secure the parallel cable into the connector using the clips on both sides of the connector. - Page 23 Network Connection Use a straight-type network cable that supports 100BASE-TX or 10BASE-T. Switch the printer off. Plug the network cable into the interface connector on the printer. Plug the other end of the network cable into a network device such as a hub. Switch the printer on.
-
Page 24: Setting The Network Environment
Setting the Network Environment This section explains how to install your printer in a TCP/IP environment. When installing the printer in a different environment, refer to the Documentaton CD-ROM. Setting the IP Address To use TCP/IP protocol, you must configure an IP address for the printer. By default, the printer is set to obtain its IP address (via the [Get IP Address] setting on the control panel) using [DHCP/Autonet]. - Page 25 Note • If you went past the desired item, return to the item by pressing the < > button. Admin Menu Network / Port Press the < > button to accept the selection. [Network/Port] is displayed. Note • If you pressed the < >...
- Page 26 Get IP Address Panel* Confirm your selection by pressing the <OK/Eject> button. The display shows [Reboot to apply settings] for 3 seconds and returns to the setting screen. You will reboot the printer after setting the gateway address. Go on to the next step. TCP/IP Get IP Address 10.
- Page 27 To Set the Subnet Mask/Gateway Address TCP/IP Subnet Mask 16. Press the < > button until [Subnet Mask] is displayed. Subnet Mask 000.000.000.000* 17. Press the < > button to accept the selection. The current subnet mask is displayed. Subnet Mask 255.255.255.000* 18.
-
Page 28: Enabling Ports
Enabling Ports Set all ports you want to use to [Enable] on the control panel. Use the following procedure to enable each port. The following procedure uses IPP as an example. Menu Print Language Press the <Menu> button on the control panel to display the menu screen. Menu Admin Menu Press the <... - Page 29 Port Status Enable Press the < > button to display [Enable]. Port Status Enable* Press the <OK/Eject> button to confirm the selection. The display shows [Reboot to apply settings] for 3 seconds and returns to the setting screen. 10. The setting is now complete. Reboot the printer by switching the power off and then on again.
-
Page 30: Configuring The Printer Using Centreware Internet Services
Configuring the Printer Using CentreWare Internet Services Overview of CentreWare Internet Services CentreWare Internet Services is a service that allows you to monitor or remotely configure the printer using a web browser when the printer is on a TCP/IP network. Some of the control panel settings can be set also on the service's [Properties] tab. -
Page 31: Setting Up The Printer
Setting Up a Web Browser When accessing CentreWare Internet Services, we recommend you set your web browser as follows: • not to use a proxy server when specifying the printer’s IP address. • to enable JavaScript. Note • If you access CentreWare Internet Services using a proxy server, the response from the service may be slow or the window of the service may not display. - Page 32 CentreWare Internet Services Setting Items The followings are the main features on each tab of CentreWare Internet Services. Tab Name Feature Status • General Displays the printer's product name, IP address, and status. • Printer Status Displays the sizes and remaining volumes of the paper loaded in the paper trays, the status of the output tray, and the remaining life of the print cartridge.
-
Page 33: Using Centreware Internet Services
Using CentreWare Internet Services Follow these steps when accessing CentreWare Internet Services. Start your computer and launch a web browser. In the URL field, enter the IP address or URL of the printer, and press the <Enter> key. The top page of CentreWare Internet Services is displayed. •... -
Page 34: Installing A Print Driver
Windows Vista. • PPD files and print driver - The PPD files and PostScript print driver (which has added Xerox unique features to Microsoft PScript 5.0) for Windows NT 4.0, 2000, Windows XP, Windows Server 2003, and Windows Vista. • Readme.txt - Describes the precautions that must be followed when using the print driver. -
Page 35: Installing The Print Driver
Installing the Print Driver This section describes how to install the print driver on Windows NT 4.0, 2000, Windows XP, Windows Server 2003, or Windows Vista. To cancel the installation, click [Cancel] in a dialog box displayed during the installation. To cancel the settings in a dialog box and return to the previous dialog box, click [Back]. -
Page 36: Uninstalling A Print Driver And Other Software
The [Install from Disk] window appears. In the [Copy manufacturer’s files from:] box, enter the drive in which the CD-ROM is located (example: "E:"). After the drive name, enter “\Eng\PS\Win2000_XP and click [OK]. Note You can also browse the folder by clicking [Browse]. If the location of the files to install the driver cannot be found, check the ReadMe file for any changes to driver locations on the CD. -
Page 37: Basic Operation
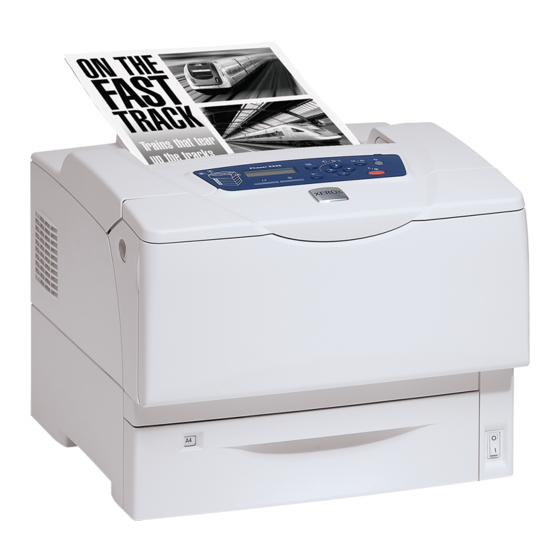
“sheet feeder”) is installed. The above illustration shows the printer with three sheet feeders (optional). Note • Trays 3, 4, and 5 can be added to the Phaser 5335. Ventilation hole Releases heat to prevent the interior of the printer from overheating. - Page 38 Name Description Front cover release lever Pulled towards you to open the front cover when replacing the print cartridge or clearing paper jams. Output tray Delivers printed output face down. Extension output tray Extended to prevent output from falling off the output tray. Right/Rear View Name Description...
- Page 39 Interior Name Description Duplex unit The unit that contains the duplex unit (optional). When the duplex unit is (Duplex unit B) installed, 2-sided printing can be performed. Fuser unit Fuses toner onto paper by means of heat and pressure. Important •...
-
Page 40: Control Panel
Control Panel Icon Name Description Indicator In the event of an error, use this mimic to verify the location of the problem indicated in an error message displayed on the LCD display. LCD display Displays the status of the printer, menu options, and messages. - Page 41 Icon Name Description <Error> lamp Blinks or lights when an error occurs. <Ready> lamp Lights when the printer is ready to print. 2.1 Main Components and Functions...
-
Page 42: Control Panel Display
Control Panel Display The display shows two types of screens: the print screen and menu screen. The print screen displays messages that show the status of the printer. The menu screen displays menus that allow you to set various settings for the printer. Note •... -
Page 43: Switching On/Off The Power
Switching On/Off the Power Switching On the Power Press the power switch to the <|> position. When the power is turned on, the display reads [Please wait...]. Wait until the message changes to [Ready to print]. Note • When the display reads [Please wait...], the printer is warming up and is not ready to print yet. -
Page 44: About The Circuit Breaker
About the Circuit Breaker The printer has a circuit breaker on its rear left side. In the event of current leakage, the breaker will automatically cut off the power circuit to prevent any current leakages or fire from occurring. If the circuit breaker trips, check insulation condition of the printer and then press the <RESET>... -
Page 45: Setting/Exiting The Power Saver Modes
Setting/Exiting the Power Saver Modes The printer has a power saving feature which reduces power consumption during periods of inactivity. This feature operates in two modes: the Low Power mode and Sleep mode. As delivered, the printer switches to the Low Power mode 3 minutes after the receipt of the last print request. -
Page 46: Cancelling/Checking A Print Job
Cancelling/Checking a Print Job Cancelling a Print Job Print jobs can be cancelled either from your computer or on the control panel. Cancelling a Print Job being Processed on a Computer Double-click the printer icon on the task bar at the lower right corner of your monitor. -
Page 47: Importing Printer Information To A Print Driver
Importing Printer Information to a Print Driver If your printer is networked, you can import printer information (such as accessory configuration, sizes and types of paper in the paper trays) into your print driver using SNMP protocol. This can be done on the [Options] tab on your print driver. The following procedure is described based on Windows XP using the PCL print driver. - Page 48 2 Basic Operation...
-
Page 49: Print
Print This chapter describes various printing methods using a PCL print driver. Printing from a Computer This section outlines the basic procedure for sending print jobs from Windows applications. The following procedure uses Windows XP WordPad as an example. (The procedure may vary depending on the application being used.) On the [File] menu of your application, click [Print]. - Page 50 Print Features in the Properties Dialog Box The following introduces some of the print features available on each tab of the print driver. For details on each feature, refer to the online help provided for the print driver. Feature Paper/Output •...
-
Page 51: Printing On Envelopes
Printing on Envelopes This section describes how to print on envelopes. Envelopes can be loaded in all paper trays. Note • For more information on how to load paper in Tray 1 (Bypass tray), refer to " Loading Paper in Tray 1 (Bypass Tray)"... - Page 52 Note • When loading the envelopes in the tray, make sure that the flaps are completely open. • When setting the margins on your application, add one-half length of the flap (from the top edge to the fold line) to the margin on the flap side. Loading Envelopes in Tray 2 - 4 Envelopes with Adhesive Flaps Load the envelopes with the address side...
-
Page 53: Printing On Envelopes
Printing on Envelopes The following procedure uses Windows XP WordPad as an example. Note • The method of displaying the Properties dialog box varies depending on the application being used. Consult the documentation for your application. On the [File] menu, click [Print]. Select the printer from the [Select Printer] list box, and click [Preferences]. - Page 54 Click the [Layout] tab, and then select the output paper size from [Output Size]. As necessary, click [Booklet/Poster/Mixed Document/Rotation], and in the displayed dialog box, set [Image Rotation (180deg)]. Click [OK] to close the dialog box. 10. Click [OK] to close the [Printing Preferences] dialog box. 11.
-
Page 55: Printing On Transparencies
Printing on Transparencies This section describes how to print on transparencies. Loading Transparencies Transparencies can be loaded in all paper trays. Note • For more information on how to load paper in Tray 1 (Bypass tray), refer to " Loading Paper in Tray 1 (Bypass Tray)"... -
Page 56: Printing On Transparencies
Printing on Transparencies The following procedure uses Windows XP WordPad as an example. Note • The method of displaying the Properties dialog box varies depending on the application being used. Consult the documentation for your application. • Leaving printed transparencies in the output tray can cause them to stick together. Remove them from the tray every 20 prints or so and fan them to cool them off. - Page 57 On the [Layout] tab, select the output paper size from [Output Size]. Click [OK] to close the [Printing Preferences] dialog box. Click [Print] in the [Print] dialog box to start printing. 3.3 Printing on Transparencies...
-
Page 58: Printing On Non-Standard Size Paper
Printing on Non-standard Size Paper This section describes how to load non-standard size paper in the paper trays. The paper trays can accommodate paper of the following sizes: Tray 1 (Bypass Tray) and Trays 2 - 5 paper feed direction length: 148 - 431.8 mm width:... - Page 59 Click [Custom Paper Size...]. Select an item from the [Details] list box. Under [Settings for:], specify the lengths for [Short Edge] and [Long Edge] by using the [ ] and [ ] keys or by directly entering the values. Note that the short edge cannot be longer than the long edge and that the long edge cannot be shorter than the short edge, even within the specified ranges.
-
Page 60: Printing On Non-Standard Size Paper
Printing on Non-standard Size Paper The following procedure uses Windows XP WordPad as an example. Important • Make sure to set paper sizes correctly. Setting wrong paper sizes can cause printer failure. Note • The method of displaying the Properties dialog box varies depending on the application being used. Consult the documentation for your application. - Page 61 Click [OK] to close the [Printing Preferences] dialog box. Click [Print] in the [Print] dialog box to start printing. 3.4 Printing on Non-standard Size Paper...
-
Page 62: Printing By Changing The Paper Types Of The Trays
Printing by Changing the Paper Types of the Trays Tray 1 (Bypass tray) and trays 2 - 5 accept plain paper and special media such as heavyweight paper and transparencies. This section describes how to print by changing the paper type setting of the trays. The following procedures use Windows XP WordPad as an example. - Page 63 From [Paper Size], select the size of the document to be printed. Click the [Layout] tab, and select the size of the output paper from [Output Size]. Click [OK] to close the [Printing Preferences] dialog box. Click [Print] in the [Print] dialog box to start printing. Printing by Setting the Paper Type on the Print Driver The following example shows how to print when the paper type of Tray 2 is set to “Plain Paper”, but the actual type of the paper loaded is “Transparency”.
- Page 64 From [Paper Type], select [Transparency]. Note • The paper type selected here is only valid for this job. This setting does not change the paper type setting on the control panel. From [Paper Size], select the size of the document to be printed. Click the [Layout] tab, and select the size of the output paper from [Output Size].
- Page 65 The [Paper/Output] tab appears. From [Paper Source], select [Auto Select]. From [Paper Type], select the desired paper type to be used. From [Paper Size], select the size of the document to be printed. Click the [Layout] tab, and select the size of the output paper from [Output Size]. Click [OK] to close the [Printing Preferences] dialog box.
-
Page 66: Printing Confidential Documents - Secure Print
Printing Confidential Documents - Secure Print - If your printer has the optional hard disk installed, you can use the Secure Print feature. Secure Print Feature Secure Print is a feature that allows you to send a password-protected document to the printer. - Page 67 The [Paper/Output] tab appears. From [Job Type], select [Secure Print] and click [Setting]. The [Secure Print] dialog box appears. Enter your user ID into [User ID]. The user ID can be up to 8 alphanumeric characters. As necessary, enter a password into [Password]. The password can be up to 12 numeric characters.
- Page 68 Operations on the Control Panel The following explains how to release a Secure Print job stored in the printer. Note • When deleting a Secure Print job without printing, select [Delete] after Step 8 in the following procedure. • If the menu screen is left idle for 3 minutes, the display returns to the print screen. Any incomplete setting on the menu screen made 3 minutes before becomes invalid.
- Page 69 Press the < > button to accept the Report selection. Print and Delete A screen that allows you to set whether to delete or save the document after printing it is displayed. Note • If you want to delete the document without printing, press the <...
-
Page 70: Printing After Checking The Print Result - Sample Print
Printing After Checking the Print Result - Sample Print - If your printer has the optional hard disk installed, you can use the Sample Print feature. Sample Print Feature Sample Print is a feature that allows you to print a proof copy of a multi-set job and print the entire sets once the print result has been verified. - Page 71 The [Paper/Output] tab appears. From [Job Type], select [Sample Print] and then click [Setting]. The [Sample Print] dialog box appears. Enter your user ID into [User ID]. The user ID can be up to 8 alphanumeric characters. From [Retrieve Document Name], select [Enter Document Name] or [Auto Retrieve]. When [Enter Document Name] is selected, enter the desired document name in [Document Name].
- Page 72 Operations on the Control Panel The following explains how to release or delete a Sample Print job depending on its print result. Note • If the menu screen is left idle for 3 minutes, the display returns to the print screen. Any incomplete setting on the menu screen made 3 minutes before becomes invalid.
- Page 73 If printing the document, select the desired Specify Quantity option by pressing the < > button. 1 sets* Enter the print quantity using the < > button, and press the <OK/Eject> button to print the document. The printing starts. 3.7 Printing After Checking the Print Result - Sample Print -...
- Page 74 3 Print...
-
Page 75: Paper
Paper About Paper Using paper that is not appropriate for the printer can cause paper jams, image quality problems, or printer failure. To use the printer at its best performance, we recommend you to use only the paper described in this section. When using paper other than that recommended, contact your Customer Support Center or your dealer. - Page 76 Important • Be sure to set the correct paper sizes, paper types, and paper trays on the print driver or control panel when printing. Loading paper that is not supported or defining wrong settings can cause paper jams. • When loading recycle paper, set the paper type to “Plain”. When loading label sheets, set the paper type to “Heavyweight 1”.
- Page 77 Supported Paper Specifications If using general paper (commercially available paper), make sure that it meets the following specifications. To achieve the best print quality, however, we recommend you to use the standard paper (introduced in this page) instead. Paper Tray Specifications (G.S.M.) Tray 1 (Bypass tray) 60 - 216 g/m...
-
Page 78: Unsupported Paper
Unsupported Paper Do not use the following types of paper or media. They can cause paper jams or printer failure. • Bond paper • Coated paper • Transparencies other than those recommended • Ink jet paper, ink jet transparencies, or ink jet postcards •... -
Page 79: Storing And Handling Paper
Storing and Handling Paper Paper stored in poor conditions can get deteriorated, resulting in paper jams, curled paper, image quality problems, or printer failure. Use the following guidelines when storing paper. Paper Storage Environment • Temperature: 10 - 30°C • Relative humidity: 30 - 65% Paper Storage Guidelines •... -
Page 80: Loading Paper
Loading Paper This section explains how to load paper in Tray 1 (Bypass Tray) or trays 2 - 5. Loading Paper in Tray 1 (Bypass Tray) Important • Load paper when the power is switched on. • Do not load paper of different types simultaneously. •... - Page 81 Adjust the side paper guides to the size of the paper. Important • Make sure that the guides are positioned just lightly against the paper. Guides that are too tight or too loose can cause paper jams. Note • Do not fill paper above the maximum fill-line. Doing so can cause paper jams.
-
Page 82: Loading Paper In Trays 2 - 5
Loading Paper in Trays 2 - 5 When loading paper longer than 14" (279.4 mm) such as B4, A3, and 11 x 17" in Tray 2, 3, 4 or 5, you must extend the tray. When the tray is extended, the extended portion projects out from the back of the printer. - Page 83 Extend (or shorten) the tray until the lock released in Step 2 is locked automatically. (Example: The tray is extended.) Pinch the guide clip on the left side of the tray and slide it to the size of the paper. (Example: A4 landscape) Pinch the rear guide clip and slide it to the size of the paper.
- Page 84 Push the tray all the way into the printer. If the tray is extended, the extended portion sticks out from the back of the printer. Important • When inserting the tray, be careful not to get your fingers caught between the tray and the printer or another tray (if the optional sheet feeders are installed).
-
Page 85: Paper Sizes / Paper Types In The Trays
Important • For best print quality, do not use envelopes that: • are curled or twisted. • are stuck together or damaged. • have windows, holes, perforations, cutouts, or embossments. • use tie strings, metal clasps, or metal folding bars. •... -
Page 86: Changing The Paper Types Of The Trays
Changing the Paper Types of the Trays Use the following procedure when changing the paper types of trays 2 - 5. Press the <Menu> button on the Menu control panel to display the menu screen. Print Language Press the < > button until [Admin Menu] is Menu displayed. -
Page 87: Setting The Paper Sizes Of The Trays
Setting the Paper Sizes of the Trays Use the following procedure when setting non-standard paper sizes for Tray 1 or trays 2 - 5. If you loaded non-standard-size paper into tray 2, 3, 4 or 5, set the paper size dial to [ Note •... - Page 88 12. After entering the length, proceed to enter Tray 2 Custom the width. Portrait (Y) Return to [Portrait (Y)] by pressing the < > button. 13. Press the < > button. Tray 2 Custom [Landscape (X)] is displayed. Landscape (X) 14.
-
Page 89: Auto Tray Selection Feature
Auto Tray Selection Feature If you request a print job with [Paper/Output] > [Paper Source] set to [Auto] on your print driver, the printer automatically selects a paper tray based on the size and orientation of the document to be printed. This feature is called “Auto Tray Selection”. If there is more than one tray that is appropriate for the document, the printer checks the [Paper Priority] setting and selects a paper tray that contains the paper of the highest priority. - Page 90 4 Paper...
-
Page 91: Control Panel Menus
Control Panel Menus Overview of the Common Menus Menu Structure The control panel menus consist of four common menus and four mode menus. The mode menus can be accessed from [Print Language] (one of the common menus) and provide menu items specific for print language settings. Common Menus Mode Menus ESC/P... - Page 92 The following table describes the overview of the common menus. Common menu Description Reference Print Language [ESC/P] ESC/P Emulation and PCL Sets the ESC/P emulation mode. Emulation settings information is available on the documentation [PCL] CD included with the printer. Sets the PCL emulation mode.
-
Page 93: Changing The Settings
Changing the Settings Basic Procedure To display a menu screen or to move up and down the menus, use the following buttons on the control panel. Press to display the menu screen (print screen) (menu screen) <Menu> Ready to print Menu Print Language Press to display the menu items in the same hierarchy... - Page 94 Setting Example: Changing the Power Saver Mode Setting Use the following procedure to set a value on the control panel. In this example, we will set [Low Power Timer] (an interval at which the printer switches to the Low Power mode) to [60 Minutes]. Press the <Menu>...
- Page 95 10. The setting is now complete. Ready to print Press the <Menu> button to return to the [Ready to print] screen. 5.1 Overview of the Common Menus...
-
Page 96: Setting The Common Menus
Setting the Common Menus This section describes the setting items in the common menus. Note • For information on how to set the menu items, refer to " Changing the Settings" (P. 75). • Some of the menu items can be configured also on CentreWare Internet Services. For details, refer to the online help provided for CentreWare Internet Services. - Page 97 Setting Item Description Sets the amount of time the printer waits for a print job. If a time-out occurs dur- PS Job Time-out ing data reception, the printer stops the reception and prints the data that has been received. Specify the time-out value in 1 minute increments. •...
-
Page 98: [Report/List]
[Report/List] Allows you to print a variety of reports/lists. For details on the reports/lists and how to print them, refer to "7.2 Printing Reports / Lists" (P. 145). Note • The reports/lists that can be printed vary depending on the options installed on your printer. For details, refer to "Types of Reports / Lists"... - Page 99 Setting Item Description Sets whether to enable or disable the parallel port at printer start-up. Port Status • [Enable] (default) • [Disable] Note • After changing this setting, reboot the printer. Sets the method of processing data (print language). Print Mode •...
- Page 100 [LPD] Set this when using the LPD port. Network / Port Port Status Print Mode Setting Item Description Sets whether to enable or disable the LPD port at printer start-up. Port Status • [Enable] (default) • [Disable] Note • After changing this setting, reboot the printer. Sets the method of processing data (print language).
- Page 101 [NetWare] Set this when using the NetWare port. Note • [NetWare] appears only when the network expansion card (optional) is installed. Network / Port NetWare Port Status NetWare Port Status NetWare TCP/IP Port Status NetWare IPX/SPX NetWare Print Mode Setting Item Description Sets whether to enable or disable the NetWare port at printer start-up.
- Page 102 [SMB] Set this when using the SMB port. Note • [SMB] appears only when the network expansion card (optional) is installed. Network / Port Port Status Port Status SMB TCP/IP Port Status SMB NetBEUI Print Mode Setting Item Description Sets whether to enable or disable the SMB port at printer start-up. Port Status If you selected [Enable], select also TCP/IP or NetBEUI.
- Page 103 [IPP] Set this when using the IPP port. Note • [IPP] appears only when the network expansion card (optional) is installed. Network / Port Port Status Print Mode Setting Item Description Sets whether to enable or disable the IPP port at printer start-up. Port Status •...
-
Page 104: Print Mode
[USB] Set this when using the USB port. Network / Port Port Status Print Mode Adobe Protocol Setting Item Description Sets whether to enable or disable the USB port at printer start-up. Port Status • [Enable] (default) • [Disable] Note •... - Page 105 [Port9100] Set this when using the Port9100 port. Network / Port Port9100 Port9100 Port Status Port9100 Print Mode Setting Item Description Sets whether to enable or disable the Port9100 port at printer start-up. Port Status • [Enable] (default) • [Disable] Note •...
-
Page 106: Snmp Settings
[SNMP Settings] Set this when using the SNMP port. SNMP must be used when managing multiple printers remotely with an application. SNMP manages printer information and provides it to the application. Network / Port SNMP Settings Port Status SNMP Settings Port Status SNMP UDP Port Status... - Page 107 [TCP/IP] Set this when using the TCP/IP port. Network / Port TCP/IP TCP/IP Get IP Address TCP/IP IP Address TCP/IP Subnet Mask TCP/IP Gateway Address Setting Item Description Sets the method of obtaining the information (the IP address, subnet mask, or Get IP Address gateway address) required to use the TCP/IP protocol.
- Page 108 [Internet Services] Set whether to use the Internet Services port. Selecting [Enable] allows you to use CentreWare Internet Services. CentreWare Internet Services allows you to monitor or remotely configure the printer using a web browser on your computer. Network / Port InternetServices InternetServices Port Status...
- Page 109 [Bonjour] Set whether to use the Multicast DNS feature. Note • [Bonjour] appears only when the network expansion card (optional) is installed. Network / Port Bonjour Bonjour Port Status Setting Item Description Sets whether to enable or disable the Bonjour port at printer start-up. Port Status •...
-
Page 110: Network Settings
[IPX/SPX Frame Type] Set the IPX/SPX frame type. Note • [IPX/SPX Frame Type] appears only when the network expansion card (optional) is installed. Network / Port IPX/SPXFrameType Setting Item Description Sets the IPX/SPX frame type. IPX/SPX Frame • [Auto] (default) Type Automatically selects the frame type. - Page 111 [IP Filter] Set this when controlling data reception by IP addresses. Note • [IP Filter] can be set also on CentreWare Internet Services. For details, refer to "Controlling Data Reception by IP Address" (P. 158). Network / Port IP Filter IP Filter No.1/Address IP Filter...
-
Page 112: System Settings
[HTTP-SSL/TLS] Set this when encrypting HTTP communication using SSL/TLS protocol. [HTTP-SSL/TLS] appears only when a certificate is registered on the printer. Note • For details on encrypting HTTP communication and a certificate required for the printer, refer to "SSL Data Encryption for HTTP Communication" (P. 153). •... - Page 113 Setting Item Description Sets whether or not to generate an audio tone when the correct button is Control Panel pressed on the control panel. • [On] (default) • [Off] Sets whether or not to generate an audio tone when the wrong button is Invalid Key pressed on the control panel, or when an operation is attempted during an error.
-
Page 114: Panel Settings
[Panel Settings] System Settings Panel Settings Panel Settings Panel Lock Panel Settings Change Password Setting Item Description Sets a password to control access to the menus. Panel Lock • [Off] (default) • [On] Allows you to change the password. Enter a new password (4-digit number). Change Password The password takes effect when the first and second entries match. -
Page 115: Sleep Mode
[Sleep Mode] System Settings Sleep Mode Setting Item Description Consumes less electricity than the Low Power mode. Set whether or not to Sleep Mode enable this feature. • [Enable] (default) • [Disable] Refer to • "2.4 Setting/Exiting the Power Saver Modes" (P. 27) •... -
Page 116: Banner Sheet
[Auto Job History] System Settings AutoJob History Setting Item Description Sets whether to automatically print a report on the completed print jobs ([Job Auto Job History History Report]). • [Off] (default) Does not automatically print the [Job History Report]. • [On] Automatically prints the [Job History Report] when the number of jobs processed reaches 22. - Page 117 NOTE: The number of pages that can be printed after the warning message appears is only a reference. This value is based on Xerox's standard document model, and may be different from the actual number of pages. [mm/inch]...
- Page 118 [Overwrite HDD] Note • [Overwrite HDD] appears only when the internal hard disk (optional) is installed. System Settings Overwrite HDD Setting Item Description Sets whether to overwrite the data stored in the internal hard disk (optional) Overwrite HDD when the internal hard disk is installed. If overwriting the data, set the number of times to overwrite the data to either once or three times.
-
Page 119: Secure Print
[Secure Print] Note • [Secure Print] appears only when the hard disk (optional) is installed. System Settings Secure Print Secure Print ActivateFeature Secure Print Interrupt Print Setting Item Description Sets whether to permit printing of Secure/Sample Print jobs from the control Activate Feature panel. -
Page 120: Printer Settings
[Printer Settings] The [Printer Settings] menu allows you to set print density, paper trays, and the Auto Tray Selection feature. [Density] Printer Settings Density Setting Item Description Sets the print density. Density • [Normal] (default) Prints documents at standard density. •... -
Page 121: Display Screen
[Display Screen] Printer Settings Display Screen Display Screen Tray 1 Display Screen Paper Tray Setting Item Description Sets whether to display a screen to prompt for a paper type every time paper is Tray 1 (Bypass tray) loaded in Tray 1 (Bypass tray). •... -
Page 122: Paper Type
[Paper Type] Printer Settings Paper Type Paper Type Tray 1 Paper Type Tray 2 Paper Type Tray 3 Paper Type Tray 4 Paper Type Tray 5 Setting Item Description Sets the type of the paper loaded in Tray 1. Tray 1 •... - Page 123 [Paper Priority] Printer Settings Paper Priority Paper Priority Plain Paper Paper Priority 1.User 1 Paper Priority 2.User 2 Paper Priority 3.User 3 Paper Priority 4.User 4 Paper Priority 5.User 5 Setting Item Description Sets the priority order of paper types. This setting will be used by the Auto Tray Plain Paper, Selection feature.
-
Page 124: Tray Priority
[Tray Priority] Printer Settings Tray Priority Tray Priority Tray Priority Tray Priority Setting Item Description Sets the priority order of the paper trays. This setting will be used by the Auto 2nd to 5th Tray Selection feature. You cannot assign a priority order to Tray 1 (Bypass Tray). - Page 125 Setting Item Description Sets the paper size for Tray 1. [Tray 1] • [A3], [B4], [A4-P], [A4-L], [Driver] (default), [B5], [A5], [11x17], [8.5x13], (Bypass Tray) [8.5x14], [7.2x10.5], [5.5x8.5], [8.5x11], [4.1x9.5], [3.9x7.5], [110x220mm], [162x229mm], [100x148mm], [148x200mm], [120x235mm], [105x235mm] • [Custom] Sets the length and width of the paper loaded in Tray 1. When [Custom] is selected, set the print orientation to [Portrait (Y)] or [Landscape (X)].
- Page 126 [Print ID] Printer Settings Print ID Setting Item Description Prints a user ID on the specified location. Print ID • [Off] (default) Does not print a user ID. • [Top Left] Prints a user ID on the top left corner of paper. •...
-
Page 127: Maintenance Mode
[Barcode Mode] Printer Settings Barcode Mode Barcode Mode Tray 1 Barcode Mode Tray 2 Barcode Mode Tray 3 Barcode Mode Tray 4 Barcode Mode Tray 5 Setting Item Description Sets whether to enable or disable the barcode mode of Tray 1. Tray 1 •... -
Page 128: Adjust Paper Type
[Adjust Paper Type] Maintenance Mode Adjust PaperType Adjust PaperType Plain Paper Setting Item Description Sets the type of plain paper. Plain Paper • [Light] • [Heavy] (default) [Init/Del Data] The [Init/Del Data] menu allows you to initialize the settings stored in the NV memory, network ports, and hard disk, and delete data such as forms registered on the printer. - Page 129 When [Auto] is selected, data will be deleted if the print language automatically selected is not present or is unavailable on the printer. Holding down the < > or < > button scrolls through the options in a circular fashion. Pressing the <...
- Page 130 5 Control Panel Menus...
-
Page 131: Troubleshooting
Troubleshooting If you encounter a problem while using this printer and have trouble solving the problem, see if any of the symptoms in the following pages matches your problem. If your problem is described in the following pages, apply the suggested solution provided for the problem. - Page 132 • When removing jammed paper, do not try to remove paper or paper piece deep inside the machine. Also, do not try to remove paper wrapped around the heat roller. It can cause injury or burn. Switch off the machine immediately and contact your local Xerox representative.
-
Page 133: Paper Jams In Tray 1 (Bypass Tray)
Paper Jams in Tray 1 (Bypass Tray) Leave the jammed paper where it is and remove the rest of the paper from Tray 1 (Bypass tray). Pull the front cover release levers ("A") on both sides of the printer towards you and open the front cover. -
Page 134: Paper Jams In The Trays 2 - 5
Paper Jams in the Trays 2 - 5 If paper is loaded in Tray 1 (Bypass tray), remove the paper and close Tray 1 (Bypass tray) cover. Important • When closing Tray 1 (Bypass tray) cover, be careful not to get your fingers caught between (the left or right edge of) the cover and the printer. - Page 135 Remove any jammed paper. Make sure no torn pieces remain inside. Important • The fuser is hot. Do not touch areas with labels indicating high temperature and those surrounding the labels. Otherwise, you can get burnt. Close the front cover. Important •...
-
Page 136: Paper Jams In The Fuser Unit
Paper Jams in the Fuser Unit Pull the front cover release levers ("A") on both sides of the printer towards you and open the front cover. Open the top cover. As necessary, hold the lever on the right side of the fuser cover and open the fuser cover. -
Page 137: Paper Jams In The Duplex Unit
Paper Jams in the Duplex Unit Open Tray 1 (Bypass tray) cover. Open the upper cover. Hold the handle on the center part of the inner cover and open the inner cover. Clear the jammed paper. Close the inner cover, the upper cover, and then Tray 1 (Bypass tray) cover. -
Page 138: Paper Jams In The Output Area
Paper Jams in the Output Area Clear the jammed paper. If paper is jammed inside the top cover, pull the front cover release levers ("A") on both sides of the printer towards you and open the front cover. Then open the top cover. Clear the jammed paper. -
Page 139: Hardware Problems
Hardware Problems (Power Failure, Abnormal Noise, etc.) Symptom Cause/Remedy The printer will not switch on. Is the power switched on? Switch the power on by pressing the power switch to the <|> position. Is the power cord firmly plugged into the power outlet? Switch the power off, plug the power cord firmly into the power connector or power outlet, and switch the power back on. -
Page 140: Printing Problems
Printing Problems Symptom Cause/Remedy An error that cannot be resolved by users occurred. Copy down the error message or <Error> lamp is error code displayed on the control panel, switch the power off, unplug the power code blinking. from the power outlet, and contact your Customer Support Center or your dealer. Is an error message displayed on the control panel? <Error>... - Page 141 Symptom Cause/Remedy Printing takes too much time. Is the [Graphics] tab > [Print Mode] on your print driver set to [High Quality]? Changing the [Print Mode] setting to [Standard] may improve print speed. Refer to • Online help for the print driver Printing may take time depending on the printing method for TrueType fonts.
-
Page 142: Print Quality Problems
Print Quality Problems Symptom Cause/Remedy Output is too light. The paper is damp. Load fresh paper. (faded or unclear) The paper is not appropriate for the printer. Load appropriate paper. Refer to • "Supported Paper" (P. 57) The print cartridge or fuser unit is damaged or deteriorated. The print cartridge or fuser unit may need replacement depending on its condition. - Page 143 Symptom Cause/Remedy Streaks appear inside or The paper may have been improperly stored or sealed in an exceptionally dry outside of halftone images. environment. Load fresh paper. Shadow is printed around The paper is not appropriate for the printer. Load appropriate paper. solid-filled images Refer to •...
- Page 144 Symptom Cause/Remedy Deletions on output. The paper is not appropriate for the printer. Load appropriate paper. Vertical white streaks appear on output. Refer to • "Supported Paper" (P. 57) The paper is damp. Load fresh paper. The print cartridge or feed rolls are not installed correctly. Correctly install the print cartridge or feed rolls.
- Page 145 Symptom Cause/Remedy Text is garbled. The data was printed using a font that does not come standard with the printer. Check Output printed is not the same the font used by the application. If using PostScript, download fonts as necessary. as the original data displayed Is the printer set to substitute TrueType fonts with the built-in fonts? on your computer screen.
-
Page 146: Paper Feeding Problems
Paper Feeding Problems Symptom Cause/Remedy Paper does not feed properly. Is the paper loaded correctly? Reload the paper correctly. Before loading transparencies, postcards, or envelopes, fan Paper jams occur. them to make sure that they are separated. Is the paper damp? Multiple sheets feed at once. -
Page 147: Error Messages And Error Codes
Error Messages and Error Codes Error Messages (in Alphabetical Order) The following table lists the error messages that appear on the control panel. Note • When a message cannot be displayed in one screen, the display switches between two or three screens to display the entire message. - Page 148 Message Symptom/Cause/Remedy Load in Tray 1 The size of the paper loaded in Tray 1 (Bypass tray) does not match the paper size xx xx xxxx specified by the job. Load the paper indicated in the message (xx xx xxxx) in Tray 1 (Bypass tray). Refer to •...
- Page 149 Message Symptom/Cause/Remedy Open Tray 2 & 3 A paper jam occurred in the printer. Clear Jam Pull out Tray 2 and Tray 3 to identify the jammed area, and clear the jammed paper. Then, open and close the front cover. Open the front cover even when there is no then jammed paper inside the cover.
- Page 150 Message Symptom/Cause/Remedy SysError ***-*** A system error occurred. Reboot printer Switch the power off, wait for the display to go out, and then switch the power back on. If the same error code is displayed, copy down the error code (***-***), and Contact your Customer Support Center or your dealer.
-
Page 151: Error Codes
Error Codes Error codes are six-digit numbers that appear on the control panel when errors occur. Such errors include abnormal print jobs and printer malfunction. Error codes are important information that identifies the causes of errors. Please have error codes ready when calling your Customer Support Center or your dealer. error code The following table lists the error codes that can be resolved by users. - Page 152 Error Code Cause/Remedy 077-216 The duplex unit (optional) is not plugged into the printer properly. Switch the power off, check if the connector cable of the duplex unit is properly plugged into the printer, and then switch the power back on. Refer to ‘...
-
Page 153: Network-Related Problems
Network-related Problems For information on how to resolve network-related printing problems, refer to the Documentaton CD-ROM. The followings are the problems you may encounter when using CentreWare Internet Services, E-mail Print, or StatusMessenger. When an error message or error code is displayed, refer to "6.6 Error Messages and Error Codes"... - Page 154 Symptom Cause/Remedy The [Refresh] button does not Is your operating system or web browser supported by CentreWare Internet work. Services? The contents in the right frame do Refer to "1.5 Configuring the Printer Using CentreWare Internet Services" (P. 12) to not change even when a different see if your operating system or web browser is supported by the service.
-
Page 155: E-Mail Print/Statusmessenger Problems
E-Mail Print/StatusMessenger Problems Symptom Cause/Remedy Cannot check the printer's status Check to see if [Properties] > [Port Status] > [StatusMessenger] on CentreWare via e-mail. Internet Services is set to [Enabled]. (StausMessenger) Check the following settings under [Properties] > [E-mail] on CentreWare Internet Services. - Page 156 6 Troubleshooting...
-
Page 157: Maintenance
Important • If you are not using the consumables recommended by Xerox, the performance of the printer may not be at its optimum level. Use only consumables recommended for this product • The page yield of consumable varies depending on print requests, documents printed, and how often the power is switched on/off. -
Page 158: Handling Consumables
Handling Consumables • Do not store consumables upright. • Do not unpack consumable parts until they are ready to be used. • Avoid storing consumable parts in the following locations: • in high temperature and humidity • near heat sources •... -
Page 159: Replacing The Print Cartridge
• Never throw a print cartridge into fire. Remaining toner in the cartridge may catch fire and cause burn injuries. If you have a used print cartridge, contact your local Xerox representative for its disposal. -
Page 160: Replacement Procedure
Important • Make sure that the power is on when replacing the print cartridge. Switching the power off erases the print data in the printer and information accumulated in the memory. • Do not expose the print cartridge to direct sunlight or strong light. •... - Page 161 Hold the print cartridge by the handles as shown in the figure and remove the print cartridge from the printer. Note • When removing the print cartridge, slide the cartridge towards you. Important • Be careful not to dirty your hands or clothes with toner. If toner gets on your hands or clothes, wash it off immediately.
- Page 162 Place the print cartridge on a flat surface, such as on a desk, with the handles facing you. Hold the end of the toner seal and slowly pull it out from the side of the cartridge. Important • Make sure to pull the toner seal straight out horizontally.
-
Page 163: Printing Reports / Lists
Printing Reports / Lists This section describes various reports/lists that can be printed from the printer. Types of Reports / Lists The printer can print the following reports/lists in addition to print jobs from its clients. Required Report/List Name Optional Description (Name on the Control Panel) Accessory... - Page 164 Required Report/List Name Optional Description (Name on the Control Panel) Accessory ESC/P Logical Printers List Lists the settings of the logical printers 1 - 5 created in the ESC/P (ESC/P Logical) mode. Note • Logical printers can be created using CentreWare Internet Services.
-
Page 165: Ok/Eject>Printing A Report/List
<OK/Eject>Printing a Report/List The reports/lists can be printed using the control panel. The following shows how to print the [Printer Settings] list. The procedure is the same also for other reports/lists. Note • The reports/lists are printed on A4 size paper. Press the <Menu>... -
Page 166: Monitoring/Managing The Printer On A Web Browser
Monitoring/Managing the Printer on a Web Browser When your printer is installed in a TCP/IP environment, you can monitor or remotely configure the printer using a web browser on a networked computer. This feature is called CentreWare Internet Services. CentreWare Internet Services can be used also to check the status of consumable and the levels of paper in the trays. -
Page 167: Checking The Printer Status Via Printingscout
Checking the Printer Status via PrintingScout PrintingScout is a tool that allows you to check the status of print jobs when your printer is local or when it is connected to an LPD port. This tool runs on Windows operating systems and can be installed from the Software CD-ROM included with the printer. -
Page 168: Checking The Printer Status Via E-Mail
Checking the Printer Status via E-mail If your printer is networked and set up for e-mail and TCP/IP communication, you can use the StatusMessenger. • If you send the printer an e-mail asking for the its status, the printer sends you the information by e-mail. -
Page 169: Setting The Statusmessenger Feature
Setting the StatusMessenger Feature To use the StatusMessenger feature, you must configure the network and e-mail environments of the printer. Ask your network administrator to find out if the following settings have been configured. Network Environment • Create an e-mail account E-mail Environment (Printer) Use CentreWare Internet Services to configure ports, an e-mail server, and the printer's e- mail address. -
Page 170: Checking The Printer Status Via E-Mail
Checking the Printer Status via E-mail Follow these guidelines when sending an e-mail to the printer. • Use the e-mail application on your computer and enter the printer's e-mail address in the "To:" field. • The subject can be whatever you like. •... -
Page 171: Security Features
Security Features This section explains various security features of the printer and how to configure them. The information in this section is intended for the system administrator of the printer. For details on each feature, refer to the reference pages in the following table. Feature Description Refer to... - Page 172 To Enable Data Encryption The following explains how to create a certificate on CentreWare Internet Services and set various settings required to enable data encryption. For more information, refer to the online help provided for CentreWare Internet Services. Note • If you install the network expansion card (optional) used on this printer to another printer, the certificate created for this printer will be deleted and the settings for SSL/TLS server communication will become invalid.
- Page 173 On the displayed page, set [Public Key Size] and click the [Generate Certificate] button. A page that allows you to reboot the printer is displayed. On the page, click the [Reboot Machine] button. After rebooting the printer, refresh your browser window. From the menu on the left, click [SSL/TLS Server Communication] again and display the [SSL/TLS Server Communication] page.
- Page 174 11. Set [SSL/TLS Server Communication Port Number]. Note • The SSL/TLS port number should not be the same as the HTTP port number. 12. Click the [Reboot Machine] button and reboot the printer. Accessing CentreWare Internet Services when Data Encryption is Enabled When data encryption is enabled, enter "https"...
- Page 175 Select [Connect to a printer on the Internet or on a home or office network], and then enter the following URL into [URL]: https://IP_Address/ipp/ (where IP_Address is the IP address of the printer). Click [Next]. Click [Have Disk]. In the dialog box displayed, enter the following path: x:\Art_ex\Win2000_XP (where x is the CD-ROM drive.) Click [OK].
-
Page 176: Controlling Data Reception By Ip Address
Controlling Data Reception by IP Address When the printer uses an LPD port or Port9100 port, the printer can deny or accept data from certain IP addresses. The following explains how to set this feature using CentreWare Internet Services. Before configuring the setting, disable the print ports other than an LPD port or Port9100 port. - Page 177 To reject printing from a specific user: Example: Reject printing from “192.168.100.50” To permit printing from a specific network address, reject printing from a particular address within the network, but permit printing from a particular user within the rejected address: Example: (1) Permit printing from “192.168.200.10”...
-
Page 178: Checking The Meter Reading
Checking the Meter Reading The printer can count the number of printed pages/sheets by a different category such as computer. Checking the Meter Reading (Meter) The total number of prints can be viewed on the control panel. Meter 1 Normally not in use Meter 2 Displays the total number of monochrome prints. -
Page 179: Checking The Meter Reading By Computer (Meter Report)
Checking the Meter Reading by Computer (Meter Report) The [Meter Report] shows the number of printed page/sheets for each computer (job owner). The [Meter Report] can be printed from the control panel. Note • When the Authentication and Auditron Administration features are enabled, you can print the [Auditron Report] instead of the [Meter Report]. -
Page 180: Authentication And Auditron Administration Features
Authentication and Auditron Administration Features The printer provides the Authentication and Auditron Administration features. The Authentication feature controls access to the printer's features. Whereas the Auditron Administration feature manages the use of each printer’s feature. This section briefly explains the overview of the Authentication and Auditron Administration features and the settings required for both features. -
Page 181: Configuring The Authentication And Auditron Administration Features
Auditron Administration Feature When the Authentication and Auditron Administration features are enabled, you can print the [Auditron Report] instead of the [Meter Report]. The [Auditron Report] lists the number of pages /sheets printed to date by each user. Note • The meter counts listed on this report are those from the time when the Authentication and Auditron Administration features were enabled. -
Page 182: Registering Login Information On The Printer
Registering Login Information on the Printer The following briefly explains how to enable the Authentication feature on CentreWare Internet Services and register users who are permitted to use the printer. For details about each setting item, refer to the online help for CentreWare Internet Services. Launch your web browser and access CentreWare Internet Services. - Page 183 Verify that [User Account] is displayed on the [Print Auditron] page. Click [Edit User Account]. 10. On the [Edit User Account] page, enter [User Account Number] and click [Edit]. 7.8 Authentication and Auditron Administration Features...
- Page 184 11. On the displayed page, enter each field and click [Save]. Note • The user ID and password set on this page will be used also on your print driver. 12. If registering more than one user, click the [back] button and repeat Steps 10 and 11. 7 Maintenance...
- Page 185 Registering the Login Information on the Print Driver (Computer) Configure the following settings under the Properties dialog box on your print driver. The printer will not print unless the user ID and password entered on your print driver match those registered on the printer. The following procedure explains how to set the login information on your print driver.
-
Page 186: Cleaning The Printer
Cleaning the Printer This section explains how to clean the printer to keep it in good condition and to ensure optimum print quality. CAUTION • Before cleaning this product, ensure to switch off and unplug the product from the electrical outlet. Accessing the machine interior when it is powered on can cause electrical shocks which can lead to injuries. -
Page 187: Cleaning The Rib Plate
Cleaning the Rib Plate Clean the rib plate when output is faded vertically in paper feed direction, white streaks appear on output, or the outline of black area or text is blurred. Switch the power off by pressing the power switch located on the front lower right of the printer to the <O>... - Page 188 Wipe the dirt on the rib plate with a soft dry rib plate cloth. transfer roll Important • Do not touch the transfer roll and the static eliminator. static eliminator Insert the print cartridge back into the printer. Note • Hold the print cartridge by the handles as shown in the figure.
-
Page 189: Cleaning The Feed Rolls
Cleaning the Feed Rolls If you load postcards with pre-printed pictures, the anti set-off powder sticks to the feed rolls, preventing the postcards from being fed properly. If this happens, wipe the feed rolls thoroughly with soft, damp cloth moistened with water. The feed rolls can be found in the following locations. - Page 190 Feed Rolls Inside the Printer If paper is loaded in Tray 1 (Bypass tray), remove the paper and close Tray 1 (Bypass tray) cover. Important • When closing Tray 1 (Bypass tray) cover, be careful not to get your fingers caught between (the left and right edge of) the cover and the printer.
- Page 191 While rotating the feed rolls, wipe the rubber part with a soft, damp cloth moistened with water. Close the top cover and then the front cover. Important • When closing the front cover, be careful not to get your fingers caught between (the left, right, top, or bottom edge of) the cover and the printer.
- Page 192 Cleaning the Feed Rolls for the Trays 2 - 5 The following explains how to clean the feed rolls for Tray 2. The procedure is the same for all trays. Pull out the tray until it stops. Hold the tray with both hands, lift it up slightly, and then pull it out completely.
- Page 193 Wipe the rubber part of both feed rolls thoroughly with a soft, damp cloth moistened with water. After cleaning the feed rolls, reinstall them in the printer. Place one of the feed rolls on long tab short tab the back shaft from the side with the short tab first.
- Page 194 Feed Roll for Tray 1 (Bypass Tray) Open the upper cover. If paper is loaded in Tray 1 (Bypass tray), remove the paper. If Tray 1 (Bypass tray) is not open, open the tray. Remove the roll cover. Identify the location of the feed roll in the printer.
- Page 195 Slide the feed roll to the right toward the white part, rotate it 90 degrees to the front, and pull it out of the printer. Wipe the feed roll with a soft, damp cloth moistened with water. After cleaning the feed roll, reinstall it in the printer.
- Page 196 11. Place the roll cover back inside the printer. 12. Close Tray 1 (Bypass tray) and the upper cover. 7 Maintenance...
-
Page 197: Moving The Printer
7.10 Moving the Printer Use the following procedure when moving the printer. CAUTION • The machine (only main unit including a consumable) weighs 23.5 kg. Make sure to carry the equipment using two or more persons. • When lifting the machine, firmly grip the recessed areas provided on both sides of the machine. - Page 198 Hold the print cartridge by the handles, and remove it from the printer. Note • When removing the print cartridge, slide it towards you. Important • Make sure to remove the print cartridge before moving the printer. Otherwise, the toner may spill in the printer.
-
Page 199: A.1 Main Specifications
Appendix Main Specifications Product Specifications Item Description Type Desktop Printing method Laser xerography Important * Semi-conductor laser + electrophotographic system Fusing system Heat roller (oil-less) Warm-up Time Less than 16 seconds (after powering on at 22 °C temperature) Continuous print speed 1 Sided : 35 sheets/min. - Page 200 * For information about the recommended paper, contact your Customer Support Center or your dealer. Paper capacity Standard: (Xerox P paper) Tray 1 (Bypass tray) : 150 sheets Tray 2 : 550 sheets Optional:...
- Page 201 Item Description Font PCL fonts : Agfa 81 typefaces MM fonts : 2 typefaces PostScript European : 136 typefaces Page Description Language Standard : PCL XL ® ® : Adobe PostScript 3™ Emulation Standard : ESC/P, PCL5e, PCL6 ® ® Supported OS Windows NT 4.0 (SP4.0 or above), Windows...
- Page 202 Item Description Dimensions (main unit only) 459 (W) x 506 (D) x 375.3 (H) mm Important When Tray 1 (Bypass tray) is closed and the paper tray is not extended. Weight 23.5 kg (only the main unit including a consumable) A Appendix...
-
Page 203: Printable Area
Printable Area Note • The actual printable area may vary depending on the printer control language. Top 4 mm Unprintable Area Printable Area Left 4 mm Right 4 mm Bottom 4 A.1 Main Specifications... -
Page 204: Optional Accessories
Optional Accessories The following table lists the main accessories available for the printer. To purchase them, contact the dealer where you purchased the printer. Product Name Product Code Description Internal hard disk 098S05006 Must be installed to use the following features: •... -
Page 205: Life Of Consumables And Regular Replacement Parts
Life of Consumables and Regular Replacement Parts Consumable Page Yield Part Name Product Code (Reference Value) Print cartridge 10K 113R00737 Approx. 10,000 pages Important • The page yield of the print cartridge is based on A4 size paper loaded in landscape orientation, printing 2 pages per job, 22 °C temperature, 55% humidity, and the standard density setting. -
Page 206: Obtaining The Product Information
• You can browse our web site also on the Documentation CD-ROM included with the printer. To access the web site, click [Xerox Web Site] on the startup window of the CD-ROM. • The URL of the driver download service page is as follows: http://www.support.xerox.com/... -
Page 207: Installing Additional Memory
2-sided printing is performed. Recommended capacity: Memory capacity recommended by Xerox. Values of the required memory capacity also vary depending on the usage environment of the printer. -
Page 208: Installation Procedure
Installation Procedure Additional memory goes into the controller board right underneath a network expansion card (optional). If your printer has a network expansion card, remove it to get access to the RAM slot. For information on how to remove/reinstall the network expansion card, refer to the installation guide provided for the network expansion card. - Page 209 Pull the rear cover forward and remove it from the printer. Loosen the three screws that secure the metal plate cover inside the printer. Pull the metal plate cover forward and remove it from the printer. If a network expansion card is installed, remove it temporarily.
- Page 210 Align the notch on the new memory card with the projection on the RAM slot (printed as "SDRAM op." on the controller board), and insert the memory card at an angle into the slot. Important • The memory card should be installed to the left of the controller board.
-
Page 211: Notes And Restrictions
Notes and Restrictions Notes and Restrictions on Using the Printer This section lists the notes and restrictions that apply to the printer. Hard Disk (Optional) • An abrupt shut down of the printer due to a power failure or other disruption may corrupt data in the hard disk. -
Page 212: Glossary
Glossary 10BASE-T: A 10 MBps Ethernet network that uses a baseband signal and twisted-pair cable. It is one of the IEEE802.3 standards. 100BASE-TX: An extended version of 10BASE-T known as FastEthernet. Its communication speed is 100 Mbps, which is much faster than 10 MBps of 10BASE-T. Address: Information (identifier) that is assigned to identify each node (computer or terminal) on a network. - Page 213 Font A complete set of characters and symbols that have common characteristics such as style and typeface. Grams per Square Meter (g/m2): A weight in grams of one square meter of paper. HTTP: A protocol used to communicate with a web browser over the Internet. Image Enhancement A feature that artificially increases resolution by smoothing out transitions between black and white and reducing jagged appearance.
- Page 214 Port: A connection point that allows exchange of information between a computer and its peripherals. Port9100: A network communication method that enables data transmission on Windows NT 4.0, 2000, Windows XP, Windows Server 2003, and Windows Vista. On Windows NT 4.0, 2000, Windows XP, or Windows Server 2003, this can be used on the standard TCP/IP port monitor.
- Page 215 USB: An acronym for Universal Serial Bus. It is a data communication method used between a computer and its peripherals. It allows hot-plug, which is the capability of connecting or disconnecting peripherals without having to switch off the computer. WINS: An acronym for Windows Internet Name Services.
- Page 216 A Appendix...
-
Page 217: Control Panel Menu Tree
Control Panel Menu Tree Basic Control Panel Functions To move up and down the menus: < > or < > button To select a menu or move to the right: < > button To cancel a selection or return to the left: <... - Page 218 Administrator Menus Ready to print Password If the control panel is locked with a password, <Menu> [0000] enter the password here. button Print Language ESC/P See the Emulation Setting Guide for details. See the Emulation Setting Guide for details. PostScript PS Error Report On * , PS Job Time-out...
- Page 219 Enable * , Network / Port Parallel Port Status Disable Print Mode Auto * , ESC/P, PDF, PS, PCL, HexDump TBCP * , Standard, BCP, Adobe Protocol Auto, Binary Enable * , Bi-directional Disable Enable * , Port Status Disable Print Mode Auto * , ESC/P, PDF, PS, PCL, HexDump...
- Page 220 From B (bottom left) ([Network / Port] continued) TCP/IP Get IP Address DHCP/Autonet * , DHCP, BOOTP, RARP, Panel IP Address, Enter when [Get IP Address] 000.000.000.000 * Subnet Mask, is [Panel] Gateway Address nnn.nnn.nnn.nnn Displays the printer's IP address when [Get IP Address] is not [Panel] InternetServices...
- Page 221 System Settings Audio Tones Control Panel Off, On * Invalid Key Off, On * Machine Ready Off, On * Job Complete Off, On * Fault Tone Off, On * Alert Tone Off, On * Out of Paper Off, On * Low Toner Alert Off, On *...
- Page 222 From E (bottom left) ([System Settings] continued) Enable * , Secure Print ActivateFeature Disable Interrupt Print Off, On * Print Priority Disable * , Enable Normal * , Darken +1, Darken +2 Printer Settings Density Lighten +2, Lighten +1 Off * , Larger Size, Substitute Tray Closest Size, Bypass Feed Display Screen...
- Page 223 From G (previous page) ([Printer Settings] continued) Paper Name 1. User 1 * - 1 - 8 alphanumeric characters 5. User 5 * Print ID Off * , Top Left, Top Right, Bottom Left, Bottom Right DefaultPaperSize A4 * , 8.5 x 11 Size Conflict Force Print * ,...
-
Page 225: Index
Index types of consumable ....139 Symbols, Numerics consumables safety ....xiv , , , and buttons . - Page 226 network expansion card ....186 network printer ......1 HTTP Network Settings.
- Page 227 uninstalling ......18 Print ID ......108 safety print job consumables .
- Page 228 Windows XP ......16 Xerox website ......vii Xerox Welcome Center .