Table of Contents
Advertisement
Quick Links
Preface
About Axis
Network CD-
ROM Servers
Network Print
Servers
IBM Mainframe
and S/3x – AS/
400 Printer
Interfaces
Axis NPS 550 User's Manual
Thank you for purchasing the Axis NPS 550 Network Print Server. Our
goal in developing this product is to enable you to connect your printers
anywhere in your network, allowing all network users access to shared
printer resources.
Axis Communications, founded in 1984, is one of the world's fastest
growing companies in the printer interface and network print server
market. The head quarters are located in Lund, Sweden, with subsidiaries
in Boston, Tokyo, and Hong Kong.
Axis Communications has a distributor network operating in more than
60 countries world-wide, marketing three product lines:
CD-ROM servers provide a flexible and cost-efficient solution for sharing
CD-ROMs across the network. They are available in Ethernet and Token
Ring versions, with or without built in drive option.
These intelligent Ethernet and Token Ring print servers support a wide
range of LAN protocols. The Axis NPS 530, 532, 550, AXIS 150 and
152 are Ethernet print servers, and the Axis NPS 630, 632 and 650 are
Token Ring print servers.
These products include a wide range of plug-in interfaces and free
standing products such as the Cobra+ and the AFP IPDS-to-PostScript
converter.
RISC
Axis NPS 550
User's Manual
Part No.:13656
Copyright © Axis Communications AB
Preface
Version 2.0
October 1995
1
Advertisement
Table of Contents

Related Manuals for Axis NPS 550


Summary of Contents for Axis NPS 550
-
Page 1: About Axis
These intelligent Ethernet and Token Ring print servers support a wide Servers range of LAN protocols. The Axis NPS 530, 532, 550, AXIS 150 and 152 are Ethernet print servers, and the Axis NPS 630, 632 and 650 are Token Ring print servers. IBM Mainframe These products include a wide range of plug-in interfaces and free and S/3x –... -
Page 2: About This Manual
This manual will guide you through a simple step-by-step installation and configuration procedure. It is divided into four sections: Introduction The NPS 550 print server, how it works, where to use it, and its main features. Getting started How to connect your NPS 550 to your printers, and how to install it in your network. - Page 3 (Compliance is not valid for unshielded twisted-pair (UTP) cabling.) Trademark acknowledgements Unix, Novell, NetWare, Microsoft, Windows, LAN Server, LAN Manager, IBM, OS/2, AIX, MVS, SunOS, Ultrix, Hewlett-Packard, and Lexmark are registered trademarks of the respective holders. Axis NPS 550 User’s Manual...
-
Page 4: Table Of Contents
Windows 95 Windows NT Windows NT - LPD printing 5 Setup for OS/2 Activate the NetBEUI Protocol Install the Axis Print Utility for OS/2 Install the NPS 550 Create a Print Queue Sharing Print Queues Verify the Communication 6 Setup for Unix systems Prepare your system Axis NPS 550 User’s Manual... - Page 5 Table of contents Set up your NPS 550 Set up and attach a print queue Print methods 7 Setup for Macintosh Choose a Printer Verify the Communication 8 Advanced Options Logical Printers Character Set Conversion Strings Before and After Print Jobs...
-
Page 6: Introduction
Section 1: Introduction Section 1 Introduction The Axis NPS 550 is a stand-alone network print server for the Ethernet environment. Using the NPS 550 makes it possible to connect your printers anywhere in an Ethernet network, allowing all network users access to shared printer resources. -
Page 7: How It Works
Each packet contains information about the sender, the receiver, how to unpack the packet, and the data itself. The NPS 550 acts as a node in the Ethernet network, with its own unique address. It receives the packets addressed to it, unpacks them, and converts the print data to a format suitable for standard printers. - Page 8 Printer. At power-on it will log in and attach to up to eight specified NetWare print servers. Windows The NPS 550 is set up using the supplied Axis Print Utility for Windows. You may print through a server (client-server), or directly (peer-to-peer). The supported platforms are Windows for Workgroups, Windows 95 and Windows NT.
-
Page 9: Main Features
Main Features Reliability The Axis NPS 550 hardware provides high performance and reliability combined with low power consumption. It is based on the Axis ETRAX chip with an integrated 32 bit RISC CPU and Ethernet controller. Flexibility It supports NetWare, Microsoft and IBM networks, TCP/IP and Apple EtherTalk simultaneously. -
Page 10: Getting Started
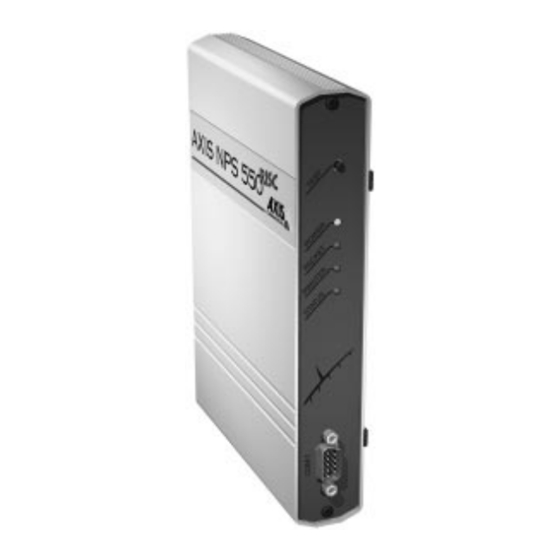
• NPS 550 Print Server; part no. 0037-3 delivery • NPS 550 User's Manual; part no. 13656 • NPS 550 Quick Installation Guide; part no. 13657 • Warranty registration form; part no. 13510 • Parallel Printer Cable, part no. 13360 •... - Page 11 Supply Connector Test Button 10base2 Connector POWER Indicator 10baseT Connector PACKET Indicator PRINTER Indicator STATUS Indicator LPT2 Printer Connector Parallel LPT1 Printer Connector Parallel COM1 Printer connector Serial The NPS 550 back and front panels Axis NPS 550 User’s Manual...
-
Page 12: Printer Installation
Make sure that the external power supply is marked with the correct mains voltage. Connect a parallel printer to NPS 550 and make a test printout: 1. Switch off the printer. 2. Connect the printer to the LPT1 port using the supplied printer cable. -
Page 13: Network Installation
• Make sure that your network is ready to accept a new node. • Any network configuration should always involve the network manager. 1. Record the serial number of your NPS 550. You will need this number for the setup. 2. Connect your NPS 550 to the network using a twisted-pair (10baseT) or a thin-wire (10base2) Ethernet cable. -
Page 14: Setup For Netware
Section 3: Setup for NetWare Section 3 Setup for NetWare The NPS 550 can run in either Print Server Mode, Remote Printer Mode or both simultaneously. The basic configuration is done using the PCONSOLE software supplied from Novell, and if you choose a setup other than the automatic print server mode, also with AXCFG supplied with the NPS 550. - Page 15 There are three different ways to set up the print server mode, depending on how you want the NPS 550 to log in to the servers at power-up, and how you want to manage printer and queue configurations:...
- Page 16 Section 3: Setup for NetWare File Server The NPS 550 will first log in to the Configuration File Server, and then to Controlled Log-In any additional NetWare servers found in the file server configuration. See page 20 for setup procedures.
-
Page 17: Print Server Mode (Automatic)
Repeat this procedure for each file server using the NPS 550. Notes: 1. If the serial number of your NPS 550 is 00408C100086, then the default name is AXIS100086. The serial number is found on the label at the back of the NPS 550. - Page 18 9. Press <Escape> repeatedly to return to the main menu. Repeat this procedure for every queue you want the NPS 550 to service. The NPS 550 supports up to 96 print queues, defined on up to 16 file servers. Note: Assuming that you have the default Logical Printer settings, output from the print queue will be directed to the LPT1 output of the NPS 550.
-
Page 19: Print Server Mode (Parameter Controlled)
Section 3: Setup for NetWare Print Server Mode (Parameter Controlled) This is similar to the automatic print server mode, but the NPS 550 will not automatically log in to all file servers and scan for queues to service. Instead, the file servers and print queues are specified by a set of parameters in the NPS 550 configuration. -
Page 20: Print Server Mode (File Server Controlled)
Print Server Mode (File Server Controlled) This method uses a NetWare file server (the Configuration File Server) to hold the print queue information. The NPS 550 will not automatically log in to all file servers and scan for queues to service. Instead, the file servers and print queues are specified on the configuration file server. - Page 21 6. Press <Insert> to see the list of Available File Servers. Add all file servers you want the NPS 550 to log in to, then press <Esc> to get back to the Print Server Information Menu. 7. Select Printer Configuration. A list of 16 printers marked Not Installed appears.
- Page 22 6. Select Serviced NetWare Servers. 7. Press <Insert> to see the list of Available NetWare Servers. Add all file servers you want the NPS 550 to log in to, then press <Esc> to get back to the Print Server Information menu.
- Page 23 Configuration done using AXCFG, the Axis NPS installation software on the disk supplied with the NPS 550. Follow the instructions in the read.me file on the disk to install the software, then proceed as follows: 1. Start AXCFG, and select NetWare.
-
Page 24: Remote Printer Mode
1. Add a Print Server 2. Create a Print Queue 3. Link a Remote Printer to the Print Queue 4. Configure the NPS 550 Add a Print Server The NetWare print server software is either installed on a file server (PSERVER.NLM), or a dedicated workstation (PSERVER.EXE). - Page 25 Repeat this procedure for each file server and print server using the NPS 550. Notes: 1. If the serial number of your NPS 550 is 00408C100086, then the default name is AXIS100086. The serial number is found on the label at the back of the NPS 550.
- Page 26 4. Press <Insert> to add a remote printer to the Defined Printers list. 5. Type AXIS<nnnnnn>!n at the Printer: prompt. (see notes below) nnnnnn> are the last six digits of the NPS 550 serial number, and n is < the logical printer number 1–8.
- Page 27 The configuration involves specifying which NetWare print servers and NPS 550 printer numbers the NPS 550 shall attach to. This is done using AXCFG, the Axis NPS installation software on the disk supplied with the NPS 550. Follow the instructions in the read.me file on the disk to install the software, then proceed as follows: 1.
-
Page 28: Verify The Communication
Section 3: Setup for NetWare Verify the Communication To verify communication by making a test printout, just send a job to one of the print queues that NPS 550 will service. Use CAPTURE, NPRINT, or PCONSOLE. Example: Use CAPTURE from the DOS command line when you are logged into the network, to print out the autoexec.bat file from the root of drive C:... -
Page 29: Setup For Windows
Section 4: Setup for Windows Section 4 Setup for Windows This section describes how to set up your NPS 550 for the Microsoft Windows environment. The following Windows platforms are supported: • Windows 3.1 (requires add-on network support) • Windows for Workgroups •... -
Page 30: Windows 3.1
Requirements: 1. Microsoft Network must be running when installing and using Axis Print Utility. 2. Axis Print Utility must be running whenever you want to print to your network printer. Peer-to-peer vs. Axis Print Utility supports both peer-to-peer and client-server printing. -
Page 31: Windows For Workgroups
1. Double-click the Axis Print Utility icon. 2. In the Port menu, click Add. 3. In the NPS Port list, select the NPS 550 port you want to install. The ports appear as <name>.LP1, <name>.LP2 and <name>.CM2, where <name> is the NPS 550 print server name (AXIS... is abbrevi- ated to AX...). - Page 32 Section 4: Setup for Windows Client-Server Follow these steps to install your NPS 550 for client-server printing at a printing: Windows for Workgroups server: Server setup 1. Choose a workstation that you want to use as server for network print- ing.
-
Page 33: Windows 95
1. Double-click the Axis Print Utility icon. 2. In the Port menu, click Add. 3. In the NPS Port list, select the NPS 550 port you want to install. The ports appear as <name>.LP1, <name>.LP2 and <name>.CM2, where <name> is the NPS 550 print server name (AXIS... is abbrevi- ated to AX...). - Page 34 Section 4: Setup for Windows Client-Server Follow these steps to install your NPS 550 for client-server printing at a printing: Windows 95 server: Server setup 1. Choose a workstation that you want to use as server for network print- ing. The server must be available at all times, and must have sufficient hard disk space for spooling print jobs.
-
Page 35: Windows Nt
1. Double-click the Axis Print Utility. 2. In the Port menu, click Add. 3. In the NPS Port list, select the NPS 550 port you want to install. The ports appear as <name>.LP1, <name>.LP2 and <name>.CM2, where <name> is the NPS 550 print server name (AXIS... is abbrevi- ated to AX...). - Page 36 2. Install Axis Print Utility on the server. 3. Set up your NPS 550 following steps 1 - 9 on page 35 (do not close Print Manager). 4. In the Printer menu, select Properties...
-
Page 37: Windows Nt - Lpd Printing
This file is normally located in /winnt35/system32/drivers/etc/hosts. 8. In the Name of Printer on the Machine field, type the logical printer number you want to use (e.g. pr1), then click OK. 9. Click OK to complete the installation. Axis NPS 550 User’s Manual... -
Page 38: Setup For Os/2
Setup for OS/2 The basic configuration in the OS/2 environment is done using the Axis Print Utility for OS/2 included on the disk supplied with the NPS 550. It comprises four steps: 1. Activate the NetBEUI protocol (if not already activated). -
Page 39: Activate The Netbeui Protocol
The Axis Print Utility will start automatically when the installation process is completed. When the Axis Print Utility is running, an action bar and a list of available Axis print server ports (initially empty) will be displayed. The action bar contains the following commands: Status, Install, Remove, Logfile, and Help. -
Page 40: Install The Nps 550
Note: port names are AX100086.LP1, AX100086.LP2 and AX100086.CM1. The serial number is found on the label at the back of the NPS 550. You may change the default names by editing parameters LPRINT_1, LPRINT_2, etc. in the config file as described in Appendix A. If you want to change the default port names, you must do that before installing the NPS 550 using Axis Print Utility. -
Page 41: Create A Print Queue
Section 5: Setup for OS/2 Create a Print Queue Each Axis print server port will be seen as a print queue destination by the OS/2 Print Manager. Print queue destinations are referred to as devices in OS/2 version 1.x and ports in version 2.x. They appear as pipe names, e.g. -
Page 42: Sharing Print Queues
<Queue name> is the queue created above. Note that the queue name equals the printer name for OS/2 version 2.x, while queue and printer names may differ for version 1.x. For further information on queue sharing, please refer to your LAN Server or LAN Manager documentation. Axis NPS 550 User’s Manual... -
Page 43: Verify The Communication
To verify communication by making a test printout, use the NET COPY command (or any other print method such as drag-and-drop, etc.) to send a job to one of the print queues that NPS 550 will service. Example: Use NET COPY from the OS/2 or DOS command line when you are logged into the network, to print a file: NET COPY <file name>... -
Page 44: Setup For Unix Systems
Up-load and run the script, then follow the instructions on your screen. Before you begin: • Make sure that the NPS 550 is powered on and attached to the net- work. • You will need root privileges on the system. -
Page 45: Prepare Your System
Each node in a TCP/IP network must have a unique Internet (IP) address, and also a unique host name to be used as an alias for the IP address. Before you add your NPS 550 to a TCP/IP network, you must prepare your system for a new node. -
Page 46: Set Up Your Nps 550
When you have prepared your system to accept a new TCP/IP node, you are ready to set up your NPS 550 as a node on your network. This is done by down-loading the new IP address to the NPS 550 using one of these three methods: •... - Page 47 This is the syntax for System V and some BSD-type systems: arp -s <host name> <node address> temp ping <host name> The node address is the serial number found at the back of the NPS 550. Each pair of digits must be separated by colons as in examples below. Examples: The arp command differs between different Unix systems.
- Page 48 00:40:8C:10:00:86 salesdept 2. Update your alias name data bases (see page 45). 3. Start the rarp daemon (if not already running) by the command rarpd -a. 4. Restart the NPS 550 to down-load the IP address. Axis NPS 550 User’s Manual...
- Page 49 :sm=255.255.255.0:gw=192.36.253.254 2. Start the bootp daemon (if not already running) by the command bootpd. 3. Restart the NPS 550 to down-load the IP address, default router address, and net mask. Notes: 1. The ht and vm fields must be entered exactly as in the example.
-
Page 50: Set Up And Attach A Print Queue
Axis NPS Print Server Technical Reference. Up-load axinstall 1. Log in to the NPS 550 with the command ftp <host name>, where host name is the name assigned in your system host table (e.g. sales- dept). You will be prompted for user id and password. Enter root as user id, and pass as password. - Page 51 Below is a sample FTP session showing how to up-load axinstall (user entries appear in bold): > ftp salesdept Connected to salesdept. 220 Axis NPS 550 FTP Print Server V5.00 ready. Name (salesdept:thomas): root 331 User name ok, need password Password: pass...
-
Page 52: Print Methods
The recommended method where available. Advantages: Easy to set up – install the NPS 550 as a remote queue in SMIT (AIX), or add a remote printer to /etc/printcap using the rm and rp fields (BSD). Limitations: Spooler features (AIX), and printcap or lpr options (BSD) such as multiple copies are not available. -
Page 53: Setup For Macintosh
“Setup for...” sections as appropriate. Before you begin: • Make sure that the NPS 550 is powered on and attached to the network. • Any network configuration should always involve the network manager. -
Page 54: Choose A Printer
3. Click the name of the printer you want. The three default NPS 550 printer names are shown as AXIS<nnnnnn>_<port>, where <nnnnnn> is the last six digits of the NPS 550 serial number, and <port> is LPT1, LPT2 and COM1 respectively. -
Page 55: Verify The Communication
3. Click the name of the printer you want. The three default NPS 550 printer names are shown as AXIS<nnnnnn>_<port>, where <nnnnnn> is the last six digits of the NPS 550 serial number, and <port> is LPT1, LPT2 and COM1 respectively. -
Page 56: Advanced Options
The key feature is the Logical Printer Concept, which will be discussed in the following pages. Print Management The NPS 550 has a number of built-in tools and features to help you to manage and monitor your printing environment. This section covers the following topics: •... -
Page 57: Logical Printers
Section 8: Advanced Options Logical Printers One of the most powerful features of the NPS 550 is the Logical Printer concept. A logical printer is a configurable device driver acting as an inter- face between the network and the physical printer. You may specify up to eight logical printers, each with different properties, even if you have only one physical printer attached. - Page 58 LF to CR+LF means that UNIX New Line commands are converted to Carriage Return + Line Feed. Logical printers are configured by editing a number of parameters in the config file. There is a menu for each logical printer (PRINTER1 - PRINTER8), see Appendix A. Axis NPS 550 User’s Manual...
-
Page 59: Character Set Conversion
ASCII character sets. As a result of this, language specific characters (such as å ü ô ñ) are sometimes printed incorrectly. The NPS 550 solution to this problem is to assign a character set conver- sion filter to a logical printer, and link that logical printer to the host causing the problem. -
Page 60: Strings Before And After Print Jobs
2 ( &l4H) and bin 1 ( &l1H) respectively. Edit the fol- lowing entries in your config file: PR4_BEF. : 1B 26 6C 34 48 PR4_AFT. : 1B 26 6C 31 48 Axis NPS 550 User’s Manual... -
Page 61: String Substitutions
1B 59) for logical printer PR2, edit the following entry in your config file: PR2_STR. : 01 0A 02 0D 0A 03 1B 47 31 02 1B 59 Note: Extensive use of string substitutions may decrease the throughput rate of the NPS 550. Axis NPS 550 User’s Manual... -
Page 62: Postscript Functions
Section 8: Advanced Options PostScript Functions The NPS 550 can translate standard ASCII print data into PostScript for- mat. This makes it possible to print with a PostScript printer from a host that doesn’t support PostScript. The PostScript functions are controlled by a number of parameters described below. - Page 63 The font settings are ignored when the ASCII to PostScript filter is inac- tive. Example: The following entry in your config file will select the Helvetica propor- tional font as the PR2 PostScript font: PR2_FONT. : Helvetica Axis NPS 550 User’s Manual...
-
Page 64: Action At Printer Busy
Section 8: Advanced Options Action at Printer Busy If the printer is busy when NPS 550 receives a new print job, you have the choice between sending the print job to another logical printer, and make the host wait until the printer is ready. -
Page 65: Telnet Login
Section 8: Advanced Options Telnet Login The Telnet support makes it possible to log in to the NPS 550 and exe- cute various commands as shown in the example below. Use the telnet <hostname> command to log in. Example: This sample telnet session illustrates the help command: >... -
Page 66: Accounting
This sample telnet session illustrates the account command: > telnet salesdept Trying 192.36.253.96 ... Connected to salesdept. Escape character is '^]'. Axis NPS 550R TELNET Print Server V5.00 NPS 550R network login: root Password: pass (not visible) Axis NPS 550R TELNET Print Server V5.00 Root>... -
Page 67: Status Logging
This sample telnet session illustrates the status command: > telnet salesdept Trying 192.36.253.96 ... Connected to salesdept. Escape character is '^]'. Axis NPS 550R TELNET Print Server V5.00 NPS 550R network login: root (not visible) Password: pass Axis NPS 550R TELNET Print Server V5.00 Root>... -
Page 68: Locally Administrated Address
Section 8: Advanced Options Locally Administrated Address Each NPS 550 is preconfigured with a unique Node Address (indentical to the serial number). You may change the node address to a Locally Administrated Address by editing the Node Address entry in your config file. -
Page 69: Snmp
Objects are contained in data bases called MIBs (Management Information Base), where MIB-II is a standard database. The NPS 550 supports all relevant parts of MIB-II. It also includes a private enterprise MIB (the AXIS MIB described in the NPS Print Server Technical Reference). -
Page 70: A The Parameter List
Editing parameter values involve three steps: Up-load the config file to your system, edit the parameter values, and down-load the modified file to the NPS 550. There are a number of methods for doing this depending on the environment you work in. -
Page 71: Unix (Tcp/Ip)
You will need FTP support (such as the MacTCP utility) to get access to the config file from your Macintosh. Proceed as described for TCP/IP above. You can also configure your NPS 550 from a NetWare server, LAN Server/LAN Manager server, or a UNIX host if you have one of those in your network. -
Page 72: Factory Default Settings
Appendix A: The parameter list Factory Default Settings If you should need to reset the NPS 550 to factory default conditions, the best way to do this is to use the TEST button. This procedure involves switching the NPS 550 off and on. If you use an external power supply, unplug the power cord to switch off the NPS 550, otherwise use the printer’s power switch. -
Page 73: The Config File
Appendix A: The parameter list The Config File The remainder of this appendix contains the complete NPS 550 parameter list. The left column shows the parameters and their default values as they appear in the config file, and the right column contains brief descriptions of the parameters. - Page 74 Printer 5 Logical Printer LPRINT_6. Printer 6 Name LLOGIC_6. : PR6 Printer 6 Logical Printer LPRINT_7. Printer 7 Name Printer 7 Logical Printer LLOGIC_7. : PR7 Printer 8 Name LPRINT_8. LLOGIC_8. : PR8 Printer 8 Logical Printer Axis NPS 550 User’s Manual...
- Page 75 PR2 PostScript Page Orientation PR2_ORNT. : PORTR (PORTR LANDS R_PORTR R_LANDS) PR2 PostScript Page Format (MPL, MPP, CPI, LPI, LM, TM) PR2_FORM. : 66 0 100 60 30 50 PR2 PostScript Font (Courier when not specified) PR2_FONT. Axis NPS 550 User’s Manual...
- Page 76 PR5 PostScript Page Orientation PR5_ORNT. : PORTR (PORTR LANDS R_PORTR R_LANDS) PR5 PostScript Page Format (MPL, MPP, CPI, LPI, LM, TM) PR5_FORM. : 66 0 100 60 30 50 PR5 PostScript Font (Courier when not specified) PR5_FONT. Axis NPS 550 User’s Manual...
- Page 77 PR8 PostScript Page Orientation PR8_ORNT. : PORTR (PORTR LANDS R_PORTR R_LANDS) PR8 PostScript Page Format (MPL, MPP, CPI, LPI, LM, TM) PR8_FORM. : 66 0 100 60 30 50 PR8 PostScript Font (Courier when not specified) PR8_FONT. Axis NPS 550 User’s Manual...
- Page 78 (IBM_PC STNDRD FAST HISPEED) LPT2 Centronics Interface Timing LPT2 Busy Status Time-Out L2_BSYTM. : 60 PANEL MENU Internal Printout Destination DEF_OUT. : PR1 (PR1 PR2 PR3 PR4 PR5 PR6 PR7 PR8) Lock Test Button LOCK_KEY. : NO Axis NPS 550 User’s Manual...
-
Page 79: B Internal Printouts
To print the test page, press the TEST button until the STATUS indica- tor starts to flash, then release the button. The Parameter The parameter list (or the config file) shows the complete NPS 550 con- List figuration. See Appendix A for a sample parameter list. -
Page 80: C Technical Specifications
• Eight logical printers (featuring Physical Printer Port, Character Set Conversion, Strings Before and After Print Jobs, String Substitutions, PostScript Functions, Action at Printer Busy, and Hex Dump Mode) • Security functions • Printout statistics logging • Use of IEEE802.2, IEEE802.3, SNAP and Ethernet II frame types simultaneously Axis NPS 550 User’s Manual... - Page 81 • Remote Printer Mode for up to 16 printers per NetWare user licence • Up to 96 print queues on 16 file servers • Port Status monitoring Windows features • Automatic installation software (Axis Print Utility for Windows) • Printing through Windows Print Manager • Both peer-to-peer and client-server printing OS/2 features •...
-
Page 82: D How To Contact Axis
SUBSCRIBE AXIS-NEWS in the message body. The Axis Bulletin The third way to access the Axis archive is the Axis BBS. You will need a Board high-speed modem, a VT100 or VT220 terminal emulator, and a Kermit or ZModem compatible software. Dial +46 46 12 06 32 or +46 46 211 94 53 and log in as guest (no password required). -
Page 83: The Axis Offices
Appendix D: How to contact Axis The Axis offices If you want to contact an Axis office, choose the one nearest to your region: Axis Communications AB Europe, Middle East, South Scheelevägen 16, S-223 70 Lund, Sweden America, Africa Phone: +46 46 19 18 00 Fax: +46 46 13 61 30 Email: info@axis.se... -
Page 84: Ibm Os
ASCII-to-PostScript Conversion 62 LAN Server/LAN Manager AXCFG 14 Configuration 38 Axis offices 83 Print Queues 41 Axis Print Utility for OS/2 39 Sharing 42 Axis Print Utility for Windows 29 Language specific characters 59 Locally Administrated Address 13, 68 Logical Printers 57... - Page 85 Windows 3.1 30 Windows for Workgroups 31 Client-server printing 32 Peer-to-peer printing 31 Windows NT Client-server printing 36 LPD printing 37 Peer-to-peer printing 35 Novell NetWare 14 TCP/IP 44 Setup for Microsoft Windows 29 SNMP 69 Axis NPS 550 User’s Manual...