Axis 1650 Setup Instructions
Axis 1650 print server: installation guide
Hide thumbs
Also See for 1650:
- User manual (75 pages) ,
- Setup instructions (74 pages) ,
- Setup instructions (14 pages)
Advertisement
Quick Links
1
Unpack Box
VERIFY THAT YOU HAVE ALL THE ITEMS LISTED BELOW:
•
Network cable
•
USB cable
Part no. 25080
QI GUIDE AXIS 1650 EUR R2.0
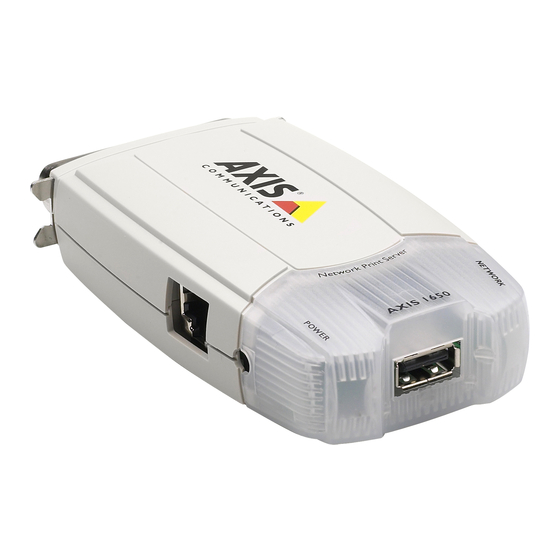
LPT1 Printer Connector
Ethernet Connector
External Power Supply
Connector
Power Indicator
•
AXIS 1650
Network
Indicator
USB Connector
•
Mounting clip
•
Power adapter
•
AXIS 1650 CD
•
AXIS 1650 Set-Up Instructions
Advertisement

Related Manuals for Axis 1650


Summary of Contents for Axis 1650
- Page 1 VERIFY THAT YOU HAVE ALL THE ITEMS LISTED BELOW: LPT1 Printer Connector Ethernet Connector External Power Supply Connector • Network cable • USB cable Part no. 25080 QI GUIDE AXIS 1650 EUR R2.0 Network Indicator USB Connector Power Indicator • AXIS 1650 • Mounting clip •...
- Page 2 1. Make sure the Canon device is off and unplugged and that the AXIS 1650 external power supply is disconnected. 2. Locate the serial number, found on the underside label of the AXIS 1650, and write it down. You will need this number to configure the AXIS 1650.
- Page 3 5. Turn the Canon device on and wait for ready mode. 6. Connect AXIS 1650 to the external power supply connector using the power adapter. The power indicator will light up. When the network indicator starts to flash, the AXIS 1650 is correctly connected to the network.
- Page 4 Mount Print Server Important: Do not drill into the Canon device; the provided wall screw is an optional wall mount. It is recommended that you do not leave the AXIS 1650 hanging from the Canon device, please affix to the Canon device.
- Page 5 Mount Print Server USB only (contd.) For CANON FAX-L400 & PC-D320/D340 It is recommended that the clip be affixed to the left side, lower back corner of the unit.
-
Page 6: Assign Ip Address
Assign IP Address INSTALL AXIS IP JUMPSTARTER 1. Insert AXIS 1650 CD into CD drive. 2. An AXIS 1650 window will pop up. If My Computer auto-run is off, click on and click on the AXIS 1650 CD and select [Open]. - Page 7 Click [Next], then [Finish]. (contd.) 10. Open IP JumpStarter. Select the AXIS 1650 from the serial number list. All AXIS1650 appear with the default IP address 192.168.0.90. If you are install- ing several AXIS 1650, check the serial number to locate a specific AXIS 1650.
- Page 8 Install AXIS CAPT Print Monitor Note: Prior to installing AXIS CAPT Print Monitor 2.0, please uninstall any previous versions of AXIS CAPT Print Monitor that may be on your operating system. Note: CANON FAX-L400 can utilize Standard TCP/IP port in case of Windows 2000/XP/Server 2003.
- Page 9 Install AXIS CAPT Print Monitor CAPT Print Monitor will download. Once complete, click [Open]. If the dialog box closes, locate the destination folder that CAPT Printer Monitor saved to and open. 7. InstallShield Wizard will begin the CAPT Print Monitor Setup program. Click [Next].
- Page 10 [New Port]. 3. If the IP address you assigned to AXIS 1650 is not on the list, enter the IP address. Click [Add] and [OK]. If listed, select the IP address and click [OK]. 4. Click [Close] to close the window.
- Page 11 Printers. Select 1. Go to the Canon device and right click and select Properties. Select the Details tab. AXIS CAPT Port 2. Select from the drop- down list and click [Apply]. 3. If your desired port is not in the available ports list, follow the Add Port instruc- tions to add the new CAPT port.
- Page 12 Install AXIS ScanClient If your Canon device also functions as a scanner, you can use your AXIS 1650 as a scanner server, too. Note: You must have a working printing environment and the scanning software for the Can- on device installed before continuing. See your Canon device manual as well as the previous sec- tions of this Guide.
- Page 13 Connect to the Scanner These sections describe how to scan via an AXIS 1650 using AXIS ScanClient. For general infor- mation on scanning, see your Canon device manual. The examples in this section show Windows XP and a Canon MF3110 with MF Toolbox 4.7.
- Page 14 Starting a Scan from the Canon Device When you have established a connection be- tween your computer and the scanner with AXIS ScanClient, place the object to be scanned on the scanner flatbed. 1. If the Canon device is in Energy Save mode, press its [Energy Saver key].
- Page 15 Starting a Scan from your Computer When you have established a connection be- tween your computer and the scanner with AXIS ScanClient, place the object to be scanned on the scanner flatbed. 1. On your computer, start the receiving Canon MF Toolbox —...