Life Fitness 9500 Series Service Manual
Hr and telemetry equipped treadmills
Hide thumbs
Also See for 9500 Series:
- Service manual (79 pages) ,
- Operation manual (32 pages) ,
- Assembly instructions (2 pages)

Related Manuals for Life Fitness 9500 Series


Summary of Contents for Life Fitness 9500 Series
-
Page 1: Service Manual
Model 9500 Series HR and Telemetry Equipped Treadmills Customer Support Services SERVICE MANUAL... - Page 2 FCC Warning - Possible Radio/Television Interference NOTE: This equipment has been tested and found to comply with Part 15 of the FCC rules. These limits are designed to provide reasonable protection against harmful interference in a residential installation. This equipment generates, uses and can radiate radio frequency energy and, if not installed and used in accordance with the instructions, may cause harmful interference to radio communications.
- Page 4 ©1995 Life Fitness. All rights reserved. The Life Fitness trademark is register in the U.S. Patent and Trademark Office, Certificate No. 1,400,502, issued July 8, 1986. FlexDeck, Zone Trainer and Heart Rate Zone Training are trademarks of Life Fitness. Any use of these trademarks, without the express written consent of Life Fitness, is forbidden.
- Page 5 Section IV to identify the proper part name and number. To order a part call Life Fitness After Market Services any Monday through Friday from 8:00 AM to 6:00 PM (C.S.T.). When you place a call, in order to speed our response to your particular situation, please have the following information available for the customer service phone technician who will be prepared to assist you: 1.
-
Page 6: Table Of Contents
Life Fitness Model 9500 Series HR and Telemetry Equipped Treadmills TABLE OF CONTENTS INTRODUCTION (How to use this Service Manual) TABLE OF CONTENTS SECTION I TROUBLESHOOTING GUIDES PAGE BELT SLOWDOWN OR SLIPPAGE ........................1 DISPLAY WILL NOT PROGRAM PASSWORD OR LOCKED IN PASSWORD MODE ........2 NOISY TREADMILL ............................ - Page 7 SECTION III ( Continued ) How To...REMOVE AND REPLACE THE POWER MODULE............................... 24,25 CONTROL (CPU) BOARD........................... 26,27 LIFT ACTUATOR..............................28,29 DRIVE MOTOR ..............................30,31 MOTOR CONTROLLER............................32 INDUCTOR ON THE EMERSON MOTOR CONTROLLER ................. 33 How To... ADJUST AND TENSION THE STRIDING BELT ..................34-37 SECTION IV PARTS IDENTIFICATION............................
-
Page 8: Troubleshooting Guide
Life Fitness Model 9500 Series HR and Telemetry Equipped Treadmills TROUBLESHOOTING GUIDE Symptom: "Slowdown". Belt slips during footfall or display reads "Press Start to Resume", or "Note Max. Speed Is Reduced To". Malfunction Probable Cause Corrective Action User is exceeding desired... -
Page 9: Display Will Not Program Password Or Locked In Password Mode
Life Fitness Model 9500 Series HR and Telemetry Equipped Treadmills TROUBLESHOOTING GUIDE Symptom: Display Will Not Program Password or Locked In Password Mode Malfunction Probable Cause Corrective Action Incorrect entries. Only 3 digits are acceptable as a password Display will not accept... -
Page 10: Noisy Treadmill
Life Fitness Model 9500 Series HR and Telemetry Equipped Treadmills TROUBLESHOOTING GUIDE Symptom: Noisy Treadmill Malfunction Probable Cause Corrective Action Faulty rear roller bearings. Replace rear roller assembly. Knocking sound at rear of machine Faulty drive motor bearings. Replace drive motor assembly. -
Page 11: Display Does Not Illuminate Or Respond To Input
Life Fitness Model 9500 Series HR and Telemetry Equipped Treadmills TROUBLESHOOTING GUIDE Symptom: Display Does Not Illuminate or Respond To Input Malfunction Probable Cause Corrective Action Insufficient power source. Plug treadmill into a dedicated 120V, 20 Display does not illuminate... -
Page 12: Unit Resets Randomly
Life Fitness Model 9500 Series HR and Telemetry Equipped Treadmills TROUBLESHOOTING GUIDE Symptom: Unit Resets Randomly Malfunction Probable Cause Corrective Action Insufficient power source. Plug treadmill into a dedicated 120V, 20 Unit resets randomly amp circuit. Line cord improperly seated in Inspect power connection at outlet and at electrical outlet. -
Page 13: No Power
Life Fitness Model 9500 Series HR and Telemetry Equipped Treadmills TROUBLESHOOTING GUIDE Symptom: No Power Malfunction Probable Cause Corrective Action On/Off switch. Check that the unit is turned on? No Power Insufficient power source. Plug treadmill into a dedicated 120V, 20 amp circuit. -
Page 14: Wax Will Not Fill Properly
Life Fitness Model 9500 Series HR and Telemetry Equipped Treadmills TROUBLESHOOTING GUIDE Symptom: Wax Will Not Fill Properly Malfunction Probable Cause Corrective Action Fill valve in kit has crimped fill Check the fill valve for proper operation. Wax will not fill hose. - Page 15 Life Fitness Model 9500 Series HR and Telemetry Equipped Treadmills TROUBLESHOOTING GUIDE Symptom: Wax Is Leaking From Treadmill Malfunction Probable Cause Corrective Action Partially open or faulty fill valve. Fully close fill valve. Wax Leak Loose hose connections. Inspect hose connections and secure as necessary.
-
Page 16: Belt Tracking Errors
Life Fitness Model 9500 Series HR and Telemetry Equipped Treadmills TROUBLESHOOTING GUIDE Symptom: Display reads "Belt Beyond Limits' or "Notify Maintenance - Belt Tracking Error" or Belt Comes In Contact With Frame and End Caps Malfunction Probable Cause Corrective Action... - Page 17 Life Fitness Model 9500 Series HR and Telemetry Equipped Treadmills TROUBLESHOOTING GUIDE Symptom: Heart Rate System Does Not Respond, Erratic Heart Rate Reading Malfunction Probable Cause Corrective Action Dirty handlebar sensors. Wipe sensors with a clean soft cloth. Heart Rate System does not...
-
Page 18: No Telemetry Reading
Life Fitness Model 9500 Series HR and Telemetry Equipped Treadmills TROUBLESHOOTING GUIDE Symptom: NO TELEMETRY READING Malfunction Probable Cause Corrective Action Chest strap sensors not making Adjust chest strap No Chest Strap detected. good contact with body of user. Moisten sensors to make better contact with skin Loose connection at receiver. -
Page 19: Speed Control Error
Life Fitness Model 9500 Series HR and Telemetry Equipped Treadmills TROUBLESHOOTING GUIDE Symptom: "Notify Maintenance" - "Speed Control Error" Malfunction Probable Cause Corrective Action Insufficient power source. Plug Treadmill into a dedicated 120Volt, Speed control error 20 Amp circuit. Record Speed Error #, and... -
Page 20: Striding Belt Not Centered On Deck
Life Fitness Model 9500 Series HR and Telemetry Equipped Treadmills TROUBLESHOOTING GUIDE Symptom: Striding Belt Not Centered On Deck Malfunction Probable Cause Corrective Action Improper walking/running. Enter into tracking automatic in Striding belt mis-alignment DIAGNOSTIC mode by pressing 9-1-9, ENTER. -
Page 21: Lift Control Error
Life Fitness Model 9500 Series HR and Telemetry Equipped Treadmills TROUBLESHOOTING GUIDE Symptom: Display reads "Notify Maintenance Lift Control Error" Malfunction Probable Cause Corrective Action Incline control error. Enter into Incline Manual mode in the Lift Error DIAGNOSTICS menu. (See Section IIII) by pressing 9-1-9 ENTER. - Page 22 Life Fitness Model 9500 Series HR and Telemetry Equipped Treadmills TROUBLESHOOTING GUIDE Symptom: Workout Pause: “Notify Maintenance” Malfunction Probable Cause Corrective Action Insufficient power. Plug into electrical outlet with proper Striding Belt will not start voltage and amperage requirements. Loose connections at motor Inspect all connections.
- Page 23 Life Fitness Model 9500 Series HR and Telemetry Equipped Treadmills NOTES:...
-
Page 24: How To
Life Fitness Model 9500 Series HR and Telemetry Equipped Treadmills DIAGNOSTIC TESTS How To...EXECUTE THE SERVICE MODE WARNING: DO NOT STAND ON THE STRIDING BELT WHILE ENTERING THE SERVICE MODE OR WHILE PERFORMING ANY OF THE DIAGNOSTIC TESTS. NOTE: TO ACCESS A SPECIFIED DIAGNOSTIC PROGRAM, USE THE PROGRAM KEYS. - Page 25 Life Fitness Model 9500 Series HR and Telemetry Equipped Treadmills DIAGNOSTIC TESTS How To...EXECUTE THE DISPLAY TEST This test indicates if the Display is working properly. TO ENTER INTO THE DISPLAY TEST TURN "ON" THE HILL AND RANDOM KEYS The information that will be displayed in this mode is as follows: ±...
- Page 26 Life Fitness Model 9500 Series HR and Telemetry Equipped Treadmills DIAGNOSTIC TESTS How To...EXECUTE THE EEPROM MODE This test indicates the amount of memory and allows for changes in the program times. TO ENTER INTO THE TEST TURN "ON" THE HILL, RANDOM AND FIT TEST PROGRAM KEYS.
- Page 27 Life Fitness Model 9500 Series HR and Telemetry Equipped Treadmills DIAGNOSTIC TESTS How To...EXECUTE THE INCLINE CONTROL TEST This test indicates if the unit is reaching or lowering to the user's chosen level. TO ENTER INTO THE INCLINE CONTROL TEST TURN "ON" THE HILL PROGRAM KEY.
- Page 28 Life Fitness Model 9500 Series HR and Telemetry Equipped Treadmills DIAGNOSTIC TESTS How To...EXECUTE VIEWING OF USAGE STATISTICS This mode supplies statistics and code versions of the Treadmill. TO ENTER INTO THE VIEWING OF USAGE STATISTICS TESTS TURN "ON" THE RANDOM AND FIT TEST PROGRAM KEYS The information that will be displayed in this mode is as follows: ±...
- Page 29 Life Fitness Model 9500 Series HR and Telemetry Equipped Treadmills DIAGNOSTIC TESTS How To...EXECUTE THE WAXER CONTROL TEST This test indicates the status of the waxing system. TO ENTER INTO THE TEST TURN "ON" THE FIT TEST PROGRAM KEY. The information that will be displayed in this mode is as follows: ±...
- Page 30 Life Fitness Model 9500 Series HR and Telemetry Equipped Treadmills DIAGNOSTIC TESTS How To...EXECUTE THE HEART RATE MONITORING MODE This test indicates if the heart rate program is operating properly. TO ENTER INTO THE TEST TURN "ON" THE HEART RATE PROGRAM KEY.
- Page 31 Life Fitness Model 9500 Series HR and Telemetry Equipped Treadmills DIAGNOSTIC TESTS How To...EXECUTE THE SPEED CONTROL OPERATION TEST This test indicates if the unit is running at the actual speed that the user has chosen. TO ENTER INTO THE TEST ALL PROGRAM KEYS SHOULD BE IN THE “OFF” POSITION.
- Page 32 Life Fitness Model 9500 Series HR and Telemetry Equipped Treadmills DIAGNOSTIC TESTS How To...EXECUTE THE MANUAL TRACKING CONTROL OPERATION TEST This test indicates the position of the Striding Belt on the unit and allows the user to activate the Tracking Motor to center the Striding Belt.
- Page 33 Life Fitness Model 9500 Series HR and Telemetry Equipped Treadmills DIAGNOSTIC TESTS How To...EXECUTE THE AUTOMATIC TRACKING CONTROL OPERATION TEST This test indicates the position of the Striding Belt on the unit and automatically activates the Tracking Motor to center the Striding Belt.
-
Page 34: Anti-Scuff Pads
Life Fitness Model 9500 Series HR and Telemetry Equipped Treadmills How To... REMOVE AND REPLACE THE ANTI-SCUFF PADS Tools Required: Non-abrasive cleaning solution, paper towels, pencil, scribe Step 1 Use a pencil to draw an outline of the upper corners of the worn ANTI-SCUFF PAD on the FRAME. -
Page 35: Stop Switch
Life Fitness Model 9500 Series HR and Telemetry Equipped Treadmills How To...REMOVE AND REPLACE THE STOP SWITCH Step 1 Turn the power OFF at the ON/OFF switch and by unplugging the machine at the electrical outlet. Step 2 Remove the DISPLAY CONSOLE from the machine (See “How To...”). -
Page 36: Telemetry / Hr Kit
Life Fitness Model 9500 Series HR and Telemetry Equipped Treadmills How To...REMOVE AND REPLACE THE TELEMETRY / HR KIT Tools Required: Phillips screwdriver Step 1 Turn the power OFF at the ON/OFF switch and by unplugging the machine at the electrical outlet. -
Page 37: Display Console
Life Fitness Model 9500 Series HR and Telemetry Equipped Treadmills How To...REMOVE AND REPLACE THE DISPLAY CONSOLE Tools Required: Phillips screwdriver, socket and ratchet set Step 1 Turn the power OFF at the ON/OFF switch and by unplugging the machine at the electrical outlet. -
Page 38: Handlebar
Life Fitness Model 9500 Series HR and Telemetry Equipped Treadmills How To...REMOVE AND REPLACE THE HANDLEBAR Tools Required: Phillips screwdriver, hex key wrench set, socket and ratchet set Step 1 Turn the power OFF at the ON/OFF switch and by unplugging the machine at the electrical outlet Step 2 Remove the DISPLAY CONSOLE (See "How To..."). - Page 39 Life Fitness Model 9500 Series HR and Telemetry Equipped Treadmills How To... REMOVE AND REPLACE THE HANDRAILS Tools Required: Phillips screwdriver, hex key wrench set, socket and ratchet set Step 1 Turn the power OFF at the ON/OFF switch and by unplugging the machine at the electrical outlet Step 2 Remove the DISPLAY CONSOLE (See "How To...").
- Page 40 Life Fitness Model 9500 Series HR and Telemetry Equipped Treadmills How To... REMOVE AND REPLACE THE DISPLAY WIRE HARNESS Tools Required: Phillips screwdriver, hex key wrench set, socket and ratchet set Step 1 Turn the power OFF at the ON/OFF switch and by unplugging the machine at the electrical outlet Step 2 Remove the DISPLAY CONSOLE (See "How To...").
- Page 41 Life Fitness Model 9500 Series HR and Telemetry Equipped Treadmills How To... REMOVE AND REPLACE THE STRIDING BELT Tools Required: Phillips screwdriver, hex key wrench set, socket and ratchet set ATTENTION: THE DECK MUST BE REPLACED OR FLIPPED TO AN UNUSED SIDE WHENEVER INSTALLING A NEW STRIDING BELT.
- Page 42 1. Check that the arrows stamped on the underside of the STRIDING BELT point in the direction of BELT rotation. 2. If the STRIDING BELT bears the 'Lifestride' or ‘Life Fitness’ logo, it should be installed so it is readable to aperson using the Treadmill.
- Page 43 Life Fitness Model 9500 Series HR and Telemetry Equipped Treadmills How To... REMOVE AND REPLACE THE DECK Tools Required: Hex key wrench set, socket and ratchet set ATTENTION: IF THE DECK IS TO BE REPLACED OR FLIPPED TO AN UNUSED SIDE, THE STRIDING BELT MUST BE REPLACED AT THIS TIME.
- Page 44 Life Fitness Model 9500 Series HR and Telemetry Equipped Treadmills How To...REMOVE AND REPLACE THE DECK ( Continued ) Step 5 Carefully lift the worn DECK and remove it from the machine. Transfer the two PINCH BRACKETS to the new DECK.
- Page 45 Life Fitness Model 9500 Series HR and Telemetry Equipped Treadmills How To... REMOVE AND REPLACE THE FRONT ROLLER Tools Required: Removable locktite, standard screwdriver, hex key wrench set, wrench set, socket & ratchet set Step 1 Turn the power OFF at the ON/OFF switch and by unplugging the machine at the electrical outlet.
- Page 46 How To... REMOVE AND REPLACE THE FRONT ROLLER (Continued) Step 7 Remove the remaining HARDWARE/LINKAGE from the worn FRONT ROLLER and transfer it to the new FRONT ROLLER. Once all of the hardware has been transferred, remember to re-establish the distance from the NUT END of the THREADED ROD to the end of the NYLON BLOCK and from the BOLT HEAD to the NYLON BLOCK on the new ROLLER.
- Page 47 Life Fitness Model 9500 Series HR and Telemetry Equipped Treadmills How To... REMOVE AND REPLACE THE REAR ROLLER / ROLLER BELT Tools Required: Hex key wrench set, socket and ratchet set, torque wrench Step 1 Turn the power OFF at the ON/OFF switch and by unplugging the machine at the electrical outlet.
-
Page 48: Rear Roller / Roller Belt
How To...REMOVE AND REPLACE THE REAR ROLLER/ROLLER BELT (Cont.) Step 9 Place the new ROLLER BELT over the TRANSFER PULLEY. Step 10 Position the REAR ROLLER in place and loop the ROLLER BELT over the drive end of the REAR ROLLER, reinsert the two MOUNTING BOLTS and the four WASHERS and tighten with a socket and ratchet wrench to 20-25 ft/lbs. - Page 49 Life Fitness Model 9500 Series HR and Telemetry Equipped Treadmills How To... REMOVE AND REPLACE THE TRACKING SENSOR SPRING ASSEMBLY Tools Required: Standard Screwdriver Step 1 The unit must be at minimum of 5.0% incline to have access to the TRACKING SENSOR SPRING ASSEMBLY.
- Page 50 Life Fitness Model 9500 Series HR and Telemetry Equipped Treadmills How To... REMOVE AND REPLACE THE HANDRAIL FOOT COVER Tool Required: Phillips screwdriver Step 1 Use a Phillips screwdriver to remove the four SCREWS from the worn HANDRAIL FOOT COVER.
- Page 51 Life Fitness Model 9500 Series HR and Telemetry Equipped Treadmills How To... REMOVE AND REPLACE THE TRACKING MOTOR Tools Required: Hex key wrench set, socket and ratchet wrench set, torque wrench, removable LOCKTITE Step 1 Turn the power OFF at the ON/OFF switch and then unplug the unit from the electrical outlet.
- Page 52 How To... REMOVE AND REPLACE THE LIFESPRINGS Tools Required: Hex key wrench set Step 1 Turn the power OFF at the ON/OFF switch and by unplugging the machine at the electrical outlet. Step 2 Remove the DECK. (See "How To...".) Step 3 Remove the two DECK CHANNELS and set them aside to be reinstalled...
- Page 53 Life Fitness Model 9500 Series HR and Telemetry Equipped Treadmills How To... REMOVE AND REPLACE THE DEBRIS BRUSH Tools Required: Phillips screwdriver, 5/16" wrench Step 1 Turn the power OFF at the ON/OFF switch and then unplug the unit from the electrical outlet.
- Page 54 Life Fitness Model 9500 Series HR and Telemetry Equipped Treadmills How To...REMOVE AND REPLACE THE WAX MOTOR /PUMP ASSEMBLY Tools Required: Socket and ratchet set, wire cutting tool, wire ties Step 1 Turn the power OFF at the ON/OFF switch and then unplug the unit from the electrical outlet.
-
Page 55: Wax Container
Lift the worn WAX CONTAINER with attached HOSE out of the TRAY and replace it with a new WAX CONTAINER and HOSE assembly. NOTE: THE WAX CONTAINER HOSE LENGTH VARIES IN THE MODEL 9500 SERIES. ROUTE THE HOSE THROUGH THE HOLE IN THE TRAY BEFORE INSTALLING THE COVER. - Page 56 Life Fitness Model 9500 Series HR and Telemetry Equipped Treadmills How To... REMOVE AND REPLACE THE WAX CONTAINER (Continued) NOTE: THE NEW WAX CONTAINER DOES NOT REQUIRE THE TWO BRACKETS. DISCARD AND USE THE TWO WASHERS. Step 8 Align the two WASHERS with the holes in the new WAX CONTAINER and insert the two BOLTS through both items.
-
Page 57: Power Module
Life Fitness Model 9500 Series HR and Telemetry Equipped Treadmills How To... REMOVE AND REPLACE THE POWER MODULE Tools Required: Standard screwdriver, 5/16" wrench, scribe, socket and ratchet set WARNING: FAILURE TO OBSERVE SAFE PROCEDURES WHEN SERVICING THIS UNIT COULD RESULT IN INJURY FROM ELECTRICAL SHOCK. -
Page 58: Power Module
Life Fitness Model 9500 Series HR and Telemetry Equipped Treadmills How To... REMOVE AND REPLACE THE POWER MODULE (Continued) Step 7 Slacken the STRIDING BELT by turning the BELT TENSIONING BOLT counter-clockwise with a socket and ratchet wrench. Slide BELT down towards the floor. -
Page 59: Control (Cpu) Board
Life Fitness Model 9500 Series HR and Telemetry Equipped Treadmills How To... REMOVE AND REPLACE THE CONTROL (CPU) BOARD Tools Required: Standard screwdriver WARNING: FAILURE TO OBSERVE SAFE PROCEDURES WHEN SERVICING THIS UNIT COULD RESULT IN INJURY FROM ELECTRICAL SHOCK. -
Page 60: Control (Cpu) Board
Life Fitness Model 9500 Series HR and Telemetry Equipped Treadmills How To... REMOVE AND REPLACE THE CONTROL (CPU) BOARD (Continued) Tools Required: Standard screwdriver Step 6 Disconnect the seven CONNECTORS from the worn CONTROL BOARD, taking note of their locations. - Page 61 Life Fitness Model 9500 Series HR and Telemetry Equipped Treadmills How To...REMOVE AND REPLACE THE LIFT ACTUATOR Tools Required: Hex key wrench set, socket and ratchet set IMPORTANT: DO NOT TURN OR CHANGE THE CURRENT SETTING OF THE LIFT ACTUATOR NUT FROM THE FACTORY PRESET AND TAPED POSITION IN WHICH IT WAS RECEIVED.
- Page 62 Life Fitness Model 9500 Series HR and Telemetry Equipped Treadmills How To...REMOVE AND REPLACE THE LIFT ACTUATOR ( Continued ) ATTENTION: THE LIFT ACTUATOR NUT IS PRESET AND TAPED INTO POSITION AT THE FACTORY FOR EASE OF ASSEMBLY. FOLLOW STEPS 8, 9 AND 10 ONLY IF THE LIFT MOTOR NUT WAS ROTATED FROM ITS PRESET POSITION.
- Page 63 Life Fitness Model 9500 Series HR and Telemetry Equipped Treadmills How To... REMOVE AND REPLACE THE DRIVE MOTOR Tools Required: Socket and ratchet set, adjustable wrench, torque wrench, belt tension gauge Step 1 Turn the power OFF at the ON/OFF switch and then unplug the unit from the electrical outlet.
- Page 64 Life Fitness Model 9500 Series HR and Telemetry Equipped Treadmills How To... REMOVE AND REPLACE THE DRIVE MOTOR (Continued) Step 10 Place the ROLLER BELT over the DRIVE MOTOR SPROCKET. Reinstall the ADJUSTMENT BOLT, NUT and WASHER, but do not overtighten as the ROLLER BELT must still be properly tensioned.
- Page 65 How To... REMOVE AND REPLACE THE MOTOR CONTROLLER Tools Required: Standard screwdriver, socket and ratchet set Step 1 Turn the power OFF at the ON/OFF switch and then unplug the unit from the electrical outlet. Step 2 With the help of another person, slowly tilt the unit on its left side. Step 3 Ground yourself to the machine.
- Page 66 Life Fitness Model 9500 Series HR and Telemetry Equipped Treadmills How To... REMOVE AND REPLACE THE INDUCTOR ON THE EMERSON MOTOR CONTROLLER Tools Required: Phillips screwdriver, 5/16" wrench, scribe Step 1 Turn the power OFF at the ON/OFF switch and then unplug the unit from the electrical outlet.
-
Page 67: How To... Adjust And Tension The Striding Belt
Life Fitness Model 9500 Series HR and Telemetry Equipped Treadmills How To...ADJUST AND TENSION THE STRIDING BELT Tools Required: Hex key wrench set, socket and ratchet wrench set NOTE: IT IS EXTREMELY IMPORTANT THAT THE TREADMILL LEVELING LEGS BE CORRECTLY ADJUSTED PRIOR TO ANY TRACKING ADJUSTMENTS. - Page 68 B. Re-tensioning the existing Striding Belt after removal Step 1 (Right FRONT FRAME CAP already removed). Measure the distance from the NYLON BLOCK to the end of slot or mark the decal at the BLOCKS' location. Step 2 Slacken the STRIDING BELT by turning the TENSIONING BOLT on the user right side of the unit counter clockwise.
- Page 69 1. Check that the arrows stamped on the underside of the STRIDING BELT point in the direction of BELT rotation. 2. If the STRIDING BELT bears the Life Fitness logo, it should be installed so it is readable to a person using the Treadmill.
-
Page 70: How To... Adjust And Tension The Striding Belt
Life Fitness Model 9500 Series HR and Telemetry Equipped Treadmills How To...ADJUST AND TENSION THE STRIDING BELT (Continued ) Step 7 Maneuver the new STRIDING BELT over the STATIONARY LEG and onto the ROLLERS. Position the new BELT as close to the center of both the FRONT and REAR ROLLER as possible. The unit will automatically track and center the STRIDING BELT later. - Page 71 Life Fitness Model 9500 Series HR and Telemetry Equipped Treadmills NOTES:...
- Page 72 Life Fitness Model 9500 Series HR and Telemetry Equipped Treadmills PARTS IDENTIFICATION and WIRING BLOCK DIAGRAMS Within Section IV, you will find a parts listing and exploded views of the treadmill to make it as quick and easy as possible to identify what is a replaceable part.
-
Page 73: Handrail
Life Fitness Model 9500 Series HR and Telemetry Equipped Treadmills PARTS IDENTIFICATION PART NUMBERS PART NUMBER ITEM SUB- DESCRIPTION COMMON TO EXCLUSIVE TO ASS’Y MODEL 9500HR TELEMETRY MODELS END CAP WITH PINS ASS'Y: RT AK26-00328-0000 AK26-00464-0001 END CAP WITH PINS ASS'Y: LT... - Page 74 Life Fitness Model 9500 Series HR and Telemetry Equipped Treadmills PARTS IDENTIFICATION ( Continued ) THE FOLLOWING ITEMS ARE AVAILABLE BUT NOT SHOWN: CBL ASS'Y: EMERSON INTERFACE AK26-00295-0000 CBL ASS'Y: TRACK/HOME AK26-00391-0000 CBL ASS'Y: DISP-CONS: CONTROL AK26-00399-0000 GK26-00002-0035 CBL ASS’Y: STOP SWITCH...
- Page 75 Life Fitness Model 9500HR and Telemetry Equipped Treadmills PARTS DESCRIPTION ( Continued ) (Continued)
- Page 76 Life Fitness Model 9500 Series HR and Telemetry Equipped Treadmills PARTS IDENTIFICATION ( Continued )
-
Page 77: Wiring Block Diagram
Life Fitness Model 9500 Series HR without Telemetry Equipped Treadmills WIRING BLOCK DIAGRAM... - Page 78 Life Fitness Model 9500 Series HR with Telemetry Equipped Treadmills WIRING BLOCK DIAGRAM...
- Page 79 Life Fitness Model 9500HR and Telemetry Equipped Treadmills NOTES:...
- Page 80 Life Fitness Model 9500 Series HR without Telemetry Equipped Treadmills WIRING BLOCK DIAGRAM...
- Page 81 Life Fitness Model 9500 Series HR with Telemetry Equipped Treadmills WIRING BLOCK DIAGRAM...
-
Page 82: Model Identification And Serial Number Location
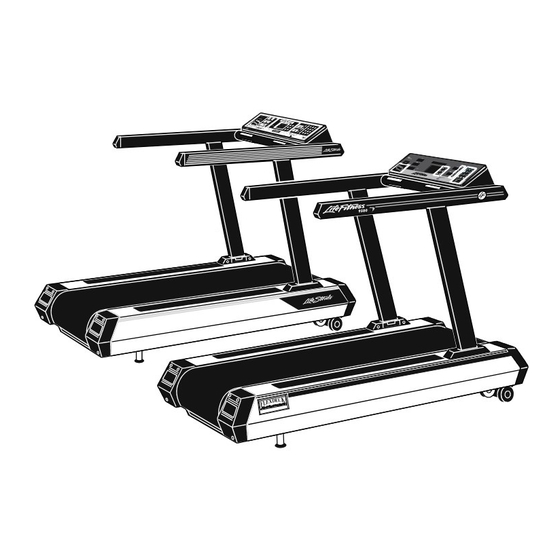
Life Fitness Model 9500 Series HR and Telemetry Equipped Treadmills MODEL IDENTIFICATION and SERIAL NUMBER LOCATION Treadmill Model Identification MODEL 9500HR MODEL 9500HR with Telemetry Serial Number Location Life Fitness Model 9500 Series HR and Telemetry Equipped Treadmills... -
Page 83: Estimated Repair Times
DRIVE ROLLER BELT 120 MIN * DRIVE MOTOR ASSY BELT 120 MIN * CIRCUIT BREAKER 30 MIN CROSS BAR 30 MIN *90 min includes belt and deck removal Life Fitness Model 9500 Series HR and Telemetry Equipped Treadmills PREVENTIVE MAINTENANCE TIPS... - Page 84 ITEM WEEKLY MONTHLY QUARTERLY BI-ANNUAL ANNUAL Anti-Static INSPECT Cords REPLACE Console Mounting INSPECT Bolts Frame CLEAN INSPECT Striding Belt CLEAN ( Top ) ( VACUUM ) INSPECT Brush REPLACE Deck INSPECT Power Cord INSPECT Display Console CLEAN INSPECT Handlebar CLEAN INSPECT Handrail and Handlebar...
-
Page 85: Communicating By Fax
Life Fitness Model 9500 Series HR and Telemetry Equipped Treadmills COMMUNICATING BY FAX If you would like to submit a parts order, or if you need help troubleshooting a problem, we have included, for your convenience, a FAX form on the following page. Simply make a copy (or copies) of the FAX sheet and fill in the necessary information. - Page 86 CUSTOMER SUPPORT SERVICES PARTS ORDER SALE ( IF BOTH PLEASE INDICATE ) PRODUCT TROUBLESHOOTING WARRANTY NAME: CUSTOMER NO: DATE: PHONE: FAX: CONTACT NAME: METHOD OF SHIPMENT: 1 DAY 2 DAY GROUND PARTS ORDER FORM ITEM NO. PART NUMBER DESCRIPTION QUANTITY PRODUCT TROUBLESHOOTING PRODUCT NAME: SERIAL NO.
- Page 87 Life Fitness Model 9500 Series HR and Telemetry Equipped Treadmills NOTES:...