
Related Manuals for Landice Executive Trainer


Summary of Contents for Landice Executive Trainer
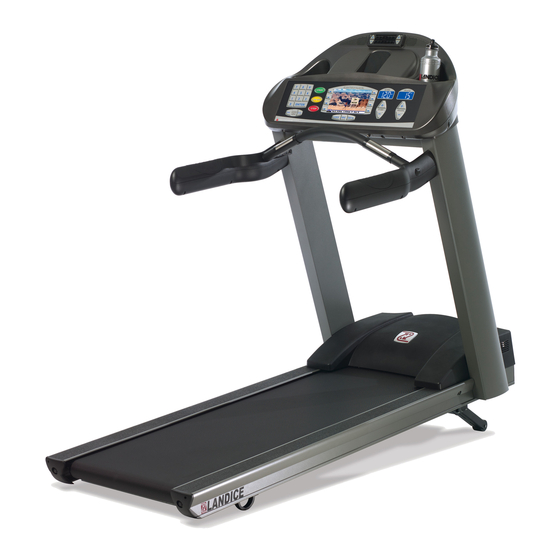
- Page 1 Executive Trainer Ownerʼs Manual Worldwide excellence for over 40 years PART NUMBER 72070 • REVISION 2.0...
- Page 2 Before you start the treadmill: The red Safety Key must be magnetically connected to the front of the display panel. During operation, removing the Safety Key will cause the treadbelt to stop until it’s replaced. To start the treadmill: START START Pressing START powers up the treadmill and all displays will light.
-
Page 3: Important Safety Instructions
Important Safety Instructions WARNING: Failure to observe the following operating instructions can result in serious injury! If you are suffering from any illness, condition, or disability which affects your ability to run, walk or exercise, do not use this product without consulting your doctor first. If you are suffering from any illness, condition, or disability which affects your ability to run, walk or exercise, do not use this product without supervision present. -
Page 4: Grounding Instructions
Important Safety Instructions WARNING: To reduce the risk of electric shock or injury to persons: An appliance should never be left unattended when plugged in. Unplug from outlet when not in use. Close supervision is necessary when this unit is used by or near children or disabled persons. Use this treadmill only for its intended use as described in this manual. -
Page 5: Table Of Contents
Table of Contents Basics Introduction....................1 Assembly Instructions. -
Page 6: Introduction
One of the great things about the Executive Trainer is its diversity of applications. It’s terrific for just starting out on a walking program or easy jog. In the case of a veteran runner, it’s the exact prescription needed for precision interval training to lower your 10K time. -
Page 7: Assembly Instructions
Assembly Instructions STEP 1: STEP 2: STEP 3: STEP 4: Unbolt treadmill from pallet Cut the box off the pallet Unstrap the treadmill Secure upright to frame • On L7 treadmills it is necessary • Remove the metal strapping • The treadmill components •... - Page 8 Assembly Instructions STEP 9: STEP 10: STEP 11: Snap upright covers STEP 12: Install upright end cap Connect contact bar Ground contact bar into place • Feed the contact heart rate • Remove the nut attached to the • Carefully align the upright cover •...
-
Page 9: Basic Control Panel Operations
Basic Control Panel Operations Press START to power up the treadmill. All the displays will light and the treadbelt will START START begin moving at 0.5 mph (0.8 km/hr in metric mode). Press PAUSE to place the treadmill in pause mode. The treadbelt will stop, but all statistical information will be preserved. -
Page 10: Features
SELECTABLE SCREENS At any point during your workout, the Executive Trainer allows you to view one of its 5 motivational screens. Each of these screens help you visualize your workout in a unique way while providing statistical information for up-to-the- second updates. -
Page 11: Getting Started
Getting Started Make sure you have read and understand this owner’s manual. Now you are ready to begin. Start by straddling the treadbelt with one foot on each traction strip. Once the treadbelt begins moving you can start walking on the treadbelt. Press the button. -
Page 12: Manual Mode
Manual Mode Upon start up, the treadmill defaults to Manual Mode. In Manual Mode, you and only you can change the speed and elevation as well as view one of the 5 motivational screens. Press NEXT or BACK to rotate through the selectable motivational screens. Motivational Screens •... -
Page 13: Numeric Keypad
Using the Numeric Keypad The Executive Trainer is equipped with a numeric keypad, which serves multiple functions to make the treadmill easier to control. It can be used to change speed and elevation, enter user settings, and configure programs. Whenever you are prompted with a numeric entry, you have the option of using the designated “+/-” keys or the numeric keypad. -
Page 14: Built-In Programs
Built-in Programs Programs have been added to the Executive Trainer so you can add some variety to your workouts. You can choose from one of 5 built-in programs, which will run you through a pre-selected speed and elevation curve. When choosing a program you select a maximum speed, maximum elevation and a time from 10 to 99 minutes. -
Page 15: Running Built-In Programs
Running Built-in Programs From the Menu screen, select PROGRAMS to view all programming options. Once you select the built-in program that best suits your need, you will be prompted with a Program Preview screen. The program preview is a graphical representation of the program you have selected which displays: •... -
Page 16: User Programs - Edit Mode
User Programs - Edit Mode The Executive Trainer has storage capacity for five User Programs, which you can create and change. The treadmill will remember these programs even if you unplug it from the wall. A User Program looks and runs exactly the same as a Built-In Program. The primary difference between Built-In Programs and User Programs is customization. -
Page 17: User Programs - Auto Program
User Programs - Auto Program The Executve Trainer comes equipped with Auto Program. It is a unique feature that allows you to write a User Program as you workout. All manual changes to speed and grade including the time of those changes will be stored as the new User Program. -
Page 18: Hrc Programs
Control programs require the use of one of them. The Executive Trainer has the ability not only to display your heart rate, but also to automatically vary the speed and elevation based upon your heart rate via its Heart Rate Control (HRC) programs. HRC training allows you to maximize your workout performance while minimizing your workout time. -
Page 19: User Hrc Programs
User HRC Programs The Executive Trainer has storage capacity for five User HRC Programs, which you can create and change. The treadmill will remember these programs even if you unplug it from the wall. A User HRC Program looks and runs exactly the same as a Built-In Program. The primary difference between Built-In Programs and User HRC Programs is customization. -
Page 20: Specific Goal Programs
These specialty programs have been designed to monitor and achieve a specific goal you may have every time you get on your Executive Trainer. Whether you want to go for a 3-mile run, burn 1,000 calories, or simply exercise for 15 minutes, the goal progress will be updated automatically as you progress through your workout. -
Page 21: Race Mode
Race Mode Race mode is a unique feature exclusive to the Landice Executive Trainer. Race is a manually controlled distance based program that monitors your progress versus a virtual pacer. The virtual pacer can be your previous/best-recorded time or manually dialed in during set up. There are five different preset race distances: Mile, 1 Mile, 2 Mile, 5 K, and 10 K. -
Page 22: Fitness Tests/ Protocols
Fitness Tests/ Protocols Overview The Executive Trainer includes 2 fitness tests and 4 fitness protocols. Based on your specific age, gender, and performance they calculate your fitness level. The Balke and the Firefighter Fitness Tests are heart rate controlled. • Balke Fitness Test (HRC: must use Accutrack or Wireless Chest Strap) Test Parameters •... -
Page 23: Taking A Fitness Test
From the Menu Screen, select Programs -> Specialty Programs. In the Specialty Programs screen, you can select one of the 2 fitness tests that the Executive Trainer has to offer. Remember, both of these tests are heart rate controlled. Upon selecting the fitness test of your choice, you will advance to the fitness test set up screen. -
Page 24: Taking A Fitness Protocol
From the Menu Screen, select Programs -> Specialty Programs. In the Specialty Programs screen, you can select one of the 4 fitness protocols that the Executive Trainer has to offer. These tests are not heart rate controlled. Upon selecting the fitness protocol of your choice, you will be prompted to the fitness test set up screen. -
Page 25: Client Mode
“Client” key and select your designated client. Note: If you haven’t set the correct time and date on your Executive Trainer, it’s highly recommended after creating a client that you do it now, so that all of your activity is logged accurately (see System Settings). -
Page 26: Fitness Calendar
Client Mode - Fitness Calendar Client Mode offers a fitness calendar that monitors all client treadmill usage over the past eight weeks. To view the Fitness Calendar: After logging on as a client, from the Menu Screen press the designated “Calendar” key. You are now in your personal Fitness Calendar Screen. -
Page 27: System Settings
In the Time Setup Screen, use any of the necessary designated keys to correctly set the time and date. Once set, the Executive Trainer will maintain the current time and date even when you turn it off. However, unplugging the treadmill will deactivate the internal clock/calendar. -
Page 28: Self-Diagnostics
Self-Diagnostics The Executive Trainer is equipped with onboard self-diagnostics. If the treadmill experiences any errors during operation, the treadmill will display the error message and the option to further investigate by commencing the treadmill’s self- diagnostics software. When you choose the option to enter diagnostics you will be prompted with a warning screen. After reading it, straddle the treadmill by stepping on the traction strips on the sides of the running surface and press NEXT to continue. -
Page 29: Heart Rate Monitoring
Heart Rate Monitoring The Executive Trainer treadmill comes standard with a wireless heart rate monitoring device and a contact heart rate cross- bar (see AccuTrack Heart Rate Monitoring System) to give you feedback on how your body is affected by your workout. We will take a look at a few basic concepts of heart rate monitoring so you can better understand how it all works and how to maximize its use to allow you to reach the fitness level you desire. -
Page 30: My Target Heart Rate Zone
What is a heart monitor? A monitor consists of two parts: a transmitter and a receiver. The Executive Trainer comes equipped with 2 transmitter options (the wireless chest strap or the contact heart rate bar). Each times your heart beats, the electrodes detect the beat and send the information to the receiver on the treadmill. -
Page 31: Heart Monitors (Wireless And Accutrack)
Pulsemeters have a high margin for error. Manual pulse measurements during exercise can result in errors as high as plus or minus 15 beats per minute, with the risk of potential error increasing as heart rate increases. The Executive Trainer includes two separate heart rate monitoring systems: The wireless heart rate chest strap transmitter and the AccuTrack Contact Heart Rate. -
Page 32: Getting The Most Out Of Your Workouts
AccuTrack Contact Heart Rate Monitoring System™ The AccuTrack Contact Heart Rate Monitoring System™ can be used in place of the wireless chest strap to perform any of the following functions: • Monitor your Time in Zone • Control HRC programs •... -
Page 33: Optimizing Your Workouts
Getting the Most Out of Your Workouts FREQUENCY OF EXERCISE Walkers: Walk 3-6 times a week; 20-60 minutes per day. Runners: Run 3-5 times a week; 20-60 minutes per day. DURATION OF EXERCISE Walkers: Walk every day. Runners: Run three to five times per week. DURING YOUR WORKOUT •... -
Page 34: Maintenance
Lubrication is not required on residential treadmills. In institutional settings Landice recommends lubricating the underside of the treadbelt with Landice SlipCoat on a monthly basis (see SLIPCOAT APPLICATION INSTRUCTIONS sheet in Lubrication Kit Box). -
Page 35: Appendix A: Medrail Installation
Appendix A: Medrail Installation STEP 1 STEP 2 Insert the side rail into the upper Fit the side rail to the bottom rail clamp and tighten the bolt rail clamp. using a 1/2” socket. (Do not over-tighten.) STEP 3 STEP 4 Use a soft mallet to firmly set the Use a 3/16”... - Page 36 Worldwide excellence for over 40 years 111 Canfield Avenue, Randolph, NJ 07869 · 1-800-LANDICE · Tel. 973-927-9010 · Fax 973-927-0630 · www.landice.com...