
Related Manuals for Landice L Series


Summary of Contents for Landice L Series
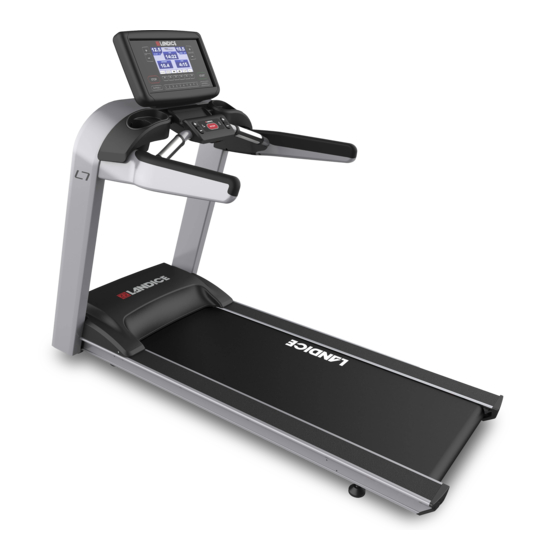
- Page 1 • • • 111 Canfield Avenue Randolph, New Jersey 07869 1-800-LANDICE FAX 973-927-0630 L-Series Home and Commercial Treadmill Diagnostic and Service Manual 2003 Version C/D.2 For Technical Service Call 1-(800)-LANDICE...
-
Page 2: Table Of Contents
Page 2-3 Table of Contents SECTION 1- Introduction Page 4 How to Use this Manual Page 5-14 Replica Landice Warranty Cards and Warranty Policy Page 15 Service Authorization Form Page 16 Time Allotted for Repairs Page 17-18 Tools Needed for Repairs... - Page 3 SECTION 4 –Servicing Landice Treadmills Page 57-59 Definitions of Components Page 60-62 Testing Components Page 63-64 Membrane Panel Bypass Test Page 65-68 Common Symptoms Page 69-87 Removal and Replacement of Components Page 88-91 Noises Page 92 Voltage Tests Page 93-94...
-
Page 4: How To Use This Manual
We are including an Index to further aid you in quickly finding what you need. If you find a problem not covered in this manual please call 1-800-LANDICE to talk to a Landice Service Technician. - Page 6 SERVICE LABOR For a period of 1 year, Landice will reimburse the selling dealer according to the terms, rates and conditions in effect at the time of service. A service authorization number must be obtained prior to performing service in order to qualify for service reimbursement.
- Page 7 TREADMILL PARTS All defective parts must be delivered prepaid to Landice where they will be replaced for a period of five years or 5,000 hours, whichever comes first. This warranty does not cover cosmetic damage, damage due to acts of God, accident, misuse, abuse, or negligence to the product.
- Page 8 TREADMILL PARTS: 5-YEARS All defective parts must be delivered prepaid to Landice where they will be replaced for a period of 5-years. This warranty does not cover cosmetic damage, damage due to acts of God, accident, misuse, abuse, or negligence to the product. This warranty is valid only in the United States and Canada.
- Page 9 Authorization numbers are given when the selling dealer or the service technician calls Landice prior to beginning work on the treadmill. This allows Landice to verify that the treadmill is within the labor warranty and also aids us in helping the technician troubleshoot the treadmill. Landice welcomes technicians to call us from the field and gives these calls the highest priority.
- Page 10 PRO-RATE SCALE FOR WEAR ITEMS The following pro-rate scale applies to all wear items on Landice L-Series Commercial Treadmills. L8/L9 L8/L9 WEAR PERIOD CHARGE TREADBELT DECK TREADBELT DECK DEALER PRICE DEALER PRICE DEALER PRICE DEALER PRICE $204.00 $140.00 $259.00 $162.00...
- Page 11 PRO-RATE SCALE FOR WEAR ITEMS The following pro-rate scale applies to all wear items on Landice L-Series Commercial Treadmills. L-Series LTD Treadmills sold after August 1, 2002 carry a 5-year parts warranty. Wear Items are pro-rated as follows: Up to 6 months –...
- Page 12 Landice will reimburse the selling dealer according to our flat rate labor schedule. If you are a service provider for Landice and do not sell our product, you have the option of billing us direct or you can bill the dealer that you’re providing service for. Generally, if our capped rate does not cover your labor charge you would bill the selling dealer.
- Page 13 Our policy requires that all defective parts be returned to Landice. All warranty parts will be billed to the dealer at dealer cost. Landice will credit this invoice upon receipt of defective parts. It is the dealer's responsibility to return the defective parts to Landice with a copy of the invoice or packing slip.
- Page 14 1 Year January 1, 2003 5 years 5 Years 1 Year International Treadmills *** Before November 1, 2001 13 Months 13 Months After November 1, 2001 3 Years 3 Years *** For information on International Warranties please contact LANDICE at 1-800-LANDICE...
- Page 15 • • • 111 Canfield Avenue Randolph, New Jersey 07869 1-800-LANDICE FAX 973-927-0630 SERVICE CLAIM FORM DEALER INFORMATION: Service Dealer / Dealer Name: Address City State Phone( Contact CUSTOMER INFORMATION Name Address City State Phone( Contact TREADMILL INFORMATION Model Type:...
-
Page 16: Time Allotted For Repairs
TIME ALLOTTED FOR REPAIRS L-Series Treadmills WORK PERFORMED TIME ALLOTTED Diagnosis at the time of repair 30 min Remove and Replace Drive Motor 30 min Remove and Replace Drive Belt 20 min Remove and Replace Elevation Motor 40 min (Includes Pot Calibration) Remove and Replace Upper Board 15 min Remove and Replace Membrane... - Page 17 RECOMMENDED TOOLS FOR SERVICING LANDICE TREADMILLS Deep socket set 3/8 drive with ratchet and extension: Must have 3/8, 7/16, 1 /2, 5/16, 9/16 socket. Combination wrench set: Must have 3/8, 7/16, 1 /2, 5/16, 9/16 #1, 2, and 3 Philips head screwdriver (or electric screwdriver)
-
Page 18: Digital Multimeter
The multi meter best s uited for found in both residential and commerci al dwelli ngs. diagnosing a treadmill wil l be able to measure: Landice treadmills come in both 110VAC and 220VAC AC voltage, DC vo ltage, Ohms and electrical continuity. versions. - Page 19 Section 2 – Installation IMPORTANT OPERATING SAFETY INSTRUCTIONS WARNING: Failure to observe the following operating instructions can result in serious injury! If you are suffering from any illness, condition, or disability which affects your ability to run, walk or exercise, do not use this product without consulting your doctor first. If you are suffering from any illness, condition, or disability which affects your ability to run, walk or exercise, do not use this product without supervision present.
-
Page 20: Grounding Instructions
DANGER To reduce the risk of electric shock, always unplug the treadmill from the electrical outlet immediately after using. Always unplug the treadmill before cleaning or removing the motor cover. WARNING To reduce the risk of burns, fire, electric shock, or injury to persons: Treadmill should never be left unattended when plugged in. - Page 21 DANGER! Improper connection of the equipment-grounding connector can result in a risk of electric shock. Check with a qualified electrician or serviceman if you are in doubt as to whether the product is properly grounded. Do not modify the plug provided with the product. If it will not fit in the outlet, have a proper outlet installed by a qualified electrician.
- Page 22 ELECTRICAL REQUIREMENTS FOR L-SERIES TREADMILLS 220 VAC CLUB TREADMILL 220V CLUB ELECTRICAL REQUIREMENTS: 220VAC , 60 Hz , 15 AMP - DEDICATED CIRCUIT & GROUND PLUG - NEMA 6-15P (PLUG) RECEPTACLE - NEMA 6-15R (RECEPTACLE) ABOVE IS DIAGRAM OF PLUG CONFIGURATION. 110 VAC HOME, LTD, &...
-
Page 23: Assembly Instructions
How to Install ASSEMBLY INSTRUCTIONS STEP 1 Lay the treadmill on the ground. Using a razor blade knife cut the box just above the brass staples along all sides of the box. DO NOT cut through the center of the box, as you could hit the treadmill. - Page 24 ASSEMBLY INSTRUCTIONS STEP 5 Install side cover screw Align the side frame cover beneath the end cap and install the Phillips head screw. Tighten the Phillips head screw until side cover aligns with endcap. STEP 6 Check drive belt tension Check the tension on the drive belt by placing the drive belt between your thumb and forefinger and twisting.
- Page 25 READING RACK INSTALLATION GUIDE 1. Begin by completely assembling the treadmill per the instructions in owners manual. 2. Place upright on bed per main assembly instructions. 3. Check that the membrane is seated correctly, it may have shifted in shipping. Do not install plastic end caps on treadmill yet.
- Page 26 L-SERIES TREADMILLS GENERAL DIMENSIONS Weight, L7 = approx. 280 pounds L8 = approx. 380 pounds L9 = approx. 380 pounds Recommended clearance around unit for safe and functional operation in a home ALLOW A MINIMUM CLEARANCE OF 18 INCHES ON EACH SIDE OF THE TREADMILL. ALLOW A MINIMUM CLEARANCE OF 4 FEET AT THE REAR OF THE TREADMILL.
- Page 27 Section 3- Parts Identification L8/L9 BED EXPLODED VIEW...
- Page 28 L7 BED EXPLODED VIEW L Series Upright...
-
Page 29: L-Series Upright
L-SERIES UPRIGHT EXPLODED VIEW... - Page 30 L SERIES MOTOR PAN EXPLODED VIEW...
-
Page 31: Parts List For L7/L8 Treadmills
PARTS LIST FOR EXPLODED VIEW L7 & L8 TREADMILLS Note: Always get Version number for electronic components to insure compatibility. MODEL DESCRIPTION PART NUMBER L8/L9 SIDE FRAME (R) 70284 SIDE FRAME (L) 70285 L8/L9 SIDE FRAME COVER(R) 70286 SIDE FRAME COVER(L) 70287 BED ENDCAP (R) 70294... - Page 32 L7/L8/L9 ELEVATION MOTOR (110V) 70088 ELEVATION MOTOR (220V) 70126 L7/L8/L9 ELEVATION CLEVIS 70049 L7/L8/L9 READING RACK ASSEMBLY 70346 L7/L8/L9 MEMBRANE PANEL(ET) 70248 MEMBRANE PANEL(CT) 70310 MEMBRANE PANEL(PT) 70279 MEMBRANE PANEL(ST) 70282 L7/L8/L9 DISPLAY BOARD(ET) 70252 DISPLAY BOARD(CT) 70308 DISPLAY BOARD(PT) 70281 DISPLAY BOARD(ST) 70329...
- Page 33 TRACTION STRIP 70005 TRACTION STRIP, WIDE (R) 70371 TRACTION STRIP, WIDE (L) 70372 DECK SPACER 70219 TREADBELT 70235 VFX DECK 70234 TAKE UP ROLLER 70237 VFX DECK POST 70216 DRIVE ROLLER 70236 DRIVE ROLLER SHEAVE CV-18-2 L7/L8/L9 BED END CAP SCREW 8-32x3/4_PPHTTW L7/L8/L9 #8 ZINC LOCK WASHER...
- Page 34 L7/L8/L9 ELEVATION POTENTIOMETER 71013 L7/L8/L9 ELEVATION NUT MISC L7/L8/L9 MOTOR BRUSH CAP MISC L7/L8/L9 MOTOR BRUSH, 110V 70222 MOTOR BRUSH, 220V 70223 L7/L8/L9 MOTOR BRUSH HOLDER MISC L7/L8/L9 SPEED SENSOR BRACKET 70067 L7/L8/L9 SPEED SENSOR 71007 L7/L8/L9 FLYWHEEL FLAT WASHER 1/4x1_FLAT_WASHER L7/L8/L9 ELEVATION CLEVIS...
- Page 35 COMMERCIAL MOTOR PAN (SCR MOTOR CONTROL BOARD)
- Page 36 L-SERIES 110V COMMERCIAL LOWER WIRE SCHEMATIC...
- Page 37 L-SERIES 220V COMMERCIAL LOWER WIRE SCHEMATIC...
-
Page 38: Led Configurations: Scr Lower Board
LED CONFIGURATIONS: SCR LOWER BOARD The SCR lower board is designed with diagnostic LED lights. The LED’s are color coded according to their specific function. Green indicates a properly operating treadmill; the green lights should always be ON when power is supplied to the treadmill. Yellow indicates a treadmill function. Red indicates a treadmill malfunction. - Page 39 SPD (yellow) – The SPD LED flashes on and off (relative to speed) when the speed sensor is operating properly. GRD (red) – The GRD (GRADE) LED should NEVER come on. It illuminates only when the elevation potentiometer becomes out of calibration. SERIAL (red) –...
- Page 40 L-SERIES SCR UPPER WIRE HARNESS WIRING DIAGRAM...
- Page 41 L-SERIES PWM MOTOR PAN (PWM MOTOR CONTROL BOARD)
- Page 42 L-SERIES HOME MOTOR PAN WIRING SCHEMATIC...
-
Page 43: Pwm Voltage Readings And Paths
PWM VOLTAGE READINGS AND PATHS A+ A- V+ P1 P2 IR M AX MIN... - Page 44 LED CONFIGURATIONS: PWM LOWER BOARD The PWM lower board is designed with two diagnostic LED lights. The LED’s are color coded according to their specific function. LED 1 (red) – This indicates a high current draw similar to the C.LIM LED on our SCR lower control board. LED 1 will only light if there is high current being used due to a possible worn out treadbelt and deck system or it can also light if the IR pot is out of adjustment.
-
Page 45: Relay Board Voltage Readings And Paths
RELAY BOARD VOLTAGE READINGS AND PATHS... - Page 46 LED CONFIGURATIONS: RELAY BOARD The RELAY board is designed with diagnostic LED lights. The LED’s are color coded according to their specific function. Green indicates a properly operating treadmill; the green lights should always be ON when power is supplied to the treadmill. Yellow indicates a treadmill function. Red indicates a treadmill malfunction.
- Page 47 L-SERIES HOME MOTOR PAN WIRING SCHEMATIC (PWM MOTOR CONTROL BOARD W/ RELAY ASSEMBLY)
- Page 48 PWM MOTOR CONTROL BOARD W/ RELAY ASSEMBLY...
-
Page 49: Pwm Upper Wire Harness Wiring Diagram
L-SERIES PWM UPPER WIRE HARNESS WIRING DIAGRAM... - Page 50 EXECUTIVE TRAINER LCD WIRING SCHEMATIC...
- Page 51 L-SERIES DISPLAY CONTROL PANELS & FEATURES PART 1 L-Series Sport Trainer Membrane Models That Use This Membrane: L7-ST, L8-ST, L7-LTD-ST, L8-LTD-ST, L7-CLUB-ST, L8-CLUB-ST. (All L7’s before L7-03229 and all L8’s before L8-01478) Production Time Frame: 1999 Electronics: : PWM motor pan on all Home Units, 110V SCR commercial motor pan for LTD’s and 110V CLUB’s, 220V SCR commercial motor pan for 220V CLUB units.
- Page 52 L-SERIES DISPLAY CONTROL PANELS & FEATURES PART 2 L-Series Pro Sports Trainer Faceplate Models That Use This Faceplate: L7-PST, L8-PST, L7-LTD-PST, L8-LTD-PST, L7-CLUB-PST, L8-CLUB-PST, L9-CLUB-PST(110V) & L9-CLUB-PST(220V) Production Time Frame: 2001-Present Electronics: : PWM motor pan on all Home Units, 110V SCR commercial motor pan for LTD’s and 110V CLUB’s, 220V SCR commercial motor pan for 220V CLUB units.
- Page 53 L-SERIES DISPLAY CONTROL PANELS & FEATURES PART 3 L-Series Cardio Trainer Membrane Models That Use This Membrane: L7-CT, L8-CT, L7-LTD-CT, L8-LTD-CT, L7-CLUB-CT, L8-CLUB-CT, L9-CLUB-CT(110V) & L9-CLUB-CT(220V). Production Time Frame: 1999-Present Electronics: PWM motor pan on all Home Units, 110V SCR commercial motor pan for LTD’s and 110V CLUB’s, 220V SCR commercial motor pan for 220V CLUB units.
- Page 54 L-SERIES DISPLAY CONTROL PANELS & FEATURES PART 4 L-Series Road Runner Membrane Models That Use This Membrane: L7-RR, L8-RR Production Time Frame: Estimated to begin in December, 2001 Electronics: PWM motor pan on all Home Units, See Wiring Diagrams. Settings Used in: Home Key Features: Closed Loop Treadmill (w/ speed sensor), Safety Lanyard, 0.5-12MPH Shifter Knob Speed and Elevation Control, 3 Built in Programs, 1 User Defined Program, Standard Wireless Heart-Rate Control, Dot-matrix LED Graphic Display.
- Page 55 CARDIO TRAINER / EXECUTIVE TRAINER ADDENDUM ACCUTRACK Contact Heart Rate Monitoring System™ The AccuTrack Contact Heart Rate Monitoring System™ can be used in place of the wireless chest strap to perform any of the following functions: • Monitor your Time in Zone •...
-
Page 56: Accessing Diagnostic Features On L-Series Treadmills
ACCESSING DIAGNOSTIC FEATURES ON L-SERIES TREADMILLS NOTE: The following information is for diagnostic and troubleshooting purposes and is meant to be used by authorized Landice service technicians ONLY and should not be made available to the general public. EXECUTIVE TRAINER PREV/3RD GREY CIRCLE BUTTON ON THE LEFT SIDE OF THE LCD SCREEN/START Reboots ET’s manufactured before December 2001... - Page 57 DRIVE MOTOR Provides power to Drive Belt to turn Pulley on Drive Roller to move Treadbelt. This gets its power from the PWM or SCR. Landice Drive motors are either 110v for 220v. DRIVE ROLLER W/ SHEAVE This is the Roller at the front of the Treadmill. The Sheave (pulley) is pressed onto the roller and allows transfer of movement from Drive Belt to Treadbelt.
- Page 58 FACE PLATE This overlay is found on our Sports Trainer, Pro Sports Trainer, and CRT models and is screwed onto the Upper Display Board. FRAMES (SIDE) One on either side, these connect with the Deck Slats and Motor Pan to form the frame of the machine. FRAME COVERS (SIDE) These sit on top of the Frame Rails and keep Deck in place.
- Page 59 Recommended Treadbelt lubricant for Landice Commercial Treadmills SPEED SENSOR Landice uses a magnetic speed sensor to receive accurate speed readings. Readings are taken directly from the flywheel on the motor and sent to the Relay Board or SCR. Distance between the sensor and the flywheel is critical but the sensor is unaffected by dirt or dust build-up (unlike optical sensors).
- Page 60 1. MOTOR COMPONENTS DRIVE MOTOR: Generation Test – all Landice drive motors (110 & 220) are direct current or DC. A DC drive motor can produce (generate) a DC voltage when it’s manually rotated. The DC output is linear to the speed the motor is rotated.
- Page 61 ELEVATION POTENTIOMETER Remove the elevation pot from elevation motor but do not disconnect the brown, orange and blue wires. Using a digital voltmeter set to ohms (Ω), place meter probes on the pot prongs with the (orange) and (brown) wires. You are measuring resistance so you do not need to observe polarity. Ω...
- Page 62 SPEED SENSOR The speed sensor can be checked for proper operation by entering the Open Loop Speed Mode. (See page 56) There is a yellow SPD LED mounted to either the relay board (HOME PWM models) or the SCR board (LTD and CLUB models). The light will flash ON and OFF when you rotate the drive motor flywheel slowly by hand.
- Page 63 START or ON. (Note on page 2 where to locate these pins on various Landice display boards) If the membrane is bad the treadmill will turn on and read “SAFE.” 6. If it is necessary, replace the damaged membrane panel.
- Page 64 JUMP EXECUTIVE TRAINER START STOP PAUSE DISP+ DISP- FAST SLOW JUMP DOWN PROG CARDIO TRAINER CARDIO SPARE SHIELD (GROUND) ENGLISH METRIC PAUSE DISP+ DISP- FAST SLOW JUMP DOWN ENGLISH METRIC PRO TRAINER GROUND STATIC...
- Page 65 COMMON SYMPTOMS Symptom: Treadbelt feels like it’s slipping or grabbing when walked on. Possible Cause: Loose drive belt or treadbelt. Adjust as per manual. Remember to adjust only till slipping stops. DO NOT OVERTIGHTEN Possible Cause: Worn treadbelt and/or deck. If treadbelt or deck is worn it will cause excessive friction and the user will feel like belt is slipping or grabbing.
- Page 66 Landice has adjustment on the front roller to correct for this type of problem. The front roller will not be damaged by the adjustment providing these steps are followed. If this doesn’t correct problem please call 1-800-LANDICE.
- Page 67 IR POTENTIOMETER ADJUSTMENTS, PWM ONLY: IR = I (amperage) R (resistance) The IR potentiometer that is located next to the MAX speed potentiometer on the PWM motor control board is used to adjust the time it takes the PWM to react to a load or amperage spike. When the user steps onto the treadbelt a load is introduced to the system which creates an amperage spike.
- Page 68 SPEED CALIBRATION: L-SERIES PWM TREADMILLS 1. Enter the O.L.S. Mode (Open Loop Speed) by pressing “MENU” and “START” simultaneously for Executive Trainers and “FAST” and “START” for all other models. 2. Adjust the max speed first. Bring the set speed to 12mph. Let actual speed stabilize. 3.
- Page 69 2. Make a note of serial number, model (L7, L8, Home, LTD, or Club) and type (Sport, Pro, Cardio, CRT, or Executive). Landice tracks all information from this serial number and it must be given when requesting parts or technical assistance.
- Page 70 CHOKE- LTD and Club ONLY 1. Remove Red wire. This connects Choke to SCR. 2. Remove Purple wire. This connects Choke to SCR. 3. Reverse to install. CAPACITOR- LTD and Club ONLY 1. Remove White wire. This connects Capacitor to SCR. 2.
- Page 71 UPPER DISPLAY BOARD 1. Remove screws from upright on either side of display. 2. Remove Caps from Display. 3. Display is attached to upright with Velcro. Pull from top of display to remove. 4. Remove Membrane from Display. 5. Disconnect main wire harness clip. (See Diagram below) IMPORTANT:Remove the display board from the membrane BEFORE removing the wire harness from the defective display board.
- Page 72 DRIVE MOTOR 1. Elevate treadmill to 15%. Unplug power cord. 2. Remove motor cover screws (4) 3. Disconnect white, green, and black wires from MCB. 4. If applicable remove green ground wire from frame. 5. Remove drive belt tension adjustment bolt by removing nut. Nut is located on bottom of motor pan.
- Page 73 2. Install new Elevation Motor. A. Remove your toolbox and set the treadmill on the ground. B. Align the Elevation Motor with the Clevis mount and install the 3/8” diameter mounting pin. Insert the hitch pin. C. Reconnect the Elevation Motor wires. D.
- Page 74 ELEVATION POTENTIOMETER CALIBRATION ELEVATION POTENTIOMETER ELEVATION MOTOR P/N #71013 P/N #70088 110volt P/N #70126 220volt ADJUSTMENT SHAFT ELEVATION NUT NOTE: ELONGATED BRACKET HOLES ARE FOR POTENTIOMETER FINE ADJUSTMENT. Enter Diagnostic Mode: Press OFF to turn treadmill off. L-Series ET’s – Hold MENU & START All other L-Series Treadmills - Hold DISPLAY (or up arrow Δ) &...
-
Page 75: Elevation Leg Assembly
ELEVATION LEG ASSEMBLY 1. Remove motor cover screws (4 screws) and remove motor cover. 2. Remove set screws (2) holding elevation motor to elevation leg assembly. 3. Remove elevation pins from elevation gear nut. 4. Carefully turn treadmill onto its side to gain access to elevation leg mounting brackets. 5. - Page 76 1. Remove Frame Rail Cap from left side (4 Philips Head Screws) and rear (2 Philips Screws) 2. Remove End Caps ( 2 Philips Head Screws) 3. Remove 9/16 Roller Bolts (2 Bolts). Note: See section on Tracking and Tensioning 4.
- Page 77 DISPLAY CONTROL PACKAGE (DCP) INSTALLATION Attach Heart Rate Control (HRC) module and bracket assembly to left upright leg. You will need to remove the control panel attachment screw in order to mount bracket. Next route the Pulse Bracket through the end cap bracket and reassemble it to the treadmill. The HRC wire harness needs to be routed between the end cap bracket and control panel frame.
- Page 78 INSTALLATION OF HEART RATE CONTROL COMPONENTS Step 1: UNPLUG the treadmill. Step 2: Remove the left-hand control panel end cap. Step 3: Remove the left-hand upright cover. Step 4: Remove the membrane panel / display board assembly. Step 5: Mount the heart rate receiver board & mounting bracket to the left-hand upright leg. The receiver is already secured to the bracket.
- Page 79 Step 6: Route the harness between the control panel end cap mounting bracket and the upright leg. Harness passes under end cap bracket. Step 7: Attach the HRC harness to the upper display circuit board. Harness connects to upper circuit board.
- Page 80 Before attempting to troubleshoot the “receiving portion” of the HRC feature, CONFIRM THE TRAMSITTER BELT IS WORKING PROPERLY. You can test the user’s transmitter belt on another Landice treadmill or a Polar® wristwatch. If the transmitter is faulty, replace battery or return to Landice for replacement (if treadmill is under warranty).
- Page 81 L7 MEDICAL RAIL FIELD INSTALLATION PROCEDURES Tools needed for this installation: Electric / Battery powered drill Drill bit size 5/16” & 1/4” Open end / combination wrench size – 7/16 Allen wrench size – 3/16 (should be included with hardware kit) 1.
- Page 82 L8 MEDICAL RAIL INSTALLATION INSTRUCTIONS 1. Insert the side rail into the upper rail clamp and tighten the bolts using a 3/16” allen wrench. 2. Fit the side rail to the bottom rail clamp. 3. Use a soft mallet to firmly set the rails inside the clamp.
- Page 83 L8 MEDICAL RAIL INSTALLATION INSTRUCTIONS PART 2 4. Again, use a 3/16” allen wrench to tighten the rail clamp bolts. 5. Line up the upright side covers and firmly snap them into place. 6. Place the plastic endcaps on the top corners of the control panel.
- Page 84 L9 HAND RAIL INSTALLATION INSTRUCTIONS 1. Remove upright side covers. 2. Slide upright legs onto the three bolts on either side of the frame.
- Page 85 L9 Hand Rail Installation Instructions PART 2 3. Insert the fourth bolt (taped inside one of the upright legs) on either side of the frame. 4. Tighten the four bolts on each side using a 7/16” socket wrench. 5. NOTE: The two bottom holes on either side are unused on L9 models.
- Page 86 L9 Hand Rail Installation Instructions PART 3 6. Insert the side rail into the upper rail clamp and tighten the bolts using a 3/16” allen wrench. 7. Fit the side rail to the bottom rail clamp. 8. Use a soft mallet to firmly set the rails inside the clamp.
- Page 87 L9 Hand Rail Installation Instructions PART 4 9. Again, use a 3/16” allen wrench to tighten the rail clamp bolts. 10. Line up the upright leg side covers and firmly snap them into place. 11. Place the plastic endcaps on the top corners of the control panel.
- Page 88 NOISES Many times a treadmill will tell you what’s wrong with it by the noises it makes. We strongly recommend the use of an automotive stethoscope. Service Tip: Treadmill making noise but can’t tell from where. Solution: Must isolate all moving parts. 1) Unplug treadmill.
- Page 89 7. Is there excess Slip Cote? If you see Slip Cote oozing from sides of belt or off end of deck remove belt and wipe down deck, belt, and rollers. 8. Is it a commercial treadmill? Landice uses a stiffer belt on Club models to increase treadbelt life. These stiffer belts make more noise and are considered normal.
- Page 90 Decks and VFX - Decks are solid pieces of wood with a phenolic coating that rest on the VFX cushioning system. 1. The deck can make a squeaking noise when the VFX hardware is not properly tightened or lubricated. You can test for this by bouncing on the deck when the machine is not running. 2.
- Page 91 Drive Motors- 1. Motor Brushes- a. Are they worn so that less than 3/8 of an inch is left? Replace Brushes. b. Are they wearing on an angle? Check that brushes are seated correctly and that motor brush holder and spring are installed properly. 2.
- Page 92 VOLTAGE TESTS Variance in voltage affects treadmill performance 1. Confirm incoming line voltage: 120/220VAC – Measuring between Hot and Neutral on relay board. PWM Units: Measuring between L1 and L2 wires on PWM board. Measuring between Hot and Neutral on SCR board. SCR Units: For 115V and 230V rated PWM’s acceptable variance is + or - 8%.
-
Page 93: Diagnostic Guide
This means you’ll get an LS or L5 error if your PWM is blown, not an OS or 05 error. This is a safety feature on all Landice Home treadmills with PWM Motor Control Boards. The SCR Motor Control Boards also have internal protection to prevent an over speed condition from occurring due to an internal component failure. - Page 94 Finally, in the rarest of cases, on home treadmills, a faulty relay board can cause an OS. To verify this, using a digital voltmeter, and with the treadmill turned on, measure the DC voltage between V+ and P1 on the PWM board. The reading should be between 6-7VDC. Also measure the DC voltage between P1 and P2 on the PWM.
-
Page 95: L-Series Executive Trainer Error Codes
L-SERIES EXECUTIVE TRAINER ERROR CODES: The Executive Trainer software is designed with special error codes to display when experiencing a system failure. Here is a list of error codes, their meanings and diagnostics. Error Code: SAFETY SHUTDOWN / Loss of signal (WITH belt movement) Meaning: upper display is not receiving signal from speed sensor. - Page 96 This screen will be displayed in diagnostic mode after OK button is pressed. Diagnostic Mode: you must press the OK button in order to proceed with troubleshooting the elevation system failure. Error Code: SAFETY SHUTDOWN / Over Speed Meaning: The actual belt speed is exceeding the user’s set speed. Example: User sets speed to 1.0mph, the actual belt speed registers 2.0mph.
- Page 97 Instructions for Rebooting Executive Trainer Software Executive Trainers with Version 2.0 Software or older (circa 12/2001). While the treadmill is off, you must hold down three (3) buttons simultaneously: PREV The third circular gray button down on the left side of the LCD screen. START Release the buttons after you see “Booting”...
- Page 98 Symptom: Executive Trainer LCD is too dim or too bright Possible Cause: Needs to be adjusted Follow setup menu to adjust contrast of LCD. If display is still bad (too bright / too dim), continue to step 1 STEP 1: Make sure that the power connector is securely connected from the LCD Screen to the display board.
- Page 99 • • • 111 Canfield Avenue Randolph, New Jersey 07869 800-LANDICE FAX 973-927-0630 L – Series Commercial Diagnostic Flow Charts L7, L8, & L9 EXECUTIVE TRAINER CARDIO TRAINER PRO TRAINER PRO SPORTS TRAINER SPORT TRAINER TECHNICAL SUPPORT CALL 1-800-LANDICE...
- Page 100 Upper display fails to light when START is pressed. Plug Treadmill into wall outlet. 1. No power from outlet. 2. Loose wire from line cord to SCR. 3. Blown SLOW-BLOW fuse on SCR. Is green +12V lamp on P/N MDA-20 (110V) the SCR lit? 4.
- Page 101 Display lights up; treadbelt does not move; L5 error. 1. Red Saftey Lanyard is not in the correct Plug Treadmill into wall outlet and position. press START. Is "SAFE" displayed? 2. Replace display board. 1. Check wiring harness connection between Is red SERIAL lamp on the SCR lit? Upper display and SCR.
- Page 102 Display lights up; treadbelt moves; speed does not increase; L5 error. Press START button. 1. Disconnect the speed sensor from the SCR. Is yellow SPD lamp on the SCR lit? 2. Is the yellow SPD lamp on the SCR lit? Replace speed sensor.
-
Page 103: Elevation System Failure
Elevation system failure; "PO" error. Place the treadmill in Diagnostic Mode: 1. Turn OFF the treadmill. 2. L7 & L8 Executive Trainer -Press MENU and START simultaneously. Grade pot out of Δ calibration or failed. 3. For all other L7 & L8's - Press DISPLAY (or UP ARROW - Recalibrate pot. - Page 104 • • • 111 Canfield Avenue Randolph, New Jersey 07869 800-LANDICE FAX 973-927-0630 L - Series Home Treadmill Diagnostic Flow Charts L7 & L8 EXECUTIVE TRAINER CARDIO TRAINER PRO TRAINER PRO SPORTS TRAINER SPORT TRAINER TECHNICAL SUPPORT CALL 1-800-LANDICE...
- Page 105 Upper display fails to light when START is pressed. 1. Plug a lamp into the wall outlet to confirm it Is the green AC PW R it is live. light on the relay board 2. Check line cord condition and connection. lit? 3.
- Page 106 Upper display lights up; treadbelt moves; speed will not increase; L5 error. Adjust speed sensor: Check speed sensor alignment. 1. Use 1/2" wrench and loosen It should be within 1/16" of the flywheel the two lock nuts securing and parallel to the flywheel. sensor to it's bracket.
- Page 107 Upper display lights up but treadbelt doesn’t move: L5 Error 1. Enter Open Loop Speed Mode. (See Page 56) Attach safety lanyard. 2. Press FAST until 12.0mph is displayed. Does four digit display window read SAFE? Is the green LED2 light on the PWM lit? Is the green BELTSW light on the relay board lit? 1.
- Page 108 Elevation system not functioning or PO (Pot Out) error code displayed in the two digit speed window. Enter the DIAGNOSTIC MODE. Proceed with re-calibrating Does elevation system work properly? elevation potentiometer. (Pg. 74) Unplug 6 pin elevation motor connector from Relay. Which button or direction has the problem? DOWN Hold the DOWN button on the Display.
- Page 109 • • • 111 Canfield Avenue Randolph, New Jersey 07869 800-LANDICE FAX 973-927-0630 L - Series Home Treadmill Road Runner Diagnostic Addendum L7 & L8 Road Runner TECHNICAL SUPPORT CALL 1-800-LANDICE...
- Page 110 L-SERIES ROAD RUNNER LOWER WIRING DIAGRAM...
- Page 111 L-SERIES ROAD RUNNER UPPER WIRING SCHEMATIC...
- Page 112 ROAD RUNNER SUPPLEMENTAL ASSEMBLY INSTRUCTIONS (Follow these instructions in conjunction with Step 10 on page 3 of your manual.) On the Road Runner, there are three wire harnesses that must be connected after the upright assembly is mounted to the frame of the treadmill. The main harness (9 multicolored wires in a gray sheath) should be routed under the elevation motor and secured with the supplied harness restraint clip or wire tie.
- Page 113 Route the CD changer harness behind the elevation motor, then around the back of the CD changer. Insert the connector into the side of the changer. It will snap when properly connected. Examine all wires around the elevation motor and drive motor to be sure they will not contact any moving parts.
- Page 114 ROAD RUNNER DIAGNOSTIC ADDENDUM The following information should be used IN ADDITION TO standard PWM diagnostic information when diagnosing the Road Runner. Software version display: -Hold elevation lever in UP position and turn key from OFF to PAUSE. Version is displayed in main window.
- Page 115 Speed and Grade Diagnostics: -Hold speed lever in the FAST position and turn key from OFF to PAUSE. -Belt begins moving at minimum open loop speed. -Speed and elevation levers function. -Press TIME to view commanded grade (displays either UP or DOWN). -Press DISTANCE to view actual grade.
- Page 116 SOUND ONLY COMES FROM ONE OF THE TWO SPEAKERS Check speaker harness connections on the back of the display board. Swap the left and right connections. If the same speaker doesn’t play, the speaker is bad. If the other speaker doesn’t play, the display board is bad.
- Page 117 TRACKING AND TENSIONING Proper tensioning of the Treadbelt and Drive Belt are necessary to insure smooth operation and long life for your treadmill. As these components may stretch as part of their normal break in period it is one of the few things we ask our customers to do in maintenance of their treadmills.
- Page 118 TREADBELT TRACKING The Treadbelt is TRACKED by means of two adjustment bolts (9/16" wrench) located at rear of treadmill. By tightening the side the belt is closest to and loosening the opposite side by the same amount, you change the alignment of the rear roller without changing overall tension. Adjustments should be made with treadmill running, and should be made in 1/4-turn increments.
- Page 119 Example: Treadbelt is tracking to the right hand side. Adjust right hand side of drive roller by moving it towards the front (motor side) of treadmill. The Treadbelt will move towards the center. Recommended Maintenance Home Models- Vacuum around and underneath the treadmill on a monthly basis. Vacuum or wipe down the deck area between the treadbelt and frame.
- Page 120 When to lubricate: Landice L-Series institutional treadmills should be inspected on a monthly ba- sis. By sliding your hand underneath the treadbelt you can feel if the surface of the deck is dry. If the deck surface feels dry then the treadmill should be lubri- cated.
- Page 121 INSTITUTIONAL DRIVE MOTOR MAINTENANCE Yearly Institutional Maintenance: Replace the Drive Motor Brushes. Failure to do so will result in premature Drive Motor failure. 1. Unplug Treadmill. 2. Remove Motor Brush caps (2). 3. Remove Motor Brushes and inspect. They should be replaced if 1/4 inch or less. Inspect motor Commutator for wear (Black-scoring present on copper segments) Try to dress out (clean up) Commutator with a Commutator stone or emery cloth.
- Page 122 Index Description Page Number Assembly Instructions DCP (Display Control Package Treadmill 23,24 Medical Handrails, L7 Medical Handrails, L8 82,83 Medical Handrails, L9 84-87 Reading Rack Accutrack Contact Heart Rate 5V LED Defintion Picture Troubleshooting 12 VDC Power Supply Definition Picture 41,42 Removal/Replacement Troubleshooting...
-
Page 123: Drive Belt
Pro-rating Troubleshooting 38,39,65,66,88-90 Diagnostic Features Accessing Diagnostic Flow Charts Commercial Units 99-103 Home units 104-108 Digital Multimeter 12, 14 Dimensions Treadmill Display Panels Pictures of ST,PT,CT,ET 51-54 Drive Belt Definition Picture 24, 30, 117 Tensioning Troubleshooting 65, 66 Drive Motor Definition Picture(Motor Pan) 30,35,41... -
Page 124: Error Codes
Picture 30,35,41 Removal/Replacement 72,73 Testing Troubleshooting 38,46,90,103,108 Wiring 36,37,42,47,74,110 Elevation Potentiometer Calibration Definition Picture Testing Troubleshooting 39,103,108 Error Codes 93,94,101-103,106-108 Face Plate Definition Removal/Replacement Testing 62, 105 Frame (Side) Definition Picture 27, 28 Frame Covers (Side) Definition Picture 27, 28 Fuses Picture 35,41,48... -
Page 125: Parts List
Wiring LED LIGHTS 38, 39 RELAY Maintenance 119-121 Medical Rails Installation-L7 Installation-L8 82,83 Installation-L9 84-87 Membrane Panel Button codes Bypass Test 63-64 Definition Picture 51-54 Removal/Replacement Testing Troubleshooting Noises 88-91 O5 (OS) Error Code 93,94,96 Parts List 31-34 PO Error Code 95,96,103,108 Power Cord (Line Cord) Removal/Replacement... -
Page 126: Speed Calibration
LED Lights Picture Removal/Replacement Testing Troubleshooting 105-108 Wiring 42,47 Voltage Road Runner Installation (Supplemental) 112, 113 Troubleshooting 114-116 Safety Lanyard Definition Troubleshooting 67,96,101,107 Safety Shutdown Error Code 95,96 (Executive Trainer Only) SCR Motor Control Board Definition LED Lights 38,39 Picture Removal/Replacement Testing Troubleshooting... -
Page 127: Upper Display Board
Treadbelt Cleaning 119,120 Definition Picture 27,28 Pro-rating Removal/Replacement Tracking/Tensioning 117, 118 Troubleshooting 66,88,89,118 Upper Display Board Definition Executive Trainer LCD Wiring Picture Removal/Replacement Troubleshooting 67,100,101,105,107,108 Testing Uprights (Frame) Definition Picture Upper Wire Harness Definition Troubleshooting 39,100,101,105-108 VFX System Definition Picture 27,28 Removal/Replacement (treadbelt/deck)