Epson EPL-6200 Service Manual
A4 monochrome page printer
Hide thumbs
Also See for EPL-6200:
- Reference manual (513 pages) ,
- Network manual (180 pages) ,
- Setup manual (12 pages)

Related Manuals for Epson EPL-6200


Summary of Contents for Epson EPL-6200
- Page 1 SERVICE MANUAL ROSCO A4 Monochrome Page Printer EPSON EPL-6200/EPL-6200L SEPG03002...
- Page 2 SEIKO EPSON CORPORATION. All effort have been made to ensure the accuracy of the contents of this manual. However, should any errors be detected, SEIKO EPSON would greatly appreciate being informed of them.
- Page 3 1. REPAIRS ON EPSON PRODUCT SHOULD BE PERFORMED ONLY BY AN EPSON CERTIFIED REPAIR TECHNICIAN. MAKE CERTAIN THAT THE SOURCE VOLTAGES IS THE SAME AS THE RATED VOLTAGE, LISTED ON THE SERIAL NUMBER/RATING PLATE. IF THE EPSON PRODUCT HAS A PRIMARY AC RATING DIFFERENT FROM AVAILABLE POWER SOURCE, DO NOT CONNECT IT TO THE POWER SOURCE.
-
Page 4: Product Description
It may Provides preventive maintenance procedures and the lists of also provide additional information that is related to a specific Epson-approved lubricants and adhesives required for servicing subject, or comment on the results achieved through a previous the product. -
Page 5: Safety Precautions
Safety Precautions Internal Laser Radiation To prevent accidents during a maintenance procedure, strictly observe the Warnings and Cautions and never depart from the instructions given in this document. Do not do anything that is dangerous even if not specifically described in this manual. In work operations, always take great care to ensure safety in consideration of not only Semiconductor Laser Specifications the precautions described below but also general safety precautions. - Page 6 Laser Safety and Caution Labels Warning labels and caution labels are affixed to this printer for accident prevention. In maintenance work, check that the labels are free from peeling and soiling. Laser safety label Laser caution label As shown below, a laser safety label is stuck on the rear panel of the printer beside As shown below, a laser caution label is stuck on the inside of the printer.
- Page 7 Revision Status Revision Date of Issue Description September 5, 2003 First release...
-
Page 8: Table Of Contents
1.4.2.2 USB Interface ..................40 1.1.2.2 “EPL-6200L” Differences from EPL-6100L ........16 1.4.2.3 Type B Interface (Not Available with EPL-6200L)......40 1.1.2.3 Differences between EPL-6200 and EPL-6200L ........ 16 1.5 Control Panel (EPL-6200)................... 41 1.1.3 Other (Only with EPL-6200L)..............17 1.5.1 External Appearance and Names of Parts .......... - Page 9 2.3.1 Operation Overview of the Main Control Circuit Board......94 2.1 Overview ......................68 2.3.1.1 Main Control Circuit Board (C533 MAIN) for EPL-6200 ....94 2.1.1 EPL-6200 Major Components ..............68 2.3.1.2 Main Control Circuit Board (C533Main) for EPL-6200L ....98 2.1.2 EPL-6200L Major Components ..............
- Page 10 3.6.7 Black Stripes or Black Bands ..............127 4.5.5 Cooling Fan Motor ................... 155 3.6.8 Offset Image ..................... 128 4.5.6 Paper Tray Empty Sensor (EPL-6200 only)..........156 4.5.7 Paper Feed Solenoid ................. 157 Chapter 4 Disassembly and Assembly 4.5.8 Paper Feed Clutch Gear ................158 4.1 Overview ......................
- Page 11 6.1.3 Cleaning of Paper Feed Rollers ..............174 Chapter 7 Appendix 7.1 Connectors......................176 7.1.1 Connectors on Main Board Assy (EPL-6200).......... 176 7.1.2 Connectors on Main Board Assy (EPL-6200L) ........177 7.1.3 Connector Assignment Diagram (Overall) ..........178 7.2 Circuit Diagrams ....................179 7.3 Exploded Diagrams ...................
-
Page 12: Chapter 1 Product Description
C H A P T E R PRODUCT DESCRIPTION... -
Page 13: Outline
Note : The engine itself supports True 1200 dpi, but 1200 dpi is not supported with EPL-6200L. With EPL-6200, the standard paper supply consists of the cassette-like universal paper tray (250 sheets) and manual feed tray (one sheet). EPL-6200 supports an optional 500-sheet lower cassette (A4 size). - Page 14 Two standard interfaces Max. IEEE1284 compatible parallel interface supporting ECP. Exclusive RAM DIMM for EPSON (Same as for EPL-6100) USB interface (USB revision 1.1, supporting USB ID). Equipped with one Type B interface slot (Level 3 supported) Data compression technology...
- Page 15 EPSON EPL-6200/EPL-6200L Revision A SOFTWARE FEATURE (ONLY WITH EPL-6200) OTHER FEATURE (ONLY WITH EPL-6200L) Printer status and printer environment are monitored by bidirectional EJL and Toner save image is made by Printer Driver. ESC/Page. Physical engine offset setting function (It is set by printer driver) The following modes and resolution are supported.
-
Page 16: Differences Between Models
New type OPC drum Not interchangeable 1.1.2.3 Differences between EPL-6200 and EPL-6200L Toner CSIC Provided Not provided Related errors added Table 1-6. Differences between EPL-6200 and EPL-6200L Font vendor AGFA Bitstream Item EPL-6200 EPL-6200L Standard Optional Font, Program... -
Page 17: Other (Only With Epl-6200L)
EPSON EPL-6200/EPL-6200L Revision A 1.1.3 Other (Only with EPL-6200L) 1.1.3.1 Restrictions on Use of EPL-6200L The printer itself cannot print the Status Sheet. When the printer is connected to a parallel interface, printing via devices such as a printer switch, LAN-Parallel converter, or USB-Parallel converter is not guaranteed. -
Page 18: Basic Specifications
EPSON EPL-6200/EPL-6200L Revision A 1.2 Basic Specifications 1.2.2 Printer Basic Specifications Resolution: 1.2.1 Process Specifications Table 1-8. Resolution Printer Type Model Resolution Note Semi-conductor laser beam scan and dry single-component non-electromagnetic EPL-6200 600 dpi/1200dpi 1200 dpi is by half speed control... - Page 19 EPSON EPL-6200/EPL-6200L Revision A Normal paper (including labels and transparencies) Thick paper Table 1-10. Continuous Printing Speed with Plain Paper (Unit: ppm or more) Table 1-11. Continuous Printing Speed with Thick Paper (Unit: ppm or more) EPL-6200 EPL-6200L EPL-6200 EPL-6200L...
- Page 20 EPSON EPL-6200/EPL-6200L Revision A Thick paper ppm control For thick paper printing, sheets of paper is fed at wider intervals (ppm Down) as described below to prevent temperature rise at both ends of the fuser unit. The ppm Down control will be started after a lapse of 100 seconds from the start of Thick Paper printing.
-
Page 21: Revision A
Paper Type and Paper Size Thickness * Paper Feed: 180 sheets Standard paper: FX-P Paper: A4 64 g/m Table 1-12. Paper Feed with “EPL-6200” 75 g/m Standard paper: XEROX 4024DP 20lb: Letter Feedable Paper Plain paper or regenerated paper: Paper Source... - Page 22 EPSON EPL-6200/EPL-6200L Revision A Available Paper Sizes, Paper Types, and Paper Orientation Table 1-14. Available Paper Sizes, Paper Types, and Paper Orientation EPL- Table 1-14. Available Paper Sizes, Paper Types, and Paper Orientation EPL-6200 6200L Dimensions Paper EPL- Paper Size...
- Page 23 EPSON EPL-6200/EPL-6200L Revision A Envelope Orientation Output Paper Capacity Table 1-16. Output Paper Capacity: Standard ↑ Output paper capacity * 100 sheets Feeding Paper sizes All sizes which can be fed through the printer body Direction (Regular or custom sizes)
- Page 24 Stand Alone Outline Dimensions and Weights Table 1-19. Stand Alone Outline Dimensions and Weights of “EPL-6200L” Stand Alone Outline Dimensions and Weights Width Depth Height Weight Table 1-17. Stand Alone Outline Dimensions and Weights of “EPL-6200” (mm) (mm) (mm) (kg) Width Depth...
- Page 25 200 V 200 V Regulations (p.31)”. 100 V 12 0V 100 V 120 V System System Current Consumption (EPL-6200) Maximum current rated 9.2 A 8.0 A 4.5 A 9.2 A 8.0 A 4.5 A Lower cassette: 5 V/ 0.03 A...
-
Page 26: Paper Specification
EPSON EPL-6200/EPL-6200L Revision A 1.2.3 Paper Specification • Four-leaf printed postcard, postcards made for inkjet printing, or press sealed postcards 1.2.3.1 Paper Type • Iron print coated paper (for inkjet or laser printing) • Sheets deteriorate or discolor by heat of the Fuser Unit of approximately Standard Paper °... -
Page 27: Printable Area
NOTE 1: Based on use of paper taken from a newly opened package, that is, free from curls and any deterioration. 2: This reliability also applies to 1200 dpi printing with EPL-6200. 3: This reliability applies to all the relevant paper feeders. -
Page 28: Durability
EPSON EPL-6200/EPL-6200L Revision A Printing Start Position Accuracy Skew (With standard paper fed from Paper tray or Lower cassette) Table 1-26. Skew Table 1-25. Printing Start Position Accuracy Scanning Direction Simplex: A4 Duplex: A4 Simplex Duplex ±1.59 mm ±2.12 mm... -
Page 29: Operating Conditions (Including Consumables)
EPSON EPL-6200/EPL-6200L Revision A 1.2.5 Operating Conditions (Including Consumables) Upper value: EPL-6200 Ambient Temperature and Humidity Conditions (Lower value): EPL-6200L Table 1-29. Ambient Temperature and Humidity Conditions Temperature (°C) Humidity (%RH) Others ∼ ∼ Printer is under operation No condensation ∼... -
Page 30: Storage And Transport Of The Printer Main Unit And Optional Products (Consumables Packaged)
EPSON EPL-6200/EPL-6200L Revision A 1.2.6 Storage and Transport of the Printer Main Unit and 1.2.7 Electrical Features Optional Products (Consumables Packaged) Fast Transient / Bursts (AC Line Noise) IEC 61000-4-4 compliance Temperature and Humidity Conditions Voltage 1 k: no malfunction occurs such as defective image quality. -
Page 31: Compliance With Standards And Regulations
EPSON EPL-6200/EPL-6200L Revision A 1.2.8 Compliance with Standards and Regulations Table 1-33. Safety Standards Model Name Applicable Standards Table 1-31. Safety Standards 100V VCCI Class B Model Name Applicable Standards FCC (47CFR) Part15 Subpart B Class B 110V-120V 100V IEC60950 (1998) compliant ICES-003: Issue3 class B (C108.8-M1983) -
Page 32: Consumable Components
EPSON EPL-6200/EPL-6200L Revision A 1.2.9 Consumable Components 1.2.9.2 Packing Storage and Transport Environments Temperature and Humidity Conditions 1.2.9.1 Specifications Table 1-35. Temperature and Humidity Conditions Table 1-34. Consumable Specifications Conditions Temperature Humidity Warranty Period Initial Size Weight ∼ ∼ Normal 35°C... -
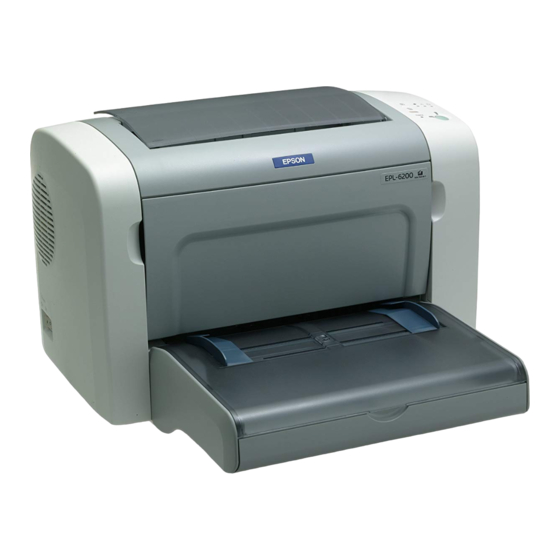
Page 33: External Appearance And Parts Name
Revision A 1.3 External Appearance and Parts Name 1.3.1 Overall Dimensions of EPL-6200 Figure 1-6 (p.33) to Figure 1-9 (p.33) show the overall dimensions of EPL-6200. Figure 1-8. Right Side View with Lower Cassette installed Figure 1-6. Front View of EPL-6200 Figure 1-9. -
Page 34: Overall Dimensions Of Epl-6200L
EPSON EPL-6200/EPL-6200L Revision A 1.3.2 Overall Dimensions of EPL-6200L Figure 1.3.1 (p.33) to Figure 1-11 (p.34) show the overall dimensions of EPL-6200L. Figure 1-10. Right Side View with MP Tray and Output Tray in Use Figure 1-11. Top View Product Description... -
Page 35: Names Of Parts Of Epl-6200
Type-B Interface Slot Cover Duplex Unit (option) Cover 1 USB Interface Connector Duplex Unit (option) Cover 2 <Top View> <Left Side View> Figure 1-13. EPL-6200 Names of Parts 2 Figure 1-12. EPL-6200 Names of Parts 1 Product Description External Appearance and Parts Name... - Page 36 <View with Lower Cassette Unit installed> <Rear View> <View with Covers opened> <View with Duplex Unit and Lower Cassette Unit installed> Figure 1-15. EPL-6200 Names of Parts 4 Figure 1-14. EPL-6200 Names of Parts 3 Product Description External Appearance and Parts Name...
-
Page 37: Names Of Parts Of Epl-6200L
EPSON EPL-6200/EPL-6200L Revision A 1.3.4 Names of Parts of EPL-6200L Table 1-37. Names of Parts <Right Side View> <Left Side View> Symbol Name Output Tray Front Cover Paper Tray Power Switch Parallel I/F Connector USB I/F Connector AC Inlet <Rear View>... -
Page 38: Controller Specification
EPSON EPL-6200/EPL-6200L Revision A 1.4 Controller Specification EPL-6200L EPSON 32bit RISC S1C33000 48MHz 1.4.1 Basic Controller Specifications <Standard> EPL-6200 <Expansion> None TMPR4955BFG-200MHz (Same as for EPL-N2500) Interface IEEE 1284 compatible parallel interface (ECP, Nibble) USB Revision 1.1 compatible, USB ID compatible <Standard>... -
Page 39: External I/F Specifications
EPSON EPL-6200/EPL-6200L Revision A 1.4.2 External I/F Specifications 1.4.2.1 Parallel Interface Specifications EPL-6200/EPL-6200L is equipped with the external host interfaces as listed below: Table 1-39. Parallel Interface Specifications Table 1-38. External Host Interfaces Item Description EPL-6200 EPL-6200L Interface Type IEEE 1284 bi-directional high speed parallel interface... -
Page 40: Usb Interface
1.4.2.2 USB Interface 1.4.2.3 Type B Interface (Not Available with EPL-6200L) Supports Windows USB PnP. EPL-6200 is equipped with one Type-B option I/F slot as standard. Supports the 18-digit USB ID as follows: Main System Type: MTP1200dpi, PW10200dt1200dpi, PRG(****)rev, AP500ma, SPD0fast, D4... -
Page 41: Control Panel (Epl-6200)
Revision A 1.5 Control Panel (EPL-6200) 1.5.2 List of Settings This section describes setting items for EPL-6200. 1.5.1 External Appearance and Names of Parts The setting items are described in groups for each tab screen of the printer driver. Values shown in bold and underlined characters are the factory default setting values. - Page 42 ON: Dot correction, OFF, No dot correction (default) Status Sheet – Printer Settings (See “Printer Settings” (p.42)) Extended Settings (See “Extended Settings” (p.43)) Note “*1”: Click the button on the tab screen to open a dialog box for further setting items. Product Description Control Panel (EPL-6200)
- Page 43 “*3”: Specify physical compensation values to adjust the paper feeding position. Based on these values for Physical Offset, the Printing Area location is adjusted according to the setting values for Offset in the Panel Settings on the “Extended Settings” dialog box. Product Description Control Panel (EPL-6200)
-
Page 44: Printer Messages
EPSON EPL-6200/EPL-6200L Revision A 1.5.3 Printer Messages A list of printer messages with EPL-6200 is shown below. Table 1-48. Printer Messages LED Indications Printer Status Status EJL Status Error LED Memory LED Toner LED Paper LED Ready LED Data LED... - Page 45 “*5”: Only one of these four cover open errors is indicated in the following order of Refer to 3.1.6 Printer Messages (EPL-6200) (p.102) for details of priority, even if two or more errors have occurred at the same time. (Only one is service call errors.
-
Page 46: Special Operation (Epl-6200)
1.5.4 Special Operation (EPL-6200) Error Related LED Indications Size of received data is different from the specification: With EPL-6200, the functions described below are activated by holding the specified Error LED flashing + Paper LED lighting switches down when turning the printer on. -
Page 47: Control Panel (Epl-6200L)
EPSON EPL-6200/EPL-6200L Revision A 1.6 Control Panel (EPL-6200L) Meaning of LED Flashing on EPL-6200L Table 1-51. Meaning of LED Flashing 1.6.1 External Appearance and Names of Parts Ready LED Error LED Supplement Meaning Power off Ready to print (It include warning status) Moving to Ready status. -
Page 48: Printer Setting Items
EPSON EPL-6200/EPL-6200L Revision A 1.6.2 Printer Setting Items Setting Items Requiring Administration by the Printer for each Printing or state change A list of setting items for this printer is shown below. Table 1-54. Function Setting (3) Setting Items for which the Printer Stores the Changed Settings... -
Page 49: Status
EPSON EPL-6200/EPL-6200L Revision A 1.6.3 Status Table 1-55. Printer Status (continued) Status description Status code Ready LED Error LED 1.6.3.1 Status List Sleep Mode 1007 Items of printer status generated in this printer are listed below: Ready 1000 Printing Job... -
Page 50: Details Of Error Status And Processing
Remove the jammed paper, close the Output Cover and close the front cover. Description Then printing resumes from the jammed page. The pop-up display of the EPSON Status Monitor disappears after error The printer is ready to print (normal status). recovery. - Page 51 Cleaning is not executed after the error recovery. Open the cover, set the correct Developer Cartridge (toner cartridge) and close the cover again to clear the error. The pop-up display of the EPSON Remedy Status Monitor disappears after error recovery.
- Page 52 Description Remedy Output Cover is open. To print pages after “Invalid Size”, select [Continue] on the EPSON Status This error is cleared when the cover is not detected to be open any longer. Monitor. To reprint after modifying driver settings, select [Cancel Printing] on the...
-
Page 53: Details Of Warning Status And Processing
C6, IB5 Remedy Remedy Clicking the [Close] button closes the pop-up display of the EPSON Status To print pages after “Mem Overflow”, select [Continue] on the EPSON Status Monitor. However, if an error of higher priority occurs just after that, the Monitor. -
Page 54: Special Operation (Epl-6200L)
Remedy Open the cover, set the correct Developer Cartridge (toner cartridge) and close the cover again to clear the error. The pop-up display of the EPSON After EEPROM initialization, input the USB ID and make the Status Monitor disappears after error recovery. -
Page 55: Printer Adjustment (Hidden Function)
EPSON EPL-6200/EPL-6200L Revision A 1.6.4.2 Printer Adjustment (Hidden Function) HOW TO INITIALIZE EEPROM For the following setting items for which the printer stores the settings, you can change Open the “Optional Settings” of the printer driver property. the setting by the following procedures: While pressing the [ALT] + [CTRL] + [SHIFT] + “W”... - Page 56 EPSON EPL-6200/EPL-6200L Revision A On the screen of the printer adjustment window (hidden window), change the setting value for the appropriate item. After changing the setting value, click the [Execute] button of the printer driver to finalize the setting. Figure 1-23. Printer Adjustment Window...
-
Page 57: Ram Expansion
1.7 RAM Expansion 1.8 System Requirements (Only for EPL-6200L) When EPL-6200 runs out of memory, the Memory LED flashes or lights up. The minimum system configuration and recommended system configuration when In this case, you have to mount expanded RAM (RAM DIMM). -
Page 58: Paper Feed Specifications (Only For Epl-6200L)
EPSON EPL-6200/EPL-6200L Revision A 1.9 Paper Feed Specifications (Only for EPL-6200L) 1.9.1 Paper Size 1.9.2 Paper Feed Specifications The following three types of information related to paper sizes are available. Table 1-58. Paper Feed Specifications User setting size: Paper sizes that the user specifies on the printer driver. -
Page 59: Case List
EPSON EPL-6200/EPL-6200L Revision A 1.9.3 Case List The table below shows a case list of paper feed specifications for each paper size. Table 1-59. Case List User setting size A Printer paper size B MP Tray paper size C Relation between B and C... -
Page 60: Notes On Operation
Ordinarily it does not operate. Use this switch only in cases where the above special environmental conditions exist. EPL-6200 incorporates an internal non-volatile memory (EEPROM). When the use environment returns to normal environmental conditions, it is necessary If the power to the printer is turned off during the process of writing in non-volatile to return it to the original setting immediately. -
Page 61: Status Sheet
EPSON EPL-6200/EPL-6200L Revision A 1.11 Status Sheet <EPL-6200> A sample of the Status Sheet is shown at right. The following information is printed at bottom left in the order of 1) to 8): 1). IA followed by firmware version shown in the DDYM format For M (month), “A”... - Page 62 EPSON EPL-6200/EPL-6200L Revision A Notes on the status sheet (a sample) for EPL-6200 are as follows: Note “*1”: Printed only when the relevant optional unit has been installed. “*2”: “Needed Soon” will be shown when the amount of toner remaining is supposed to permit printing for not more than 300 sheets.
- Page 63 “*3”: The following notice is given when non-genuine Developer Cartridge (toner cartridge) has been installed: Non-genuine cartridge installed. Using a non-genuine cartridge may affect print quality. Genuine EPSON cartridge recommended. NOTE 1: Developer Cartridge (toner cartridge) model and toner capacity: S050167: 3K 2: Photoconductor Unit model: S051099...
-
Page 64: Ambient Conditions
This function, a hidden function, must not be opened to users. Environment X: Range of ambient conditions to guarantee operation Humidity(%) Shown below is an example of the engine status sheet of EPL-6200: Feed Offset 0.0 mm Scan Offset 0.0 mm Feed Offset2 0.0 mm... -
Page 65: Differences In Specifications Between Intended Markets
EPSON EPL-6200/EPL-6200L Revision A 1.13 Differences in Specifications between Intended Markets 1.13.1 Differences in Specifications Table 1-60. Differences in Specifications between Intended Markets Model EPL-6200 LP-2500 EPL-6200L LP-1400 South South America Europe, Pacific, China and America Europe, Pacific, China and... -
Page 66: Jumper Setting
Revision A 1.13.2 Jumper Setting 1.14 Notes on Installation of Optional Units C533MAIN (for EPL-6200) is equipped with two resistance jumpers. Notes on Installation of Duplex Unit Resistance Jumper The Duplex Unit cannot be installed without the Lower Cassette Unit installed. - Page 67 C H A P T E R OPERATING PRINCIPLES...
-
Page 68: Overview
EPSON EPL-6200/EPL-6200L Revision A 2.1 Overview EPL-6200 and EPL-6200L are almost the same in operating principles. However, do not forget that there are some differences in mechanisms between EPL-6200 and EPL- 6200L. 2.1.1 EPL-6200 Major Components Table 2-1. EPL-6200 Major Components... -
Page 69: Epl-6200L Major Components
EPSON EPL-6200/EPL-6200L Revision A 2.1.2 EPL-6200L Major Components Table 2-2. EPL-6200L Major Components Major Components Print Head Unit Paper Exit Roller Fuser Unit Transfer Section MP tray Developer Cartridge (toner cartridge) Photoconductor Unit (Drum Cartridge) Figure 2-2. Sectional View of Mechanism (EPL-6200L) -
Page 70: Paper Path
EPSON EPL-6200/EPL-6200L Revision A 2.1.3 Paper Path Output Tray <EPL-6200> EPL-6200 Duplex Unit (Option) Paper feed is carried out through two ways from the MP Tray (250 sheets) and Manual Feed Tray (1 sheet). An optional lower cassette unit (500 sheets) can be installed so that three paper feed methods are available. -
Page 71: Electrical Parts
EPSON EPL-6200/EPL-6200L Revision A 2.1.4 Electrical Parts Printer Body Table 2-3. Electrical Parts Symbol Name Main Motor Cooling Fan Motor Fusing Roller Heater Lamp Thermistor Thermostat Print Head Unit Paper Feed Sensor Front Cover Switch Paper Tray Empty Sensor Paper Eject Sensor... -
Page 72: Operation Sequence
EPSON EPL-6200/EPL-6200L Revision A 2.1.5 Operation Sequence Printing End Sequence Printing Start Sequence Figure 2-6. Printing End Sequence Figure 2-5. Printing Start Sequence Operating Principles Overview... -
Page 73: Various Sensors
EPSON EPL-6200/EPL-6200L Revision A 2.1.6 Various Sensors Table 2-4. Various Sensors Unit Detected Matter EPL-6200 EPL-6200L Detecting Method Refer to Printer Body Paper jam Actuator + photo switch p.83 Paper presence Automatic detection by sensor p.86 Paper Tray Paper size –... -
Page 74: Description Of Mechanisms
EPSON EPL-6200/EPL-6200L Revision A 2.2 Description of Mechanisms Semi-conductor Laser SOS (Start of Scan) Sensor 2.2.1 Print Head (PH) G1 Lens G2 Lens 2.2.1.1 Entire Constitution 1st Mirror Scanning with the laser beam coming out of the Print Head is performed by the polygon motor. -
Page 75: Laser Emission Timing
EPSON EPL-6200/EPL-6200L Revision A 2.2.1.3 Laser Emission Timing When the Ready signal is detected upon passage of a certain period of time after issue of the printing start signal, the Laser ON signal is output from the Mechanical Control Polygon Mirror SOS Mirror Board. -
Page 76: Cooling Inside The Printer
EPSON EPL-6200/EPL-6200L Revision A 2.2.1.5 Cooling inside the Printer The Cooling Fan Motor discharges the heat emitted by the Print Head Unit to the outside of the printer, thus preventing temperature rise of the Print Head Unit. Figure 2-11. Cooling inside the Printer... -
Page 77: Charging Process
EPSON EPL-6200/EPL-6200L Revision A 2.2.2 Charging Process Before laser exposure, static electricity is given to the OPC drum (Organic Photoconductor Unit Photoconductor) to charge it. Drum Cover Paper Powder Cleaner The surface of the OPC drum is charged by the rotating brush (charging brush) and pre-charging film. -
Page 78: Development Process (Imaging Cartridge)
EPSON EPL-6200/EPL-6200L Revision A 2.2.3 Development Process (Imaging Cartridge) 2nd toner blade Imaging Cartridge 2.2.3.1 OVERVIEW OPC Drum The Developer Cartridge and development section are constructed as described below: This printer employs one-component FMT (Fine Micro Toning) development method. Toner in the Developer Cartridge (toner cartridge) is sent into the toner sending roller area by the toner agitation blade. -
Page 79: Opc Drum
EPSON EPL-6200/EPL-6200L Revision A 2.2.3.2 OPC Drum Electric charge retaining layer Carrier generation layer An OPC (Organic Photo Conductor) is used. This photoconductor is of a laminate type consisting of a carrier generation layer and Aluminum base an electric charge retaining layer applied onto an aluminum base (cylinder). -
Page 80: Development Process
EPSON EPL-6200/EPL-6200L Revision A 2.2.3.3 Development Process OPC Drum Toner in the Developer Cartridge (toner cartridge) is sent into the toner sending 2nd Toner Blade roller area by the toner agitation blade. The toner sending roller transports the toner to the development roller side. -
Page 81: Detection Of Developer Cartridge (Toner Cartridge)
EPSON EPL-6200/EPL-6200L Revision A 2.2.3.4 Detection Of Developer Cartridge (toner cartridge) Installation Detection (Presence Detection): Installation of the Imaging Cartridge is detected in such a way that its presence/ absence is electrically detected at power off and on or opening and closing of the... -
Page 82: Transfer Process
EPSON EPL-6200/EPL-6200L Revision A 2.2.4 Transfer Process Overview OPC Drum The image created on the OPC drum in the development process is transferred to the paper. Transfer is performed by the roller transfer method using the transfer roller. By the roller transfer method, ozone is generated rarely and the transferred image is little dislocated since the paper passes between the drum and the transfer roller all through during printing. -
Page 83: Fusing Process
EPSON EPL-6200/EPL-6200L Revision A 2.2.5 Fusing Process Actuator 2.2.5.1 Overview Fusing Separation Claw In this process, the toner transferred to the paper in the transfer process is fused to Thermostat (TS1) the paper. For fusing, this printer uses the heat roller fusing system. The sheet with toner on... - Page 84 EPSON EPL-6200/EPL-6200L Revision A TEMPERATURE CONTROL MODE During printing, the fuser temperature is adjusted along the passage of time counted from completion of warming up. Mode 1: Temperature control mode 1 continues for five minutes. However, the temperature adjustment mode 1 that was interrupted once is resumed with the timer counting from the count just before interruption, if the thermistor temperature is 50°C or...
-
Page 85: Paper Feed Mechanism
EPSON EPL-6200/EPL-6200L Revision A 2.2.6 Paper Feed Mechanism 2.2.6.1 MP (Multiple Purpose Paper) Tray Push-down Cam Paper Feed Roller PAPER FEED OPERATION Paper Feed Sensor (S1) When the paper feed solenoid is turned ON, the driving power from the main motor is transmitted to the paper feed roller via the paper feed clutch, and the paper feed roller rotates. -
Page 86: Manual Paper Feeding (Epl-6200)
This function works for paper feeding from any of the paper trays. MP Tray Empty Sensor (PE1) Figure 2-22. MP Tray Empty Sensor 2.2.6.2 Manual Paper Feeding (EPL-6200) Manual paper feeding can be performed through the paper feed slot above the MP Tray. (See “Figure 2-23”) -
Page 87: Paper Feed Mechanism
2.2.7 Lower Cassette (Option for EPL-6200) PWB-A CAS This section describes the mechanism of the optional lower cassette unit for EPL-6200. 2.2.7.1 Locations of Electrical Parts See Figure 2-24 at right and Table 2-7 below for locations of electrical parts. -
Page 88: Paper Cassette Empty Sensor
EPSON EPL-6200/EPL-6200L Revision A 2.2.7.3 Paper Cassette Empty Sensor The Paper Cassette Empty sensor is mounted on the control board in the Lower Cassette and it detects “paper cassette empty”. Paper Cassette Empty Sensor (See “Figure 2-26”) When there is paper, the actuator is lifted so that the light to the sensor is intercepted. -
Page 89: Paper Eject Process
EPSON EPL-6200/EPL-6200L Revision A 2.2.8 Paper Eject Process 2.2.8.1 Paper Eject Mechanism Output Tray Transports paper from the fuser area to the Paper Eject Roller. Paper Eject Roll Face-down Eject Paper Eject Roller Figure 2-28. Paper Eject Mechanism Operating Principles... -
Page 90: Duplex Unit (Option)
EPSON EPL-6200/EPL-6200L Revision A 2.2.9 Duplex Unit (option) 2.2.9.1 Locations of Electrical Parts Table 2-9. Electrical Parts Symbol Name Duplex Unit Transport Motor Duplex Unit Inversion Motor SL-3 Skew Correction Solenoid PWB-A DUP Duplex Unit Control Board PWB-A DUP Top Cover Opening/Closing Detection Sensor... -
Page 91: Driving Of Duplex Unit
EPSON EPL-6200/EPL-6200L Revision A 2.2.9.2 Driving of Duplex Unit Duplex Unit Inversion Motor (M5) The Duplex Unit is driven as follows: the paper after printing on one side is fed into the Output Tray once and when the tail end of the paper has left the guide behind the paper eject roller, the paper eject roller starts rotating to transport the paper into the Duplex Unit. -
Page 92: Paper Feeding System
EPSON EPL-6200/EPL-6200L Revision A 2.2.9.3 Paper Feeding System 1-SHEET CIRCULATION DUPLEX PRINTING A sheet of paper is loaded and the image of the 2nd page is printed. The sheet is sent to the paper eject area once, and then sent backward. - Page 93 EPSON EPL-6200/EPL-6200L Revision A 2-SHEET CIRCULATION DUPLEX PRINTING The 1st sheet of paper is loaded and the image of the 2nd page is printed. The sheet is sent to the paper eject area once, and then sent backward. At the same time, the 2nd sheet of paper is loaded.
-
Page 94: Operating Principles Of Electric Circuitry
C533 MAIN Board Memory Board Assy (IPL+ code + font): The main controller of EPL-6200 is a full-set controller which controls various printer Initial Products: C533 PROG (16 MB Flash) modes and all the necessary processing up to video data generation. The main... - Page 95 EPSON EPL-6200/EPL-6200L Revision A COMPARISON OF EPL-6200 WITH EPL-6100 Table 2-10. Comparison of EPL-6200 with EPL-6100 Device EPL-6100 EPL-6200 TMPR4955AF-200 TMPR4955BFG-200 DLC: E05B96BA ← ASIC Memory, I/O integrated controller, USB ← Onboard MASK ROM None 1 slot. +3.3V DIMM. 1 slot. +3.3V DIMM. IPL, Code, Font, PS, SDRAM...
- Page 96 EPSON EPL-6200/EPL-6200L Revision A Table 2-10. Comparison of EPL-6200 with EPL-6100 (continued) Device EPL-6100 EPL-6200 ES, initial MP: EPROM ← Steady MP: Mask Expansion by ROM-DIMM None 90-pin. 1 slot Expandability Expansion by RAM-DIMM (Newly employed) ← SDRAM 90-pin. 1 slot...
- Page 97 EPSON EPL-6200/EPL-6200L Revision A MAJOR ELEMENTS Table 2-11. Major Elements Name Location Remarks CPU/Clock IC100 TMPR4955BFG-200 / 200MHz DLC: Memory control and I/O control integrated ASIC IC101 E05B96BA ASIC Standard ROM CN300 IPL, code, font, PS, SDRAM DIMM DIMM onboard SDRAM Mounted on ROM DIMM.
-
Page 98: Main Control Circuit Board (C533Main) For Epl-6200L
All the functions, including those of the CPU, are incorporated in one ASIC (called “SLC2”). As the CPU core, C33 core made by EPSON is employed. The algorithm of the extension circuit is BitRepeat3. This controller is a fruit of the full pursuit of cost reduction:... -
Page 99: Chapter 3 Troubleshooting
C H A P T E R TROUBLESHOOTING... -
Page 100: Overview
(p.101) 3.1.3 Preliminary Checks Once an error occurs, the “EPSON Status Monitor 3” will appear as a pop-up window on the screen of the host PC. It will show details of how to cope with the trouble. In Does the same... -
Page 101: Preliminary Checks
EPSON EPL-6200/EPL-6200L Revision A 3.1.3 Preliminary Checks 3.1.4 Notes on Troubleshooting Before starting troubleshooting, be sure to verify that the following conditions are all The troubleshooting method described here assumes there is no malfunction in the met: printer controller (Main Board). If you can not fix a problem even by following the troubleshooting procedure, you are advised to replace the printer controller with a The power supply voltage must be within the specification limits. -
Page 102: Printer Messages (Epl-6200)
When there is any error display, such as a service call error, print an error sheet to The state of EPL-6200 is indicated in the following four types and all the indications identify the content of error first, and then recover or repair the printer. - Page 103 EPSON EPL-6200/EPL-6200L Revision A Engine Errors Table 3-1 below shows the engine-related service call errors in EPL-6200 Table 3-1. Service Call Error (Engine-Related) Error Code Eggg Explanation Paper LED Toner LED Memory LED Ready LED Data LED Error LED Refer to Fuser warming up problem p.107...
- Page 104 EPSON EPL-6200/EPL-6200L Revision A Controller Errors Table 3-2 below shows a list of controller-related service call errors in EPL-6200. Table 3-2. Service Call Error (Controller-Related) Error Code C ffff Explanation Paper LED Toner LED Memory LED Ready LED Data LED...
- Page 105 EPSON EPL-6200/EPL-6200L Revision A Table 3-2. Service Call Error (Controller-Related) (continued) Error Code C ffff Explanation Paper LED Toner LED Memory LED Ready LED Data LED Error LED Refer to 1000 Standard RAM Error (No RAM at all, etc.) 1001 Standard RAM Error (Not enough for minimum stack, etc.)
-
Page 106: Printer Messages (Epl-6200L)
EPSON EPL-6200/EPL-6200L Revision A 3.1.7 Printer Messages (EPL-6200L) EPL-6200L is not equipped with an LCD. Once an error occurs, the “EPSON Status Monitor 3” will appear as a pop-up window on the screen of the host PC, showing the trouble. -
Page 107: Troubleshooting When There Is Error Display
Main Board Assy (C533/C534 Main) (p.146) Troubleshooting here should be used only for errors that can not be • Power Supply Unit (PU1) (p.151) cleared even by following the instructions in EPSON Status Fuser unit Monitor 3. Replace the fuser unit. -
Page 108: Fan Problem
EPSON EPL-6200/EPL-6200L Revision A 3.2.2 Fan problem 3.2.3 Polygon Motor Error The following condition is handled as a fan problem: Any of the following conditions is handled as an polygon motor error: During operation of the Cooling Fan Motor, the lock signal (H or L) has been The lock signal was not detected within the predetermined period of time maintained for more than the predetermined period of time. -
Page 109: Laser Problem
EPSON EPL-6200/EPL-6200L Revision A 3.2.4 Laser problem 3.2.5 High voltage circuit problem Any of the following conditions is handled as a laser problem: Any of the following conditions is handled as a high voltage circuit problem: When the laser output exceeded the upper limit. -
Page 110: Fuser High Temperature Problem
EPSON EPL-6200/EPL-6200L Revision A 3.2.6 Fuser high temperature problem 3.2.7 CPU Error The following condition is handled as a fuser high temperature problem: Table 3-10. Troubleshooting for “CPU Error” During temperature control, the thermistor detected temperature was kept Step Action and Question above 235°C over the predetermined period of time. -
Page 111: Fuser Low Temperature Problem
EPSON EPL-6200/EPL-6200L Revision A 3.2.9 Fuser low temperature problem Table 3-12. Troubleshooting for “Fuser low temperature problem” (continued) Step Action and Question The following condition is handled as a fuser low temperature problem: Thermostat (TS1) During temperature control, the thermistor detected temperature was kept... -
Page 112: Standard Ram Error
(p.120) securely. The expanded RAM must be EPSON's original Note : The Main Board Assy and Memory Board Assy used with EPL-6200 and EPL-6200L SDRAMDIMM. are as listed below. The standard RAM is mounted on the Memory Board Assy (EPL-6200) or on the Main Board Assy (EPL-6200L). -
Page 113: Rom Checksum Error (Font)
Does the error still occur? (p.120) (p.120) Note : The Main Board Assy and Memory Board Assy used with EPL-6200 and EPL-6200L Note : The Main Board Assy and Memory Board Assy used with EPL-6200 and EPL-6200L are as listed below. -
Page 114: Option Rom Error
Assy. ♦ Does the error still occur? (p.120) EPL-6200/EPL-6200L is not available with any optional ROM and is not equipped with any free slot for optional ROM. How to initialize EEPROM is as follows: EPL-6200: Turn on the power while pressing “Start/Stop” + “Job Cancel”... -
Page 115: Engine Initialization Error
EPSON EPL-6200/EPL-6200L Revision A 3.2.16 Engine Initialization Error 3.2.18 Software Error Table 3-19. Troubleshooting for “Engine Initialization Error” Table 3-21. Troubleshooting for “Software Error” Step Action and Question Step Action and Question Parts below can be the source of this error... -
Page 116: Troubleshooting For Paper Jam
Transport Sensor (PC5) Repair or replace the relevant Do the actuators operate normally? actuator. Figure 3-3. EPL-6200 (with Optional Units installed) Eject Sensor (PS3) Open and close the Front Cover to reset the printer after correction of a paper jam. -
Page 117: Jam Detection Timing / Action To Be Taken
EPSON EPL-6200/EPL-6200L Revision A 3.3.3 Jam Detection Timing / Action to be Taken 3.3.3.2 Fuser Area Jam / Paper Eject Area Jam Detection Timing 3.3.3.1 Paper Feed Area Jam / Paper Transport Area Jam Fuser Area Jam / Paper Eject Area Jam Table 3-24. -
Page 118: Transport Area Jam In Duplex Unit (Option)
EPSON EPL-6200/EPL-6200L Revision A 3.3.3.3 Transport Area Jam in Duplex Unit (Option) 3.3.3.4 Paper Re-feed Area Jam in Duplex Unit (Option) Detection Timing Detection Timing Table 3-25. Transport Area Jam in Duplex Unit (Option) Table 3-26. Paper Re-feed Area Jam in Duplex Unit (Option) -
Page 119: Troubleshooting For Abnormal Operations
EPSON EPL-6200/EPL-6200L Revision A 3.4 Troubleshooting for Abnormal Operations 3.4.1 Power Cannot be Turned ON Table 3-27. Troubleshooting for Impossible Power Turning On Step Action and Question Parts below can be the source of this error (Chapter 4 Disassembly and Assembly) •... -
Page 120: Electrical Noise
EPSON EPL-6200/EPL-6200L Revision A 3.4.2 Electrical Noise Table 3-28. Troubleshooting for “Electrical Noise” (continued) Step Action and Question Table 3-28. Troubleshooting for “Electrical Noise” Continuity of cables Replace the Step Action and Question Check continuity of each cable. Go to Step 6... -
Page 121: Troubleshooting For Electrical Parts
EPSON EPL-6200/EPL-6200L Revision A 3.5 Troubleshooting for Electrical Parts 3.5.3 Switches Table 3-30. Troubleshooting for Switches 3.5.1 Checking Method for Electrical Parts Step Check Item Solution Yes: Replace the Control At occurrence of a paper jam or any other trouble, you can check the relevant electrical... -
Page 122: Motors
EPSON EPL-6200/EPL-6200L Revision A 3.5.5 Motors Table 3-34. Troubleshooting for Motors 3 Step Check Item Solution Table 3-32. Troubleshooting for Motors 1 Yes: Replace the motor or Step Check Item Solution Control Board Are the relay connector of the motor and the print jack... -
Page 123: Troubleshooting For Print Quality Problems
EPSON EPL-6200/EPL-6200L Revision A 3.6 Troubleshooting for Print Quality Problems If any print quality problem occurs, replace the Developer Cartridge (toner cartridge) and the Photoconductor Unit (Drum Cartridge) first, and determine whether the problem is caused by a cartridge or caused by the printer. -
Page 124: Blank Print Or Solid Black
EPSON EPL-6200/EPL-6200L Revision A 3.6.1 Blank Print or Solid Black Step Action and Question High voltage unit (HV1) Connect Description of the problem: Go to Step 5 ♦ Is the connector of the High Voltage Unit (HV1) properly. Printed page is completely white or connected properly? completely black. -
Page 125: White Out
EPSON EPL-6200/EPL-6200L Revision A 3.6.2 White Out 3.6.3 Back of Paper Gets Dirty Description of the problem: Description of the problem: In the image, there are extremely light areas or The back side of the paper is soiled. areas where image is completely missing. -
Page 126: Low Image Density
EPSON EPL-6200/EPL-6200L Revision A 3.6.4 Low Image Density 3.6.5 Foggy Background Description of the problem: Description of the problem: Image density is too light as a whole. Toner is present in some unexpected areas or over the whole page. Such areas appear Parts that may be the source of this error fogged. -
Page 127: White Stripes Or White Bands
EPSON EPL-6200/EPL-6200L Revision A 3.6.6 White Stripes or White Bands 3.6.7 Black Stripes or Black Bands Description of the problem: Description of the problem: There are light or completely white bands in Black stripes or bands are running parallel the printed image. These bands are running with the paper-feed direction. -
Page 128: Offset Image
EPSON EPL-6200/EPL-6200L Revision A 3.6.8 Offset Image Description of the problem: Ghost image appears on the printed sheet. The image printed on the previous page or part of image printed on the current page appears again as a image. Parts that may be the source of this error Transfer Roller (p.136) - Page 129 C H A P T E R DISASSEMBLY AND ASSEMBLY...
-
Page 130: Overview
EPSON EPL-6200/EPL-6200L Revision A 4.1 Overview 4.1.1 Precautions See the precautions given under the heading “WARNING” and “CAUTION” in the This section describes procedures for disassembling the main components of the following column when disassembling or assembling the product. product. Unless otherwise specified, disassembly units or components can be reassembled by reversing the disassembly procedure. -
Page 131: Tools
EPSON EPL-6200/EPL-6200L Revision A 4.1.2 Tools Avant de commencer, assurez vous que l’imprimante soit eteinte et Use only specified tools to avoid damaging the printer. que le cordon d’alimentation soit debranche. Name Commercial Availability Code Phillips screwdriver No. 1 Available B743800100 Phillips screwdriver No. -
Page 132: Main Unit Disassembly
Protection Sheet Metal (p146) Front Cover (p.141) Top Cover (p.142) Main Board Assy (C533/C534 Main) (p.146) Parallel I/F Board (EPL-6200) (p.149) Paper Tray Empty Sensor Paper Exit Open/Close Cover (p.142) (EPL-6200 only) (p.156) USB I/F Board (EPL-6200) (p.149) Paper Exit Cover (p.143) PH Unit (p.154) - Page 133 EPSON EPL-6200/EPL-6200L Revision A 4.6 Lower Cassette Unit (Option) (p.160) Second Paper Feed Unit (p.160) Paper Feed Roller (Lower Cassette) (p.161) Paper Feed Solenoid (Lower Cassette) (p.161) Paper Size Detect Switch (p.162) Paper Cassette Unit Control Board (p.162) 4.7 Duplex Unit (Option) (p.163) Right Cover (p.163)
-
Page 134: Locations Of Fuses
EPSON EPL-6200/EPL-6200L Revision A 4.2 Consumables and Regular Replacement Parts 4.2.1 Locations of Fuses F101 The fuses used in this printer are as follows: (See Figure 4-1) F102: AC 125 V, 8 A F101: AC 125 V, 12 A F102 NOTE: For removal of fuses, refer to “4.3.10 Lower Rear Cover... -
Page 135: Developer Cartridge / Photoconductor Unit Replacement
EPSON EPL-6200/EPL-6200L Revision A 4.2.3 Developer Cartridge / Photoconductor Unit Replacement When you put the Developer Cartridge (toner cartridge) and Photoconductor Unit (Drum Cartridge) separated from each other on the floor or table, take care not to let toner fly apart. -
Page 136: Transfer Roller
EPSON EPL-6200/EPL-6200L Revision A 4.2.4 Transfer Roller Do not touch the surface of the Transfer Roller nor stain it with chemicals or toner, for the dents or dirt on the surface of the Transfer Roller badly affects the print quality. -
Page 137: Removal Of Covers
EPSON EPL-6200/EPL-6200L Revision A 4.3 Removal of Covers <EPL-6200> Table 4-2. Covers Names Refer to p.143 Paper Exit Cover p.139 Right Cover MP Cassette (MP Tray) p.140 p.141 Front Cover p.142 Top Cover Output Tray p.141 p.138 Left Cover p.142 Paper Exit Open/Close Cover <EPL-6200L>... -
Page 138: Left Cover
EPSON EPL-6200/EPL-6200L Revision A 4.3.1 Left Cover Remove the screw (x1) at the rear of the printer. (See Figure 4-7) Release the hook at the front bottom of the printer.(See Figure 4-8) With attention paid to the two hooks at the cover top (Top Cover), lift and remove the Left Cover from the printer. -
Page 139: Right Cover
The hook, if not released, can be broken during removal of the Right Cover. Figure 4-9. Right Cover Removal (EPL-6200) Remove the screw (x1) at the rear of the printer. (See Figure 4-10) Release the hook at the front bottom of the printer. -
Page 140: Mp Cassette (Mp Tray)
EPSON EPL-6200/EPL-6200L Revision A 4.3.3 MP Cassette (MP Tray) <EPL-6200> While holding down the printer body with your hand, lift and remove the paper feed tray. (See Figure 4-11) <EPL-6200L> Close the MP Tray. Remove the MP Tray while pushing one side outward. (See Figure 4-12) You can remove the MP Tray easily if you remove the Right and Left Covers beforehand. -
Page 141: Front Cover
EPSON EPL-6200/EPL-6200L Revision A 4.3.4 Front Cover Boss x2 Remove the Left Cover. (p.138) Remove the Right Cover. (p.139) Open the Front Cover. Remove the Front Cover while pushing one side inward. (See Figure 4-13) Install the Front Cover so that the Front Cover is located below the stoppers on the right and left frames of the printer. -
Page 142: Top Cover
EPSON EPL-6200/EPL-6200L Revision A 4.3.6 Top Cover Remove the Left Cover. (p.138) Remove the Right Cover. (p.139) Open the Paper Exit Open/Close Cover. Release the four hooks of the right and left printer frames. Remove the Top Cover. (See Figure 4-15) 4.3.7 Paper Exit Open/Close Cover... -
Page 143: Paper Exit Cover
EPSON EPL-6200/EPL-6200L Revision A 4.3.8 Paper Exit Cover Remove the Left Cover. (p.138) Remove the Right Cover. (p.139) Remove the Top Cover. (p.142) Remove the Paper Exit Open/Close Cover. (p.142) While pushing the right and left hooks (two hooks) at the rear of the printer inward, slide the Paper Exit Cover toward the front and remove it. -
Page 144: Lower Rear Cover
EPSON EPL-6200/EPL-6200L Revision A 4.3.10 Lower Rear Cover Remove the Left Cover. (p.138) Remove the Right Cover. (p.139) Remove the Top Cover. (p.142) Remove the Paper Exit Cover. (p.143) Remove the Upper Rear Cover. (p.143) Remove the two screws securing the Lower Rear Cover, the one screw on the IF side securing the High Voltage Unit (HV1) and the two screws securing the AC Inlet. -
Page 145: Removal And Installation Of Circuit Boards
If you need to work on the printer with power applied, strictly follow the instructions in this manual. Parallel I/F Board (EPL-6200) To protect sensitive microprocessors and circuitry, use static discharge equipment, such as anti-static wrist straps, when accessing internal components. -
Page 146: Main Board Assy (C533/C534 Main)
Remove the three screws, and remove the protection sheet metal. (See Figure 4-21) At the rear of the printer, remove the two screws and remove the TYPE-B slot cover. (See Figure 4-22) Figure 4-21. Removing the Protection Sheet Metal (EPL-6200) Remove the TYPE-B guide rail. (Continued to next page) - Page 147 White Control Panel Blue Fuser Unit White Paper Feed Solenoid White High Voltage Unit (CN1) – PH Unit Figure 4-23. Removing the C533 Main (EPL-6200) White Main Motor Black Power Supply Unit (CN2) Black Fuser Unit White PH Unit White...
-
Page 148: Epl-6200L (C534 Main)
EPSON EPL-6200/EPL-6200L Revision A 4.4.1.2 EPL-6200L (C534 Main) Remove the Right Cover. (p.139) Remove the three screws, and remove the protection sheet metal. (See Figure 4-25) Disconnect all the connectors and flat cables on the Mechanical Control Board. Remove the three screws at the rear of the printer rear on the I/F side. -
Page 149: Parallel I/F Board (Epl-6200)
Remove the three screws, and remove the protection sheet metal. (See Figure 4-21) Parallel I/F Board Remove the Parallel I/F Board (EPL-6200). (p.149) Figure 4-27. Removing the Parallel I/F Board Disconnect the connector (CN815) for the Duplex Unit from the Main Board. -
Page 150: Control Panel
Remove the Right Cover. (p.139) Remove the two screws, and remove the Control Panel Assy. (See Figure 4-30) Figure 4-29. Control Panel Removal (EPL-6200) Remove the one screw, and remove the Control Panel. Figure 4-30. Control Panel Removal (EPL-6200L) Disassembly and Assembly... -
Page 151: Power Supply Unit (Pu1)
EPSON EPL-6200/EPL-6200L Revision A 4.4.5 Power Supply Unit (PU1) Remove the Left Cover. (p.138) Remove the Right Cover. (p.139) Remove the Top Cover. (p.142) Remove the Paper Exit Cover. (p.143) Remove the Upper Rear Cover. (p.143) Remove the Fuser Unit. (p.152) Remove the Lower Rear Cover. -
Page 152: Removal And Installation Of Major Components
EPSON EPL-6200/EPL-6200L Revision A 4.5 Removal and Installation of Major Components 4.5.1 Fuser Unit The Fuser Unit remains at hazardous temperature for a certain period of time even after stop of operation and turning off of the power. To prevent suffering a burn, be sure to wait after power turning off until the temperature of the Fuser Unit cools down to a safe level, and then start working on the printer. -
Page 153: Fuser Unit Disassembly
EPSON EPL-6200/EPL-6200L Revision A 4.5.2 Fuser Unit Disassembly Do not touch the glass of the heater lamp with bare hands. When you remove the Fusing Separation Claw, take care not to lose the spring. To avoid scratching the Fusing Roller surface by the Fusing Separation Claw, keep the Fusing Separation Claw lifted when removing or installing the Fusing Roller. -
Page 154: Ph Unit
EPSON EPL-6200/EPL-6200L Revision A 4.5.3 PH Unit Do not disassemble or adjust the Print Head Unit. Otherwise, a laser beam can be emitted and you may lose your eyesight if Disconnect the power cable before disassembling or assembling you are exposed to the laser beam. -
Page 155: Main Motor
EPSON EPL-6200/EPL-6200L Revision A 4.5.4 Main Motor Remove the Left Cover. (p.138) Disconnect the connector of the Main Motor. (See Figure 4-37) Remove the two screws, and remove the Main Motor from the printer. 4.5.5 Cooling Fan Motor Remove the Left Cover. (p.138) Disconnect the connector of the Cooling Fan Motor. -
Page 156: Paper Tray Empty Sensor (Epl-6200 Only)
EPSON EPL-6200/EPL-6200L Revision A 4.5.6 Paper Tray Empty Sensor (EPL-6200 only) Remove the Left Cover. (p.138) Remove the Right Cover. (p.139) Remove the Front Cover. (p.141) Remove the protection sheet metal (Main Board). (See p.161) Disconnect the one connector (CN812) on the Main Board. -
Page 157: Paper Feed Solenoid
EPSON EPL-6200/EPL-6200L Revision A 4.5.7 Paper Feed Solenoid 1. Remove the Left Cover. (p.138) Disconnect the connector of the Paper Feed Solenoid. Remove the one screw, and remove the Paper Feed Solenoid. After installing the solenoid, turn the gear in the direction of the arrow shown below until a click sound is made. -
Page 158: Paper Feed Clutch Gear
EPSON EPL-6200/EPL-6200L Revision A 4.5.8 Paper Feed Clutch Gear Remove the Left Cover. (p.138) Remove the Right Cover. (p.139) Remove the Top Cover. (p.142) Remove the MP Cassette (MP Tray). (p.140) Remove the Front Cover. (p.141) Remove the Paper Exit Cover. (p.143) Remove the Fuser Unit. - Page 159 EPSON EPL-6200/EPL-6200L Revision A 13. Remove the protection sheet metal. (See p.161) 14. Disconnect the one connector (CN809) and one FFC (CN805) on the Main Board. 15. Remove the two screws from each of the right and left frames of the printer, and remove the PH Base Plate Assy.
-
Page 160: Lower Cassette Unit (Option)
EPSON EPL-6200/EPL-6200L Revision A 4.6 Lower Cassette Unit (Option) 4.6.1 Second Paper Feed Unit Remove the Duplex Unit. (If the Duplex Unit has been installed) Separate the printer body and the second paper cassette from each other. Release the two hooks, and remove the cover. -
Page 161: Paper Feed Roller (Lower Cassette)
EPSON EPL-6200/EPL-6200L Revision A 4.6.2 Paper Feed Roller (Lower Cassette) Remove the Duplex Unit. (If the Duplex Unit has been installed) Separate the printer body and the second paper cassette from each other. Remove the two Paper Feed Rollers. 4.6.3 Paper Feed Solenoid (Lower Cassette) Remove the Duplex Unit. -
Page 162: Paper Cassette Unit Control Board
EPSON EPL-6200/EPL-6200L Revision A 4.6.4 Paper Cassette Unit Control Board Remove the Duplex Unit. (If the Duplex Unit has been installed) Separate the printer body and the second paper cassette from each other. Remove the Second Paper Feed Unit. (p.160) Remove the one screw, disconnect the one connector, and remove the cover. -
Page 163: Duplex Unit (Option)
EPSON EPL-6200/EPL-6200L Revision A 4.7 Duplex Unit (Option) Left Cover 4.7.1 Right Cover Remove the Duplex Unit. Right Cover Release the one hook. Remove the Right Cover. 4.7.2 Left Cover Remove the Duplex Unit. Release the one hook. Figure 4-51. Duplex Unit Remove the Left Cover. -
Page 164: Duplex Unit Inversion Motor
EPSON EPL-6200/EPL-6200L Revision A 4.7.4 Duplex Unit Inversion Motor Remove the Duplex Unit. Remove the Left Cover. Disconnect the one connector. (See Figure 4-53) Remove the two screws, and remove the Duplex Unit Inversion Motor. 4.7.5 Duplex Unit Transport Motor Remove the Duplex Unit. -
Page 165: Chapter 5 Adjustment
C H A P T E R ADJUSTMENT... -
Page 166: Overview
EPSON EPL-6200/EPL-6200L Revision A 5.1 Overview This printer requires the following adjustments, when repairing the printer by replacing the main board. USB-ID input (See page 167) Feed Registration Adjustment (See page 169) The detailed procedures for each adjustment is explained in the following pages. -
Page 167: Usb Id Input
EPL-6200/EPL-6200L comes with the USB interface as standard, and the PC Do not start the adjustment program before connecting the connected to the EPL-6200/EPL-6200L via the USB interface identifies the printer by parallel cable to the printer. referring to the USB ID information specific to each printer. - Page 168 EPSON EPL-6200/EPL-6200L Revision A When the window as shown in Figure 5-2 is displayed, check “USB ID input” and Click the OK button on the screen as shown below, and the USB ID (18 digits in total) click the OK button.
-
Page 169: Feed Registration Adjustment
5.3.2 Adjustment Follow the steps below to execute the adjustment program and proceed the adjustment. With the EPL-6200/6200L, the image registration position in sub-scanning direction Do not start the adjustment program before connecting the (paper feeding direction) is adjusted on each engine mechanism and the registration position correction value is stored on the non-volatile memory on the main controller at parallel cable to the printer. - Page 170 EPSON EPL-6200/EPL-6200L Revision A Specify the port of the PC in the [Port] list box, to which the target printer is connected. Click on [Print] button to print a test pattern chart. Take a printed chart and measure As a default, “Auto Selection” is specified and the program automatically search for the distance from the leading edge of paper to a specified check point on the pattern the port with the target printer connected.
- Page 171 EPSON EPL-6200/EPL-6200L Revision A Verify the registration position at both left and right side of the pattern. When printing a test pattern chart, make sure that the edge guide of paper tray is properly aligned against the edge of paper in order to avoid possible skew with fed paper.
- Page 172 C H A P T E R MAINTENANCE...
-
Page 173: Chapter 6 Maintenance
Developer Cartridge Pre-installed cartridge: To avoid dust explosion or ignition, never bring any (Toner Cartridge) 3,000 pages (EPL-6200) consumables close to flame or throw them into fire. 1,500 pages (EPL-6200L) Drum Cartridge After printing of about 20,000 sheets Do not use alcohol, paint thinner, or other such solvents. -
Page 174: Cleaning Of Paper Feed Rollers
EPSON EPL-6200/EPL-6200L Revision A 6.1.3 Cleaning of Paper Feed Rollers PAPER FEED ROLLER OF MAIN UNIT Remove the Imaging Cartridge. Clean the Paper Feed Roller with a cloth. PAPER FEED ROLLER OF SECOND PAPER CASSETTE (OPTION) Remove the Duplex Unit, and separate the printer body and the second paper cassette from each other. -
Page 175: Chapter 7 Appendix
C H A P T E R APPENDIX... -
Page 176: Connectors
EPSON EPL-6200/EPL-6200L Revision A 7.1 Connectors 7.1.1 Connectors on Main Board Assy (EPL-6200) Table 7-1. Connectors on Main Board Assy (EPL-6200) CN No. Pins Color Connected to Remarks – Parallel I/F Board White USB I/F Board White Control Panel Blue... -
Page 177: Connectors On Main Board Assy (Epl-6200L)
EPSON EPL-6200/EPL-6200L Revision A 7.1.2 Connectors on Main Board Assy (EPL-6200L) Table 7-2. Connectors CN No. Pins color Connected to Remarks White Panel (LED) Blue Fuser Unit White Paper Feed Solenoid White High Voltage Unit (CN1) PH Unit White Main Motor... -
Page 178: Connector Assignment Diagram (Overall)
EPSON EPL-6200/EPL-6200L Revision A 7.1.3 Connector Assignment Diagram (Overall) Appendix Connectors... -
Page 179: Circuit Diagrams
EPSON EPL-6200/EPL-6200L Revision A 7.2 Circuit Diagrams This section shows electric control circuit diagrams of EPL-6200/EPL-6200L. Table 7-3. Circuit Diagrams List Circuit Board Model Names of Parts Refer to Name EPL-6200 C533 MAIN Main Board Assy p.180 EPL-6200L C534 MAIN Main Board Assy p.184... -
Page 186: Exploded Diagrams
EPSON EPL-6200/EPL-6200L Revision A 7.3 Exploded Diagrams This section shows exploded diagrams of EPL-6200/EPL-6200L. EPL-6200 Housing (p.187) Engine Components - Fusing/Paper Exit mechanism (p.188) Engine Components - Paper Feeding mechanism (p.189) Engine Components - Drive mechanism (p.190) Electrical Components (p.191) - Page 187 C533-CASE-001 The parts to which no reference number is assigned will not be available as after-sale service parts. 3727 PWB-O 3727 FOR LP-2500/EPL-6200 NO.01 Rev.01 C533...
- Page 188 C533-MECH-001 The parts to which no reference number is assigned will not be available as after-sale service parts. 3727 1305 1305 3340 1305 3727 1305 FOR LP-2500/EPL-6200 NO.02 Rev.01 C533...
- Page 189 C533-MECH-002 The parts to which no reference number is assigned will not be available as after-sale service parts. 3727 3727 FOR LP-2500/EPL-6200 NO.03 Rev.01 C533...
- Page 190 C533-MECH-003 The parts to which no reference number is assigned will not be available as after-sale service parts. 3504 1305 3727 FOR LP-2500/EPL-6200 NO.04 Rev.01 C533...
- Page 191 The parts to which no reference number is assigned will not be available as after-sale service parts. 4021 3504 1115 1115 3727 3504 3504 3504 3727 3504 3504 3547 3504 3504 3504 1318 3504 3504 3504 3504 FOR LP-2500/EPL-6200 NO.05 Rev.01 C533...
- Page 192 C534-CASE-001 The parts to which no reference number is assigned will not be available as after-sale service parts. 3504 3727 PWB-O FOR LP-1400/EPL-6200L NO.01 Rev.01 C534...
- Page 193 C534-MECH-001 The parts to which no reference number is assigned will not be available as after-sale service parts. 3727 1305 1305 3340 1305 3727 1305 FOR LP-1400/EPL-6200L NO.02 Rev.01 C502...
- Page 194 C534-MECH-002 The parts to which no reference number is assigned will not be available as after-sale service parts. 3727 3727 FOR LP-1400/EPL-6200L NO.03 Rev.01 C534...
- Page 195 C534-MECH-003 The parts to which no reference number is assigned will not be available as after-sale service parts. 3504 1305 3727 FOR LP-1400/EPL-6200L NO.04 Rev.01 C534...
- Page 196 C534-ELEC-001 The parts to which no reference number is assigned will not be available as after-sale service parts. 4021 3504 1115 1115 3727 3504 3504 3504 01 02 3504 3727 3504 3547 3504 3504 3504 1318 3504 3504 3504 3504 FOR LP-1400/EPL-6200L NO.05 Rev.01 C534...
-
Page 197: Asp List
EPSON EPL-6200/EPL-6200L Revision A 7.4 ASP List The ASP list of EPL-6200/EPL-6200Lare shown on the following page. ASP List for EPL-6200 (p.198) ASP List for EPL-6200L (p.202) Appendix ASP List... - Page 198 EPSON EPL-6200/EPL-6200L Revision A Table 7-4. ASP List - EPL-6200 EPL-6200 Ref.No. Description Table 7-4. ASP List - EPL-6200 05-03 HV TRANSFORMER Ref.No. Description 05-05 FRAME 01-01 COVER 05-07 FRAME 01-02 SHIELD 05-08 POWER SUPPLY 200V 01-03 COVER 05-09 WIRE HARNESS ASSY...
- Page 199 EPSON EPL-6200/EPL-6200L Revision A Table 7-4. ASP List - EPL-6200 Table 7-4. ASP List - EPL-6200 Ref.No. Description Ref.No. Description 02-06 ROLL 02-38 HEATER 220V 02-07 02-39 SPRING THERMAL SWITCH 02-08 02-40 ROLL GUIDE 02-09 HOLDER 02-42 ROLLER 02-12 02-44...
- Page 200 EPSON EPL-6200/EPL-6200L Revision A Table 7-4. ASP List - EPL-6200 Table 7-4. ASP List - EPL-6200 Ref.No. Description Ref.No. Description 03-24 SOLENOID 04-09 GEAR 03-25 04-10 WIRE HARNESS ASSY GEAR 03-26 04-11 GUIDE GEAR 03-27 STOPPER 04-12 GEAR 03-28 04-13...
- Page 201 EPSON EPL-6200/EPL-6200L Revision A Table 7-4. ASP List - EPL-6200 Ref.No. Description 04-47 CONTACT 04-48 WIRE HARNESS ASSY 04-49 CONTACT 04-50 WIRE HARNESS ASSY 04-51 GUIDE 04-52 EARTH GROUND 04-53 MICRO-SWITCH 04-54 WIRE HARNESS ASSY 1305 SCREW 3340 TAPPING SCREW...
- Page 202 EPSON EPL-6200/EPL-6200L Revision A Table 7-5. ASP List - EPL-6200L EPL-6200L Description Ref.No. Table 7-5. ASP List - EPL-6200L 05-17 SHIELD Ref.No. Description 1115 SCREW 01-100 "LOGO PLATE 10X40;C,2COLOR SEIKEI" 1318 SCREW 01-12 COVER 3547 SCREW 01-13 LENS 4021 TAPPING SCREW...
- Page 203 EPSON EPL-6200/EPL-6200L Revision A Table 7-5. ASP List - EPL-6200L Table 7-5. ASP List - EPL-6200L Description Description Ref.No. Ref.No. 02-31 HOUSING 03-19 HOLDER 02-32 03-20 SPRING ROLL 02-33 03-21 CONTACT PRESSURE SPRING 02-34 CONTACT 03-22 PRESSURE SPRING 02-35 03-23...
- Page 204 EPSON EPL-6200/EPL-6200L Revision A Table 7-5. ASP List - EPL-6200L Table 7-5. ASP List - EPL-6200L Description Description Ref.No. Ref.No. 04-12 GEAR 04-51 GUIDE 04-13 04-52 GEAR EARTH GROUND 04-14 04-53 GEAR MICRO-SWITCH 04-15 GEAR 04-54 WIRE HARNESS ASSY 04-16...