
Related Manuals for Heat Controller COMFORT-CINE REG-183A


Summary of Contents for Heat Controller COMFORT-CINE REG-183A
- Page 1 CAUTION • BEFORE SERVICING THE UNIT, READ THE SAFETY PRECAUTIONS IN THIS MANUAL. • ONLY FOR AUTHORIZED SERVICE PERSONNEL. REG-183A REG-243A...
-
Page 2: Table Of Contents
Disassembly instructions...14 Mechanical parts ...14 Air Handling Parts ...15 Electrical Parts ...16 Refrigeration cycle ...19 Schematic Diagram...22 Troubleshooting guide...23 Piping System ...23 Troubleshooting guide ...24 Room Air Conditioner Voltage Limits...26 Exploded View...28 Replacement Parts List ...29 2 Room Air Conditioner... -
Page 3: Safety Precautions
Safety Precautions To prevent injury to the user or other people and property damage, the following instructions must be followed. Incorrect operation due to ignoring instruction will cause harm or damage. The seriousness is classified by the following indications. WARNING This symbol indicates the possibility of death or serious injury. - Page 4 Be sure the installation area does not deterio- rate with age. • If the base collapses, the air conditioner could fall with it, causing property damage, product failure, and per- sonal injury. 4 Room Air Conditioner Do not install, remove, or re-install the unit by yourself(customer).
-
Page 5: Dimensions
Dimensions Symbols Used in this Manual This symbol alerts you to the risk of electric shock. This symbol alerts you to hazards that could cause harm to the air conditioner. This symbol indicates special notes. NOTICE Outside Dimensions Model Dimension... -
Page 6: Product Specifications
OUTSIDE DIMENSION (W x H x D) * DB:Dry Bulb ** WB:Wet Bulb NOTE: Please refer to Label Quality on the produst since this specification may be changed for improving performance. 6 Room Air Conditioner MODELS REG-183A 1Ø, 208/230V, 60Hz (Btu/h) -
Page 7: Installation
INSTALLATION How to Install the unit 1. To avoid vibration and noise, make sure the unit is installed securely and firmly. 2. Install the unit where the sunlight does not shine directly on the unit. If the unit receives direct sunlight, build an awning to shade the cabinet. -
Page 8: Window Requirements
Installation Kits Contents (some models including installation kit) Left frame curtain Frame guide(2) Window locking bracket Sill bracket (2) Type B (7) Type A (14) 9 Room Air Conditioner Top retainer bar (Plain-Back) Foam-PE (Adhesive-Backed) Support bracket(2) Type C (5) Type D (2) ". -
Page 9: Suggested Tool Requirements
Suggested tool Requirements SCREWDRIVER(+, -), RULER, KNIFE, HAMMER, PENCIL, LEVEL • PREPARATION OF CHASSIS 1. Remove the screws which fasten the cabinet at both sides and at the back. Keep these two screws which fasten the cabinet at both sides for later use. 2. -
Page 10: Cabinet Installation
(Type B) through the cabinet into window stool. 2. The cabinet should be installed with a very slight tilt downward toward the outside. 11 Room Air Conditioner Sill Bracket Carriage Bolt... -
Page 11: Service Manual
Push the grille in until it snaps into place. (See Fig.34) 11. Lift the inlet grille and secure it with a screw (Type A) through the front grille. (See Fig. 14) 12. Window installation of room air conditioner is now completed. Figure 10 Power Cord... -
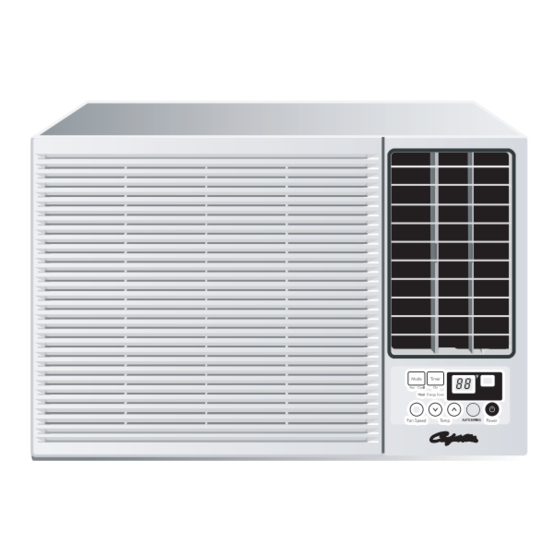
Page 12: Operation
The damper is opened and room air is exhausted. 1. POWER BUTTON To turn the air conditioner ON, push the button. To turn the air conditioner OFF, push the button again. This button takes priority over any other buttons. 2. OPERATION MODE SELECTION BUTTON Everytime you push this button, it will toggle COOL, FAN and HEAT. -
Page 13: Mechanical Parts
Disassembly - Before the following disassembly, power switch is set to off and disconnected the power cord. Mechanical parts 1. Front grille 1. Open the inlet grille upward or downward. 2. Remove the screw which fastens the front grille. 3. Pull the front grille from the right side. 4. -
Page 14: Air Handling Parts
(See Fig. 21) 9. Remove the blower with plier or your hand without touching blades. (See Fig. 22) 10. Re-install the components by referring to the removal procedure, above. 15 Room Air Conditioner Figure 19 Figure 20 Figure 21 Figure 22... -
Page 15: Electrical Parts
6. Fan 1. Remove the cabinet. (Refer to section 2) 2. Remove the brace and shroud cover. (Refer to section 4) 3. Remove the side cover with 2 screws.(See Fig. 23) 4. Remove the 5 or 6 screws which fasten the condenser. 5. - Page 16 2. Unfold the control box. (Refer to section 10) 3. Disconnect the thermistor terminals from main P.W.B assembly. 4. Remove the thermistor. 5. Re-install the components by referring to the removal procedure above. (See Figure 30) 17 Room Air Conditioner Figure 27 Figure 28 Figure 29...
- Page 17 13. SYNCHRONOUS MOTOR 1. Remove the control box. (Refer to section 3) 2. Unfold the control box. (Refer to section 10) 3. Remove the crankshaft. 4. Disconnect all the leads of the synchronous motor. 5. Remove the 2 screws which fasten the synchronous motor.
-
Page 18: Refrigeration Cycle
3. After discharging the refrigerant completely, unbraze the interconnecting tube at the capillary tube. 4. Remove the capillary tube. 5. Re-install the components by referring to notes. 19 Room Air Conditioner . Leave the valve in place after servicing the system. Figure 31 Figure 32... - Page 19 NOTICE - Replacement of the refrigeration cycle. 1. When replacing the refrigeration cycle, be sure to discharge the refrigerant system using a Freon recovery System. If there is no valve to attach the recovery system, install one (such as a WATCO A-1) before venting the Freon .
- Page 20 Disassembly Equipment needed: Vacuum pump, Charging cylinder, Manifold gauge, Brazing equipment. Pin-off tool capable of making a leak-proof seal, Leak detector, Tubing cutter, Hand Tools to remove components, Service valve. Figure 31B-Charging Figure 31A-Pulling Vacuum 21 Room Air Conditioner...
-
Page 21: Schematic Diagram
Schematic Diagram Schematic Diagram Wiring Diagram ELECTRIC HEATING MODEL Service Manual 22... -
Page 22: Troubleshooting Guide
This will help you to understand the refrigeration cycle and the flow of the refrigerant in the cooling cycle. EVAPORATOR COILS COMPLETE LIQUID BOIL OFF POINT COOLED LIQUID PRESSURE DROP 23 Room Air Conditioner ROOM AIR CONITIONER CYCLE OF REFRIGERATION SUCTION LINE COOL LOW PRESSURE VAPOR ROOM AIR HEAT LOAD MOTOR COMPRESSOR... -
Page 23: Troubleshooting Guide
Troubleshooting Guide In general, possible trouble is classified in two kinds. The one is called Starting Failure which is caused from an electrical defect, and the other is ineffective Air Conditioning caused by a defect in the refrigeration circuit and improper application. Unit runs but poor cooling. - Page 24 Capacitor check. Replacement Irregular motor resistance ( Irregular motor insulation ( Replacement of compressor (Motor damaged) 25 Room Air Conditioner Fails to Start Improper thermostat setting. Loose terminal connection. Improper wiring. Check circuit breaker and fuse. Gas leakage of feeler bulb of thermostat Check of control switch.
-
Page 25: Room Air Conditioner Voltage Limits
Room Air Conditioner Voltage Limits NAME PLATE RATING 208~230±10% 115±10% COMPLAINT Fan motor will not run. No power Power supply cord Rotary switch Wire disconnected or con- nection loose Capacitor (Discharge capacitor before testing.) Will not rotate Revolves on overload. - Page 26 Copper tubing Auto air-swing fails. Rotary switch. Wiring Synchronous motor. 27 Room Air Conditioner CAUSE Check the position of knob If not at the coldest set- ting, advance the knob to this setting and restart unit. Check continuity of the thermostat. Replace ther- mostat if circuit is open.
-
Page 27: Exploded View
Exploded View 130910 749740 731273 359012 354210 349001 W48602 135312 159830 135314 147581-2 147581-1 148000 749750 135515 346811 349600 147582 249950 264110 567480 W0CZZ 268711-1 137215 238310 146812 268711-2 135510 267110 135500 554031 W48602 559011 149980 130410 554160 550140 552102 352115-2 352115-1 352113... - Page 28 LocNo P/NO 130410 3041A23004F 130910 3091AR6056Q 135312 AEB30969402 135314 3530AR1604A 135510 3551A30015A 137215 3720AR6163A 146812 2H01102J 147581-1 4758AR7264C 147581-2 4758AR7278C 147582 4758AR6157B 148000 4800AR7271A 149980 4998AR1597B 159830 5231AR6159A 238310 MDD37823802 249950 4995A20186K 264110 6411A20056Q 567480 6323A20003S 268711-1 6871A20611V 268711-2 EBR30851603 267110 6711A20035A 346811...
-
Page 29: Replacement Parts List
LocNo P/NO 130410 3041A23004H 130910 3091AR6056Q 135312 AEB30969402 135314 3530AR1604A 135510 3551A30015A 137215 3720AR6163A 146812 2H01102J 147581-1 4758AR7264C 147581-2 4758AR7278C 147582 4758AR6157B 148000 4800AR7271A 149980 4998AR1597B 159830 5231AR6159A 238310 MDD37823802 249950 4995A20186L 264110 6411A20056Q 567480 6323A20003S 268711-1 6871A20611V 268711-2 EBR30851603 267110 6711A20035A 346811...