Table of Contents
Advertisement
Available languages
Available languages
Quick Links
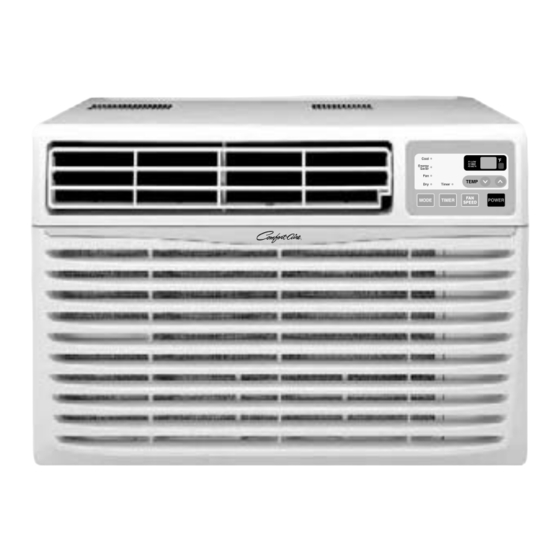
HEAT CONTROLLER, INC.
Room Air Conditioner
RADS-151A
RADS-151A
Important Information
• Please read this manual carefully and thoroughly before operating this unit.
• Contact a qualified sevice technician for installation, repair and maintenance of this unit.
• The appliance is not intended for use by young children or those who require supervision.
• Young children should be supervised to ensure that they do not play with the appliance.
MODEL:RADS-151A
RAD-183B
Advertisement
Chapters
Table of Contents

Related Manuals for Heat Controller Comfort-Aire RAD-183B


Summary of Contents for Heat Controller Comfort-Aire RAD-183B
- Page 1 HEAT CONTROLLER, INC. Room Air Conditioner MODEL:RADS-151A RAD-183B RADS-151A RADS-151A Important Information • Please read this manual carefully and thoroughly before operating this unit. • Contact a qualified sevice technician for installation, repair and maintenance of this unit. • The appliance is not intended for use by young children or those who require supervision.
- Page 2 Electrical Data...
- Page 3 Safety Precautions Safety Precautions To prevent injury to the user or other people and property damage, the following instructions must be followed. ■Incorrect operation due to ignoring instructions will cause harm or damage. The seriousness is classified by the following indications. ■Because of the weight of the product, it is recommended that you have a helper to assist in the installation.
- Page 4 Safety Precautions Operation Plug in the power cord Do not operate or stop the Do not damage or use an properly. unit by inserting or pulling unspecified power cord. out the plug. • Otherwise, it will cause • It will cause electric shock or •...
- Page 5 Safety Precautions Do not operate the air conditioner if you Close all doors, windows and other outside smell gas. openings to the room. • The air conditioner must be operated in a • It may cause an explosion or fire. enclosed area to be most effective.
- Page 6 • It will waste power and may cause an accident. The air conditioner is not designed to act as a refrigeration system. If the battery acid leaks from the batteries and gets If you accidently ingest battery acid, onto your skin or clothes,rinse well with clean water. your mouth with water and call your local If burning occurs call your local poison control center poison control center immediately for help.
- Page 7 Before Operation Before Operation Preparing for Operation 1. Plug in the power cord properly. 2. Use a dedicated circuit. Overloading the line could create a fire hazard. 3. Do not use an extension cord. See page 11 for more details. 4.
- Page 8 Introduction Introduction Symbols Used in this Manual This symbol alerts you to the risk of electric shock. This symbol alerts you to hazards that could cause harm to the air conditioner. This symbol indicates special notes. Tip! Features WARNING: This appliance should be installed in accordance with the National Electric Code.
- Page 9 Electrical Safety Electrical Safety Electrical Data 115V~ 230V~ Power cord may include a current interrupter device. A test and reset button is provided on the plug case. The device should be tested on a periodic basis by first pressing the TEST button and then the RESET button.
- Page 10 Electrical Safety Electrical Safety WARNING: This appliance must be properly grounded. The power cord of this appliance is equipped with a three-prong grounding plug. To minimize the risk of electric shock, use the plug with a standard three-slot grounding wall power outlet. If the power outlet does not include a grounding slot, have a qualified electrician replace the outlet before you use the room air conditioner.
- Page 11 Electrical Safety Temporary Use of an Adapter We strongly discourage the use of an adapter due to potential safety hazards. For temporary connections, use only a UL-listed adapter, available from most local hardware stores. Ensure that the large slot in the adapter is aligned with the large slot in the receptacle for a proper polarity connection.
- Page 12 Installation Installation How to Install the Unit To prevent vibration and noise, make sure the unit is installed securely and firmly Fence Awning Install the unit where the sunlight does not shine Cooled air directly on the unit. Heat radiation The outside of the cabinet must extend outward for at least 12"...
-
Page 13: Table Of Contents
Installation Installation Kits Contents NAME OF PARTS Q'TY FRAME CURTAIN SUPPORT BRACKET SILL BRACKET LOCK NUT SCREW (TYPE A) SCREW (TYPE B) SCREW (TYPE C) SCREW (TYPE D) CARRIAGE BOLT FOAM STRIP FOAM SEAL WINDOW LOCKING BRACKET DRAIN PIPE FRAME GUIDE Suggested Tool Requirements SCREWDRIVER(Philips and Flathead), RULER, KNIFE, HAMMER, PENCIL, LEVEL PREPARATION OF CHASSIS... -
Page 14: Support Bracket
Installation Cabinet Installation Open the window. Mark a line on the center of the Sill window stool between the side window stop Bracket Support moldings. Bracket Carriage Loosely attach the sill bracket to the support Lock nut Bolt bracket using the carriage bolt and the lock nut. Machine screw(Type D) Attach the sill bracket to the window sill using the and lock nut... -
Page 15: Foam Strip
Installation Pull each Frame curtain fully to each window sash track, and pull the bottom window sash down behind the Top retainer bar until it meets. Attach each Frame curtain the window sash by using screws (Type C.) Slide the unit into the cabinet. CAUTION: For security purpose, Screw reinstall screws(Type A) - Page 16 Installation Attach the front grille to the cabinet by inserting the tabs on the grille into the tabs on the front of the cabinet. Push the grille in until it snaps into place. Lift the inlet grille and secure it with a screw (Type A) through the front grille.
- Page 17 Operating Instructions POWER Operation starts when this button is pressed and stops when you press the button again. FAN SPEED SELECTOR For increased power while cooling, select a higher fan speed. 3 steps: High ON/OFF TIMER The timer can be set to start and stop the unit in hourly increments (up to 12 hours).
- Page 18 Operating Instructions Remote Controller CAUTION: The Remote Controller will not function properly if strong light strikes the sensor window of the air conditioner or if there are obstacles between the Remote Controller and the air conditioner. Power Operation starts when this button is pressed and stops when you press the button again.
- Page 19 Operating Instructions Additional Features Air Direction Airflow can be adjusted by changing the direction of the air conditioner's louvers. This can also increase the cooling efficiency of the air conditioner. Adjusting Horizontal Air Flow Direction Adjusting the vertical louvers left and right will change horizontal airflow.
-
Page 20: Drain Pipe
Operating Instructions Additional Features Drain Pipe In humid weather, excess water may cause the Base Pan to overflow. To drain the water, remove the Drain Cap and secure the Drain Pipe to the rear hole of the Base Pan. Drain Pipe Press the drain pipe into the hole by Drain Cap pushing down and away from the fins... - Page 21 Maintenance and Service Maintenance and Service Air Filter Check the air filter at least twice a month to see if cleaning is necessary. Trapped particles in the filter can build up and block the airflow, reducing cooling capacity and causing an accumulation of frost on the evaporator. To clean the air filter: Do not force open or open to far.
- Page 22 Maintenance and Service How to Remove the Front Grille 1. Pull the inlet grille forw 2. Remove the screw securing the Front Grille. 3. Push the grille up from the bottom and pull the top of the grille away from the Cool F1 LOW F2 MED...
- Page 23 Maintenance and Service Maintenance and Service Maintenance and Service Maintenance and Service Common Problems and Solutions Before Calling for Service If you have problems with your air conditioner, read the following information and try to solve the problem. If you cannot find a solution, turn off the air conditioner and contact your dealer.
- Page 24 Maintenance and Service Troubleshooting The air conditioner ma y be operating abnormally when: Problem Possible Causes What To Do The air conditioner is Make sure the air conditioner plug is unplugged. pushed completely into the outlet. The fuse is blown/circuit Check the house fuse/circuit breaker is tripped.
- Page 25 Memo Owner’s Manual 25...
- Page 26 Memo 26 Room Air Conditioner...
- Page 27 Manual del usuario del acondicionador de aire tipo Ventana TABLA DE CONTENIDOS PARA SUS ARCHIVOS Precauciones de Seguridad ..28 Escriba aquí el modelo y número de serie: Antes de poner en marcha...32 Modelo n°: Serie n°: Introducción ........33 Puede encontrar los números en la etiqueta de la parte Símbolos Utilizados en lateral del producto.
-
Page 28: Precauciones De Seguridad
Precauciones de Seguridad Precauciones de Seguridad Para prevenir tanto lesiones al usuario u otras personas como daños materiales, es preciso seguir estas instrucciones. La incorrecta operación del aparato como consecuencia de ignorar las instrucciones provocará daños o lesiones. A cause del peso pesado del producto, se recomienda que usted tenga a un ayudante a participa en la instalación. - Page 29 Precauciones de Seguridad Funcionamiento Enchufe la corriente No haga funcionar o detenga No dañe ni use un cable no adecuadamente. la unidad insertando o especificado. tirando del enchufe. • De otro modo, causará • Causará descarga eléctrica o • Causará descarga eléctrica o descarga eléctrica o incendio.
- Page 30 Precauciones de Seguridad Cierre todas las puertas, ventanas y otras Ventile antes de hacer funcionar el aberturas de la sala. acondicionador de aire cuando sale el gas. • El aparato de aire acondicionado debe • Puede causar explosión, incendio, operarse en un área cerrada para ser más quemaduras.
-
Page 32: Antes De Poner En Marcha
Precauciones de Seguridad Antes de poner en marcha Preparar para el funcionamiento 1. Coloque el enchufe correctamente. 2. Use un único circuito para este aparato. Recargar el circuito podría provocar un riesgo de incendios. 3. No utilice un alargador. Consulte la página 36 para más detalles. 4. -
Page 33: Introducción
Precauciones de Seguridad Introducción Símbolos Utilizados en Este Manual Este símbolo lo advierte de un peligro de accidente por corriente eléctrica. Este símbolo lo adiverte de un peligro que pueda causar un daño del ventliador. Este símbolo significa condicciones especiales. CONSEJO Características ADVERTENCIA : Este aparato debería instalarse de acuerdo con las... - Page 34 Precauciones de Seguridad Seguraidad Electrica Aire Acondicionador...
-
Page 35: Seguridad Eléctrica
Precauciones de Seguridad Seguridad Eléctrica Este equipo debe estar puesto a tierra debidamente. El cable de alimentación está equipado de una toma de tierra con tres pins. Para minimizar el peligro de una lesión por corriente eléctrica, utilice una toma con enchufe de tierra estándar con tres contactos. -
Page 36: Uso Transitorio De Un Adaptador
Precauciones de Seguridad Uso Transitorio de un Adaptador Debido a eventuales peligros de seguridad no recomendamos en absoluto el uso de un adaptador. Sólo para una conexión transitoria se puede usar el adaptador clasificado como UL que está a disposición en la mayoría de las tiendas de productos eléctricos. -
Page 37: Instalación
Instalación Cómo instalar la unidad Para prevenir la vibración y el ruido, asegúrese que la Cerco unidad esté instalada con seguridad y firmeza. Protección Instale la unidad donde la luz del sol no caiga Aire fresco directamente en la misma. Radiación de calor La parte exterior del gabinete debe extenderse hacia... - Page 38 Instalación Contenidos de los conjuntos de instalación Nº NOMBRE DE LA PARTE Cantidad MARCO DE LA CORTINA MENSULA DE SOPORTE MENSULA DEL ALFEIZAR TUERCA TORNILLO (TIPO A) TORNILLO (TIPO B) TORNILLO (TIPO C) TORNILLO (TIPO D) PERNO BURLETE DE ESPUMA BURLETE de ESPUMA-PE ABRAZADERA DE FIJACIÓN A LA VENTANA CAÑO DE DRENAJE...
-
Page 39: Instalación Del Gabinete
Instalación Instalación del gabinete MENSULA DEL ALFEIZAR Abra la ventana. Marque una línea en el centro de la repisa de la ventana entre las molduras de tope de la MENSULA ventana lateral. DE SOPORTE BULÓN Coloque sin apretar la ménsula del alféizar en la ménsula de soporte utilizando el pemo y la tuerca de segutidad. -
Page 40: Tornillo (Tipo A)
Instalación Hale cada panel guía completamente a cada lado de la ventana y repita del paso 2. Adjunte cada panel guía a cada lado de la ventana usando tornillos (Tipo C). Deslice el chasís dentro del gabinete. PRECAUCIÓN: Por razones de seguridad, TORNILLO re instale los tornillos (Tipo A) en los lados del gabinete. -
Page 41: Tornillo (Tipo D)
Instalación Instale la rejilla frontal en el cabinete insertando la lengüeta en la rejilla a la lengüeta en el frente del cabinete. Empuje la rejilla hasta que se cierre con sonido de golpe. Levante la rejilla de entrada y asegúrela con un tornillo (tipo A) a través de la rejilla frontal. -
Page 42: Instrucciones De Funcionamiento
Instrucciones de funcionamiento POWER (encendido) El funcionamiento se inicia cuando se pulsa esta tecla y se detiene cuando se la presiona nuevamente. SELECTOR DE VELOCIDAD DEL VENTILADOR (FAN SPEED) Para aumentar la capacidad mientras se refresca, seleccione una mayor velocidad del ventilador. 3 Pasos: High (alta) Low (baja) Med (media) -
Page 43: Control Remoto
Instrucciones de funcionamiento Control Remoto POWER (encendido) El funcionamiento se inicia cuando se pulsa esta tecla y se detiene cuando se la presiona nuevamente. CONTROL DE TEMPERATURA El termostato monitorea la temperatura de la Power habitación para mantener la temperatura deseada. El termostato puede ser colocado entre 60 F~86 C~30... -
Page 44: Adicionales E Características
Instrucciones de funcionamiento Ajustar la dirección del flujo de aire El flujo de aire puede ser ajustado cambiando la dirección de las rejillas de ventilación del acondicionador deaire. Esto puede también incrementar la eficacia del acondicionador de aire. Ajustar la dirección del flujo de aire horizontal. Ajustar las rejillas verticales hacia la izquierda yderecha cambiará... -
Page 45: Tubo De Desagüe
Operating Instr uctions Adicionales e Características Tubo de Desagüe En climas húmedos, es posible que la Bandeja Evaporadora se llenne de agua. Para quitar el agua acumulado, es preciso conectar el tubo de desagüe. Quite la Tapa del Desagüe y conecte el Drain Pipe Drain Cap Tubo a la Bandeja Evaporadora. -
Page 46: Mantenimiento Y Servicio
Mantenimiento y servicio Mantenimiento y servicio Filtro de Aire Revise por lo menos dos veces al mes si no es necesario limpiar el filtro de aire. Las partículas detenidad se pueden acumular en el filtro impidiendo el flujo del aire, limitando el rendimiento de enfriamiento y causando la acumulación de hielo en el evaporador. -
Page 47: Como Remover La Parilla Frontal
Mantenimiento y servicio Como Remover la Parilla Frontal 1. Tire de la rejilla de entrada hacia delante agarrando ambas lengüetas y tire del filtro del aire hasta sacarlo. 2. Saque el tornillo que asegura la Parrilla Frontal. 3. Suelte el lado izquierdo primero. Cool F1 LOW Energy... -
Page 48: Problemas Y Soluciones Habituales
Mantenimiento y servicio Problemas y Soluciones habituales Antes de Llamar el Servicio de Asistencia Técnica Si tiene problemas con su ventilador, lea las informaciones siguientes y trate de resolver el problema. Si no puede encontrar la solución, desconecte el ventilador y diríjase a su suministrador. - Page 50 Nota 50 Aire Acondicionador...
- Page 51 Specifications and performance data subject to change without notice. HEAT CONTROLLER, INC. 1900 WELLWORTH AVENUE • JACKSON, MICHIGAN 49203 THE QUALITY LEADER IN CONDITIONING AIR P/No.: MFL42072404 Printed in China...