Table of Contents
Advertisement
Owner's Guide
and
Installation Instructions
Solar Loline Water Heater
WARNING: Plumber – Be Aware
Use copper pipe ONLY. Plastic pipe MUST NOT be used.
It is a requirement of a solar water heater installation that all pipe work be in copper
and not plastic, due to the effects of high water temperatures and pressures.
This water heater must be installed and serviced by an authorised person.
Please leave this guide with the householder.
Advertisement
Table of Contents

Related Manuals for Rheem Solar Loline Water Heater


Summary of Contents for Rheem Solar Loline Water Heater
-
Page 1: Installation Instructions
Owner’s Guide Installation Instructions Solar Loline Water Heater WARNING: Plumber – Be Aware Use copper pipe ONLY. Plastic pipe MUST NOT be used. It is a requirement of a solar water heater installation that all pipe work be in copper and not plastic, due to the effects of high water temperatures and pressures. - Page 2 Rheem Australia Pty Ltd. TRADE MARKS ® Registered trademark of Rheem Australia Pty Ltd. ™ Trademark of Rheem Australia Pty Ltd. Note: Every care has been taken to ensure accuracy in preparation of this publication. No liability can be accepted for any consequences, which may arise as a result of its application.
-
Page 3: Table Of Contents
CONTENTS HOUSEHOLDER – We recommend you read pages 4 to 19. The other pages are intended for the installer but may be of interest. About Your Water Heater ......................4 Regular Care ..........................12 Water Supplies ........................... 14 Save A Service Call ........................17 Installation –... -
Page 4: About Your Water Heater
The solar storage tank is suitable for either outdoor or indoor installation and can be installed with Rheem NPT 200 or HBT 200 solar collectors. The system is not suitable for installation above 400 metres altitude. - Page 5 Refer to “Booster Control” on page 6. Rheem recommends the thermostat is set at 60°C to maximise solar maximum recommended contribution. supply temperature to bathrooms and ensuites Note: AS 3498 requires that a water heater provides the means to inhibit the growth of Legionella bacteria in potable water.
- Page 6 The power supply cord and plug must be replaced with a genuine replacement part available from Rheem. Phone Rheem Service or their nearest Accredited Service Agent to arrange for an inspection.
- Page 7 ABOUT YOUR WATER HEATER Timer Control Switch A suitably rated timer control switch can be installed and will help maximise energy savings with an electrically boosted solar water heater connected to a continuous, time of use or extended Off-Peak (overnight and day) electricity supply. If used with an extended Off-Peak (overnight and day) electricity supply, the timer switch should: ...
- Page 8 ABOUT YOUR WATER HEATER FREEZE PROTECTION The system has a level of freeze protection designed to guard the system against damage from freeze conditions. The system must be installed with the full length of the solar hot and solar cold pipes insulated to offer protection against freeze damage (refer to “Pipe Work and Insulation”...
- Page 9 If the red LED continues to emit a rapid pulse for longer than ten (10) minutes, or emits a series of flashes, then count the number of flashes and phone Rheem Service or their nearest Accredited Service Agent to arrange for an inspection.
- Page 10 ABOUT YOUR WATER HEATER BLEEDING THE SOLAR COLLECTORS It is necessary to purge air from the collector circuit: When the water heater is to be turned on and the solar collectors and solar hot and solar cold pipes have been drained. ...
- Page 11 ABOUT YOUR WATER HEATER TO TURN ON THE WATER HEATER Open the cold water isolation valve fully at the inlet to the water heater. If the solar collectors and solar hot and solar cold pipes have been drained, it will be necessary to bleed the collector circuit (refer to “Bleeding the Solar Collectors”...
-
Page 12: Regular Care
Have any trees trimmed which may shade the solar collectors. Rheem solar collectors have passed the AS/NZS 2712 requirements for resistance to hailstone damage, so it is not normally necessary to fit a guard to a collector. Stone Guards are available to provide a level of protection to the collectors against vandalism or accidental damage. - Page 13 REGULAR CARE FLUSHING THE SOLAR COLLECTORS It may be necessary to flush the solar collectors if there is sediment in the water supply. This should be conducted in the morning, within three hours of sunrise. To flush the solar collectors: ...
-
Page 14: Water Supplies
WATER SUPPLIES This water heater must be installed in accordance with this advice to be covered by the warranty. This water heater is manufactured to suit the water conditions of most public reticulated water supplies. However, there are some known water chemistries which can have detrimental effects on the water heater and its operation and / or life expectancy. - Page 15 Refer to the Saturation Index chart on page 16. Contact Rheem Service or their nearest Accredited Service Agent if a replacement heating unit is required. Refer to the cold water connection detail on page 35 for the position of the expansion control valve.
- Page 16 WATER SUPPLIES SATURATION INDEX (SI) SOLAR WATER HEATERS - ELECTRIC BOOST WITHIN WARRANTY SPECIFICATION -1.0 +0.4 +0.8 SATURATION INDEX (calculated @ 80°C water temperature) scaling very corrosive corrosive very scaling SUMMARY OF WATER CHEMISTRY ADVICE AFFECTING WARRANTY The warranty of this water heater does not apply on the components listed below if the water heater is connected at any time to a water supply with water chemistry of: Water Chemistry Component...
-
Page 17: Save A Service Call
Switch off the electrical supply at the power outlet to the solar control unit for a few seconds, then switch on again. If the green LED remains off or the red LED recommences to flash, then count the number of flashes and phone Rheem Service or their nearest Accredited Service Agent to arrange for an inspection. Collectors shaded If trees or other objects shade the solar collectors or if the glass is dirty, the effectiveness of the solar collectors will be greatly reduced. - Page 18 Heavy flows of hot water until the water heater is cold - then stops until water reheats The water heater must be switched off at the isolating switch or switchboard. Phone Rheem Service or their nearest Accredited Service Agent to arrange for an inspection.
- Page 19 Warning: No attempt should be made to remove or replace broken collector glass. The collector glass is not offered as a replacement part. Should the solar collector require replacement, contact Rheem Service or their nearest Accredited Service Agent. HIGHER THAN EXPECTED ELECTRICITY BILLS With the installation of your new solar hot water system, maximum electrical energy savings can be achieved with careful planning of hot water usage.
-
Page 20: Installation – Solar Storage Tank
INSTALLATION – SOLAR STORAGE TANK THIS WATER HEATER IS NOT SUITABLE FOR POOL HEATING. The system is suitable for installation with Rheem NPT 200 or HBT 200 solar collectors. The system is not suitable for installation above 400 metres altitude. - Page 21 INSTALLATION – SOLAR STORAGE TANK WATER HEATER APPLICATION This water heater is designed to be installed as an electric boosted solar water heater with its booster heating unit connected to a power supply, however it may be installed with an in-series continuous flow or storage booster.
- Page 22 INSTALLATION – SOLAR STORAGE TANK MAINS WATER SUPPLY Where the mains water supply pressure exceeds that shown in the table, an approved pressure limiting valve is required and should be fitted as shown in the installation diagram (refer to diagram on page 35).
- Page 23 INSTALLATION – SOLAR STORAGE TANK HOT WATER DELIVERY This water heater can deliver water at temperatures which can cause scalding. It is necessary and we recommend that a temperature limiting device be fitted between the water heater and the hot water outlets in any ablution and public areas such as a bathroom, ensuite or public amenities, to reduce the risk of scalding.
- Page 24 INSTALLATION – SOLAR STORAGE TANK CIRCULATED HOT WATER FLOW AND RETURN SYSTEM A solar water heater should not be installed as part of a circulated hot water flow and return system in a building. The benefits of solar gain will be significantly reduced and energy gained from the sun lost through the pipe work.
- Page 25 INSTALLATION – SOLAR STORAGE TANK REDUCING HEAT LOSSES The cold water line to and the hot water line from the water heater must be insulated in accordance with the requirements of AS/NZS 3500.4. The insulation must be weatherproof and UV resistant if exposed. The full length of the solar hot and solar cold pipes between the solar storage tank and the solar collectors MUST BE insulated.
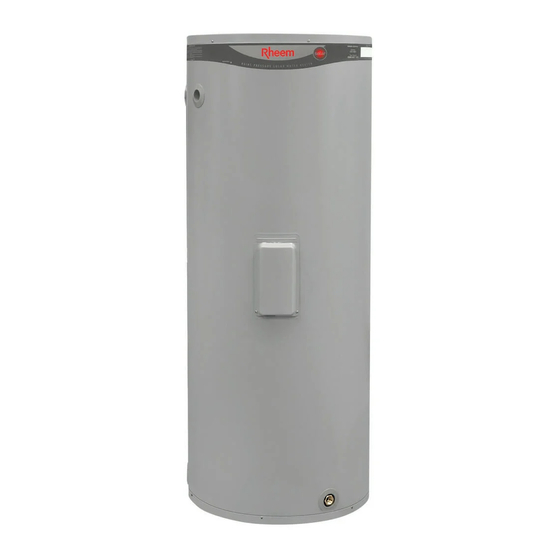
- Page 26 INSTALLATION – SOLAR STORAGE TANK DIMENSIONS AND TECHNICAL DATA Tank Mass (kg) Model Capacity Empty Full Rheem Solar 511 Series Electric Boost 511 270 270 litres Dimensions 511 340 325 litres 511 430 410 litres Dimensions (mm) 511 270 1395 1117 32°...
- Page 27 INSTALLATION – SOLAR STORAGE TANK TYPICAL INSTALLATION – OUTDOOR LOCATION TYPICAL INSTALLATION – INDOOR LOCATION Rheem Solar Loline 511 Series Electric Boost Rheem Solar Loline 511 Series Electric Boost Typical Installation Solar Storage Tank Typical Installation Solar Storage Tank...
-
Page 28: Installation – Solar Control Unit
INSTALLATION – SOLAR CONTROL UNIT The solar control unit is designed to be mounted on the side of the solar storage tank, with its location above and offset from the solar cold water outlet. The solar control unit, supplied with a 1.8 metre power cord, requires a 240 V 50 Hz general purpose outlet (GPO) located within 1.2 metres of its installation. - Page 29 INSTALLATION – SOLAR CONTROL UNIT SOLAR STORAGE TANK WITH RAISED SOLAR HOT INLET Numbers in parentheses refer to items on diagram on page To connect the solar cold pipe and mount the solar control unit on a Loline storage tank with a raised solar hot inlet (and raised heating unit): ...
- Page 30 INSTALLATION – SOLAR CONTROL UNIT from solar to solar collectors collectors refer to the installation diagram on page 30 for assembly details of solar hot and solar cold pipe connections Solar Storage Tank with Solar Control Unit pen Circuit Pumped Electric Boost - Installation Schematic SUPPLIED IN SOLAR CONTROL UNIT KIT (299121) Hex nipple ½”...
-
Page 31: Installation – Solar Collectors
INSTALLATION – SOLAR COLLECTORS SOLAR COLLECTOR LOCATION Consideration must be given to the position of the solar collectors in relation to the solar storage tank. There are limitations on the maximum length of the solar hot and solar cold pipes between the solar storage tank and the solar collectors. - Page 32 INSTALLATION – SOLAR COLLECTORS LATITUDE OF SOME AUSTRALIAN CITIES Adelaide 35°S Cairns 17°S Hobart 42°S Port Hedland 20°S Alice Springs 24°S Canberra 35°S Mildura 34°S Rockhampton 24°S Brisbane 27°S Darwin 12°S Melbourne 38°S Sydney 34°S Broken Hill 31°S Geraldton 28°S Perth 32°S Townsville...
- Page 33 INSTALLATION – SOLAR COLLECTORS WARNING: Plumber – Be Aware The solar hot and solar cold pipes between the solar storage tank and the solar collectors MUST BE of copper. All compression fittings must use brass or copper olives. The full length of the solar hot and solar cold pipes MUST BE insulated.
- Page 34 INSTALLATION – SOLAR COLLECTORS Maximum height to collectors The maximum height of a solar Loline installation, from the solar controller (circulator) to the top of the solar collectors, is determined by the maximum recommended total pipe length for the system and the water supply pressure.
-
Page 35: Connections – Plumbing
CONNECTIONS – PLUMBING CONNECTION SIZES Hot water connection: RP¾/20. Cold water connection: RP¾/20. Solar hot (from collector) connection: DN15 compression fitting. (solar hot inlet to tank: RP¾/20) Solar cold (to collector) connection: DN15 compression fitting. (solar cold outlet from tank: RP¾/20) ... - Page 36 CONNECTIONS – PLUMBING This water heater has either a plastic dip tube or fitting liner in the inlet and outlet fittings (see diagram). These must be in place for the water heater to function properly. Do not remove or damage them by using heat nearby.
- Page 37 CONNECTIONS – PLUMBING RELIEF VALVE DRAIN DN15 copper drain lines must be fitted to the temperature pressure relief valve and expansion control valve (if one is installed). Connect the drain lines to the valves using disconnection unions. The drain line from the valve to the point of discharge should be as short as possible, have a continuous fall all the way from the water heater to the discharge outlet and have no tap, valves or other restrictions in the pipe work.
-
Page 38: Connections – Electrical
For reasons of safety and economy, we advise the thermostat be set at the lowest temperature that will provide sufficient hot water during periods when boosting is required. Rheem recommends the thermostat is set at 60°C to maximise solar contribution. Discuss the thermostat setting requirements with the householder. - Page 39 CONNECTIONS – ELECTRICAL BOOSTER CONTROL The isolating switch installed in the electrical meter box for the solar storage tank should be left switched on. Leaving the isolating switch switched on will also provide a sufficient period of time each day for the booster heating unit to operate, if required, to satisfy the requirements of AS 3498.
- Page 40 CONNECTIONS – ELECTRICAL TIMER CONTROL SWITCH WIRING DIAGRAM Switchboard Switchboard Switchboard CONTINUOUS EXTENDED OFF-PEAK EXTENDED OFF-PEAK POWER SUPPLY POWER SUPPLY POWER SUPPLY (timer with rechargeable battery) Timer Timer Terminal Block Terminal Block TIMER WITHOUT CONTACTOR TIMER WITH CONTACTOR (if required) TIMER WIRING DIAGRAMS ELECTRIC BOOSTED DIRECT SOLAR WATER HEATER...
-
Page 41: Commissioning
COMMISSIONING TO FILL AND TURN ON THE WATER HEATER The power supply to the solar storage tank and solar control unit must not be switched on until the water heater is filled with water and a satisfactory megger reading is obtained. ... - Page 42 COMMISSIONING Explain to the householder or a responsible officer the functions and operation of the solar water heater and the timer if one is installed. Upon completion of the installation and commissioning of the water heater, leave this guide with the householder or a responsible officer. BLEEDING THE SOLAR COLLECTORS Upon completion of the installation, it is necessary to purge the air from the collector circuit.
- Page 43 If the red LED continues to emit a rapid pulse for longer than ten (10) minutes, or emits a series of flashes, then count the number of flashes and phone Rheem Service or their nearest Accredited Service Agent to arrange for an inspection.
-
Page 44: Draining The Solar Collectors
DRAINING THE SOLAR COLLECTORS To drain the solar collectors and the solar hot and solar cold pipe: Open a hot water tap and allow the water to run for five minutes immediately prior to draining the solar collector(s). This will assist in the transfer of any high temperature water in the solar collector(s) to the solar storage tank. - Page 45 This page is intentionally blank.
- Page 46 This page is intentionally blank.
-
Page 47: Warranty
(we suggest that the collector glass be covered by d) Where the solar Loline water heater or solar Loline water your home insurance policy). heater component has failed directly or indirectly as a result 2. - Page 48 WARRANTY – SOLAR LOLINE WATER HEATER MODELS 511270, 511340, 511430 Rheem will repair or replace, at Rheem’s sole discretion and subject to the warranty conditions and exclusions, any component, the storage tank or the solar collector if it fails within the warranty period below.