
Related Manuals for Roland UM-ONE


Summary of Contents for Roland UM-ONE
- Page 1 For the following languages, a PDF version of the Owner’s Manual can be found on the CD-ROM. Deutsch, Français, Italiano, Español, Português, Nederlands...
-
Page 2: What Is Midi
* DAW software is a term that refers to music production software, such as SONAR. Note Do not connect the UM-ONE to the computer until the driver has been installed (p. 9). Before using this unit, carefully read the sections entitled: “USING THE UNIT SAFELY” and “IMPORTANT NOTES”... -
Page 3: Using The Unit Safety
(except when this manual provides specific instructions directing you to do so). Refer all servicing to your retailer, the nearest Roland Service Center, or an • Immediately disconnect the USB cable, authorized Roland distributor, as listed on and request servicing by your retailer, the “Information”... - Page 4 USING THE UNIT SAFETY • DO NOT play a CD-ROM disc on a conventional audio CD player. The resulting sound may be of a level that could cause permanent hearing loss. Damage to speakers or other system components may result. • Try to prevent cords and cables from becoming entangled.
-
Page 5: Important Notes
Swiftly wipe away any liquid that spills on the unit which was developed by Technology Properties Limited using a dry, soft cloth. (TPL). Roland has licensed this technology from the TPL Group. Maintenance • For everyday cleaning wipe the unit with a soft, dry cloth or one that has been slightly dampened with water. - Page 6 MEMO...
-
Page 7: Table Of Contents
Using the UM-ONE ........ -
Page 8: Panel Descriptions
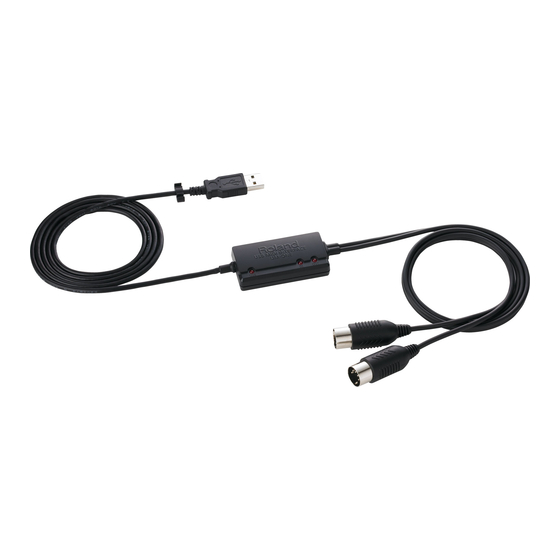
Panel Descriptions Note Do not connect the UM-ONE to the computer until the driver has been installed (p. 9). Name Description USB Cable Connects the UM-ONE to a computer. Lights when the UM-ONE is connected to a computer and the USB Indicator computer has detected the UM-ONE. -
Page 9: Driver Installation
Mac OS X Note Do not connect the UM-ONE to the computer until you are directed to do so. A “driver” is software that transfers data between the UM-ONE and application software running on your computer, when your computer and the UM-ONE are connected. - Page 10 Driver Installation Windows 5. When a confirmation screen regarding user account control appears, click [Yes] or [Continue]. 6. When “The UM-ONE Driver will be installed on your computer” appears, click [Next]. 7. Click [Next] again. Windows 7/Windows Vista If a dialog box regarding Windows security appears, click [Install].
- Page 11 Driver Installation Windows 7/Windows Vista 9. When “Installation has been completed.” appears, click [Close]. Close the “UM-ONE Driver Setup” dialog box. If the “Change System Settings” dialog box appears, click [Yes] to restart Windows. Installation complete. Windows XP 9. If a dialog box that asks whether you want to connect to Windows Update appears, select [No, not this time] and click [Next].
- Page 12 13. Confirm that “UM-ONE” appears in the “MIDI Studio” window or the “Audio MIDI Settings” dialog box. If “UM-ONE” does not appear or if it is grayed out, it means that the UM-ONE is not being detected properly. Click [Rescan MIDI]. Also try disconnecting and reconnecting the UM-ONE’s...
- Page 13 [Apply]. 17. Using your mouse, drag and connect the up/down arrows (which represent the input/output ports of each device) of the [UM-ONE] and the [UM-ONE] that you added so that they are connected as shown in the figure. 18, 20 18. Click [Test Setup].
-
Page 14: Basic Use
UM-ONE. • Select the UM-ONE for the software’s MIDI device setting. • The UM-ONE will not operate in the Mac OS X Classic environment. Use the UM-ONE when the Classic environment is not running. Recording MIDI Data, Playing a Software Sound Module To transmit MIDI messages from a MIDI keyboard or digital piano in order to record MIDI data using DAW software or play a software sound module, make the following connections and settings. -
Page 15: Playing Back Midi Data
(CONNECT TO MIDI IN) To MIDI IN Connector Software’s MIDI Output Device: UM-ONE Digital Piano MIDI Sound Module * When connecting other devices, always be sure to turn the volume down before connecting or disconnecting cables to prevent damage to speakers. -
Page 16: Troubleshooting
USB devices connected? and keyboard) during installation. Is the UM-ONE connected to a USB hub Use a USB hub that connects to a power supply. that is connected to a power supply? If you change the USB connector to which the “Found New... -
Page 17: Using The Um-One
Troubleshooting Problem Confirmation Resolution If you connect the UM-ONE to a different USB connector than the one you used when installing Numeral such the driver, a numeral may appear with the device as “2-” appears Did you connect the UM-ONE to a name. - Page 18 Is the driver installed? Install the driver (p. 9). Is the software’s input device and output Select the UM-ONE as the input and output device device configured? (p. 14, p. 15). Make sure that the UM-ONE is connected to the computer correctly.
- Page 19 Is the computer’s power management Configure power management settings (p. 20). function set to energy saving mode? Connect the UM-ONE directly to one of the Is the UM-ONE connected to a USB hub? computer’s USB connectors. Is the driver’s [Lighten Load] setting Place a check in the [Lighten Load] check box (p.
-
Page 20: Changing Computer Settings To Avoid Problems
Changing Computer Settings to Avoid Problems Changing these computer settings can help you avoid the problems described in “Driver Installation” (p. 16) and “Using the UM-ONE” (p. 17). Driver Signing Options Setting (Windows XP) If the “Driver Signing Options” setting is set to [Block], you cannot install the driver. Configure as follows. - Page 21 Troubleshooting 3. Click [Change plan settings] next to [High performance]. If “High performance” is not displayed in Windows 7, click [Show additional plans]. 4. Click [Change settings that are currently unavailable]. 5. In the [Advanced settings] tab of the “Power Options” control panel, click the [+] mark next to “Hard disk,”...
-
Page 22: Reinstalling The Driver
2. Install the driver again as described in “Driver Installation” (p. 9). Deleting the Driver If the computer does not detect the UM-ONE correctly, use the following procedure to delete the driver, and then install the driver again as described in “Driver Installation” (p. 9). - Page 23 Mac OS X 10.5 or earlier Open [Driver], and then [10.4_10.5] 4. When “This uninstalls UM-ONE driver from this Macintosh.” appears, click [Uninstall]. If other messages appear, follow the instructions on the screen. 5. When “Are you sure you want to uninstall the driver?” appears, click [OK].
-
Page 24: Lightening The Midi Load (Windows)
Troubleshooting Lightening the MIDI Load (Windows) The MIDI load can be lightened in the UM-ONE driver setting dialog box. 1. Exit all programs that are using the UM-ONE. 2. Open the “Control Panel” and set the display mode as follows. -
Page 25: Main Specifications
Main Specifications UM-ONE: USB MIDI Interface MIDI IN Cable (CONNECT TO MIDI OUT) x 1 (16 MIDI Channels) Connectors MIDI OUT Cable (CONNECT TO MIDI IN) x 1 (16 MIDI Channels) USB Cable USB Indicator Indicators MIDI IN Indicator MIDI OUT Indicator... - Page 26 For EU Countries For China...
-
Page 27: Declaration Of Conformity
For the USA DECLARATION OF CONFORMITY Compliance Information Statement Model Name : UM-ONE Type of Equipment : USB MIDI Interface Responsible Party : Address : Telephone : For EU Countries This product complies with the requirements of EMC Directive 2004/108/EC.