Table of Contents
Advertisement
Quick Links
OWNER'S MANUAL
We'd like to take a moment to thank you for purchasing
the Roland UM- 4 (64 Channel USB MIDI Interface).
This document explains how to set up the UM- 4 system.
To avoid problems and enjoy optimal performance, please
carefully follow the setup instructions described in this
document.
Before using this unit, carefully read the sections entitled:
"USING THE UNIT SAFELY" (P. 3, 4) and
"IMPORTANT NOTES" (P. 5). These sections provide
important information concerning the proper operation of
the unit. Additionally, in order to feel assured that you
have gained a good grasp of every feature provided by
your new unit, this manual should be read in its entirety.
The manual should be saved and kept on hand as a
convenient reference.
Copyright © 1999 ROLAND CORPORATION
All rights reserved. No part of this publication may be
reproduced in any form without the written permission of
ROLAND CORPORATION.
Advertisement
Table of Contents

Related Manuals for Roland UM-4


Summary of Contents for Roland UM-4
- Page 1 OWNER’S MANUAL We’d like to take a moment to thank you for purchasing the Roland UM- 4 (64 Channel USB MIDI Interface). This document explains how to set up the UM- 4 system. To avoid problems and enjoy optimal performance, please carefully follow the setup instructions described in this document.
-
Page 3: Using The Unit Safely
(except when this manual provides specific instruc- tions directing you to do so). Refer all servicing to your retailer, the nearest Roland Service Center, or an autho- rized Roland distributor, as listed on the "Information" page. For EU Countries... - Page 4 012d • Immediately turn the power off, and request servicing by your retailer, the nearest Roland Service Center, or an authorized Roland distributor, as listed on the "Information" page when: • Objects have fallen into, or liquid has been spilled onto the unit;...
-
Page 5: Important Notes
IMPORTANT NOTES 291a In addition to the items listed under “USING THE UNIT SAFELY” on page 3-4, please read and observe the following: Power Supply • Before connecting this unit to other devices, turn off the power to all units. This will help prevent malfunctions and/or damage to speakers or other devices. -
Page 6: Table Of Contents
Appendices ... 34 1. Connecting Equipment Supporting MTC ... 34 MTC settings for Macintosh users... 34 2. When Connecting Multiple UM-4 Units ... 36 3. Deleting the USB MIDI Driver from Windows ... 39 Troubleshooting ... 41 Main Specifications ... 47 System requirements ... -
Page 7: Introduction
Introduction 1. Features of the UM-4 The UM-4 is a USB MIDI interface which uses USB as its connection to your computer. What is USB? USB stands for Universal Serial Bus, which is a new interface for connecting various types of peripheral device to computers. -
Page 8: Contents Of The Package
Introduction 2. Contents of the Package The UM-4 package contains the following items. As soon as you open the package, please verify that all items are present. If any items are missing, please contact the dealer where you purchased the package. - Page 9 Introduction Before You Begin (Attaching the Rubber Feet) If you will be using the UM-4 by itself without using the separately sold rack mount adaptor (Roland RAD-50), please attach the rubber feet to the bottom of the unit as shown in the diagram.
-
Page 10: Front And Rear Panel
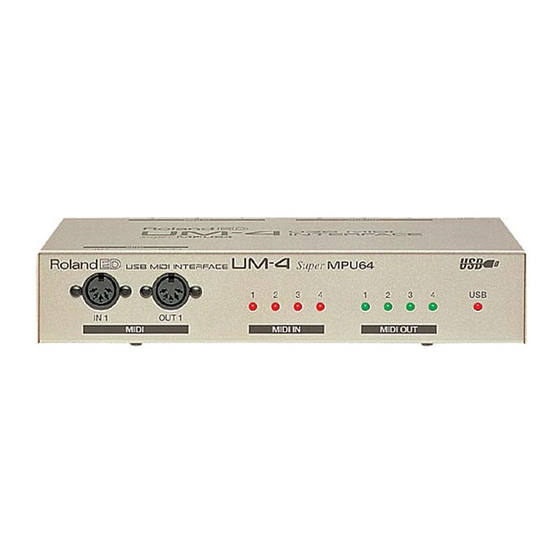
Introduction 3. Front and Rear Panel fig.01-06_95 MIDI IN 1/2/3/4 Connectors Connect these to the MIDI OUT connector of the keyboard or other devices that will transmit MIDI messages to your computer. MIDI OUT 1/2/3/4 Connectors Connect these to the MIDI IN connector of the sound modules or other devices that you wish to play from your computer. -
Page 11: Connections
When using a USB cable to connect your computer to the UM-4, it is not necessary to turn off the power of your computer. When you use a USB cable to connect the UM-4 to your computer for the first time, a dialog box for driver installation will appear. Refer to the procedure " Installing &... -
Page 12: Connections With The Midi Equipment
When you are ready to use the system, turn on the power of the MIDI Sound module and of your audio playback system. Connecting a MIDI keyboard If you wish to connect a MIDI keyboard, use a MIDI cable to connect the UM-4’s MIDI IN connector to the MIDI OUT connector of your keyboard. - Page 13 Before turning the power off, be sure to turn down the volume of all devices to avoid speaker damage or malfunctions. Before disconnecting the USB cable which connects your computer and the UM-4, halt any operations which record or playback MIDI data. This will prevent the sound module etc.
-
Page 14: Installing & Setup The Driver
Installing & Setup the Driver In order to use the UM-4, you must first install the UM-4 Driver. The UM-4 Driver is included in the “UM Driver CD-ROM.” What is UM-4 Driver? The UM-4 Driver is software which passes data between the UM-4 and the application (sequencer software etc.) that is running on the USB-connected computer. -
Page 15: Windows Users
If a MIDI driver for the S-MPU64 is currently installed on the computer, it will recognize the UM-4, and treat it as being a S-MPU64. As a result, this dialog box will not be displayed. In this case, you do not need to install the new driver, because the UM-4 can be used as if it were a S-MPU64. - Page 16 Installing & Setup the Driver When the display indicates “What do you want Windows to do?,” choose [Display a list of all the drivers in a specific location, so you can select the driver you want.]. Then click [Next]. fig.03-02.e When the display indicates “Select the manufacturer and model of hardware device,”...
- Page 17 * If necessary, change the drive name D: to match the drive name of your CD-ROM drive. For example if your CD-ROM drive is named Q:, you would input “Q:\ENG\UM4.” Make sure that Roland UM-4 USB Driver is indicated as the model, as shown below, and click [Next].
- Page 18 Installing & Setup the Driver The display will indicate “Windows driver file search for the device.” Click [Next], and installation of the driver files will begin. Please wait. fig.03-06UM4.e A dialog box will appear to inform you that the driver installation has been completed. Click [Finish].
- Page 19 Specifying the Output Destination for MIDI Data Here you can make settings for using the USB MIDI driver with applications such as the “Media Player” that is included with Windows. Click the Windows [Start] button, select [Settings] from the menu that appears, and select [Control Panel].
- Page 20 In Multimedia Properties, click the [MIDI] tab. Then, with [Single instrument] selected for MIDI output, click the MIDI device that corresponds to the MIDI port to which your MIDI equipment is connected via [Roland UM-4 MIDI 1] through [Roland UM-4 MIDI 4]. fig.03-10.e.eps_50 MIDI devices correspond to MIDI ports as follows.
-
Page 21: Using Oms On The Macintosh
Install the MIDI driver (OMS) into your Macintosh. Turn on the power of your computer and start up your Macintosh. Use a USB cable to connect the UM-4 to your computer (P.11). The message shown in the illustration will appear, so click [OK]. Insert the UM Driver CD- ROM into your CD-ROM drive. - Page 22 Installing & Setup the Driver If the following dialog box appears, click [Continue]. fig.installstart.eps_50 When installation is finished, the following dialog box will appear. Click [Restart] to restart your Macintosh. fig.03-oms3.e After your Macintosh restarts, the following message will appear. Click [OK]. fig.USBMessage.e To learn more about OMS If you would like to learn more about OMS, please refer to “OMS_2.3_Mac.pdf”...
- Page 23 Then install the UM-4 Driver. • the “USBSMPU64Driver” file in the “Extensions” folder • the “SMPU64” file in the “OMS Folder” folder In the “UM Driver E” -“UM-4” folder of the CD-ROM, double-click the “UM4 OMS Driver-E Installer” icon. fig.03-scdrv1.e.eps_50 Make sure that OMS is already installed in the location where the driver will be installed, and click [Install].
- Page 24 Installing & Setup the Driver If the following message appears, click [Continue] and all other currently-running applications will be exited, and installation will continue. fig.03-scdrv2z.e When installation is completed, the following dialog box will appear. Click [Restart] to restart your Macintosh. fig.03-scdrv3.e OMS settings In the “Opcode”...
- Page 25 The “Create a New Studio setup” dialog box will appear. Click [OK]. fig.03-omsu3.e * If the “Create a New Studio setup” dialog box does not appear, click [New Studio setup] in the [File] menu. The “OMS Driver Search” dialog box will appear. Click [Search]. fig.03-omsu4.e Installing &...
- Page 26 Driver Setup” dialog box, and click [OK]. fig.03-omsu5.e After making sure that the UM-4 is listed in the “OMS MIDI Device Setup” dialog box, click each check box for Port1 through Port4 to check them all, and click [OK]. fig.03-omsu6.e...
- Page 27 The “Save” dialog box will appear. Input the desired file name, and click [Save]. fig.03-omsu7.e If a sound module is connected to a MIDI connector of the UM-4, select [Test Studio] in the [Studio Menu] and check it in order to Test Studio whether sound is produced.
- Page 28 * Port 1 is MIDI IN / OUT 1 of the UM-4 Port 2 is MIDI IN / OUT 2 of the UM-4 Port 3 is MIDI IN / OUT 3 of the UM-4 Port 4 is MIDI IN / OUT 4 of the UM-4 After you have finished the above check, exit OMS Setup.
-
Page 29: Using Freemidi On The Macintosh
FreeMIDI must already be installed on the start-up hard disk. The UM-4 Driver included on the disc is provided as an additional module that allows the UM-4 to be used with FreeMIDI. In order to use it, FreeMIDI must already be installed on the start-up hard disk. - Page 30 [Continue]. fig.fm02.e When installation is completed, click [Restart] to restart your computer. fig.03-scdr3.e This completes installation of the UM-4 Driver. Next you will make FreeMIDI settings. FreeMIDI settings Open the “FreeMIDI Applications” folder, and double-click the “FreeMIDI Setup” icon.
- Page 31 In the “FreeMIDI Preferences” dialog box, check “UM-4 Port” which is located below UM-4 Driver in MIDI Configuration, and click [OK]. fig.fm05.e If the dialog box does not show “UM-4 Driver,” check whether the UM-4 is connected correctly, and start up FreeMIDI Setup once again.
- Page 32 Select the model of your MIDI equipment. If the appropriate model does not appear in the list, select “Other.” Studio Location: Select “UM-4,” and for “Cable” that appears below it, select the port to which your MIDI equipment is connected. If two or more units of MIDI equipment are connect, repeat step 5.
- Page 33 When settings are complete, click [Done]. A setting window like the following will appear. fig.fm08UM4.e.eps_50 * This is one example of a setting window. The window that appears will depend on your setup. If you selected “Other” for Model, double-click the appropriate icon in the setting window to make settings for your MIDI equipment.
-
Page 34: Appendices
Appendices 1. Connecting Equipment Supporting MTC When connecting the UM-4 with equipment that supports MTC such as a hard disk recorder, refer to the illustration below, and connect to a port separate from the MIDI sound generator. * Refer to the manuals that came with your MTC-compatible device or MIDI sequencer for details about making the settings you need. - Page 35 FreeMIDI settings Start up “FreeMIDI Setup,” and double-click the MIDI device icon in “FreeMIDI Configuration.” In the “FreeMIDI Device Specification” window, check all items in “Transmit Channels.” fig.04macmtc02.e In “Properties,” check the 5 items enclosed by a frame in the illustration, and then click [OK].
-
Page 36: When Connecting Multiple Um-4 Units
MIDI device assigned to each UM-4, disconnect the USB cables connected to all UM-4 units (from the computer or USB hub). Then connect the UM-4 that you want to be the first unit to the USB connector that had been connected to the UM-4 previously recognized as the first... - Page 37 Windows Users If you use multiple UM-4 units, device numbers will be added to the beginning of the device name to indicate the order (connection order) in which the computer recognized each UM-4 unit. fig.04-03UM4.e.eps_50 OMS Users on Macintosh If you connect multiple UM-4 units and make OMS settings (P.24), multiple “Roland UM-4”...
- Page 38 Appendices FreeMIDI Users on Macintosh If you connect multiple UM-4 units and make FreeMIDI settings (P.30), multiple “UM-4 Port” items will appear in step 3 (P.31), as shown in the illustration. Check all of them, and click [OK]. Then follow the procedure to continue making settings.
-
Page 39: Deleting The Usb Midi Driver From Windows
3. Deleting the USB MIDI Driver from Windows From the Windows Control Panel, double-click the [System] icon. Click the [Device Manager] tab. fig.21-011.e Double-click [Sound, video, and game controllers] to access the list of devices. fig.21-012.e Appendices... - Page 40 From the list, select Roland UM-4 USB Driver and click [Remove]. fig.21-013.e Make sure that Roland UM-4 USB Driver does not appear in the [Sound, video, and game controllers] list, and click [Close]. Use the Windows Explorer etc. to remove the following files.
-
Page 41: Troubleshooting
Is USB enabled? Enable USB on your computer. If an Unknown Device is not detected when you first connect the UM-4 to your computer via a USB cable, it is possible that the USB interface itself is disabled. Use the following procedure to check whether the USB interface is enabled. - Page 42 Disconnect the USB cables, and then re-connect them. It is possible that the computer has failed to recognize or initialize the UM-4. Leave the USB cable connected to the UM-4, and restart Windows. If connection still does not occur, exit Windows, and turn off the power of your computer.
- Page 43 Disconnect the USB cable, and then re-connect it. On some computers when Windows resumes from the suspended state, the UM-4 may fail to resume. If this occurs, the USB cable connected to the UM-4 should be disconnected and then reconnected.
- Page 44 The UM-4 requires Windows 98. It will not operate on Windows 95. Case 8: How can I rack-mount the UM-4? Since the UM-4 is a one-space half-rack size, it can be mounted in a standard rack using the separately sold rack-mounting adapter (Roland RAD-50). When using the Roland RAD-50, do not attach the included rubber feet.
- Page 45 If another USB device is connected, try connecting only the UM-4. It is possible that the computer did not correctly recognize or initialize the UM-4. Leave the USB cable connected to the UM-4, and restart your Macintosh. If the connection is still not achieved, exit your Macintosh and turn off the power of the computer.
- Page 46 (check) only the port (UM-4 Port 1–4) to which the MIDI device you wish to record is connected. * When you select “UM-4 Driver,” all of the four items “UM-4 Port1, 2, 3, 4” will be selected. However if “UM-4 Driver” and “UM-4 Port 1–4” are selected, the selected port will be sounded in duplicate.
-
Page 47: Main Specifications
* Although Roland has tested numerous configurations, and has determined that on average, a computer system similar to that described above will permit normal operation of the UM-4, Roland cannot guarantee that a given computer can be used satisfactorily with the UM-4 based solely on the fact that it meets the above requirements. - Page 48 Service’99/06/11(EDIROL)_ Information When you need repair service, call your nearest Roland/EDIROL Service Center or authorized Roland/EDIROL distributor in your country as shown below. SINGAPORE AFRICA AFRICA CRISTOFORI MUSIC PTE EGYPT Blk 3014, Bedok Industrial Park E, #02-2148, SINGAPORE 489980 Al Fanny Trading Office TEL: 243 9555 P.O.
- Page 52 02012278 00-9-E2-21N...