Polycom IP 7000 User Manual
Soundstation
Hide thumbs
Also See for IP 7000:
- User manual (130 pages) ,
- Setup manual (38 pages) ,
- Integration manual (32 pages)

Related Manuals for Polycom IP 7000


Summary of Contents for Polycom IP 7000
-
Page 1: User Guide
User Guide ® for the SoundStation IP 7000 Phone SIP 3.0.2 March, 2008 Edition 1725-40075-001 Rev. A SIP 3.0.2... - Page 2 As between the parties, Polycom, Inc. retains title to, and ownership of, all proprietary rights with respect to the software contained within its products. The software is protected by United States copyright laws and international treaty provision.
-
Page 3: About This Guide
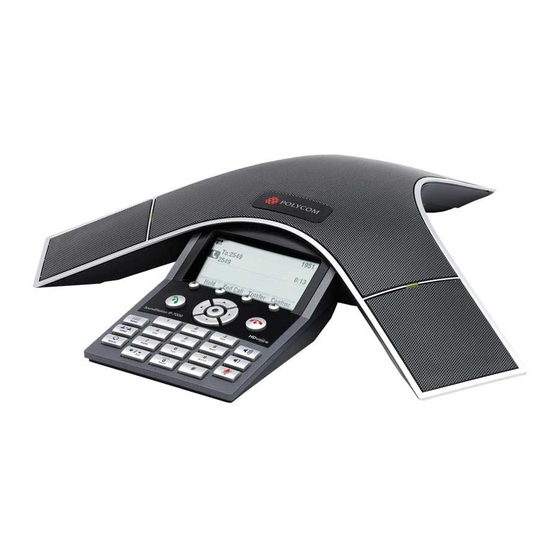
About This Guide ® Thank you for choosing the SoundStation IP 7000 conference phone. This conference phone provides multi-person audio conferencing capabilities for medium to large conference rooms within a Session Initiation Protocol (SIP) internet telephony system. This guide provides everything you need to quickly use your new conference phone. - Page 4 User Guide for the SoundStation IP 7000 Phone www.InternetVoipPhone.co.uk | sales@internetvoipphone.co.uk | 0800 088 4846...
-
Page 5: Table Of Contents
Contents Contents About This Guide ....... . . iii 1 Getting Started with Your Phone ....1-1 Parts List . - Page 6 User Guide for the SoundStation IP 7000 Phone Managing Contacts ..........2-18 Adding Contacts to Your Local Contact Directory .
- Page 7 Contents Forwarding Calls ..........3-17 Forwarding Calls Statically .
- Page 8 User Guide for the SoundStation IP 7000 Phone viii www.InternetVoipPhone.co.uk | sales@internetvoipphone.co.uk | 0800 088 4846...
-
Page 9: Getting Started With Your Phone
This chapter provides basic installation instructions and information for obtaining the best performance from your SoundStation IP 7000 conference phone. The SoundStation IP 7000 conference phone is a next-generation phone with a modern industrial design, and the latest advancements in Polycom voice technology. -
Page 10: Parts List
User Guide for the SoundStation IP 7000 Phone Parts List The following items are included in your basic SoundStation IP 7000 package: • SoundStation IP 7000 Conference Phone • 25-foot Network Cable • Quick Start Guide Make sure your conference phone package contains each item. If any item is missing, see your system administrator. -
Page 11: Installing The Phone
Getting Started with Your Phone Installing the Phone This section describes how to install your phone. It includes the following topics: • Connecting Network and Power Sources on page • Connecting Optional Extension Microphones on page • Connecting Optional Auxiliary Audio Components on page Connecting Network and Power Sources There are four ways to connect your phone to the network and a power source. -
Page 12: Ac Power (One Phone)
User Guide for the SoundStation IP 7000 Phone To connect the phone using PoE: 1. Connect the 25-foot Network Cable to the LAN jack on the phone. 2. Connect the other end of the 25-foot Network Cable to an available LAN port on the wall or hub/switch device port. -
Page 13: Ac Power (One Phone, With Multi-Interface Module)
Getting Started with Your Phone AC Power (One Phone, with Multi-Interface Module) You can connect one phone to an AC power source and the Multi-Interface Module. In this way, you have access to the auxiliary audio connectors on the module so you can connect speakers, wireless (lapel) microphones, and recording devices and computers (to record phone calls). -
Page 14: Ac Power (Two Phones, With Multi-Interface Module)
User Guide for the SoundStation IP 7000 Phone AC Power (Two Phones, with Multi-Interface Module) If you have a larger room configuration, you can connect up to two phones together. In this case, the phones act as one phone and display the same information. -
Page 15: Connecting Optional Extension Microphones
Getting Started with Your Phone 3. Connect the 25-foot Network Cable to the Multi-Interface Module. 4. Connect the other end of the 25-foot Network Cable to an available LAN port on the wall or hub/switch device port. 5. Connect the Power Adapter to the Multi-Interface Module. 6. -
Page 16: Connecting Optional Auxiliary Audio Components
User Guide for the SoundStation IP 7000 Phone The following figure shows a two phone setup with an optional extension microphone. Power Adapter Multi-Interface Module 12-foot Network Cable (10-pin) Console Interconnect Cable 25-foot Network Cable Connecting Optional Auxiliary Audio Components... -
Page 17: 2.5Mm Audio Connector On Phone
Getting Started with Your Phone • Audio connectors and ports on the Multi-Interface Module—to connect wireless (lapel) microphones, speakers, and recording devices and computers (to record phone calls). To connect audio components to the Multi-Interface Module, see your system administrator. After you connect an auxiliary audio component to the Multi-Interface Module, you must enable the component. -
Page 18: Audio Connectors On Multi-Interface Module
User Guide for the SoundStation IP 7000 Phone To connect to audio from a mobile phone: >> Connect one end of the optional Mobile Phone Cable to the headset jack on your mobile phone, and connect the other end to the 2.5mm audio connector on your conference phone. -
Page 19: Features Of The Phone
Getting Started with Your Phone Features of the Phone The following figure shows the primary hardware features of your phone console. Feature Description Speaker Allows for ringer and hands-free audio output. Microphones Provide 360 coverage by three internal microphones. LED Indicators Indicate phone and call status through three bi-color LEDs. - Page 20 User Guide for the SoundStation IP 7000 Phone The following figure shows the primary keys, controls, and indicators on your phone console: Item Description LCD graphic display Shows call and status information, messages, soft keys, menus, time, and date. Soft keys Select specific context-sensitive functions that display on the screen above each soft key.
- Page 21 Getting Started with Your Phone Item Description End Call key Ends a call. Select key Allows you to: • Select a field of displayed data • Enable or disable fields Volume keys Adjust the volume of the speaker and the ringer. Mute key Stops local audio from being heard at the far end of the call.
-
Page 22: Understanding Icons
User Guide for the SoundStation IP 7000 Phone Understanding Icons Line, Call State, or Icon Indicator Description Active call A call is in progress using HD Voice. The active call icons merge into one icon on the phone screen. The following figure shows what displays... -
Page 23: Navigating Menus And Entering Data
Getting Started with Your Phone Line, Call State, or Icon Indicator Description Ringing The phone is ringing. Unregistered line The phone is unable to place and receive calls. Voice mail message You have a new voice mail message. See Using Voice Mail on page 3-22. - Page 24 User Guide for the SoundStation IP 7000 Phone If you want to ... Then do this ... Select a menu item Do one of the following: • Scroll to the menu item, and then press • Scroll to the menu item, and then press the Select soft key.
-
Page 25: Customizing Your Phone
Customizing Your Phone You can customize your SoundStation IP 7000 conference phone by adjusting certain settings, including time and date, language, display contrast and intensity, and ring tone. You can also add contacts to your phone’s local Contact Directory. This chapter shows you how to customize your phone. It includes the following topics: •... -
Page 26: Updating Preferences
User Guide for the SoundStation IP 7000 Phone • Updating the Backlight Intensity • Updating the Ring Tone • Updating Audio Quality and Capabilities Updating Preferences The Preferences menu allows you to customize the language that displays on the phone and how the time and date display on the idle screen. -
Page 27: Updating The Time And Date Display
Customizing Your Phone To change the language: 1. Press , and then select Settings > Basic > Preferences > Language. The Language screen displays. 2. Scroll to the language you want, and then press Select. The text that appears on the screen will change to the language that you selected. - Page 28 User Guide for the SoundStation IP 7000 Phone To display a new time format: 1. Press , and then select Settings > Basic > Preferences > Time & Date > Clock Time. The Clock Time screen displays. 2. Scroll to the time format you want, and then press Select.
- Page 29 Customizing Your Phone To disable the time and date display: 1. Press , and then select Settings > Basic > Preferences > Time & Date. The Time & Date screen displays. 2. Scroll to Disable, and then press Select. 3. Press to return to the idle screen.
-
Page 30: Updating The Display Contrast
User Guide for the SoundStation IP 7000 Phone Updating the Display Contrast To adjust the contrast on the phone display: 1. Press , and then select Settings > Basic > Contrast. The Contrast screen displays. 2. Press the Up or Down soft keys to increase or decrease the display contrast. - Page 31 Customizing Your Phone Dim mode intensity is determined by the Backlight On intensity and the Backlight Idle intensity together as follows: Backlight On Intensity Backlight Idle Intensity Dim Intensity dimmer than low medium dimmer than medium medium high medium high medium high medium...
- Page 32 User Guide for the SoundStation IP 7000 Phone To update the backlight intensity: 1. Press , and then select Settings > Basic > Backlight Intensity. The Backlight Intensity screen displays. 2. Select Backlight On Intensity. The Backlight On Intensity screen displays.
-
Page 33: Updating The Ring Tone
Customizing Your Phone 6. Scroll to the intensity you want, and then press Select. The default Backlight Idle Intensity is Low. 7. Press the Save soft key. 8. Select Maximum Intensity. The Maximum Intensity screen displays. 9. Press the Up or Down soft keys to increase or decrease the maximum intensity the screen can display, and then press the Ok soft key. -
Page 34: Setting Distinctive Ring Tones For Contacts
User Guide for the SoundStation IP 7000 Phone To select a ring tone for your phone: 1. Press , and then select Settings > Basic > Ring Type. The Ring Type screen displays. 2. Scroll to the ring type you want. To hear the ring type, press the Play soft key. - Page 35 Customizing Your Phone To set a distinctive ring tone for a contact: 1. Press , and then select Features > Contact Directory. The Directory screen displays. 2. Scroll to the contact for whom you want to assign a distinctive ring tone. 3.
-
Page 36: Updating Audio Quality And Capabilities
User Guide for the SoundStation IP 7000 Phone Updating Audio Quality and Capabilities You can adjust the audio quality of your phone, and enable auxiliary audio components, such as wireless (lapel) microphones, speakers, recording devices, and computers that you connect to the Multi-Interface Module. -
Page 37: Enabling Auxiliary Audio Components
Customizing Your Phone — To adjust the bass control, scroll to Bass EQ, and then press Select. The Bass EQ screen displays. 3. Press the Up or Down soft keys to adjust the treble or bass EQ, and then press Select. 4. - Page 38 User Guide for the SoundStation IP 7000 Phone To enable or disable wireless (lapel) microphones: 1. Press , and then select Settings > Basic > Audio > Auxiliary Audio > Aux Audio In. The Aux Audio In screen displays. 2. Do one of the following: —...
-
Page 39: Adjusting The Speaker And Ringer Volume
Customizing Your Phone 2. Do one of the following: — To enable recording devices or computers to record phone calls, scroll to Record Out, and then press Select. — To enable external speakers, scroll to External Speaker, and then press Select. -
Page 40: Viewing Call Lists
User Guide for the SoundStation IP 7000 Phone The following figure shows what the idle screen looks like when you miss a call. Viewing Call Lists You can access missed, received, and placed calls from the Main Menu, or you can quickly access call lists from the idle screen. - Page 41 Customizing Your Phone To manage a call list: 1. Press the Dir soft key, and then select Call Lists. The Call Lists screen displays. 2. Do one of the following: — To clear the records in a call list, select Clear > Missed Calls, Received Calls, or Placed Calls.
-
Page 42: Managing Contacts
User Guide for the SoundStation IP 7000 Phone — To view and manage a call list, scroll to either Missed Calls, Received Calls or Placed Calls, and then press Select. Your call list information displays. The following figure shows a Placed Calls list. - Page 43 Customizing Your Phone To view your local Contact Directory: >> Do one of the following: — Press , and then select Features > Contact Directory. — Press the Dir soft key, and then select Contact Directory. The Directory screen displays, listing all the contacts in your directory. To view your Corporate Directory: >>...
-
Page 44: Adding Contacts To Your Local Contact Directory
User Guide for the SoundStation IP 7000 Phone Adding Contacts to Your Local Contact Directory You can add contacts to your local Contact Directory in the following ways: • Manually (if you have permission to update your local Contact Directory) •... - Page 45 Customizing Your Phone 3. Enter the contact information. To move between fields, use the up and down scroll keys. Enter the following information: Note Your phone may not display all the following fields. For more information, see your system administrator. —...
-
Page 46: Adding Contacts From Call Lists
User Guide for the SoundStation IP 7000 Phone cannot monitor your status. For more information on monitoring status, see Using Buddy Lists on page 4-9. Press the right or left scroll key to switch between the Enabled and Disabled settings for the Watch Buddy and Block Buddy fields. - Page 47 Customizing Your Phone To add a contact to your local Contact Directory from a Corporate Directory: 1. Press the Dir soft key, and then select Corporate Directory. The Corporate Directory screen displays. 2. Search for the contact, and then scroll to the contact’s entry. For information on how to search for a contact, see Searching for Contacts in a Corporate Directory...
-
Page 48: Searching For Contacts
User Guide for the SoundStation IP 7000 Phone Searching for Contacts You can search for contacts in your local Contact Directory, or in a Corporate Directory (if this is set up on your phone). Searching for Contacts in Your Local Contact Directory Search for a contact by scrolling through the directory, or entering specific search criteria. -
Page 49: Searching For Contacts In A Corporate Directory
Customizing Your Phone Searching for Contacts in a Corporate Directory Search for a contact by scrolling through the directory, or entering specific search criteria. Note You can enable your phone to save Corporate Directory search results, and to remember the last person you viewed in the directory. Whenever you re-display Corporate Directory, the last person you viewed will display. -
Page 50: Updating Contacts In Your Local Contact Directory
User Guide for the SoundStation IP 7000 Phone 3. Scroll to the contact you are searching for. From this screen, you can press the Dial soft key to dial the contact, or press the View soft key and save the contact to your local Contact Directory. -
Page 51: Deleting Contacts From Your Local Contact Directory
Customizing Your Phone 4. Update the contact information. For information on the fields you can update, see Adding Contacts Manually on page 2-20 (step 3). 5. Press the Save soft key. 6. Press twice to return to the idle screen. Deleting Contacts From Your Local Contact Directory You can delete contacts from your local Contact Directory. -
Page 52: Placing Calls To Contacts
User Guide for the SoundStation IP 7000 Phone Placing Calls to Contacts You can place calls to contacts from your local Contact Directory or from your Corporate Directory (if this is set up on your phone). To place a call to a contact from your Local or Corporate Directory: 1. - Page 53 Customizing Your Phone To send incoming calls from a particular contact directly to voice mail: 1. Press the Dir soft key, and then select Contact Directory. The Directory screen displays. 2. Scroll to the contact whose calls you want to go to your voice mail system. You can use the * key to Page Up and the # key to Page Down.
-
Page 54: Diverting Calls
User Guide for the SoundStation IP 7000 Phone Diverting Calls You can customize your phone so that incoming calls from a particular party are transferred directly to a third party. To divert incoming calls from a contact to a third party: 1. -
Page 55: Understanding Shared Lines
Customizing Your Phone Understanding Shared Lines Note Shared lines is an optional feature that your system administrator sets up. Your system may not support it. For more information, contact your system administrator. If two phones share a line, an incoming call to one number will cause both phones to ring. - Page 56 User Guide for the SoundStation IP 7000 Phone 2 - 32 www.InternetVoipPhone.co.uk | sales@internetvoipphone.co.uk | 0800 088 4846...
- Page 57 Using the Basic Features of Your Phone Your SoundStation IP 7000 conference phone is designed to be used like a regular conference phone on a public switched telephone network (PSTN). You can place calls, transfer a call to someone else, conduct a multi-party conference call, or perform other basic and more advanced functions.
- Page 58 User Guide for the SoundStation IP 7000 Phone Placing Calls You can place a call off-hook (with a dial tone), or on-hook (without a dial tone). If you place a call off-hook, you have the option of dialing a contact using a URL, or using the last call return (LCR) feature (if enabled for your phone).
-
Page 59: Using The Basic Features Of Your Phone
Using the Basic Features of Your Phone To dial a URL, press the URL soft key, enter the URL or IP address of the party you want to call, and then press or the Dial soft key. To enter the number and letters displayed on a key, press the key one or more times quickly. -
Page 60: Answering Calls
User Guide for the SoundStation IP 7000 Phone The Speed Dial Info screen displays. 2. Do one of the following: — Enter the speed dial index number. The call is placed. — If the contact you want to call is not already highlighted, scroll to the contact, and then press the Dial soft key. -
Page 61: Ending Calls
Using the Basic Features of Your Phone Ending Calls To end a call: >> Press or the End Call soft key. Note You cannot end a call that is on hold until you resume the call. To end a call on hold, scroll to the call on hold, press the Resume soft key, and then press the End Call soft key. -
Page 62: Redialing Numbers
User Guide for the SoundStation IP 7000 Phone Redialing Numbers You can redial the last number you dialed, or search a list of placed calls to find a previously-dialed number. To redial the last number dialed: >> Press To redial a previously dialed number: 1. -
Page 63: Holding And Resuming Calls
Using the Basic Features of Your Phone Holding and Resuming Calls To hold a call: >> During a call, press the Hold soft key. The LEDs blink red to indicate that a call is on hold. The following figure shows James Smith on hold. The Resume soft key now displays on the screen. -
Page 64: Setting Up Conferences
User Guide for the SoundStation IP 7000 Phone Setting Up Conferences You can set up a conference in one of two ways: • Using or the Confrnc soft key. • Using the Join soft key, if you have an active call and a call on hold. -
Page 65: Call On Hold
Using the Basic Features of Your Phone The Active:Conference screen displays. Setting Up a Conference with An Active Call and a Call on Hold If you are currently in an active call, and you have another call on hold, you can create a conference call between the active call, the call on hold, and yourself, by pressing the Join soft key. -
Page 66: Managing Conferences
User Guide for the SoundStation IP 7000 Phone Managing Conferences To manage a conference, you must currently be in an active conference call. From the Active:Conference screen, you can press the Manage soft key to manage the individual parties in the conference. -
Page 67: Muting Conference Call Parties
Using the Basic Features of Your Phone Muting Conference Call Parties To mute a conference call party: >> From the Manage Conference screen, scroll to the party you want to mute, and then press the Far Mute soft key. The following figure shows the far mute feature applied to James Smith. The “far mute”... -
Page 68: Removing Conference Call Parties
User Guide for the SoundStation IP 7000 Phone The following figure shows James Smith on hold. The “on hold” icon displays next to his name, and the Resume soft key appears. The held party cannot hear any parties and no party can hear the held party. -
Page 69: Holding And Resuming Conferences
Using the Basic Features of Your Phone To display information about a conference call party: 1. From the Manage Conference screen, scroll to the party whose information you want to obtain. 2. Press the Info soft key. The Participant Info screen displays. 3. -
Page 70: Splitting Conferences
User Guide for the SoundStation IP 7000 Phone From the Hold:Conference screen, you can do the following: • To resume the conference call, press the Resume soft key. The Active:Conference screen will display again. • To place a call to a new party, press the New Call soft key. The conference remains on hold, and the new call becomes the active call. -
Page 71: Performing A Consultative Transfer
Using the Basic Features of Your Phone • Blind transfer—The call is automatically transferred after you dial the number of the party to whom you want to transfer the call. You do not have the option of talking to the party. —... -
Page 72: Performing A Blind Transfer
User Guide for the SoundStation IP 7000 Phone Performing a Blind Transfer When you use a blind transfer, you transfer a call without speaking to the party to whom you are transferring the call. The call is automatically transferred as soon as you dial the party’s number. -
Page 73: Forwarding Calls
Using the Basic Features of Your Phone Forwarding Calls Note Your company’s settings may override this feature. For more information, contact your system administrator. Call forwarding is not available on shared lines. You can set up your phone to forward incoming calls to another party (static forwarding) or you can forward a call as your phone rings (dynamic forwarding). - Page 74 User Guide for the SoundStation IP 7000 Phone 3. Do one of the following: — If you selected Always, enter a number to forward all incoming calls — If you selected No Answer, do the following: In the Contact field, enter a number to forward all unanswered incoming calls to.
-
Page 75: Forwarding Calls Dynamically
Using the Basic Features of Your Phone Forwarding Calls Dynamically You can manually forward a call to another number while your phone rings. To forward an incoming call to another extension: 1. While your phone rings, press the Forward soft key. The Call Forwarding screen displays. - Page 76 User Guide for the SoundStation IP 7000 Phone To enable and disable Do Not Disturb: 1. Press , and then select Features. The Features screen displays. If Do Not Disturb is not highlighted, scroll to it. 2. To toggle Do Not Disturb on and off, press Select.
-
Page 77: Managing Speed Dial Entries
Using the Basic Features of Your Phone Managing Speed Dial Entries Use the speed dial feature for fast, automated dialing. To use speed dial, you enter a speed dial index number instead of entering a complete phone number. When you create a Contact Directory entry, the phone automatically assigns a Speed Dial index to the entry. -
Page 78: Using Voice Mail
User Guide for the SoundStation IP 7000 Phone 3. Scroll to Speed Dial Index, and then update the speed dial index number. Use the << soft key to update an existing entry. 4. Press the Save soft key. 5. Press twice to return to the idle screen. -
Page 79: Using The Advanced Features Of Your Phone
Phone This chapter provides operating instructions for the advanced features of your SoundStation IP 7000 conference phone. If you require additional information or assistance with these features, contact your system administrator. For information on the basic features of your phone, refer to Chapter... -
Page 80: Listening To Computer Or Mobile Audio
User Guide for the SoundStation IP 7000 Phone If you connect your computer calling application or mobile phone to your conference phone when your conference phone is idle, the computer or mobile audio automatically becomes the active call, and you immediately hear any audio associated with the mobile phone or computer calling application. - Page 81 Using the Advanced Features of Your Phone The following figure shows what the screen looks like when you connect a computer calling application or mobile phone (with or without a current call) to the conference phone when the conference phone is idle. To listen to computer or mobile audio when the conference phone has another call: 1.
- Page 82 User Guide for the SoundStation IP 7000 Phone The conference phone screen shows a computer or mobile audio source. The LEDs blink green to indicate the audio source. 2. Do one of the following: — If the conference phone has an active call, press the Hold soft key.
-
Page 83: Ending Computer Or Mobile Audio
Using the Advanced Features of Your Phone Ending Computer or Mobile Audio To remove the computer or mobile audio source, disconnect the Computer Calling Cable or Mobile Phone Cable from the conference phone. If you want to keep the connection for future computer or mobile audio calls, end the call from your computer or mobile phone, but do not remove the Computer Calling Cable or Mobile Phone Cable. - Page 84 User Guide for the SoundStation IP 7000 Phone The following figure shows the Confrnc soft key that displays when the computer or mobile audio is on hold. • If you have a computer or mobile audio source and another call (one active, one on hold), use the Join soft key.
- Page 85 Using the Advanced Features of Your Phone • If you have a conference call, and you connect computer or mobile audio, use the Join soft key. To access the Join soft key, scroll to the computer or mobile audio. If you have a conference call on hold, and you connect computer or mobile audio, accept the computer or mobile audio first, and then press the Join soft key.
-
Page 86: Adjusting The Volume Of Computer Or Mobile Audio
User Guide for the SoundStation IP 7000 Phone Adjusting the Volume of Computer or Mobile Audio To adjust the speaker volume: >> While you listen to computer or mobile audio, press either to adjust the speaker volume. To mute the microphone: >>... -
Page 87: Using Buddy Lists
Using the Advanced Features of Your Phone If three or more calls are taking place, the phone displays a counter at the top left of the screen. For example, in the following figure, “1/3” indicates that the call to John is the first one out of a total of three. To select the other two calls, press the up or down scroll keys. -
Page 88: Updating Presence Settings
User Guide for the SoundStation IP 7000 Phone Updating Presence Settings Your presence setting indicates your status (either online, busy, be right back, away, on the phone, out to lunch, or offline). Update your presence setting so that other users can monitor your status from their phones. -
Page 89: Selecting Contacts To Monitor
Using the Advanced Features of Your Phone Selecting Contacts to Monitor Select the contacts whose presence you want to monitor by updating the contacts in your buddy list. You add contacts to your buddy list from your local Contact Directory. Note If your call server is Microsoft Office Live Communications Server 2005, see Integrating With Microsoft Office Live Communications Server 2005... -
Page 90: Blocking Contacts From Viewing Your Status
User Guide for the SoundStation IP 7000 Phone When Watch Buddy is enabled, the contact is added to your buddy list and you can monitor the contact’s status. When Watch Buddy is disabled, the contact is removed from your buddy list and you cannot monitor the contact’s status. -
Page 91: Using Your Blocked List To Unblock Contacts
Using the Advanced Features of Your Phone 3. Press the Edit soft key. The Edit Contact screen displays. 4. Scroll to Block Buddy, and then press the right or left scroll key to choose Enabled or Disabled. When Block Buddy is enabled, the contact cannot watch your status. The contact will display in your Blocked List. -
Page 92: Monitoring The Status Of Contacts In Your Buddy List
User Guide for the SoundStation IP 7000 Phone 2. Scroll to the contact, and then press the Unblock soft key. 3. Press to return to the idle screen. The contact can now watch your phone. The contact will display in your Watcher List. - Page 93 Using the Advanced Features of Your Phone Any contacts added through your buddy list will appear as a contact in Microsoft Office Communicator and Windows Messenger. Any contacts added as a contact in Microsoft Office Communicator and Windows Messenger will appear in your buddy list. You can access your Privacy List on the phone to allow or disallow your contacts from monitoring your presence.
-
Page 94: Restarting The Phone
User Guide for the SoundStation IP 7000 Phone Restarting the Phone Note If your phone malfunctions, you may be able to restore normal operation without restarting it. Before you restart your phone, contact your system administrator. Periodically, you may need to restart your phone so your phone can: •... - Page 95 Using the Advanced Features of Your Phone The Advanced screen displays. Enter your password, and then press the Enter soft key. The Advanced screen displays. Select Restart Phone. The message “Are you sure?” displays. If you still want to restart the phone, press the Yes soft key. The restart process begins.
- Page 96 User Guide for the SoundStation IP 7000 Phone 4 - 18 www.InternetVoipPhone.co.uk | sales@internetvoipphone.co.uk | 0800 088 4846...
-
Page 97: Troubleshooting Your Phone
Troubleshooting Your Phone This chapter contains general troubleshooting information to help you solve any problems you might encounter when you use the SoundStation IP 7000 conference phone. The tables in this chapter list possible trouble symptoms, the likely causes of these problems, and recommended corrective actions to take. -
Page 98: Installation Configuration
User Guide for the SoundStation IP 7000 Phone Installation Configuration Symptom Problem Corrective Action The display shows: The phone installation Verify that you have installed the phone(s) configuration is not supported. and any components correctly: “General configuration error Unsupported configuration •... -
Page 99: Power And Startup
Troubleshooting Your Phone Power and Startup Symptom Problem Corrective Action The display shows “Network Link The network cable is not properly Verify that the network cable is properly is Down” connected. connected: • Check the cable termination at the switch or hub (furthest end of the cable from the phone). -
Page 100: Controls
User Guide for the SoundStation IP 7000 Phone Controls Symptom Problem Corrective Action The dial pad does not work. The dial pad on the phone does Do one of the following: not respond. • Check for a response from other feature keys. -
Page 101: Access To Screens And Systems
Troubleshooting Your Phone Access to Screens and Systems Symptom Problem Corrective Action There is no response when you The phone is not in an active Do one of the following: press a feature key. state. • Press the keys more slowly. •... -
Page 102: Calling
User Guide for the SoundStation IP 7000 Phone Calling Symptom Problem Corrective Action There is no dial tone. Power is not correctly applied to Verify that power is correctly applied to the the phone. phone: • Check that the display is illuminated. -
Page 103: Displays
Troubleshooting Your Phone Displays Symptom Problem Corrective Action There is no display. Power is not correctly applied to Verify that power is correctly applied to the the phone. phone: The display is incorrect. • Check that the display is illuminated. The display has bad contrast. - Page 104 User Guide for the SoundStation IP 7000 Phone 5 - 8 www.InternetVoipPhone.co.uk | sales@internetvoipphone.co.uk | 0800 088 4846...
-
Page 105: Safety Notices
Polycom, Inc. Do not remove (or allow anybody else to remove) any product identification, copyright or other notices. - Page 106 Replacement products or parts may be new or reconditioned. Polycom is expected to warrant any replaced or repaired product or part for ninety (90) days from shipment, or the remainder of the initial warranty period, whichever is longer. Products returned to Polycom must be sent prepaid and packaged appropriately for safe shipment, and it is recommended that they be insured or sent by a method that provides for tracking of the package.
- Page 107 Cet appareil numérique de la classe [A] est conforme à la norme NMB-003 du Canada. CE and VCCI Mark This SoundStation IP 7000 phone is marked with the CE mark. This mark indicates compliance with EC Directives 2006/95/ED and 2004/108/EC. A full copy of the Declaration of Conformity can be obtained from Polycom Ltd., 270 Bath Road, Slough, Berkshire, SL1 4DX, UK.
- Page 108 User Guide for the SoundStation IP 7000 Phone Safety and Compliance (continued) WARNING Electrical Safety To avoid electric shock, do not connect safety extra low voltage (SELV) circuits to teleconference station network (TNV) circuits. LAN ports contain SELV circuit, and WAN ports contain TNV circuits. Some LAN and WAN ports both use RJ-45 connectors.
- Page 109 3–7, 4–5 audio connectors 1–8, 1–10, 2–13 conference key, about 1–13 Auto Divert setting 2–21 conference phone. See SoundStation IP 7000 Auto Reject setting 2–21 console interconnect cable 1–2, 1–6 auxiliary audio components 1–8, 2–13, 4–1 consultative transfer 3–14 contact directory, managing 2–18...
- Page 110 User Guide for the SoundStation IP 7000 Phone contrast, adjusting for screen 2–6 corporate directory, managing 2–18 Join soft key, using 3–9, 4–6 customizing your phone 2–1 key buttons, description of 1–12 data, entering 1–15 date and time display, updating 2–3 language, updating for phone 2–2...
- Page 111 2–31 Silence feature 3–4 Watch Buddy setting 2–21, 4–12 soft keys, about 1–12, 1–16 watcher list 4–12 SoundStation IP 7000 wireless microphones 1–8, 2–13 accessories (optional) for 1–2 advanced features of 4–1 auxiliary audio components, connecting to 1–8 basic instructions for 3–1...
-
Page 112: Index
User Guide for the SoundStation IP 7000 Phone Index – 4 www.InternetVoipPhone.co.uk | sales@internetvoipphone.co.uk | 0800 088 4846...