Table of Contents
Advertisement
Available languages
Available languages
Advertisement
Chapters
Table of Contents

Related Manuals for Clarity Alto PLUS


Summary of Contents for Clarity Alto PLUS
- Page 1 User Guide Amplified Telephone with DCP™, CID and Speakerphone...
-
Page 3: Table Of Contents
TABLE OF CONTENTS . . . . . . . . . . . . . . . . . . . . . . . . . . . . . . . Important Safety Instructions . -
Page 4: Important Safety Instructions
IMPORTANT SAFETY INSTRUCTIONS When using your telephone equipment, basic safety precautions should always be followed to re- duce the risk of fire, electric shock and injury to persons, including the following: 1 . Read and understand all instructions . 2 . Follow all warnings and instructions marked on the telephone . 3 . -
Page 5: Battery Safety
IMPORTANT SAFETY INSTRUCTIONS 13 . To reduce the risk of electrical shock, do not take this phone apart . Opening or removing covers may expose you to dangerous voltages or other risks . Incorrect reassembly can cause electric shock when the appliance is subsequently used . 14 . -
Page 6: Claritylogic Tm
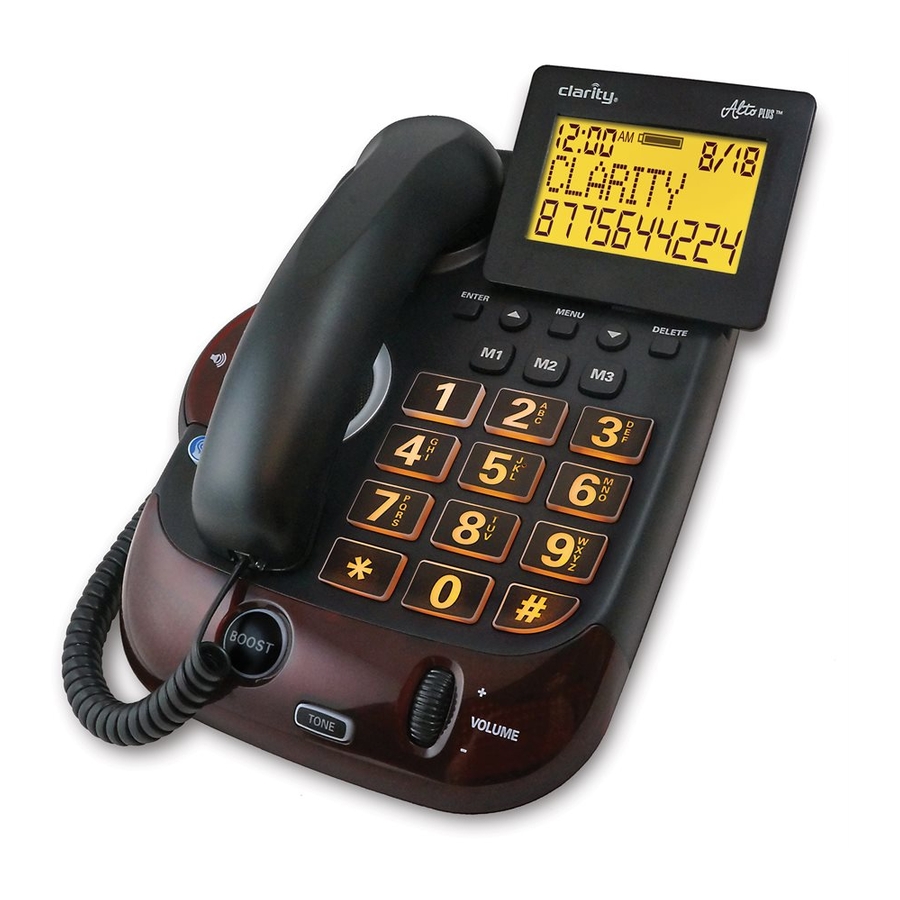
. Just use the pre-programmed ClarityLogic button on the Fortissimo speakerphone or call 1-877-LOGIC24 (1-877-564-4224) to find out how Clarity is there to make life easier . ClarityLogic Memory Dial ®... - Page 7 INTRODUCTION Thank you for purchasing your new AltoPlus from Clarity – providing a superior experience by offering clear and loud audio, to ensure you never miss a word again . Please read these instructions to ensure you take advantage of the complete set of rich features that this product offers .
-
Page 8: Packaging Contents
PACKAGING CONTENTS Your package includes all the items as shown below . If there is anything missing, please contact our Customer Care Department immediately . NOTE: Please retain a copy of proof of purchase for your records. FLASH REDIAL ENTER MENU DELETE PAUSE... -
Page 9: Basic Installation
ALTOPLUS INSTALLATION Basic Installation Step 1: Install the backup batteries (optional) by removing the battery cover as shown in Figure 1. Step 2: Pull the ends of the phone cord to untable the cord; connect the loose end of the phone cord into your wall telephone outlet . -
Page 10: Wallmount Installation
ALTOPLUS INSTALLATION Wall Mount Installation Pull the handset hook out of the base and reverse its position so that the hook points up Step 1: and will hold the handset when you hang up . (See Figure 3) Pull the ends of the phone cord to untangle the cord; run the cord through the groove on Step 2: the back of the phone . -
Page 11: Altoplus Features List
Figure 1 ALTOPLUS FEATURE LIST FLASH REDIAL ENTER MENU DELETE PAUSE MUTE/ SILENT VOLUME TONE... -
Page 12: Mute/ Silent
ALTOPLUS FEATURE LIST 1 . FLASH button: use this button to engage the Call Waiting/Call Waiting Caller ID function (feature provided by local phone company) . 2 . REDIAL button: use this button to redial the last number dialed (up to 32 digits) . 3 . - Page 13 ALTOPLUS FEATURE LIST 14 . TONE button: a . During a call: press the TONE button to toggle between the preset tone set- tings on your unit, and choose the best setting for your needs . There are five preset tone settings available on your unit, ranging from emphasizing low frequencies to emphasizing high frequencies;...
-
Page 14: Back View
19 . NECKLOOP port: insert a standard neckloop (mono, 3 .5mm plug) to use with your T-coil equipped hearing aid . We recommend the Clarity CE30 neckloop . For more information on purchasing please contact Clarity at 1 800 426 3738 . -
Page 15: Operations
9), an extra level of amplification is added over the entire range of the Volume Control . During a call, the BOOST button can toggle the Clarity Power amplifier function on or off according to your needs . The BOOST button will re- set automatically every time the phone is hung up . -
Page 16: Boost Override
OPERATIONS The available settings are: t1 - Low frequency emphasis: best used to hear low pitched sounds; t2 - Flat frequency response: best if you need all audible range of voice to be amplified; t3-t4 - High frequency emphasis: two settings, to best fit most people’s levels of hearing loss . -
Page 17: Menu Operations
MENU OPERATIONS There are four main menu options on the AltoPlus: CID (Caller ID - optional feature, pur- chased separately from your phone service provider), Memory Dial, Phonebook and Lan- guage . Caller ID (CID) Operations Caller ID is a service that is provided through your local telephone company . This telephone will automatically display the incoming caller’s name and number along with the date and time of the call . - Page 18 MENU OPERATIONS View CID? 1 YES 2 NO Figure 9 Formatting and calling from CID To format and/or make a call from the CID entry, select the desired CID entry and press the ENTER button . “Pick Format” will appear on screen first, then “Press UP/DN” will appear .
- Page 19 MENU OPERATIONS Call number? 1 Yes 2 No Figure 11 To store any CID record to one of the memory keys (M1-M3), follow the steps below: 1 . Pick the correct dialing format by following the steps above 2 . Press ENTER. 3 .
-
Page 20: Programming/Editing Memory Dial Buttons
MENU OPERATIONS NOTE: Saving a CID record to a MemDial button that is not blank will over- write the previously saved name/number without prompting. Programming/Editing Memory Dial Buttons This feature allows you to program or edit numbers in the three memory locations (M1-M3) or make changes to the currently programmed numbers . -
Page 21: Phonebook Operations
MENU OPERATIONS Phonebook Operations In addition to the three memory keys (M1-M3), you can manually save phone records for your mostly dialed numbers to the Phonebook in your AltoPlus . Follow the steps below to save up to ten additional records for easy access . To program the phonebook records: 1 . -
Page 22: Language
MENU OPERATIONS Language The user has the option to select English (default), French or Spanish for the screen text . Press the MENU button and press the DOWN arrow until “Language” is displayed on screen . Press 1 (one) for English, 2 (two) for Spanish or 3 (three) for French . (See Figure Language Language 3 FR... -
Page 23: Outgoing Speech Amplification (Osa)
MENU OPERATIONS “Clarity” is displayed on the screen in idle mode if the following standby screens are not applicable: The number of CID calls are shown on screen: “1 Call” “No Ph Line” is displayed if the phone line is not plugged in . -
Page 24: Technical Specifications
TECHNICAL SPECIFICATIONS Amplified dB Level: 50dB/124 dBSPL Tone control range: From 300 to 3000Hz Dimensions: Size: 10 . 4 ” x 8” x 4 . 4 ” (26 . 4 cm X 20 .5cm x 11 .2cm) Weight: 2 . 7 lbs (1 .23kg) Power Requirements: DC Adapter: 9VDC, 800 mA Batteries: 4 AA alkaline batteries (not included) -
Page 25: Troubleshooting
TROUBLESHOOTING No Dial Tone/Phone Will Not Operate 1 . Check all phone cords and connections . Make sure they are plugged-in securely . 2 . Plug unit into a different phone jack to help determine if the difficulty is with the phone or the phone jack . - Page 26 TROUBLESHOOTING Unable To Hear Phone Ringer 1 . Too many phone or phone devices on a line may cause your phone to not ring . Discon- nect one or two of the devices to see if the problem is eliminated . If not, contact your local phone company for load guidelines .
- Page 27 Guía del Usuario Teléfono amplificado con DCP™, CID y altavoz...
- Page 29 TABLA DE CONTENIDOS Instrucciones de seguridad importantes . . . . . . . . . . . . . . 30 ClarityLogic . . . . . . . . . . . . . . . . . . . . . . . . . . . . . . . . . . . . . . . . . 32 Lista de revisión de piezas .
-
Page 30: Instrucciones De Seguridad Importantes
INSTRUCCIONES DE SEGURIDAD IMPORTANTES Cuando utilice su aparato telefónico, debel tomar precauciones básicas de seguridd para reducir los riesgos de incendio, descarga eléctrica y lesiones a las personas, entre las que se incluyen las siguientes: 1 . Lea y comprenda todas las instrucciones . 2 . - Page 31 INSTRUCCIONES DE SEGURIDAD IMPORTANTES 13 . Para reducir el riesgo de descarga eléctrica, no desarme el teléfono . Quitar o abrir las carcasas puede exponerlo a voltajes peligrosos u otros riesgos . El re-armado incur recto puede causar descarga eléc- trica luego, cuando se utilice el apara to . 14 .
-
Page 32: Claritylogic
Clarity, y autorizar Clarityto recibir información específica sobre su teléfono, Clarity puede acceder a información sobre el teléfono, tales como el nombre del modelo del teléfono y ajustes . De inmediato, el representante toma conocimiento del tipo de teléfono y de las configuraciones actuales . - Page 33 INTRODUCCIÓN Gracias por comprar el nuevo AltoPlus de Clarity – proporcionar una experiencia superior, ofreciendo un audio claro y en voz alta, para asegurar que no se pierda una sola pa- labra más . Por favor, lea estas instrucciones para asegurarse de que aprovechar el conjunto completo de características avanzadas que ofrece este producto .
-
Page 34: Lista De Revisión De Piezas
LISTA DE REVISIÓN DE PIEZAS Su paquete incluye todos los artículos como se muestra aquí . Si hay cualquier cosa que falta, entre en contacto con por favor nuestro departamento del cuidado del cliente inmediata- mente . NOTA: CONSERVE POR FAVOR UN COPY DE LA PRUEBA DE LA COMPRA PARA SUS EXPEDIENTES. -
Page 35: Instalación Básica
INSTALACIÓN SU ALTOPLUS Instalación Básica Paso 1: Instale las baterías de reserva (opcional) al quitar la tapa de baterías . Solo usar baterías alcalinas AA . NO use baterías recargables . (Figura 1) Paso 2: Tire de los extremos del cable telefónico para desenredarlo; conecte el extremo suelto al tomacorriente de teléfono de la pared . -
Page 36: Instalación Básica
INSTALACIÓN SU ALTOPLUS Instalación para montaje en la pared Paso 1: Saque hacia afuera de la base el gancho del auricular y reviértalo para que apunte hacia arriba y así sostendrá el auricular cuando usted cuelgue . (Figura 3) Paso 2: Tire de los extremos del cable telefónico para desenredarlo; ubíquelo en la ranura en la parte posterior del teléfono . -
Page 37: Conoser Su Altoplus
CONOCER SU ALTOPLUS FLASH REDIAL ENTER MENU DELETE PAUSE MUTE/ SILENT VOLUME TONE... - Page 38 CONOCER SU ALTOPLUS 1 . Botón FLASH: use este botón para activar la función de Llamada en espera con iden- tificador de llamadas o Llamada en espera (función suministrada por la empresa local de telefonía) . 2 . Botón REDIAL: use este botón para volver a llamar al último número marcado (hasta 32 dígitos) .
- Page 39 CONOCER SU ALTOPLUS 13 . Botón BOOST: presione BOOST para activar la amplificación adicional . Con el modo encendido, Boost On, el teléfono tiene un rango de volumen que alcanza 50 dB de am- plificación . Cuando está activo, el botón BOOST se ilumina con color rojo . Presione de nuevo para apagar la amplificación adicional .
- Page 40 3 .5 mm) para usar con su audífono con un cable de este tipo . Recomendamos el cable en espiral Clarity CE30 . Para obtener más información sobre cómo comprarlo, comuníquese con Clarity al 1 800 426 3738 .
- Page 41 Control de Volumen . Durante una llamada, el botón BOOST puede encender y apagar la función de amplificación Clarity Power, conforme a sus necesidades . El botón BOOST se restablecerá automáticamente cada vez que se cuelgue el teléfono (a menos que el interruptor BOOST OVERRIDE esté...
-
Page 42: Usar Su Altoplus
. Estas cinco configuraciones predeterminadas, junto con la personalizada y la amplificación de volumen, son parte de la tecnología Digital Clarity Power (DCP™) . (Figura 8) Figura 8 Figura 6... -
Page 43: Anulación De Función Boost (Boost Override)
OPERACIONES (VOLUME) y espere hasta que la pantalla muestre de nuevo el nivel de volumen, o bien presione rápido el botón TONE: verá que se muestra “Custom” en su pantalla . Ahora tiene una sexta configuración de tono: personalizada para sus necesidades . Puede alternar entre todas las configuraciones (las predeterminadas y la nueva personalizada) si presiona el botón TONE durante las llamadas . -
Page 44: Menu Operations
OPERACIONES DE MENÚ Hay cuatro opciones principales de menú en AltoPlus: CID, Memory Dial, Phonebook y Language . (Para cambiar de una opción principal del menú a la otra, presione la flecha hacia abajo) . NOTA: si en algún momento desea volver a la pantalla en espera, presione la tecla MENU. - Page 45 OPERACIONES DE MENÚ NOTA: Si, después de 30 segundos, no ha hecho una selección, la pantalla volverá al modo en espera. NOTA: Puede ver la lista de CID si presiona las flechas UP o DOWN en el modo en espera (inactivo). Elegir Formato y Llamar desde el CID Para elegir un formato y hacer un llamado desde una entrada de CID, seleccione la entrada deseada y presione el botón ENTER .
-
Page 46: Programar Y Editar Los Botones Memoria
OPERACIONES DE MENÚ Para guardar un registro del CID a una de las teclas Memoria, haga lo siguiente: 1 . Elija el formato correcto de marcado siguiendo los pasos anteriores . 2 . Presione ENTER. 3 . Elija “2” (NO) cuando se le pide si quiere marcar ese número . El registro con el formato correcto de marcado se mostrará... -
Page 47: Operaciones Del Directorio
OPERACIONES DE MENÚ Ver lis llam? 1 OUI 2 NO Figure 12 3 . Use el botón DEL y borre “Mem Mar 1” o el nombre guardado . A continuación, es- criba el nombre del número que quiere guardar . Presione el botón ENTER . 4 . -
Page 48: Marcar Desde M1-M3 O Desde El Directorio
OPERACIONES DE MENÚ 3 . Con el teclado numérico, ingrese el número telefónico para ese registro, en el formato que necesite estar para que se marque de forma correcta (7-10-11 dígitos, según sea nec- esario) . 4 . Presione ENTER; el registro (nombre y número) está guardado como se muestra, y ahora verá... -
Page 49: Amplificación Del Micrófono Del Teléfono (Osa)
. Durante el modo inactivo Si las siguientes pantallas no están disponibles, se mostrará “Clarity” en el modo inactivo . El número de las llamadas del CID se registrarán en la pantalla (por ejemplo, “1 llam”) . -
Page 50: Especificaciones Técnicas
ESPECIFICACIONES TÉCNICAS Nivel de amplificación en dB: 50dB/124dB Rango del control de tono: pleno rango: 300 à 3000Hertz Dimensiones : Tamaño: 10 . 4 ” x 8” x 4 . 4 ” (26 . 4 cm X 20 .5cm x 11 .2cm) Peso : 2 . -
Page 51: Solución De Problemas
SOLUCIÓN DE PROBLEMAS No hay tono de marcar/el teléfono no funciona 1 . Verifique todas las líneas y conexiones del teléfono . Asegúrese de que todas estén inserta- das firmemente . 2 . Conecte la unidad a un conector telefónico diferente para poder determinar si la dificul- tad está... - Page 52 SOLUCIÓN DE PROBLEMAS el problema . De no ser así, contacte con su empresa telefónica local para conocer los lineamien tos de carga . 2 . Si el teléfono no está recibiendo alimentación, no trabajará el volumen extra del timbre . 3 .
- Page 53 Guide de l’utilisateur Téléphone amplifié avec DCP™, CID et haut-parleur...
- Page 55 TABLE DES MATIÈRES Mesures de Sécurité importantes . . . . . . . . . . . . . . . . . . . . . 56 ClarityLogic .
-
Page 56: Mesures De Sécurité Importantes
MESURES DE SÉCURITÉ IMPORTANTES Quand vous utilisez votre équipement téléphonique, des mesures de sécurité simple devraient tou- jours être sui-vis pour réduire le risque de feu, choc électrique et blessures aux personnes incluant : 1 . Lire et comprendre toutes mode d’emploi . 2 . - Page 57 MESURES DE SÉCURITÉ IMPORTANTES 13 . Pour réduire le risque de choc électrique, ne pas démonter ce téléphone . Ouvrir ou enlever des couvertures peut vous exposez à de dangereuses tensions ou à d’autres risques . Un remontage incorrect peut causer un choc électrique quand l’appareil est utilisé par la suite . 14 .
-
Page 58: Claritylogic
ClarityLogic est le nom de notre service d’assistance au client simplifié et facile à utiliser . Lorsque vous parlez avec un représentant de Clarity, le téléphone envoie à Clarity des infor- mations comme le nom du modèle et les paramètres . Le représentant est donc immédiate- ment informé... - Page 59 âgées à vivre de manière épanouie et active. Fondé il y a plus de 40 ans, Clarity est un leader mondial du secteur des téléphones amplifiés, des systèmes de notification et des dispositifs d’écoute assistée.
-
Page 60: Contenu De Pièces De La Liste De Verification
CONTENU DE PIÈCES DE LA LISTE DE VÉRIFICATION Votre forfait comprend tous les éléments, comme indiqué ici . S’il ya quelque chose manque, s’il vous plaît contacter notre service client immédiatement . NOTE : VEUILLEZ MAINTENIR UN COPY DE LA PREUVE DE L’ACHAT POUR VOS DISQUES. - Page 61 INSTALLATION DE VOTRE ALTOPLUS Installation de base Étape 1 : Installez les piles de secours (en option) en retirant le couvercle de la batterie . N’utilisez que des piles alcalines AA . NE PAS installer de piles rechargeables . (Figure 1) Étape 2 : Tirez sur les extrémités du cordon téléphonique pour démêler le cordon ;...
-
Page 62: Fixation Murale
INSTALLATION DE VOTRE ALTOPLUS Fixation murale Étape 1 : Retirez le crochet du combiné de la base et inversez sa position, de sorte que le crochet se trouve pointe vers le haut et qu’il puisse soutenir le combiné lorsque vous raccrochez . (Figure 3) Étape 2 : Tirez sur les extrémités du cordon téléphonique pour démêler le cordon;... -
Page 63: Présentation De Votre Altoplus
PRÉSENTATION DE VOTRE ALTOPLUS FLASH REDIAL ENTER MENU DELETE PAUSE MUTE/ SILENT VOLUME TONE... - Page 64 PRÉSENTATION DE VOTRE ALTOPLUS 1 . Touche FLASH : utilisez ce bouton pour activer la fonction appel en attente / appel en attente avec identificateur d’appel (fonction fournie par votre compagnie de téléphone locale) . 2 . Touche REDIAL (Rapel) : appuyez sur cette touche pour recomposer le dernier numéro composé...
- Page 65 PRÉSENTATION DE VOTRE ALTOPLUS 13 . Touche BOOST : appuyez sur BOOST pour activer l’amplification supplémentaire du volume . En mode Boost On (allumé), le volume du téléphone s’étend sur une plage allant jusqu’à 50dB . Lorsque le mode Boost est activé, la touche rouge à rétroéclairage s’allume .
- Page 66 18 . Port HEADSET (CASQUE) : insérez un casque standard (prise de 2,5 mm) à utiliser à la place du combiné . Pour plus d’information concernant l’achat de ce disposi- tif, veuillez prendre contact avec Clarity au 1 800 426 3738 .
- Page 67 (mono, prise de 3,5 mm) pour utiliser votre appareil de correction auditive à collier . Nous recommandons le collier inductif CE30 de Clarity . Pour plus d’information con- cernant l’achat de ce dispositif, veuillez prendre contact avec Clarity au 1 800 426 3738 . 20 . Port POWER (ALIMENTATION) : (pour l’adaptateur d’alimentation) 21 .
-
Page 68: Utilizer De Votre Altoplus
9), un niveau d’amplification supplémentaire est ajouté à la plage de contrôle de volume . Pendant les appels, la touche BOOST permet d’allumer ou d’éteindre la fonction d’amplification de Clarity Power selon vos besoins . La touche BOOST se remet automatiquement en position initiale chaque fois que vous raccrochez le combiné... -
Page 69: Boost Override (Boost Continu)
UTILISER DE VOTRE ALTOPLUS Les réglages disponibles sont : t1 - Accent sur les fréquences basses : préférable pour entendre les sons graves et faibles t2 - Réponse en fréquence uniforme : préférable si vous avez besoin d’amplifier toute la gamme sonore de la voix t3-t4 - Accent sur les fréquences hautes : deux réglages, pour s’adapter de la meilleure manière au niveau de perte auditive de la plupart des gens... -
Page 70: Menu Operations
LES OPÉRATIONS DU MENU L’AltoPlus dispose de quatre options de menu principales : CID, numérotation rapide, an- nuaire et langue . Utilisez la flèche vers le bas pour passer d’une option du menu principal à l’option suivante . REMARQUE : si vous souhaitez revenir à l’écran de veille à tout moment, appuyez sur la touche MENU. - Page 71 LES OPÉRATIONS DU MENU REMARQUE : L’affichage sera interrompu et reviendra vers l’écran de veille si vous ne faites aucune sélection dans les 30 secondes. REMARQUE : Vous pouvez consulter la liste CID en appuyant sur la touche HAUT ou BAS en mode veille. App HAUT/BAS Chois format 18005644224...
- Page 72 LES OPÉRATIONS DU MENU 1 OUI 2 NO Appeler num? Figure 11 3 . Choisissez « 2 » (Non) lorsque vous êtes invité à composer le numéro . L’ enregistre- ment avec le format de numérotation correct sera affichée sur l’écran ; 4 .
-
Page 73: Programmation/Modification Des Touches De Numérotation Rapide
LES OPÉRATIONS DU MENU Programmation/modification des touches de numérotation rapide Cette fonction permet à l’utilisateur de programmer ou de modifier les numéros des quatre emplacements de numérotation rapide (M1-M3) ou d’apporter des modifications aux nu- méros programmés . Pour programmer les touches de numérotation rapide : 1 . -
Page 74: Utilisation Du Annuaire
LES OPÉRATIONS DU MENU Utilisation du annuaire En plus des trois touches de numérotation rapide (M1-M3), vous pouvez enregistrer manu- ellement les numéros que vous composez le plus souvent dans le annuaire de votre AltoPlus . Suivez les étapes ci-dessous pour enregistrer jusqu’à dix numéros supplémentaires pour un accès facile : Pour programmer les enregistrements du annuaire 1 . -
Page 75: Langue
En mode veille En mode veille, le message « Clarity » sera affiché sur l’écran si les écrans en attente suiv- ants ne sont pas disponibles . Le nombre de CID d’appels s’affiche à l’écran . (Exemple : « 1 appel »... -
Page 76: Osa - Amplification Du Volume Sortant
LES OPÉRATIONS DU MENU REMARQUE : En cas de nouveau CID, le message “New VMail screen” (« Écran nouveau message vocal ») et les numéros des nouvelles entrées CID (par exemple: « 2 Appels ») s’affichent en alternance. Outgoing Speech Amplification (OSA - Amplification du volume sortant) Cette fonction amplifie le son de votre voix de façon à... -
Page 77: Dépannage
DÉPANNAGE Aucune tonalité/le Téléphone ne Fonctionne Pas 1 . Vérifier tous les cordons et connexions . S’assurer qu’ils soient tous bien branchés cor- rectement . 2 . Brancher l’unité dans une prise de courant différente pour déter miner si la difficulté provient du téléphone ou des cordons de ligne téléphonique . - Page 78 DÉPANNAGE est éliminé . Sinon, vous devriez entrer en contact avec votre compagnie de téléphone pour obtenir des directives de surcharge supplémentaires . 2 . Si la puissance ne se rend pas à votre appareil téléphonique, la sonnerie forte ne fonction- nera pas .
-
Page 79: L'information Technique
L’INFORMATION TECHNIQUE Niveau décibel amplifié : 50dB/124dB Gamme de contrôle de tonalité : 300 à 3000Hertz Dimensions : Grosseur : 10 . 4 ” x 8” x 4 . 4 ” (26 . 4 cm X 20 .5cm x 11 .2cm) Poids : 2 . - Page 80 .com Website: www .clarityproducts .com ©2013 Clarity, a Division of Plantronics, Inc . All rights reserved . Clarity, Clarity Professional, Clarity, the amplification device, Clarity and the amplification device combined, ClarityLogic, Digital Clarity Power, DCP, AltoPlus, and Smart for Seniors are trademarks or registered trademarks of Plantronics, Inc .