ESI Feature Phone User Manual
Ivx-s class with integrated answering machine
Hide thumbs
Also See for Feature Phone:
- User manual (102 pages) ,
- Manual (2 pages) ,
- User manual (104 pages)

Related Manuals for ESI Feature Phone


Summary of Contents for ESI Feature Phone
- Page 1 ESI Feature Phone User’s Guide Integrated Answering Machine WITH 0450-0484 Rev. D Visit http://www.esiusers.com for up-to-date help.
- Page 2 IVX is a registered trademark, and Esi-Dex, Integrated Answering Machine, Quick Groups, Quick Moves, Virtual Mailbox Key, AutoPage, Quick Page and Verbal User Guide are trademarks, of ESI. CompactFlash is a registered trademark of SanDisk Corporation. Act! is a registered trademark of Symantec Corporation. Goldmine is a trademark of Goldmine Software Corporation.
-
Page 3: Table Of Contents
Table of contents Introduction..............................A.1 What it covers .......................................A.1 How it’s arranged......................................A.1 48-Key Feature Phone ....................................A.2 24-Key Feature Phone ....................................A.4 12-Key Feature Phone ....................................A.5 Connecting your ESI phone ..................................A.6 Help mode (Verbal User’s Guide)........................B.1 User programming: An introduction......................C.1 User programming menu ....................................C.1 Integrated Answering Machine operation....................D.1... - Page 4 (This page included for pagination purposes only.)
-
Page 5: Introduction
You’ll be able to learn many of the features simply by using your phone; and this User’s Guide will introduce you to the wide variety of features offered by your ESI phone system and how to use your phone effectively to achieve maximum benefits. -
Page 6: 48-Key Feature Phone
User’s Guide 48-Key Feature Phone The 48-Key Feature Phone has a variety of programmable and built-in features. Additionally, it supports the optional 60-Key Expansion Console. The 48-Key Feature Phone’s built-in voice mail features and voice prompts make it easy to program and use. - Page 7 The 60-Key Expansion Console adds 60 more programmable feature keys to your 48-Key Feature Phone. You program the Expansion Console’s keys just as you do the programmable feature keys on your ESI Feature Phone, using either direct or traditional programming (see pages C.2).
-
Page 8: 24-Key Feature Phone
Introduction User’s Guide 24-Key Feature Phone The 24-Key Feature Phone has a variety of programmable and built-in features. The 24-Key Feature Phone’s built-in voice mail features and voice prompts make it easy to program and use. Volume/scroll keys (pg. E.2) Status indicator light (pg. -
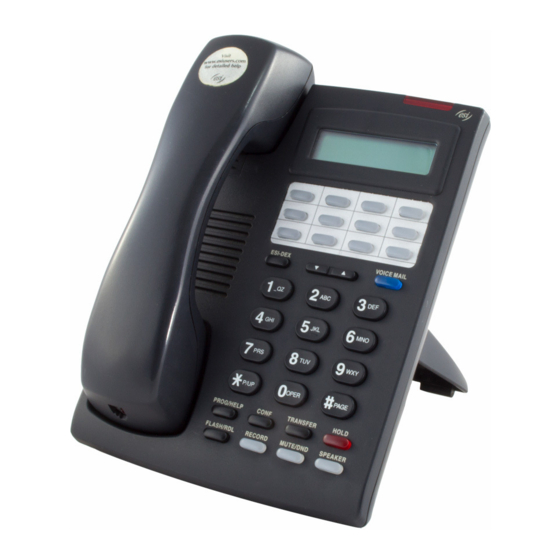
Page 9: 12-Key Feature Phone
Fixed feature keys to Verbal User’s Guide and tutorial Note: Certain special features, including Esi-Dex (see “Special keys,” pages F.1–F.13), are not available on the 12-Key Feature Phone. Important: A VOICE MAIL key, CONFERENCE key, and MUTE/DND key must be set on one of the nine programmable feature keys to utilize those features. -
Page 10: Connecting Your Esi Phone
User’s Guide Connecting your ESI phone Use the diagram (below) to connect your ESI phone. Each diagram represents the panel on the phone’s underside. Note: The “Top of phone” and “Bottom of phone” references in this diagram shows the correct vertical orientation of the phone —... -
Page 11: Help Mode (Verbal User's Guide)
User’s Guide Help mode (Verbal User’s Guide) Your ESI phone system’s help mode (also called the Verbal User Guide) — a carefully conceived combination of spoken information, display readouts and even key illumination when appropriate — is a powerful tool to help you learn how to use the system’s many features. - Page 12 Help mode (Verbal User Guide) User’s Guide (This page included for pagination purposes only.)
-
Page 13: User Programming: An Introduction
PROGRAM key. This station is designated as the Master Station. All other users will only be able to play and delete messages. A 12, 24, or 48-Key Feature Phone can be installed on an extension in the Master Lst. However, a 24 or 48-Key Feature Phone must be on the extension designated as the Master Station. -
Page 14: Select Personal Greeting
User programming: An introduction User’s Guide 1 Select personal greeting Select the desired greeting — 1, 2 or 3. The system will play the current greeting, followed by prompts to re-record, delete or hear again — or select the current greeting by pressing #. Record personal greeting Begin recording at the tone. -
Page 15: Station Options
See page E.2. Message monitor See page F.10. Note: Background announce and selections 3, 5, and 6 are not available on a 12-Key Feature Phone. Not necessary with Generation II system. If unsure which system you have, consult your System Administration. -
Page 16: Station Audibles
User programming: An introduction User’s Guide 4 Station audibles The station audibles programming provides control of the following audible items: Station ring tone You can select from six possible tones to help distinguish it from other nearby ringing phones. Press ▼ or ▲ to select a tone, then press # to accept it. Station ring volume Press ▼... -
Page 17: External Message Notification
User programming: An introduction User’s Guide 6 External message notification Delivery options Delivery to phone number only Notify pager only No off-premises delivery Phone delivery Enter phone number Enter the phone number (24 digits, maximum) followed by #. Do not include an outside line access code (i.e., don’t add 9, 8 or 7) before the number. -
Page 18: Pager Notification
User programming: An introduction User’s Guide Pager notification Enter pager number Enter the pager number (24 digits, maximum) followed by #. Do not include an outside line access code (i.e., don’t add 9, 8 or 7) before the number. To insert a special character, press the right scroll key (▲) to select the desired special code: # , , F or P. -
Page 19: Integrated Answering Machine Operation
The VOICE MAIL key is used for direct access to voice mail features. Warning: On stations with a 12-Key Feature Phone, a programmable feature key must be set to code 5 7 9 (for VOICE MAIL key). If a key is not programmed to 5 7 9, you will still be able to... -
Page 20: Leaving Messages
LED will glow green and the greeting played as confirmation). Note: On a 48 or 24-Key Feature Phone, press RECORD while the confirmation is playing and follow the prompts to record the greeting. Otherwise, listen to the greeting to the end and follow the prompts. - Page 21 4. At the end of each message, the ESI phone system prompts you for instructions (see the chart, “Keys’ functions during voice mail message retrieval,” below). Once you’ve learned these prompts, you can proceed more rapidly by pressing one of the appropriate keys any time during a message or during a prompt.
- Page 22 3. If no one answers and the mailbox greeting plays, press 8 # to hear the messages. 4. If required, enter your password. 5. The ESI phone system will announce the number of new and old messages, and will start playback of messages starting with the oldest new message and continue until all messages and recordings have played or you press to disconnect.
-
Page 23: Off-Premises Message Delivery
Off-premises message delivery Introduction The ESI phone system can be programmed to deliver messages to an off-premises phone or to page you when the voice mailbox receives a message. You can set the phone number (cell phone, home number, another extension, etc.), a delay time (the period that the system is to wait before attempting to deliver the message), or the pager number. -
Page 24: Message Recycle Bin (Un-Delete)
User’s Guide Message Recycle Bin (un-delete) The ESI phone system stores the Integrated Answering Machine’s 10 most recently deleted messages in a Message Recycle Bin to allow you to recover, or "un-delete,” messages that may have been deleted in error. -
Page 25: Esi Feature Phone Operation
Programmable feature keys The programmable feature keys at the top of the Feature Phone — 30 on a 48-Key, 12 on the 24-Key, and nine on the 12-Key — have been pre-programmed by the Installer. You may wish to add to or change some of these keys to perform different functions explained throughout this manual. - Page 26 Notes: If you press MUTE/DND while your phone is ringing, this forwards the call to the voice mailbox your station will be placed in DND. On stations with a 12-Key Feature Phone, a programmable feature key must be set to 5 7 8 for MUTE/DND capability. For more information, see page F.12.
-
Page 27: Dial Tone
These soft keys, located under the display, include ESI-DEX , PROGRAM, HELP, and scroll keys (▼ and ▲). Along with spoken and displayed commands, they guide you through the use of Esi-Dex (page F.2), various programming activities and controlling the volume of your phone’s handset and speaker. -
Page 28: Direct Station Selection
If you press a key for a station that’s in use (red; steadily lit), you will “camp onto” the station, where its Feature Phone’s display will tell its user that you’re waiting (see “Call waiting,” page E.7). If you press a key for a station that’s in DND (amber; steadily lit), you’ll be forwarded directly to the person’s mailbox. -
Page 29: Transferring An Outside Call
ESI Feature Phone operation User’s Guide Transferring an outside call ..to another station Blind transfer 1. While connected to an outside call, press a station key (or press TRANSFER and then dial the extension number). -
Page 30: Conference Calling
ESI Feature Phone operation User’s Guide Conference calling Note: On stations with a 12-Key Feature Phone, a programmable feature key must be set to 570 in order to initiate a conference call. For more information, see page F.12. To create a conference call: 1. -
Page 31: Call Waiting
“Call waiting display” (above). If the person ignores the call waiting, your call or the transferred call will be forwarded to the mailbox. A 12-Key Feature Phone will show only the first caller. Even if you hang up from the first call, the second call’s Caller ID information will not appear. -
Page 32: Hold/Exclusive Hold Operation
Hold/exclusive hold operation The difference between hold and exclusive hold Your ESI Feature Phone lets you put a call on either hold or exclusive hold. Each puts a call into a standby mode, but here’s the difference between the two: •... -
Page 33: Exclusive Hold
User’s Guide To retrieve a held call To retrieve a held call from the same ESI Feature Phone where it was put on hold, press HOLD again and dial the appropriate line number (using the display for reference). To retrieve a held call from any idle ESI Feature Phone on the system, press HOLD and dial the appropriate line number. -
Page 34: Paging
If you frequently page, assign 1 9 9 to a programmable feature key (see pp. C.2–C.3). Paging through phones Press PAGE to page through all of the ESI Feature Phone speakers. The Installer may have added an overhead page system to the page zone. -
Page 35: Special Keys
Note: The hookswitch also acts as a combination FLASH/RELEASE key (and is the only way to perform these functions on a 12-Key Feature Phone, which has neither a FLASH key nor a RELEASE key). To send a flash hook signal, quickly press the hookswitch once. -
Page 36: Esi-Dex
Auto-dialing using Esi-Dex . . . On the 24-Key Feature Phone 1. While your station is idle (or just after receiving dial tone), repeatedly press ESI-DEX to select the desired Dex: 2. Choose the desired name from the selected Dex, using one of the two following methods: Press repeatedly ... - Page 37 User’s Guide . . . On the 48-Key Feature Phone 1. While your station is idle (or just after receiving dial tone), press ESI-DEX. This causes the Esi-Dex menu to appear, as shown: 2. Press a key to choose the appropriate Dex —Station Dex (STA), System Dex (SYS), or Personal Dex (PER) —...
- Page 38 Caller ID method (on either Feature Phone) Whenever a Caller ID name appears on your LCD display (while talking on an incoming call or during message retrieval) press ESI-DEX to automatically store the name and number in your Personal Dex. The display confirms:...
- Page 39 User’s Guide Manual method (on the 48-Key Feature Phone) 1. While your station is idle (or just after receiving dial tone), press ESI-DEX. This causes the Esi-Dex menu to appear, as shown: Note: Your display may differ, depending upon the availability of certain Dexes on your system.
- Page 40 Deleting names from your Personal Dex . . . On the 24-Key Feature Phone 1. While your station is idle (or just after receiving dial tone), repeatedly press ESI-DEX to select the Personal Dex: 2. Choose the desired name from the selected Dex, using one of the two following methods: Press repeatedly ...
- Page 41 User’s Guide . . . On the 48-Key Feature Phone 1. While your station is idle (or just after receiving dial tone), press ESI-DEX. This causes the Esi-Dex menu to appear, as shown: 2. Press PER to choose the Personal Dex.
- Page 42 Let’s say you’re on a call with the XYZ Company — XYZ COMPANY appears on your display — and you wish to save the name and number for future use. Just press ESI-DEX. Your display will confirm that the information has been stored.
-
Page 43: Override Ring
System speed-dialing with Esi-Dex If your Administrator has programmed system speed-dial numbers, you can access one of these numbers either via Esi-Dex, as explained in the foregoing discussion, or auto-dial it by dialing its corresponding three-digit access number (in the range 600–699). -
Page 44: Message Monitor Mode (Live Call Screening)
If you change your greeting several times a day, set the reminder for about 3 hours. Headset operation You can use a 48-Key or 24-Key (but not 12-Key) Feature Phone with a headset. However, the details vary depending on whether your system is IVX S-Class Generation II or Generation I (consult your System Administrator if you’re not sure which system you have). -
Page 45: Outside Dial Tone Preference
If a private line has been assigned to your station, you must have a line key programmed (see pages C.2–C.3) in order to access it. This aspect (i.e., that it’s always the highest line available to you) can’t be changed. Not available on 12-Key Feature Phone. F.11... -
Page 46: Optional Features
Greeting 3 Mute/DND Override ring Note: Gray shaded items are the only key codes available for the 12-Key Feature Phone. Manual day/night mode (Code 560) The system’s main greeting can be manually changed using a programmable feature key. Each time the key is pressed, the display switches between DAY and NGT. - Page 47 Special keys User’s Guide Background announce key (Code 569) During call waiting, you can also make a brief, private background announcement (see “Background announce feature,” page E.8) to the station's earpiece (if the station user has enabled the background announce feature). Hold down the key until you hear a beep, then begin talking; release the key when finished.
- Page 48 Special keys User’s Guide (This page included for pagination purposes only.) F.14...
-
Page 49: Analog Stations
Phones), its operation and capabilities will be different. Tip: To use a cordless phone in conjunction with an ESI Feature Phone, program a programmable feature key ( 5 6 5 ) to easily forward calls to the cordless phone when out of your office. Have the Installer program the cordless phone’s station programming to forward calls not sent to the mailbox. -
Page 50: Call Forwarding
Lift the handset, dial 5 6 5 and dial the extension number (or # and the mailbox number) to which the system should forward all calls. Note: If the forwarded-to station is busy or does not answer a forwarded call, the ESI phone system will return the call to the mailbox. -
Page 51: Call Pick-Up
0 will answer the longest ringing outside call. Voice mail operation from an analog station The ESI phone system will provide accurate and timely messages. Others will become more comfortable leaving you voice messages if you pick-up and respond to your messages promptly. -
Page 52: Retrieving Messages
Analog stations User’s Guide Retrieving messages You can pick up messages from your station, when away from the office or from another user’s ESI Feature Phone. 1. Lift the handset, and dial 501. 2. If calling from outside, when the operator or another user answers your call, have them transfer you by pressing VOICE MAIL and hanging up. -
Page 53: Analog Station Programming
Analog stations User’s Guide Analog station programming After logging into the mailbox (pressing followed by the mailbox number), dial 5 to program. Select greeting (Master Station user only) Select the desired greeting number: 1, 2 or 3. The system will prompts to re-record, delete, hear, or select as the current greeting by pressing #. -
Page 54: Off-Premises Message Delivery
User’s Guide Off-premises message delivery The ESI phone system can be programmed to deliver messages to an off-premises phone and/or to page you when the mailbox receives a message. You can set the phone number (cell phone, home number, another extension, etc.) or the pager number and a delay time (the period that the system is to wait before attempting to deliver the message/page). -
Page 55: Message Recycle Bin (Un-Delete)
Analog stations User’s Guide Off-premises message delivery Delivery options Delivery to phone number only Notify pager only No off-premises delivery Phone delivery Enter phone number Enter the phone number followed by # (24 digits maximum). Do not include an outside line access code (i.e., don’t add 9, 8 or 7) before the number. - Page 56 Analog stations User’s Guide (This page included for pagination purposes only.)
- Page 57 Overhead paging port (199), E.10, G.2 Preference, F.11 Paging through phones, E.10 Direct station select, E.4 Password, C.4 DSS. See Direct station select Personal Dex. See Esi-Dex Esi-Dex, F.2 Phone use Personal Dex Basic, E.3 Adding names, F.4 Programmable feature keys, C.2, E.1 Deleting names, F.6...
- Page 58 www.esi-estech.com...